The Grow Awards 2026 🏆 


Likes
4
Share
@Aleks555
Follow
Hello people. It's a very cool variety, delicious strong, and all covered with crystals, even on large leaves. ...................................
Likes
22
Share
@TheReefinery
Follow
Week 12 done and dusted!! Week 4 of flower!! 🌸
There's been some more movement and stretching and the canopy has now taken shape and the top bud sites are positioned, developing and ready for the post stretch period. The home straight isn't far away now!! 🌱🌲
Just top dressed them with some mycoboost then next week I'll start with the Bloom2 and I'll probably add some guano as an extra boost!! 🦇
May give them one last defoliation next week to clear some of the fan leaves!! ✂️
Catch you next week for another update!! 🍋🍇🤙

Likes
37
Share
@Radagast_
Follow
04.08.
Cherry Poppers 1# Day 101#
Cherry Poppers 2# Day 98#
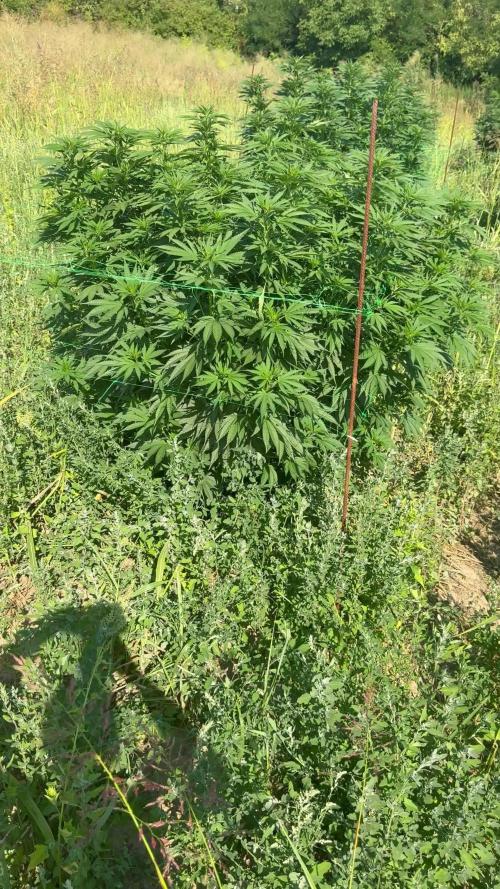
The plants are progressing well, most of them went into preflower a few days ago, the others are slowly entering... I was too lazy to photograph and record each plant separately, so I took a picture and recorded everything together... this grass has grown too much, in some places it is half way up the plant and you can't see how big the plants actually are, these days I will mow it under them and around them and in the next update I will post individual pictures where everything will look nice...day before yesterday I watered them with clean water, the next watering also with clean water and then I will most likely switch to food for the flower, I will see from the situation.
Three days ago it was the end of their fourteenth week, the pictures and videos are from day before yesterday.
Stay High and Keep Growing!!!


Likes
1
Share
@HumboldtHomegrown
Follow
Bottomed the plants on day 22
Over three weeks into flower and they’re still stretching but starting to slow down
nice pistils forming
I like the way she is stacking up
Likes
9
Share
@pzwags420
Follow
On day 1 I adjusted the PH from 6.6 to 6.2. The tallest cola is 13.75" away from light.
On day 2 I adjusted the PH from 6.4 to 6.2. The tallest cola is 12.5" away from light.
On day 3 the PH is 6.2. The tallest cola is 11.5" from the light.
On day 4 I didn't take data points long day...
On day 5 the rez PH is 6.2. the tallest cola is 10" from the light.
On day 6 the rez PH is 6.0. The tallest cola is 9.5" from the light. I defoliated heavily to bring in more light and airflow.
On day 7 The tallest cola is 9" from the light. I mixed up a new rez.
Likes
77
Share
@ctm_dzagi
Follow
Didn't get all what i can, because it's stop stretching sooner then most strains before.

Likes
13
Share
@TheMightyHermit
Follow
Honey Cream is starting to smell wonderfully, a Sweet almost candy/bubblegum smell, incredible !
Likes
78
Share
@Roberts
Follow
Pure Ice cream is doing great under the Spider Farmer G5000/UVR40 lights, in the Athena blended line nutrition. She got a solution change a few days ago to blooming nutes. Nothing special to report. Thank you Spider Farmer, Athena, and Pure Instinto Seeds. 🤜🏻🤛🏻🌱🌱🌱
Thank you grow diaries community for the 👇likes👇, follows, comments, and subscriptions on my YouTube channel👇. ❄️🌱🍻
Happy Growing 🌱🌱🌱
https://youtube.com/channel/UCAhN7yRzWLpcaRHhMIQ7X4g
Spider Farmer Official Website Links:
US&Worldwide: https://www.spider-farmer.com
CA: https://spiderfarmer.ca
UK: https://spiderfarmer.co.uk
EU: https://spiderfarmer.eu
AU: https://spiderfarmer.com.au
G5000 Light Amazon Link:
amzn.to/4643esa
UVR 40:
https://www.amazon.com/dp/B0BR7SGTHS
Discount code: saveurcash (Stackable)

Likes
54
Share
@GarciasGarden
Follow
MAY 9th (day 50)
Well we finally started flowering yesterday and within the first 12 hours they stretched a good 2-3 inches already starting to get that Danky dank smell I have to say I’m being able to train a plant the perfect way you want it .. is probably my favorite part of the whole cycle! Since last week they almost doubled in size. Made the decision to go completely LED got one more light coming in today and that will leave me with 940 true watts led also made some improvements to the grow room like runoff catchers and a whole new veg tent !! Don’t mind the end just a little experiment I’m doing lol!! ENJOY THE VIDEO.
P.s. always love to hear any helpful tips or feedback !!

Likes
8
Share
@Shellshocked
Follow
Well looked at the trics and I seen about 40% ambers so I put her in dark for 2 days before I harvested her pulled her out or the dark checked the trics. again and seen zero ambers while I was confused I knew she was not ready so I had a space in my veg. Tent so I threw her in there for her last week or 2. She looks so bad as I let her dry out big time and with the ph issues I had earlier in the grow there's not a leaf on her that's not got part of it dying off. Hopefully this is last week of flower as it's week start of week 10 and I really wanna try her out although most will go to concentrates as this grow was not ideal and the frost is minimal compared to other gg4 I got flowering right now.

Likes
14
Share
@BLAZED
Follow
Week 11 (26-9 to 2-10)
26-9
Temperature: 26.5 degrees (lights on) 19.8 degrees (lights off)
Humidity: 70% (highest) 50% (lowest)
Watering: None.
27-9
Temperature: 26.4 degrees (lights on) 20.2 degrees (lights off)
Humidity: 82% (highest) 56% (lowest)
Watering: 1500 ml. PH 6.4 EC: 1.7 (with Hybrids & PK+)
28-9
Temperature: 26.2 degrees (lights on) 21.2 degrees (lights off)
Humidity: 74% (highest) 57% (lowest)
Watering: 1100 ml. PH 6.5 EC: 0.6 (without Hybrids & PK+)
29-9
Temperature: 26.8 degrees (lights on) 21.2 degrees (lights off)
Humidity: 92% (highest) 59% (lowest)
Watering: 800 ml with Hybrids & PK+ and 1000 ml without Hybrids & PK+
PH 6.4 EC: 0.6/1.7
30-9
Temperature: 28.6 degrees (lights on) 21.1 degrees (lights off)
Humidity: 81% (highest) 56% (lowest)
Watering: None.
I set the light to 85% strength, with a distance of 30 cm (highest tops) LUX: 20.400 / 26.200
1-10
Temperature: 28.4 degrees (lights on) 19.9 degrees (lights off)
Humidity: 77% (highest) 55% (lowest)
Watering: 1000 ml. PH 6.5 EC: 0.6 (without Hybrids & PK+)
2-10
Temperature: 28.7 degrees (lights on) 20.5 degrees (lights off)
Humidity: 88% (highest) 60% (lowest)
Watering: 1000 ml. PH 6.5 EC: 0.6 (without Hybrids & PK+)


Likes
51
Share
@Mr_und_Ms_Lue_Roots
Follow
Hallo liebe Gartenfreunde,
Ja insgesamt gibt es nicht ganz soviel zu sagen. Die Purple Coockie Kush auf dem Balkon wächst kaum noch da sie sich in re vege befindet.
Die Schwester und die CBD sonnen sich täglich gediegen im Gewächshaus.
Zudem haben die Ameisen 🐜 defentiv mehr Spaß wie wir Grower 😮💨 Wir haben auch schon sehr viel versucht... grrrrr
Na gut, desweiteren sind nur auch kurz mal wieder ein paar Bilder aus dem Gewächshaus mit angehangen.
In diesem Sinne euch noch ein terpigen Sonntag Abend und eine neue erfolgreiche Woche gewünscht!
Vielen Dank im Voraus an all die, die unseren Report verfolgen, kommentieren und liken! 😉
VG ✌️ 😎
Likes
43
Share
@UnorthadoxDude
Follow
Hey growmies! 👊 I am back online finally!
So it is day 95 for Nesia and she is no less impressive today than at any week before now. Check out the video! I have a new phone so hopefully the photos will be better too!
I am really excited to see what this girl can do, she has started to swell those buds! The smell of Amnesia is really strong now.
Height: 103cm Fertigated 10l 4 days ago and 7.5l today.


Likes
35
Share
@IndicaVibeMe
Follow
I'm going to need to transplant this gal! Already roots poking out the bottom so I'm prepared to get her in a bigger pot soon! Probably this week.-- update, she's loving Life in a larger pot!
Smells incredible already 👍
Likes
17
Share
@BLAZED
Follow
Week 11 (10-4 to 16-4)
10-4
Temperature: 24.4 degrees (lights on) 21.1 degrees (lights off)
Humidity: 60% (highest) 52% (lowest)
No pictures.
Added 10L to the reservoir, and turned it on for a couple of minutes.
11-4
Temperature: 24.4 degrees (lights on) 21 degrees (lights off)
Humidity: 61% (highest) 52% (lowest)
12-4
Temperature: 25.5 degrees (lights on) 22 degrees (lights off)
Humidity: 65% (highest) 57% (lowest)
Turned the reservoir on for a couple of minutes.
13-4
Temperature: 26.5 degrees (lights on) 23 degrees (lights off)
Humidity: 65% (highest) 56% (lowest)
14-4
Temperature: 26.4 degrees (lights on) 22.1 degrees (lights off)
Humidity: 64% (highest) 45% (lowest)
Turned the reservoir on for a couple of minutes.
The reservoir is almost empty, there is 850 ml left.
15-4
Temperature: 24.4 degrees (lights on) 20 degrees (lights off)
Humidity: 59% (highest) 49% (lowest)
No pictures.
16-4
Temperature: 23.5 degrees (lights on) 19.5 degrees (lights off)
Humidity: 60% (highest) 53% (lowest)
Today i defoliated both plants heavily for the last time, you can say i did a method called: schwazzing.
Dont know why but while i was defoliating the Chemdog smelled a little bit like soap haha.
Turned on the reservoir for a couple of minutes. (Till the AutoPots are full and the valve closes)
Rised the pots aswell, so the canopy is very even.
I let them recover from the heavy defoliation i did, and next week i will slowly increase the light's strength. (Now still at 50% 50cm)

Likes
16
Share
@DabBod
Follow
This week went well no real problems besides underestimating the amount of water I would need to prepare following the transplant. I’m noticing some older leaves showing some curling at the tips especially on the second pheno, I’m going to let it ride for the next week as it could be attributed to the transplant although the signs point to n tox I’m using slow release dry amendments as directed I don’t think this is the case. I may add the trellis net next week if the second pheno can catch up in heigh.
