The Grow Awards 2026 🏆 


Likes
Comments
Share
@GuerillaGorilla
Follow
28th August
Finally the first pistils pop out.
A glimpse of flower, allthough nothing compared to the other strains.
She already got her bloom feed last time.
Handfull of thomaskali. Maybe this helped to kick in flowering.
Not as thirsty as the others

Likes
28
Share
@DreamIT
Follow
Sponsored by:
🎭ZAMNESIA SEEDS🎭-💡VIPARSPECTRA💡-💐GREEN BUZZ LIQUIDS💐-🛠️WEDRYER🛠️
28/7 has already recovered well after the cut, fantastic!
2/8 it reacted well to the cut and the cloning seems to have been successful. Thursday comes into bloom
__________________________________________
Personal advertising (contains affiliate links)
__________________________________________
🦄Zamnesia boasts the most complete and accurate site where you can find everything related to cannabis and the "psychedelic" world. Autoflowering, feminized seeds, mushrooms, salvia divinorum, afrodisiacim of everything, and more! ( no affiliate link)
✅https://bit.ly/Zamnesiaseeds
__________________________________________
Did you know that Green Buzz Liquids fertilizers are 100% vegan? A complete line of products ready to give the best to each of your plants! Visit the site and see my journals to see how they work 🦄
🤯 And with the code "dreami t" you will immediately receive a 15% discount on your purchases
✅https: //bit.ly/GreenBuzzLiquidsPro
__________________________________________
👀 Are you looking for a good lamp to start with? 👀
🌞Viparspectra has something more than the others, take a look at their site.
⏩ Use "GDVIP" for an extra discount or "DREAMIT3" for an extra 5 %% discount
👀 Search for it on Amazon
✅Amazon USA: https://amzn.to/30xSTVq
✅Amazon Canada: https://amzn.to/38udUVe
✅Viparspectra UE: bit.ly/ViparspectraUE
✅Viparspectra USA: bit.ly/ViparspectraUS
______________________________________________
🌈 Tired of blowing on your weed hoping it dries quickly? Check out the Wedryer website! You will find a well-made accessory that will help your weed dry in just 8-10 days without the annoying risk of finding mold or other annoyances! (no affiliate links)
✅https: //bit.ly/Wedryer_
______________________________________________
📷🥇Follow the best photos on Instagram 🥇📷
https://www.instagram.com/dreamit420/
Backup
https://www.instagram.com/dreamit4200/
🔻🔻Leave a comment with your opinion if you pass by here🔻🔻
🤟🦄💚 Thank you and good growth 💚🦄🤟


Likes
65
Share
@Roberts
Follow
Gold Sativa is doing well. She is bulking now. Has a nice frost. She got a solution change as usual and ready to go for a few days. She is in a New Level Hydro bucket, under a Spider Farmer SE5000 light. Thank you Spider Farmer, New Level Hydro, and Quebec Seeds🤜🤛🌱🌱🌱
Thank you grow diaries community for the 👇likes👇, follows, comments, and subscriptions on my YouTube channel👇. ❄️🌱🍻 Happy Growing 🌱🌱🌱
https://youtube.com/channel/UCAhN7yRzWLpcaRHhMIQ7X4g
SE5000
https://amzn.to/3qFpAML
Spider Farmer Official Website Links:
US&Worldwide: https://www.spider-farmer.com
UK: https://spiderfarmer.co.uk
CA: https://spiderfarmer.ca
EU: https://spiderfarmer.eu
AU: https://spiderfarmer.com.au
Coupon Code: saveurcash
Www.newlevelhydro.com
Www.hygrozyme.com

Likes
15
Share
@Aircoholic
Follow
She was getting ancient - on day 117, after almost 4 months, it was time - the trichomes increased oxidization, her buds purpled and her leafs showed all kinds of lovely autumn colors, signalling that she's ready. She matured for a really long time and her buds significantly chunked up in the last few weeks, her aroma ripened from a super sweet cherry flavor during most flower, she added some really nice spicy, earthy flavors to the mix.
She's drying at a nice 18° C in my "poor man's Cannatrol", a whine chiller I repaired and added better drying racks to. Very curious about the result!

Likes
13
Share
@NSABND
Follow
Let´s start Day 43 😎 some sun and cloudy with rain again 😳
Day44 cloudy and rain and cold 😡
Day45 rain and cloudy 😡 temp 16C/60F .. WTF it´s summer 😡😖😱
Day46 no rain litle bit sun and cloudy 22C/71F still not a real summer 😩
Day47 starts with rain and cloudy weather 😩 then came the sun finally 👌
Day48 the summer comes back again.... sunny day 🙏👍

Likes
34
Share
@Roberts
Follow
FBT 2308 is growing great in the Agrogardens nutrition, under the Medic Grow Mini Sun-2. She has gotten her roots pruned, and selective defoliation plus lst. Everything is looking really good for it at the moment. Thank you Medic Grow. Agrogardens, and Fast Buds. 🤜🏻🤛🏻🌱🌱🌱
Thank you grow diaries community for the 👇likes👇, follows, comments, and subscriptions on my YouTube channel👇. ❄️🌱🍻
Happy Growing 🌱🌱🌱
https://youtube.com/channel/UCAhN7yRzWLpcaRHhMIQ7X4g
Processing
Likes
47
Share
@CRiSPrGrow
Follow
Another week just cruising for the FBT1 : looks like she bulked just a bit. The last of the trichomes has turned cloudy, she's all cloudy now, no amber. So that means this is the last week before harvest ! She's also just wrapped up her third week of flush and last week of additive flush. Hopefully she'll be super smooth and delicious ! Right now she absolutely reeks of sour lemons , means she's gonna be a strong one I hope ! Clipped a few fan leaves and gonna chop her down and hang her whole. She's gonna be dried for a bit more than 12 days then jarred . Let's see what happens ! 🚀


Likes
1
Share
@DERRAMEGrow
Follow
Clyde established itself really well after the transplant. Feeding has started this week with Biobizz Bio-Grow at half strength. Clyde was topped today at the 4th node, 6 nodes were already established, and LST has began also.

Likes
49
Share
@Roberts
Follow
Green Cure CBD Auto germinated and has sprouted easily. Every seed I started all germinated. So she is getting acclimated, and should start growing very soon. Everything is looking good. I did provide a light feed to help with ph stability in coco. She is off to a good start. Thank you Medic Grow, and Zamnesia Seeds. 🤜🏻🤛🏻🌱🌱🌱
Thank you grow diaries community for the 👇likes👇, follows, comments, and subscriptions on my YouTube channel👇.
❄️🌱🍻 Happy Growing 🌱🌱🌱
https://youtube.com/channel/UCAhN7yRzWLpcaRHhMIQ7X4g
Likes
44
Share
@XperencdGmanXG
Follow
did some LST to this girl. We were in the middle of a mini drought but we did get 6mm of rain yesterday. So that will help with growth a lot. I also watered them with a whopping 9 gal each day before the rain. So I am expecting some excellent growth over the coming week. Ive been looking for an inexpensive source of granulated humic and fulvic acids if anyone knows of a source in southern Ontario.
Processing
Likes
3
Share
@kenzleu
Follow
Purple starting to come through on plant 2! At what point do you start your 2 week flush? (if you do). First grow and kind of anxious about doing it too soon or too late.
Likes
34
Share
@PapaNugs
Follow
Another good week come and gone. A couple of the girls needed nutrients so I add some general hydroponics blend into those that needed them. Didn't seem to make much difference yet. But they are getting into late flower.
The purple lemonade, without a doubt, has the best smells out of the crew. Actually lemonade smelling. Plus the color makes this worth exploring more. I'm not a fan of autos but I might do her again 😂
Dimmed to 80%
Here are the lights details:
Medic Grow Mini Sun-2 150W LED
Model: MN150-022
Spectrum mode: V1
Efficacy: 2.8 umol/J
Thanks for stopping by!
You can find the light on Grow Diaries:
https://growdiaries.com/grow-lights/medic-grow/mini-sun-2-150-watts
You can find the light on Medic Grow's website:
https://medicgrow.com/
Likes
12
Share
@QueenBZA
Follow
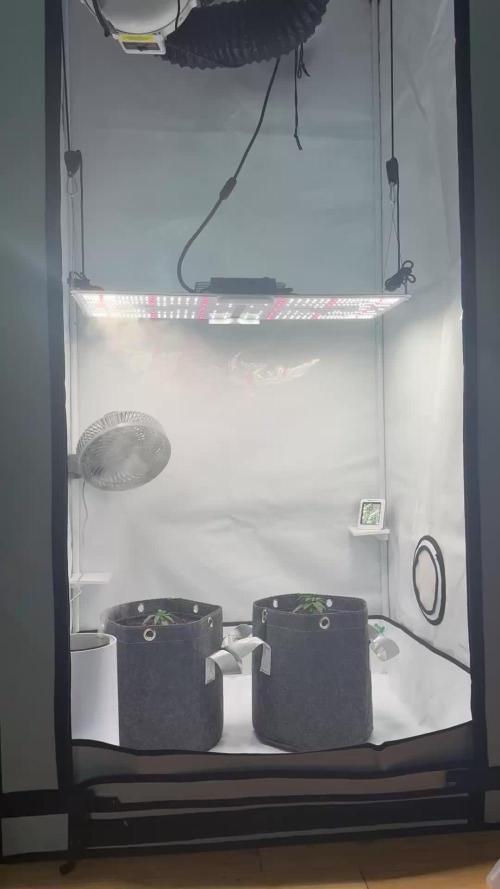
Beautiful take off from these ladies with the Wedding Cake Roots already touching water!


Likes
216
Share
@CRiSPrGrow
Follow
Week 1 : Auto Colorado Cookies Biotabs
sprouted quick bursting out of their shell, stayed in the propagator 4 days then straight and erly into the forever home prepared according to the @biotabsf69 method in 5 gal pots, all soil plus 23% perlite just eyeballed it dont know why i'm saying it was that precise lol. mixed in the startrex , added the mykos 3 in the pot and two in the cavity for the root plus, watered with orgatrex and bactrex then used boom boom spray to keep the humidity at around 70 for a day maybe a bit more. got some good pictures of the seedlings in but watered again with plain water 2L on day 3, now the medium is wet and wil likely remain so until late next week . just plain water until week 5 folks dont hold your breath. Just going to be using my special spray, co2 and kelp extract once a week some micro nutres in the spray of my own creation. Enjoy !
VPD .05 - 1.0 finally got it basically right after 3 days

Likes
33
Share
@StickyFingah420
Follow
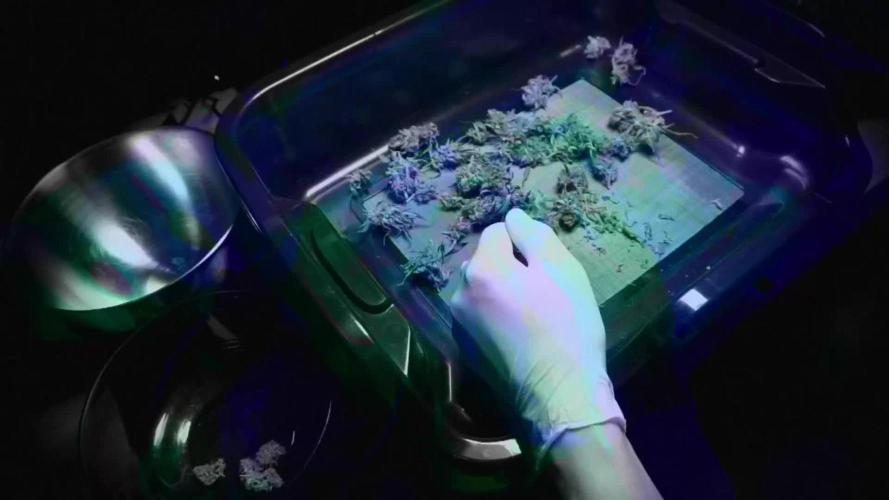
Día 88 y penúltimo antes del corte.
Ya se aplicó Flawless Finish para un acabado impecable como su nombre lo indica. Siempre prefiero hacer el lavado de raiz solo aplicando agua en las últimas 2 semanas, pero esta vez lo hice aplicando el finalizador y luego los últimos riegos con agua purificada.
La verdad es que estoy contento con los resultados de esta nena, que es hermosa por cierto, desprende olores ácidos, cítricos, dulces.
Los colores son hermosos y las flores están rebosantes de tricomas, lo que la vuelve muy vistosa.
Es todo por ahora, estaré manteniendoles informados en estos últimos días.
Buenos humos! 👽


Likes
18
Share
@gdogfunk
Follow
Day 63 This should be the last week in veg. It might be a partial week...I'll make the call in a few days. I'm excited to see these babes flower!!!
Day 64: Last day of VEG! I set the timer to 12/12 and lower the lights to 18". These babes are ready to switch, based on my past experience. I hope they don't shoot too much in the next couple of weeks! Flower time is here at last!
Day 65: I tore part of a main top branch today and immediately put clonex gel and used some clear packing tape to secure it back together. I think it will be ok. I sure hope so! It's pretty much the biggest top of the plant. I don't know if the potassium silicate treatment is making the stalks too strong, but I only tried to tuck it into the next hole of the screen. Oh well, time will tell. Fed transistion week 1 nutes today.
Day 67: The branch survived! The plants are stretching nicely and I expect to run out of room on the screen at the outer edges.
Day 69: The canopy is so FULL! I'm amazed at how healthy they are and how many bud sites are filling up the screen!

Likes
4
Share
@HowtoBubatz
Follow
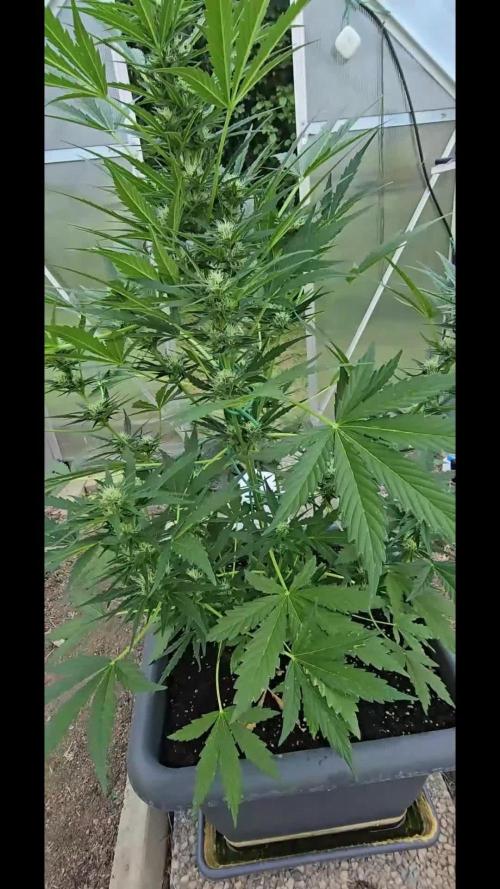
This plant is thriving in its 3rd week of vegetation—it’s growing very healthy and strong!🌱
I’ve applied some Light Stress Training (LST) to ensure all parts of the plant are receiving equal light exposure, and it’s responding beautifully.
Midway through the week, I noticed the first signs of flowering!
This plant is transitioning into bloom faster than expected, which is really exciting. It seems eager to show what it’s capable of.
Now, I’m looking forward to seeing how it handles the stretch phase—I can’t wait to watch it shoot up and develop further.😊