The Grow Awards 2026 🏆 


Likes
Comments
Share
@organicman
Follow
1 seed dead:
1 strawberry pie
seeded 1 new:
1 strawberry pie
2 seeds dead:
2 euphorias
seeded 1 new:
1 white widow x big bud
___________________________________________
light- and watering schedule: see photos
now:
16 plants
3 x Auto Orange Bud > Dutch Passion (early80's)
3 x Haze Berry Automatic > Royal Queen Seeds (2018)
2 x Auto Euforia > Dutch Passion (late 90's)
2 x Auto Bubblegum > TH Seeds (late 80's)
2 x Original Auto BubbleGum > Fast Buds Company (late 80's)
1 x Strawberry Pie Auto > Fast Buds Company
1 x Gorilla Cookies Auto Seed Stockers (2015)
2 x Auto White Widow x Big Bud > Female Seeds
setup + strategy:
18 seeds
3 x Auto Orange Bud > Dutch Passion (early80's)
3 x Haze Berry Automatic > Royal Queen Seeds (2018)
3 x Auto Euforia > Dutch Passion (late 90's)
2 x Auto Bubblegum > TH Seeds (late 80's)
2 x Original Auto BubbleGum > Fast Buds Company (late 80's)
2 x Strawberry Pie Auto > Fast Buds Company
1 x Gorilla Cookies Auto Seed Stockers (2015)
2 x Auto White Widow x Big Bud > Female Seeds
setup:
18 x gronest 2 liter
60 cm x 120 cm x 180 cm (2 x 4) growtent
4 l humidifier
25 watt axial fan
15 watt clip fan
ro-filter
bath room with a 50 watts room fan (-> carbon filter not necessary)
...and a lot of odds and ends.
grow strategy:
max yield by stressing with:
1. tiny shoes (2 l fabric pots standing on 3 plastic rings (4 cm) for max oxygen)
2. tiny growspace (17 plants on 0.72 sqm)
3. many strains (8 strains)
4. annoying neighbourhood (mixing old - i.e. bubblegum (late 80's) - with young- i.e. hazeberry (2018) - genetics)
5. no stress by light or food or water
plus:
- no lst - no hst - just leaf tucking
- positioning bigger strains (euphoria, orange bud, haze berry) or just bigger phenos on less intense light spots (end of tent + edges)
- music-rotation: 24 hrs reggae (for sativas) - 24 hrs classicals (because it's scientifically proofed) - 24 hrs traditionals from the hindukush region (for the indicas)
max efficiency (min electricity - max yield):
- light: 23 h on - 1 h off
- keeping the distance of 18" (45 cm) and dimming to the right par (lux) - value depending on growing stages (see sheet: beginning 185 par ( 10000 lux/100 watt )/end 340 par ( 18000 lux/175 watt )) => ends up in approx. 150 watts in average over max 12 weeks
temperatur management:
- using approx. max. half of what the lamp can do keeps temperature low:
my tsl 2000 is pulling max. 360 watts of the wall - i need only 175 watts, results in less temperature than using a 175 watts lamp
- adjusting the temperature by using a humidifier outside of tent:
blown in humidity is soaking degrees and is transported out by fan, works much better than doing the same with pure air
summer extreme: no humidifier: 36°C / 35 rh - with humidifier: 29°C / 65 rh
works for 1-2 weeks of real hot summer days, no mould, no signs of stress in two summers
germination:
seeding in soil
spraying "basic"-water: ro-water (22 ppm) + calmag to 180 ppm every 4 - 8 hours
man versus fungus gnat:
5 days before seeding i'm running the tent with "basic"-watered pots as if there were plants inside - led on, fans on, humidifier on. Fungus gnats coming with the soil might take the chance to come out now for breeding. i'm waiting with a 9 mm rifle. in the past i found 6 gnats in 2 of 8 x 50 l biobizz lightmix bags coming out of the soil. i could eliminate every single gnat successfully ;)
rotating harvest:
the little ones will be harvested completely when ready. at this point only the top branches of the big ones will be cut...and the new (basic-watered) pots of the new grow will move into the tent. 2-3 weeks later the second half of the big ones will be cut and the second half of the new grow will move in...
nutes:
individual feeding schedule/once a week:
bloom,grow,topmax,activera,algamic
+ aminopower instead of bio heaven (too expensive)
individual feeding schedule:
veg: 200 - 600 ppm
bloom: 600 - 900 ppm
water:
ro-water with:
veg: 100-150 ppm calmag
bloom: 150 ppm calmag


Processing
Likes
7
Share
@Kushizlez
Follow
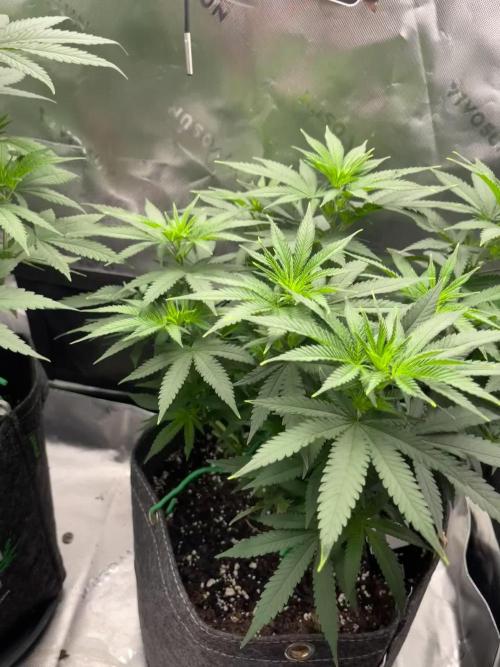
Day 56-63
(Day 57) I might have to fix the light to the roof of the tent so I can get another 3 inches up. The ppfd is just too intense at this height. The node stacking is super tight, I’m seeing some droop on almost every plant and the plants just look stunted. I might have to take out the big shelf I just paid 90$ for and raise the light to get the ppfd level down. This happened my last grow as well. It’s a great light for flowering but sucks ass for veg unless it’s hung 5’ above the canopy. I’ve seen videos of others with the same light and they have to fix it to the roof. The dimming function only works with a master controller I don’t have the money for right now.
Pulling bbb #2. I’m seeing very small but clear pollen sacks. It’s also drooping like crazy. The roots don’t look as healthy as some of the other males I pulled earlier. They have a slight brown tinge but still mostly white. I wonder if I accidentally gave top dressed it too many times when I mixed them all up a while ago.
I’m going to transplant bbb’s #1, #3, #6 & #7 into my 10 gallon destiny/coco pots lightly water. This is kind of a gamble because 2 of them are not showing definitively. Although I’m about 75% sure they’re fems. If not, I got my two backups.
(Day 58) I was reading about symptoms of high PH and I definitely have it indicated by the twisted and stunted growth on top. I’m going to try to water in a full gallon at 5.8 and see if I get a good response. I sprayed the pump nozzle directly into the soil after it was empty to put some oxygen into that big 10g pot.
The blackberry I gave the lowered PH water too noticeably responded within a few hours. The clawing has pretty much stopped and it now looks like the healthiest plant in the tent. I’m going to see how it responds over the next few days then try it with my other plants if everything looks good.
I’m going to try it with bbb #5 in the 1.7g pot and see if it responds in the same way. I ran a gallon of 5.8 water through 1.7g and got less than a 100ml of runoff which is a little surprising. The runoff measured 1750ppms which seems a little on the high side but isn’t insane for peat based soil.
(Day 59) Wow. The plants responded to that little PH adjustment insanely well. #5 isn’t dropping at all and the leaf wrinkles are actually flattening out. It’s starting to look like one of the healthiest plants in the tent. I’m still hoping for #5 to show female. 5 plants would cut my veg time down and give me another opportunity for a keeper pheno.
All 4 plants are looking like they’ve already recovered from their transplant. #1 in particular was drooping like crazy yesterday and today it’s bounced back and looking happier than ever. I’m seeing a bit of tip droop on a few plants but they still seem fine
I wonder if because my soil is 50% coco I should try watering on the acidic side, around 6.0-6.2 from now on. I’m almost certain that solved all the issues I was having.
(Day 62) Plants are all looking really healthy. They all seem to have outgrown the initial light stress actually but node stacking is still really tight and I hope to raise the light up next week sometime.
I’m going to drop the humidity to 60% for the rest of veg.
These pots are massive and I’m still a little worried about dry downs but they aren’t showing any signs of overwatering or lack of oxygen.
BBB#3 is starting to show some weird discoloring like an mag or nitrogen deficiency. Which is weird because it’s freshly transplanted into nitrogen rich soil. Guess I will give it a kelp foliar spray.
I’ve been looking for a good organic source of K without an absurd amount of magnesium and sulfur like langbeinite has. I found some 0-0-15 kelp/seaweed extract in soluble crystal form. So from time to time I will water that in at half strength or with compost teas to keep my soil K dominant.
(Day 63) I’m still waiting on #6 to show sex. I am shocked it hasn’t shown sex yet. Although it was started a week and a half after the others but still. I’m going to be so pissed if it ends up being a male. I’m taking a gamble but I’m confident it will show female when the time comes.
bbb#3 got a little more color back from that foliar spray. Hope that doesn’t get worse because it’s my favorite pheno so far. I will give a N boost in the form of compost tea tomorrow afternoon to both of my tents.
I’m starting to utilize the scrog net and boy does it make training way easier. This seems to be a much smarter style of growing for yield and quality.
I’m getting tired of these pH fluctuations every time I water. I’ve been eyeballing for the most part and I need a consistent formula. I found the perfect mix to stabilize my RO water and stabilize the pH at 6.2. I moistened the top soil of each plant and will watch for any reactions.
Water recipe:
60ml bottled water
2000ml RO water
3ml calmag
2ml microbes
Likes
32
Share
@Fatnastyz
Follow
Week 8
10-14 Day 50
She looks, smells and grows well!
Little studdered on drinking.
What else but pics and videos!
10-16
Just water and pictures. Letting her do her thang!
Around 500-700ml water a day.
10-19
Some burn, so I ran some runoff, yep burn!
1200 ppm now 400.
😱 Well 2 weeks from here 🤣 or so.
10-20
Nothing changed.
.
Likes
3
Share
@MicroHidroGrow
Follow
Día 18. Estoy en la 3ra semana de crecimiento. Apliqué HST en las dos ramas altas para poder igualar la altura con las otras dos. Por el momento viene todo en marcha. Solamente hubo un poco de stress con hojas un poco arrugadas por exceso de nutrientes. Así que hoy rebajé la solución con un poco de agua. En 3 o 4 semanas debería estar en condiciones de cortar los esquejes que voy a necesitar para el sistema completo. Inicialmente voy a usar un módulo que ya tenía armado que hice con un cajón plástico. Ese es para 4 esquejes y la madre. Pero es muy chico para el espacio que tengo. Así que inicialmente usaré este y luego armaré uno para 9 o 7 plantas. Veremos cuan cómodo queda con 5 plantas por ahora, porque quizá prefiero hacer 7 plantas cómodas y no meter 9 y después no poder manejar el espacio. La idea es que la madre vaya al medio y los esquejes alrededor.
Día 21. Rocíe la planta con tierra de diatomeas como preventivo. Sigo aplicando HST para lograr que las ramas bajas tomen protagonismo,y ya que van a ser los esquejes que use. De todos modos estoy viendo en el crecimiento que la genetica no está bien estabilizada. Los bancos de semillas argentinos, hasta ahora han sido decepción en cada siembra que hice, por lo cual no me sorprendería que esta también lo sea. Estoy analizando la idea de pasar a floración la planta así cómo está en el indoor grande y arrancar con una genética europea que tengo guardada para la próxima. Porque correr riesgos innecesarios me costaría mucho tiempo. Por el momento mantengo la solución, ya que en crecimiento la suelo hacer durar 10 o 15 días. Principalmente cuando la planta tiene menos de 4 semanas. Esta semana que arranca voy a definir que hago con esta genética. De paso subo un video con la configuración casi terminada del indoor. Pero cuando esté funcionando se va a entender mejor.
Processing
Likes
10
Share
@Dunk_Junk
Follow
Day 77 - She's growing well this week. Starting to show her trichomes 😍

Likes
2
Share
@GingerGarageGrow420
Follow
Strain: Chill Out OG F4
Day 0 of Flower
Day: 49 from sprout
Medium: Fox Farm Ocean Forest
Light: Vivosun VS2000 at 75%
Light Distance: 12 inches
Watering: By hand, ~12 oz daily
Nutrients: pH Perfect Advanced Nutrition Grow, Bloom, Micro 2 ml / L, 1 ml / L big bud
Just switched to Flower today
Likes
10
Share
@BasedBuds_89
Follow
Great week, no problems whatsoever. Looking forward to watching the progress more


Likes
17
Share
@BB_US
Follow
These ladies are solid and filled with tons of orange hairs. The smell is like no other of citrus and fresh cut wood. One week then I am going to flush her.

Likes
2
Share
@PatriciaGant
Follow
and every day we come closer to harvest hmmm time is torture now. best grow i ever done nutrients controlled only once in week plant very vorgiving all my mistakes. awesome. i bend the side down and well im breake it so i hope he will survive and i call it planed HST.
Likes
4
Share
@sunshinegroww
Follow
What a monster had to supercrop hey didn’t mind it at all now 12/12 lets see and hope isnt a boy

Likes
18
Share
@rockbo47
Follow
SUMMARY: Still continuing with early bloom nutes this week. I ran out of rainwater this week for a few days and had to make a batch with tap water. Had some issues with humidity and temps now that the RH has naturally increased due to the size and bushiness of the plants and so I have had to turn the dehumdifier on however this raises the temps and so its about finding a good balance.
I did a heavy defoliation on day 44 stripping almost all fan leaves and any lower small shoots which wont ever get enough light. I also raised the light again so that it is 16" above the canopy of my tallest plant which is a few inches taller than the NL. To mitigate this I raised the NL up by a couple inches or so.
DAY 44
--------
Sunday 14th February 11:45
I made 10L of early bloom nutes with dechlorinated tap water (no rain water left), 5L at a pH of 5.7 and 5L at a pH of 5.6.
Sunday 14th February 18:00
I did a heavy defoliation on the NL stripping almost all fan leaves and any lower small shoots which wont ever get enough light. I also raised the light again so that it is 16" above the canopy of my tallest plant which is a few inches taller than the NL. To mitigate this I raised the NL up by a couple inches or so.
I fed the NL 2L of early bloom nutes which produced 550ml runoff (28%). [24°C/46%]
DAY 45
--------
Monday 15th February 18:30
I fed the NL 2L of early bloom nutes which produced roughly 800ml runoff (40%) I THINK, as I spilt a bit in the tent.
DAY 46
--------
Tuesday 16th February 11:30
I made 10L of early bloom nutes with rainwater, 5L at a pH of 5.8 and 5L at a pH of 5.9.
I forgot to turn the heat down over night and the humidity is at 56% currently. [22°C/56%]
Tuesday 16th February 18:30
I fed the NL 2L of early bloom nutes which produced roughly 1L runoff (50%). Shes still not back to her normal intake before the defoliation which was only 2 days ago.
I turned the dehumidifier on and set it to 45% as the RH had climbed to 62%. [22°C/62%]
DAY 47
--------
Wednesday 17th February 12:00
I made 10L of early bloom nutes with dechlorinated tap water, 5L at a pH of 5.7 and 5L at a pH of 5.6.
Wednesday 17th February 18:30
I fed the NL 1.7L of early bloom nutes which produced roughly 820ml runoff (48%).
DAY 48
--------
Thursday 18th February 18:30
I fed the NL 1.2L of early bloom nutes which produced roughly 670ml runoff (56%). Shes still hardly drinking much so I will dial this down to 1L tomorrow.
I adjusted a couple of ties to expose more bud sites. I had to move the light up again by 2 inches to accommodate for growth as it was sitting at 14" above the canopy. [24°C/52%]
DAY 49
--------
Friday 19th February 18:30
I found the tent at 28% RH. No idea how that's occurred but I did notice it was hotter then usual this morning. I turned the dehumidifier of for a couple of hours and it jumped back up to 61% and so I will just set it to 55% RH.
I fed the NL 1.5L of early bloom nutes which produced roughly 500ml runoff (33%) so it's looks like she may finally be bouncing back after the defol last sunday. [24°C/52%]
DAY 50
------
Saturday 20th February 11:30
The tent temp has been sat at around 23°C overnight somehow. The dehumidifier keeping the humidity around 45-50% seems to also keep the temps between 23-27°C.
Saturday 20th February 18:30
I fed the NL 1.5L of early bloom nutes which produced roughly 600ml runoff (40%). Looks like i have a humidity problem and so ive reluctantly removed some more leaves from Jesus as she is bushy again after a week or perhaps I didnt defol enough. If I have the dehumidifier off the humidity is in the low 60s but if I lower it to like 45-50% then the temps stays too high between 24°C-33°C. [22°C/64%]
Likes
30
Share
@Tazard
Follow
Doing great this week. I’ll try and get some elevation photos next week to show the branching. These seem to be a very vigorous cross.
Likes
4
Share
@IndianaGrow
Follow
Week 6th done so far so good i put scrog net down and small bit of defoliation to get some air flow through the canopy next week i will be put another scog net down to open some light penetration for the lower buds

Processing
Likes
4
Share
@Big0zGrower420
Follow
Day 49!
Starting to give her just plain water for 2 weeks of flushing. Getting really excited to harvest and then get going on another grow.
See you next week.

Processing
Likes
29
Share
@Lennys_Laboratory
Follow
Feed Started With Tap Water Left Overnight For Chlorine/Chlorides To Evaporate.
Next Day.
Starting EC of our water is 0.10-0.15.
I added 1ML of Regenaroot Per Litre. Then Used Canna Terra Flores Until EC measured 0.7.
I then used the mighty bloom enhancer by the ml until my EC measured 1.3
Always Give A Little Sprinkle Of Great White Into The Mix
Finally i PH'd the mix to 6.2. Made sure the feed was of adequate temp (21c) and continued to feed.
😎

Likes
59
Share
@GMSgrows
Follow
Cloudy here today. Girls are taking on some nice colors due to the colder nights now. Went down to 2 here a couple of nights ago. Buds are starting to bulk up now. Had to fight a little PM I seen, so I sprayed them down with 60 parts water and 40 parts homogenized milk. All gone now., have to keep my eyes open for any more to start. If so, another blast will do them and that will give them enough time to finish up, without worrying any further...Thanks for all the looks and likes. People here are the best in the world.
Thanks AMS for the opportunity to grow the best strains in the world...🙏

Likes
11
Share
@CocoLogic
Follow
Sept 13th: (F27)
Fertigation once a day with same recipe (1200 EC 6.1 PH) watered until 10-20% run-off
Sept 14th: (F28)
Fertigation once a day with same recipe (1200 EC 6.1 PH) watered until 10-20% run-off
Sept 15th: (F29)
Fertigation once a day with same recipe (1200 EC 6.1 PH) watered until 10-20% run-off
Sept 16th: (F30)
Fertigation once a day with same recipe (1200 EC 6.1 PH) watered until 10-20% run-off
Sept 17th: (F31)
Fertigation once a day with same recipe (1200 EC 6.1 PH) watered until 10-20% run-off
Had to supercrop 1 branch on the PE#2 since it was almost in the roof of the tent
Sept 18th: (F32)
Fertigation once a day with same recipe (1200 EC 6.1 PH) watered until 10-20% run-off
Sept 19th: (F33)
Fertigation once a day with same recipe (1200 EC 6.1 PH) watered until 10-20% run-off


Likes
4
Share
@Longmountain
Follow
Week 6 of flower, nugs are super dense and stacking well cant wait for the last few weeks
Likes
4
Share
@CelticSmokey88
Follow
What you guys thinking of these going start feeding them bio grow what else could I get