The Grow Awards 2026 🏆 


Likes
Comments
Share
@Willy_Balls
Follow
This week, i transplanted the girls to the final pots.
I' ve just realized that autopot has 8,5l pots for my trays so I ordered some. I prefer smaller pots to my previous 15ls.
So, they are in 8,5l autopots with air domes on the bottom. Around 5cm of aqua pebbles on the bottom too, prewashed and soaked in 5,8 ph water. Then coco mixed with aqua pebbles around 66:33.
I watered them thoroughly with my aptus line.
The lights are changed from 2 led t5's to my single 320w led bar for now.
I ' let them veg for at least two weeks and we will see how it goes.
Cheers!

Likes
18
Share
@Diips
Follow
d.57 - looks alright, had to do some lst and adjustments to level out the height
gave an additional biotab.
move my big fan, below the plant, in an effort to push the moisture upwards and out, which resulted in me being able to raise the lights further up.. my plant is way over the average height of is genetics, thanks to biotabs 🌞.
fastbuds said it would have an average height of 70-100 cm, and ny plant is closing in on the 80 cm and she keeps going ^^. and people say that autoflowers cant be main lined, well i believe this grow proves it.
achieved darker folliage in the bottom, so i believe that we are on the right track. hopefully the deficiency levels out.
day 62/63 gave an additional biotab so we are at 6 total. day 63 i gave 10 ml bio pk with the watering.

Likes
37
Share
@DaddyPrime2
Follow
3/26/24 3 gal pots amended with 8 Tablespoons of Gaias 444.
The last time I was growing was about 3 years ago and I had always wanted to try Gaia green but it wasn’t available in the US. So I’m excited about getting to try something, previously unobtainable.
3/31/24 end of march and end of week and one veg. They haven’t grown too much. I switched them to their final grow space in my garage, from the warm bathroom in my house so I think they are getting used to the environment finally. Finally getting the environment dialed in for them. The garage on its own is a stable 50-60*F and RH 50-60%. I thought that would be easy to control with minimal swings. The light didn’t bring the temp up as high as I thought. Things are dialed in now and they should start taking off.
Likes
20
Share
@Experimentgreen
Follow
I won't say it was a perfect growing experience, because i kept running into problems with keeping the lights a good distance away, but that was the most difficult problem I faced.
It was definitely a very successful do-over. Both of these plants easily were 2 times the size (width/height) of my 1st sour stomper attempt, they yielded at least double and in Plant A's case...triple. And all by the few simple changes of using LEDs earlier in the grow, larger pots, being in a tent and having one tiny duct fan.
My nutrient regimen stayed pretty low and for the most part the same as previous grow. However in my opinion one of the most crucial differences was having them in the 3 gallon pots. They didn't dry out as quickly and they were able to be soaked more effectively than the 1 gallon smart pot had been.
For me this was a very important grow on grow diaries as this was basically Part 2 of my first indoor, man made grow. Learning these minimal differences in how to have plants turn out enormously better was essential to any future indoor grows I might do, even though I'm sure i just skimmed the surface on potential problems that could occur and how to fix them.
The buds from this grow were not only dense enough to be worth smoking, but every piece of the plant including its leaves will be useful for pressing. The couple presses i did on this plant so far had a beautiful golden color, an amazing smell, and had zero plant byproducts inside it from using the 90 micron bags. The only downfall with the micron bags and the pucks are they retain a fair amount of the pressed rosin, the only solutions I can think of would be to add them to an edibles mixture or to stack them all up and continue repressing.
All in all this was a fantastic grow, and I'm very grateful for all the support and for mephisto for making such a solid strain.

Likes
19
Share
@EmeraldLakeCannabis
Follow
yeh, forgot to add the new week the other day. Oh well. Didn't miss much of anything.
Timelapse for the last week starts us off here, as usual will update as the week goes on if anything notable happens.
-3/14/2021 - Been slacking off on progress updates and pictures. However, progress has been damn good. Recovery from topping is over and the plants have adjusted to the new pot sizes.
Likes
21
Share
@Siriuz
Follow
Day 37
We started with nutes today
Then all day long outdoors
From 6AM to 6PM
Plus CFL afterwards
They rest for 3 hours and then CFL again
Btw accidentally snapped one part of one big leave but that okay
Since we don't do defoliation on her
We guessing it's okay she will recover soon
Day 38
Since she's such a queen we wanted to upload a video showing how she starts flowering for the record, thanks a lot
You can Always follow me at Instagram
@cannagrowersiriuz
Also don't forget to add your comment below, it is important to us!
We want to learn, any tips, suggestion, more than welcome my friends
Happy Growing
Day 39 Some mins before installing ScroG
Day 40 Wonderful, she's out of there already so huge, full of buds
Day 41 she's actually doing great full of buds but those 2 first leaves are a little bit sad looking weird plus those black dots idk and it's turning yellow in between I decided to remove it and well, I'm hoping she's doing well what else I could think of guys any help or concerns?
At the end of the day, she's overall healthy and strong
Day 42 Time to feed the babies, so we added 900PPM (300ml) floranova grow
Followed by 1590ppm (300ml) flora nova bloom to make sure she's got all nutrients balanced well, also added 400ml of plain water after that so they could get a nice run off.
I think they're happy and we gonna check on them in a couple days to see how they go, Ph is around 6.2
which is great
Temp outdoors from 7-@
1pm around 25C to 36C
Then back indoors
Temp is 28C and drop to 22 at night and dawn so they're good and comfortable
Keeping humidity lvls around 40/65% top
Nice AC and Fan for air circulation
Thank you all for your support

Likes
6
Share
@Hanibert
Follow
Pb#3 let leaves hang a little bit but looks a bit better now.
Some of the Poppin Bottlez allready reaking of oranges.

Likes
7
Share
@Ice_R
Follow
Early this week found 2 fungus gnats on the soil of one of the plants so was afraid of an infestation but after getting rid of the 2 havent seen any other one. Yesterday (day 14) had to give some support to 1 of the plants cause it was bending over. Overal not perfect but think these problems are all minor. So lets see.


Likes
36
Share
@pifflestikkz
Follow
Day 99
09/08/24 Friday
Feed today, using de-chlorinated tap water pH 6, no plagron products this week due to seeing nute burn.
But she has bounced back yet again from a heavy defoliation and topping last week.
Trying to keep her small enough to flip in the tent 🤞
Day 100
10/08/24 Saturday
Picture and video update ✌️ 💚
Day 101
11/08/24 Sunday
De-chlorinated tap water pH 6 today again with calmag.
Day 102
12/08/24 Monday
De-chlorinated tap water pH 6 today again with calmag and Plagron PK13-14 5L 10% run off
Just trying to maintain her still untill my dragon has finished 🤦♂️
Thriving 😍✌️💚

Likes
29
Share
@JeyGanesha
Follow
Un altra settimana è passata senza problemi...grazie alla mia perseveranza nel curarla e debellare i ragnetti Rossi che bastardelli mi sono arrivati anche dentro al box... sicuramente c'è li ho portati io involontariamente quando sono andato a vedere delle piante di un amico che erano impregnate di ragnetti e ragnatele sui fiori....vabbè ora devo sbattermi un po' più ma non lascerò che mi rovinino la mia terapia 💪👍🙏🕉️🙏... Boom Shiva Shankar 🕉️ belle le mie coccinelle 🐞 che mi tengono pulita la mia terapia

Likes
7
Share
@El_Bottanico
Follow
Hello everyone.
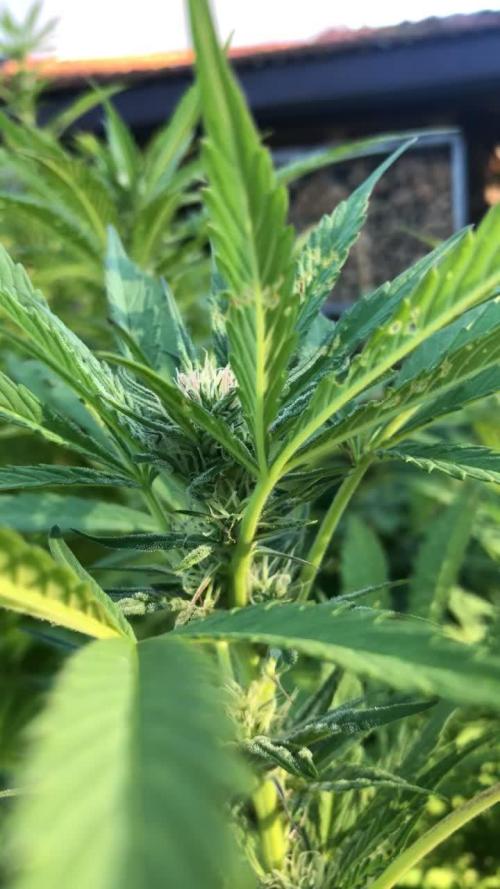
This week the plant took of. She's stretched quite a bit during the last days showing her sativa dominance, buds are building up nicely.
Day 28 I topdressed with humus and compost mixed with 7-10 grams of organic mineral npk 5-10-15 to give her some extra feeding to start flowering.
She's going thirsty every two days now so I alternated water and feeding with humus tea and molasses. Watering volume about 5-6 liters.
Only training this week has been removing two or three fan leaves which were occluding the lower buds. I've been very conservative with this plant because she's not too bushy and has some internodal distance, the air circulation between
Likes
34
Share
@LockDownGrow
Follow
My first time making alcohol tintcure
Using the c1 ,
Hold on tight gonna be a trip

Likes
4
Share
@Brentb2607
Follow
10 days of darkness during the flush begins. Had great results with Wanda and her genetics. Blessed for a first grow. Cut Wanda down at the end of the week. She’s now drying. I will be giving a thorough review for my harvest diary. Excited to share what I’ve experienced and learned from this grow.

Likes
5
Share
@CannabisAprendiz
Follow
Para ser mi primer cultivo . encuentro que tuvo un excelente resultado . las cepa escogida me dejo muy conforme con los resultados y la produccion obtenidad
en un espacio de 1x1x2 con 300 watts de luz encuentro que estuvo muy bien . Muy contento con el efecto relajante y medicinal del la cepa , era lo que estaba buscando y lo encontre. /
To be my first crop. I find that it had an excellent result. the chosen strain left me very satisfied with the results and production
in a space of 1x1x2 with 300 watts of light I found that it was very good. Very happy with the relaxing and medicinal effect of the strain, it was what I was looking for and I found it.

Likes
18
Share
@Changman
Follow
Due to life being life (i lost three friends and my cousin in Dec 23' ) i haven't been on here at all. I have however been taking care of the plants as they have stopped me from wanting to unalive myself. As you can see shes grown into a beauty unlike my marriage which is seemingly falling to pieces as well. And unlike my ungrateful family who just calls me when they want money, this plant only calls me when she wants water and love. So everyone dont be a cheater like some spouses, just take care of your plants cause unlike some undeserving partners your plants wont leave and destroy half your stuff in the process. Good day to

Likes
4
Share
@Mr_nugs_lover_David
Follow
Super frosty and stinky lady, super good strain,same aroma as her sister, smells super sweet,unfortunately she didn't got a good enough size so she's not gonna be very productive, I hope to grow her again to be able to get a bigger yield of this sweet organic nuggets! 💚🌱🤞

Likes
567
Share
@Rock_n_Roll_Randy
Follow
Messed up on the days last weeks update. 23 days old today. The mutant is still OK. Planted most of the vegetables outside today with the wife👌. Everything is still looking healthy 👍🤘
Likes
5
Share
@TheGreenDisciple
Follow
Day 80 ~ Plants are looking and smelling great. I have been keeping an eye on the trichomes for the first plant and she looks like she will be ready right after the harvest moon! So I am excited to harvest her on Friday. While plant 2 is still another week and a half to 2 weeks away!

Likes
4
Share
@FuturJuice
Follow
Week 5 of Flower is over and my Papaya Cake girl is showing her true colors and smells! She is in full bloom and pumpin trichomes like a Queen.
Report:
I’m seeing a “tiny” bit of nutrient deficiency pop up but nothing to be alarmed about. She been getting straight 6.2 ph water and nothing else from here on out. Shout out to the YouTube channel “Welcome to the Grow tent” and “Growweedeasy.com for pointing out a few mistakes I’ve made along the way and saving my ass when I thought it was a Nute defi but was just a root bound plant. Their reccs have made a HUGE diff in my yields and overall plant structure.
The last run with this strain was nothing like this girl. The smell in the morning around 8:40 and 6:40pm in the evening is something you could write a book about.🎂
Your nose picks up faint odor of papaya and vanilla wedding cake. Hence the lineage she came from would make the most sense.
Do you talk to your plants? I do and I know they are paying me back for the CO2 they need.
I’m def enjoying the fruits of my labor as they say. And I hope you enjoy the pics.
—— How I would rate her overall ——
Node stacking: 7/10
Cola structure: 8/10 (more time to improve)
Smell: 9/10
Colors of bud sites: 9.5/10
Size of buds: 8/10 (this will never be a 10😎)
Overall Appearance: 9/10
Taste: TBD


