The Grow Awards 2026 🏆 


Processing
Likes
25
Share
@parachute
Follow
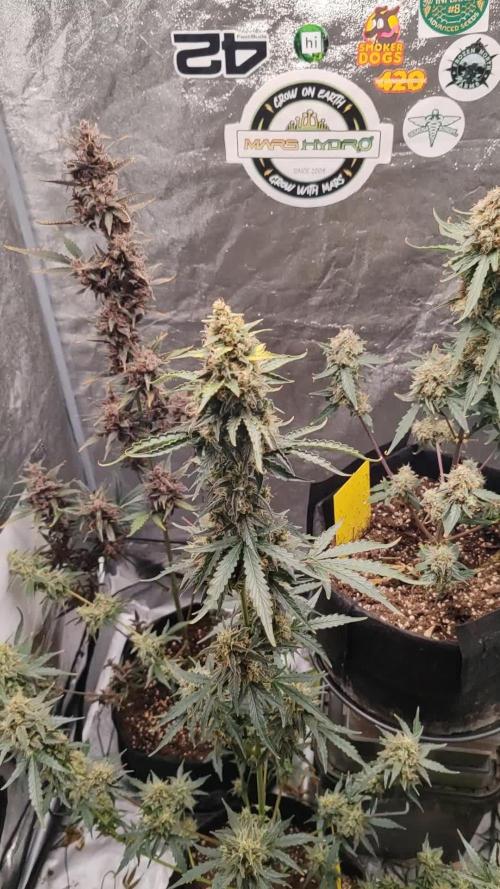
Every 5± days from week 5 I suppose I get rid of below leaves and big fan leaves,which don't let the light get to the bottom buds,as was recommended in comments. They react good on that kind of stress and the bottom buds started developing too.
Despite the high temperature( 28-30 degrees) they keep on growing and forming buds,happily.


Likes
43
Share
@The_Northern_Skunk
Follow
Well most of the autos have came into flower a couple are still slacking behind and the others are a week younger so i expect them to come into flower in the next week or so..

Likes
15
Share
@DailyhighclubNLyara
Follow
Okay so the result of my LST surprised me like a lot. The plant looks great under the light, it’s still my second grow so I hope to learn a lot about the beautiful plants and how they respond. I want to experience everything to learn from them and know how to respond.
I think this week went good but the dry wet cyclus is something I really needed to learn this week. I first tried watering every day but i noticed that the soil wasn’t dry at all, so I thought no that’s maybe just the soil. *Ive learned this cycle in the next week* spoiler alert: it wasn’t
I still give around 1 tbsp of the molasses because the plant is really responding good to it.
The small plant is also looking healthy so perfect, just keep giving her love.
I did a big oops:
So, the plant grew bigger and bigger and faster then I could keep up. So I decided to lst some more, Olga went perfect and I build a lot of confidence from that. So... busy with the other “big” plant and I started doing the head top, but the band was just to tight, but I noticed that to late *SNAP*. Did I just snapped the biggest branch of the middle plant? Yes, I hated myself for 4 days until I thought: there are no mistakes, just happy..... (fill in with your brainpower) well see what happens

Likes
1
Share


Likes
26
Share
@Wicked_Stix
Follow
Had a lot going on this week so the plants didnt get any care or maintenance at all other than just checking on the water level a couple times. They need some major defoliation which I wanted to do this week but procrastination is the vibes currently. Will probably get some done next week.... the plants are looking good and most of them are bushing out pretty nice. They dont seem to be stretching as much as they normally do by this time, but they are transitioning to flower. Will probably do a flush and water change soon since they haven't had one in over a month. I'm just anxious to see some frosty buds at this point.

Likes
16
Share
@SeshHouseCannabis
Follow
This is the final week of feeding, hopefully the plants will be ready to harvest in a few weeks. After flushing only Purpinator and Fulltilt will be used in this week.


Likes
35
Share
@SmokingTiki
Follow
- I didn't weight wet buds.
- The trichomes photos have been taken just before the harvest on buds all over the plants.
- The hash balls were : a little less than 1cm diameter for the Mandarin Punch#1 and around 3mm diameter for the Mandarin Punch#2
- Drying was made at 20°C and around 50% of humidity.
- Humidity in jar around 50% on the first day, temperature around 20°C.
MANDARIN PUNCH #1
Veg time : 44 days.
Flowering time : 70 days.
Total time from seed to harvest : 114 days.
Height : 142cm
Pot size : 26l
Harvest : 61g
MANDARIN PUNCH #2
Veg time : 45 days.
Flowering time : 67 days.
Total time from seed to harvest : 112 days.
Height : 123cm
Pot size : 10l
Harvest : 41g


Likes
44
Share
@Jays_Not_Here_Man
Follow
The girls have recovered well from my incompetence ( hot solution and too much light) they have took off and are getting some bushiness to them. I will be transplanting to a 2 gallon pot in the very near future.
Temps have been high, but the RH has also been high so the VPD hasn’t suffered too much. Started feeding the girls about 1/3 to 1/2 cup water, and by the end of the week we were at nearly a full cup. They are drying back well, and are needing some water every third day or so…

Likes
15
Share
@Hypnogrow
Follow
I've pretty much been hands off this grow.
Just letting the plants do what they want.
I did a spray with insecticidal Soap which shocked some of the auto genetics. Had some leaf loss but they are bouncing back. I saw one tiny fly and wasnt worth the shock some of the susceptible plants had. Lesson learned.
I havent done much more than fimmed, topped, and lsted very lightly. Testing out fimming on autos. So far the lst only autos started flowering around day 23 to 25. The fimmed autos have stayed in veg much longer and were way more resilient. They are just starting to flower or show pistil. One of the Double Grape is showing completely different pheno than the other double grape. So much that I thought it might need 12/12 to flower. However it started showing pistils a day ago. Double grape responded very well to Fim and so did the northern lights big bud auto and purple scoops.
I had problems with a driver on a brand new fc3000 blowing up, mars hydro sent me a replacement driver. They then wanted to squabble about replacing the plastic piece that connects the driver to the light. Two weeks later they sent the part after I told them I had to buy an HLG cause I couldnt believe they wouldnt send me a plastic part.
Then the HLG I was sent was the 65 version not the 100 but they sent me the correct light right away and my plants and the clones loveeeed the HLG 100 v2. So much so that I bought the 65 version they sent by mistake and they gave me $10 bucks off for my troubles.
Even though I had to be persistent with Mars Hydro they did do me right and now both my LEDs are working. However I had a 4 by 8 of plants all stacked on one end under 150 watts for weeks trying to get this solved. I had multiple power and light issues with adding the new 4 by 8 tent that costs my plants I'm sure. I decided not to freak about it and let things go with the flow and not stress. Things will not be optimum but I learn each grow about my setup and this is my first grow in soil so learning curves.
I'm feeding very small amounts of calmag and seaweed extract in each watering which is every two to three days with ro water. I started this week three when the plants showed shock from the spray. It seemed to help them recover.
I'm using light warrior, ocean forest and living soil layered mix.
I kept 1 king tut, 3 alien tech clones which are doing good nice and rooted directly in light warrior. Transplanted week three in 3 gal pots.
Never cloned before so is a learning process.


Likes
7
Share
@weedrevolution
Follow
Plants are happy and coming up really nice.
They were defoliated and given a good dose of S.W.A. Organic Compost Tea.
See you soon for another update. 😁
Likes
26
Share
@420DeepGrow
Follow
Gracias al equipo de Seedsman y XpertNutrients sin ellos esto no sería posible.
💐🍁 Bubba Cheescake:
Bubba Cheesecake es un cruce de Bubba Kush anterior al 98 con Cheese Cake (Wedding Cake x Exodus Cheese). Se trata de un híbrido 70% índica con muy buenos rendimientos, alto en THC y bajo en CBD. Bubba Cheesecake prospera en interiores y exteriores. En interior se aconseja un corto periodo de crecimiento vegetativo debido a la cantidad de estiramiento que presentan las plantas. Las plantas pueden crecer hasta una altura de 250 a 350 cm. cuando se deja crecer naturalmente al aire libre. En interior, la floración dura entre 60 y 65 días, con rendimientos entre buenos y altos, de 400 a 550 gr/m2. Las plantas de exterior son capaces de producir entre 700 - 800 gr. peso seco. En las latitudes norteñas, en exterior, los productores pueden esperar cosechar a principios de octubre. Los cogollos son grandes y duros como piedras. Las plantas maduras muestran atractivos colores púrpuras y azules y brillan con una resina pegajosa que cubrirá las manos del cultivador si no tiene cuidado. El componente Wedding Cake agrega dulzura al sabor del regaliz y el aroma es terroso y musgoso. La producción de THC es muy alta con un nivel bajo de CBD. El efecto es intensamente narcótico, fuerte y duradero.
🌻🚀 Consigue aqui tus semillas:
🍣🍦🌴 Xpert Nutrients es una empresa especializada en la producción y comercialización de fertilizantes líquidos y tierras, que garantizan excelentes cosechas y un crecimiento activo para sus plantas durante todas las fases de cultivo.
Consigue aqui tus Nutrientes:
https://xpertnutrients.com/es/shop/
📆 Semana 8:
Se aprecian unas lindas preflores hembra, comienza a estirar de forma acelerada.
Todo sigue su ritmo y ellas comen bien todos los nutrientes, comienzo a aplicar sugarshot, silica force y enzimas.

Likes
42
Share
@cheetah844
Follow
Growing healthy, tall like expected. I've been waiting over 2 years to replenish my JH flower, the last one I grew happened to be a huge male. I miss the bud & can't wait to have some back. It was a very nice mood boosting & pain relieving daytime strain for me. I hope the pheno I have rings true to this
Likes
7
Share
@Fonzi
Follow
Der Duft ist sehr lecker. Die Jacky White geht in Richtung Zitrus Haze gefällt mir sehr. Bin gespannt.
Strawberry Ak auch sehr lecker fruchtiges Aroma.
Dauert nichtmehr lange


Likes
8
Share
@HighOhioAn
Follow
What can I say papaya sherbet really thriving under low stress training starting the last week of stretch hoping to keep a level canopy, but without topping her it’s hard to keep it flat🔥
Likes
15
Share
@AK1210
Follow
New flowering continues to develop on this lady, she seems to be swelling up day by day.
Yellowing of the fan leaves has started which usually means it's time to flush, I need to check the trichomes to see how amber they appear before I do just in case the flavour or yield could be effected.
Likes
15
Share
@OrganikTek
Follow
Weather Continuos Cool And Wet
Beautiful Bubs Forming In Black Cream
Wedding Cake Gone Full Bloom. Discoverd Source Of The Yellowing.... Red Led From My esp32....
BomBerry Shes a Later Late VegBoom Late Full Bloom If Shes Continuos To Grow I Dont Have More Space For Her
Couskush She Isnt So Big as The Other. The Other Are More Evolued I Think. Shes Now Starting To Go Full On Bloom.
Chears BrotherHood

Likes
57
Share
@Zurban_Poison
Follow
Hello everyone! this week, I had to do defoliation all the same .. on that girl I was not going to touch .. the fact is that there were a lot of leaves .. too many .. it was difficult for the plant to breathe .. in short, I did defolation and also took advantage of the fact that the plant itself made a topping))) and with the help of the LST I took 2 central branches to the sides .. from today I will decrease the light regime gradually .. I hope this will help the plants show their gender as soon as possible ..

Likes
3
Share
@Avengergreen
Follow
We are slowly approaching the finale. I'm counting on two more weeks at most. Gorilla and Titan are getting pretty thick. LSD doesn't really want to go into volume. Maybe that's also a phenotype. We'll see what effects it will have. Hopefully it won't disappoint