The Grow Awards 2026 🏆 


Likes
11
Share
@Yukagrls
Follow
I want that happy face! I have to confess I love watching this cute little plant every day, so before I go to bed I come and say hi and then goodnight! All I have dine so far is water them with water from the rain. Its been raining a lot. ;)

Processing
Likes
11
Share
@TheVerdini
Follow
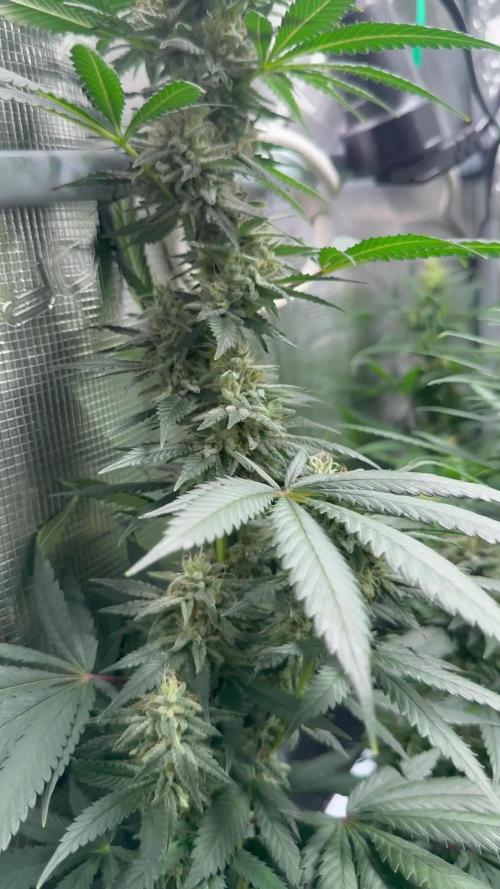
Coming along nicely. Large number of bud sites, starting to grow but still far from mature. Nice aroma every time I open the tent. Starting to become a bit frosty.

Likes
2
Share
@I_Identify_As_A_Dan
Follow
Day 63
Harvested 70% of the plant, going to let the bottoms get some extra days to put on some weight.
Really looking forward to her drying out and trying her in maybe a weeks time.


Likes
14
Share
@TOMI08
Follow
101.nap nagyon meleg 32fok
A trainwreck napról napra nagyobb..
A specail kush szépen virágba van
Növeltem a viz mennyiséget két naponta 10liter
Elfogyott a canna flores hesi bloom van helyette
A special kush kapja canna pk 13/14 2ml/10l víz

Likes
3
Share
@TheBudWhisperer
Follow
Second week on the veg. And the drainage table repairs were done just in time. Moved all these plants into the recirc. System and within 24hours of transplant they were notably happy. I’ll add two more seedlings to the group for a total of 10 plants. Hopefully at least 50% are female🤞.
This grows pretty much on autopilot now. All that will be left is regular plant maintenance and top offs to the finish👍.
Likes
1
Share
@GERGrowDesigns
Follow
Welcome to Flower week 1 of Sweet Seeds Mental Rainbow F1
I'm excited to share my grow journey with you from my
Sweet Seeds Project . It's going to be an incredible ride, full of learning, growing, and connecting with fellow growers from all around the world!
For this Project , I’ve chosen the Feminized Photo strain Mental Rainbow F1 :
Here’s what I’m working with:
• 🌱 Tent: 120x60x80
• 🧑🌾 Breeder Company: Sweet Seeds
• 💧 Humidity Range: 50
• ⏳ Flowering Time: 7-8weeks
• Strain Info: 22-30%THC
• 🌡️ Temperature: 26
• 🍵 Pot Size: 16
• Nutrient Brand: Narcos
• ⚡ Lights : 600W x 2
A huge thank you to Sweet Seeds for allowing me to try my Best with this amazing collection from Photo Strains they managed to Sponsore . Big thanks for supporting the grower community worldwide! Your genetics and passion speak for themselves!
I would truly appreciate every bit of feedback, help, questions, or discussions – and of course, your likes and interactions mean the world to me as I try to stand out in this exciting competition!
Let’s grow together – and don’t forget to stop by again to see the latest updates!
Happy growing!
Stay lifted and stay curious!
Peace & Buds!


Likes
2
Share
@CanadianFillmore
Follow
Start of 12/12 light cycle, round 2 with the citrus skunk strain. Increased feeding to 6L per plant (water + nutes), hopefully this increase will keep the plants healthier throughout the grow.

Likes
23
Share
@PrairieFrostGrow
Follow
She has fought off all pest and environment issues and is very stable. She was switched to a 20 hour light cycle at mid to end of flower and she took that well and swelled further. Opened her up on the inside to the let the light in and she has rewarded with fat little nugs all the way down her stems!! She liked the LST and would push harder the day after being tied down.
She finished just a beautiful girl and she will be on a screen saver for a few months to come😃😃😃


Likes
39
Share
@HydroHerb420
Follow
Massive dense colas. Is definately going to be the biggest yield of the three.


Likes
26
Share
@DrRobeRt
Follow
Hello fellow Growers
Nancy had been droopy lately after her nute and light burn (Man she's had it tough) so I backed off on the nutes and she seems to be happier now - in fact, I think her buds are putting on weight now - slowly but surely.
Wendy, on the other hand, is Frikn bullet Proof! She's getting fatter and fatter by the day and I'm thinking that I will need to flush soon before the harvest.
Any tips at this point would be really appreciated - it's my first harvest and I wanna do it right ;-)
Peace oooot ;-)

Likes
30
Share
@TightNugs
Follow
Good growth this week,switched nutes to advanced nutrients after my other nutes went off.Seeing instant results so happy days.
🤞🍁

Likes
16
Share
@Diips
Follow
Both plants looking good.
The cheese, is really frosting and flowering up, really crazy! shes gonna become a beast and is so early into flower
13-08-2024. both plants been given a 5 ml shot of Calmag. also the cheese got her mid bloom dose of Biopk
16-08-2024. the ladies got some water today, and the Orange Apricot Glue has overtaken the cheese in height, compared to the cheese being the bigger one for most of the “grow”.


Likes
10
Share
@GracelessGardens
Follow
Started having some leaf issues at the end of week 6, defoliated, gave medium/heavy feeding of big bloom. Going to start flushing with distilled water for a few days and see if any improvement, only fan leaves affected at this time.
Day 45: checked ph of soil, showing 7.0, just ordered some fox farms ph down should be here in 48hrs
Day 49: bought a reliable pH testing pen and found my distilled water to be 9.5! Mixed up some spring water/nutes/pH down at 5.8/5.9 . Hopefully this does the trick!


Likes
346
Share
@Canna96
Follow
Hey now! This week went very well. I feel like she is finally done growing, and just starting to thicken up and ripen. I did switch from the liquid koolbloom to the dry, and within 48 hours or so I really started noticing the weight of the colas start leaning towards the floor. I did support the main colas last week, but this week I noticed several of the smaller unsupported colas started drooping to the floor, so i added a few support lines. I am thinking maybe she has two or three weeks left. I am not a big believer in an all out flush, as I do not wish to stress her out even near the end. Rather, I am gradually weaning her off the nutes over the next 2-3 weeks. She is starting to get brown tips on almost every leaf so not sure if this is just her being near the end or a bigger issue?? Any advice please hit me up! I'm still struggling with humidity issues, but she seems to be ok! Thank you so much to everyone in this community for all the love, support, and help with my first grow. Thanks and blaze on!
