The Grow Awards 2026 🏆
Likes
Comments
Share
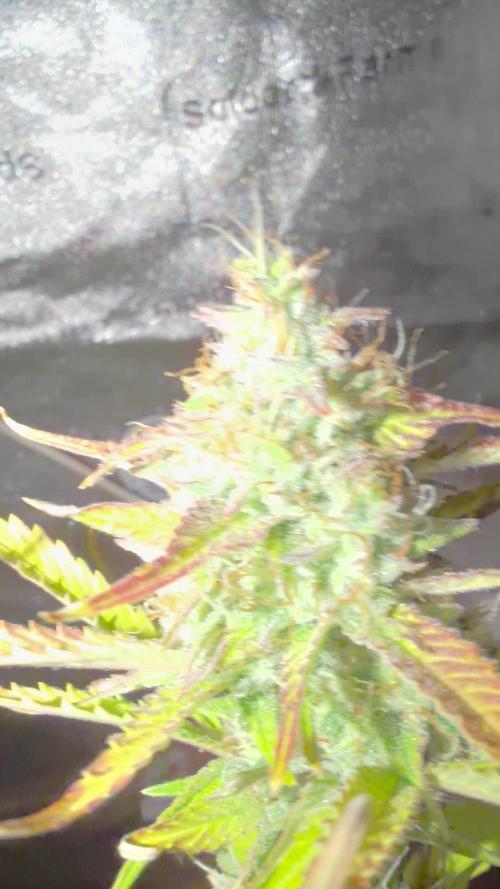
This is my fav strain for now. I love the taste more than anything. Take a vape hit and exhale through the nose. Oh god, this is good. Despite the low light intensity, The BUDS ARE TIGHTER THAN THE FIST OF A FIGHTER.
Likes
11
Share
@Hix57
Follow
La LSD 25 auto évolue avec brio malgré son démarrage un peu trop "gourmand" en azote. Les premières feuilles ont fait un clin d'œil jaune, mais rien de comparable à la banane purple punch qui a décidé de prendre un virage jaune express. Est-ce la sénescence ou un petit coup de mou en azote ? L'avenir nous le dira, mais croisons les doigts pour que notre traitement porte ses fruits et atténue ces petits caprices. J'ai opté pour un rééquilibrage en donnant un quart de la dose recommandée d'azote, pour finalement arriver à la moitié. Les têtes sont déjà en pleine maturation, certaines ont même déjà fini leur course en seulement 47 jours. Imaginez-vous, une plante de cannabis qui nous offre des têtes en un mois et deux semaines ! C'est tout simplement impressionnant. Je prévois de patienter encore deux ou trois semaines, histoire de laisser la magie opérer un peu plus. Restez branchés pour la suite de cette aventure végétale pleine de surprises !
Likes
1
Share
Running into some deficiencies, don’t think it’s any pests but if you have any recommendations what it is plz let me know. Already fed a compost tea looks like it fixed the problem. Could be PH haven’t tested the soil yet.
Likes
170
Share
Bonjour à tous les padawans et les maîtres jedis Jour42 ma plante entre bien en floraison je pratique sur elle une defolliation pour permettre aux têtes de prendre la lumière La floraison des plantes de cannabis La plante de cannabis passe par différentes étapes de vie avant de parvenir à la récolte. Ces étapes sont : la germination, la pré-croissance, la croissance et la floraison. Pour les autofloraisons il n'est pas nécessaire d'avoir de changer le cycle de lumière elle entre en floraison automatiquement voilà d'où elle tient son nom "d'autofloraison" L'origine de l'auto-floraison vient de la sous-espèce "cannabis sativa ruderalis" , qui à l'origine produit de très faibles niveaux de THC. C'est en croisant cette variété de marijuana avec d'autres qui produisent des niveaux de THC plus élevés qu'à vu le jour ce magnifique compromis que sont les variétés auto-fleurissantes avec des taux de THC très satisfaisants. En parallèle, cela a permis d'améliorer la production de ces variétés, qui initialement étaient exceptionnellement basse. Pour des résultats optimaux, en culture Outdoor (extérieur), je recommande que la germination des graines de marijuanaAuto-flo se fasse entre avril et août. En culture Indoor(intérieur), la photopériode idéale que ce soit pour la croissance comme pour la floraison est de 20h de lumière. N'oubliez pas que ces graines ne sont pas tributaires de la photopériode pour passer en floraison. Il est préférable d'utiliser des pots d'une capacité de 10 à 20L dès le début, étant donné que leur cycle de vie est réduit, les auto-flo n'ent pas besoin de plus de volume pour se développer. Vu sa petite taille (et la discrétion) elle fait l'objet d'un bon choix pour la culture de cannabis sur balcons. La première variété de Lowryder auto-floraison a été créé à partir de cannabis indica sativa croisé avec des génétiques de cannabis sativa rudelaris par la banque de graines de marijuana "The Joint Doctor". Puis vinrent la White Dwarf de "Buddha Seeds", la Roadrunnerde "Dinafem", l' Auto Stoned d' "Autofem", la Speed Devil de "Sweet Seeds" , la Maxi Gom de "Grassomatic", la Flash, la Gnomo de Kannabiaet bien d'autres. Jour42 defolliation (video) Avant toute chose n'oublions pas de bien désinfecter ses outils et bien ce laver les mains. Quesque la defolliation ? LES CULTIVATEURS AMATEURS, PRENEZ GARDE, MAIS NE PRENEZ PAS PEUR La défoliation consiste à retirer les feuilles des plants de cannabis en intérieur afin d'accroître le rendementfinal. Le cultivateur amateur doit faire preuve de vigilance lorsqu'il commence à appliquer cette technique de taille. Malgré le débat sans fin entre ceux qui prônent cette technique et ceux qui la dénigre, il n'y aucune raison pour qu'un amateur ne s'y essaie pas afin de voir si ça lui convient ou non. COMMENT DÉFOLIER Que vous tailliez les feuilles ou les branches des plants de cannabis, il vaut mieux utiliser un sécateur stérile qui est confortable en main. Arracher des feuilles à la main manque de finesse et engendre souvent par accident, l'arrachement des couches d'une tige en plus de la feuille. L'objectif principal de la défoliation est de permettre une meilleure pénétration de la lumière et de promouvoir la production de plus grosses têtes. Les feuilles éventails qui font de l'ombre doivent être retirées. Tailler la tige principale et/ou les pousses secondaires n'est pas de la défoliation. La règle d'or lorsque vous donnez à vos plantes un rafraîchissement est de commencer avec les feuilles nourricières les plus grandes et les plus larges, en taillant du bas vers le haut. Il est important de retirer les feuilles stratégiquement et non pas au hasard. Pensez également qu'il vous faut limiter votre rafraîchissement à approximativement 10 à 20 % des feuilles totales de votre pied. Il est très facile de s'emporter durant la taille et de se retrouver avec des plantes chauves. Un excès de taille de feuilles empêchera la photosynthèse et paralysera vos plants. QUAND FAUT-IL DÉFOLIER Il est assez rare d'appliquer la défoliation comme seule technique pour obtenir un fort rendement. La taille des feuilles est généralement associée à d'autres méthodes de tailles et de palissage pour un meilleur rendement telles que le topping ou étêtage, le FIMming, le LST, le manifolding, le supercropping et le ScrOG. Les cultivateurs utilisant la méthode ScrOG auront besoin de retirer toutes les croissances inférieures ainsi que les feuilles et les tiges se trouvant sous le filet. Les plants de cannabis peuvent être défoliés dès lors qu'ils sont passés de la phase de plantule vers la phase de croissance végétative. Cependant, il est recommandé aux cultivateurs amateurs de laisser aux plantes 1 à 2 semaines de croissance végétative avant de s'attaquer à la défoliation de celles-ci. De plus, certaines variétés sont plus sensibles à la taille que d'autres et de ce fait, seront plus stressées par la taille des feuilles. Surveillez minutieusement le comportement de vos plants après la taille. Une période de convalescence de minimum 3 à 7 jours avant de recommencer la défoliation est fortement recommandée pour éviter trop de stress aux plants. Les cultivateurs peuvent également défolier pendant la phase de floraison, ce qui permettra à l'énergie de la plante d'être concentrée vers la production de têtes tout en limitant l'ombre et l'excès d'humidité. Néanmoins, il est important de ne pas défolier trop tard sous peine de simplement blesser ses plants inutilement. LES AVANTAGES DE LA DÉFOLIATION Évidemment, l'avantage numéro un de la défoliation, c'est l'augmentation du potentiel de rendement de cette technique de taille pour tous types de cannabis allant de la photopériode aux variétés autofloraison. Ce n'est pas un secret que les fleurs qui reçoivent plus de lumières deviennent plus grandes et larges que celles dissimulées dans l'ombre des feuilles. De plus, retirer les feuilles intérieures des plants touffus aide à prévenir toutes menaces de moisissure. Les plants très feuillus avec un feuillage intérieur dense produiront une quantité importante de têtes pop-corn. Dans le pire des cas, les branches de têtes et les têtes qui sont denses succomberont au pourrissement. Si vous observez des gouttes d'eau se former sur la surface des feuilles, il est grand temps de penser à faire de la défoliation. Libérer la zone inférieure et médiane des feuilles est un excellent moyen d'améliorer la circulation de l'air. LES DÉSAVANTAGES DE LA DÉFOLIATION Les plants de cannabis en intérieur bénéficient de la défoliation pour deux raisons. La première est parce qu'ils reçoivent la lumière d'une source stationnaire au-dessus d'eux, et la deuxième est parce que les conditions environnementales sont contrôlées par le cultivateur et non Mère Nature. Les plants d'extérieurs eux, n'y gagnent pas beaucoup, car les cas échéants se vérifient pour eux. Le soleil traverse le ciel, illuminant sur sa route, différentes portions de la plante de son lever à son coucher. Les cultivateurs en extérieur n'ont pas besoin de manipuler les plantes afin qu'elles se développent en adoptant une structure plate puisque le soleil est infiniment plus puissant que n'importe quelle lampe de culture et qui plus est, il est toujours en mouvement. Tailler les feuilles des plants extérieurs les rend également plus vulnérables aux conditions humides et brise leurs barrières naturelles contres les nuisibles. De nombreux cultivateurs d'intérieur peuvent, et malheureusement, c'est souvent le cas, réduire le rendement final à cause d'une défoliation faite au mauvais moment et/ou excessive. Tailler les plantules n'est pas conseillé et engendre souvent des plants nains. Scalper les plants matures est encore pire, et au lieu d'obtenir de longues branches de têtes, vous obtiendrez probablement encore moins de fleurs. De même, tailler des plants malades ou en mauvaise santé à n'importe quelle période de la croissance risque de paralyser la croissance plutôt que d'encourager la formation de fleurs denses. Jour44 Arrosage une fois sur 2 topmax de biobizz Jour46 arrosage avec de l'eau ph6.3 à laquelle j'ajoute 0.8g par litre d'eau de feeding enhancer greenhouse. Jour47 léger arrosage. Jour48 léger arrosage
Likes
2
Share
Explosive growth compared to last week. I topped again, which might be the last time before I allow for some more growth before flipping. Super Impressed, this would be much bigger if I did not delay transplanting for a week and a half, because I had my grow space full! I just started 2 others, unfortunately bad timing as this one's almost to flower, so either I will stretch the veg out for much longer so all plants can flower at same time, or work out other arrangements. So far I'm beyond impressed with Homegrown Genetics and cannot wait to see these beauties flower 😁
Likes
20
Share
So this is how things are looking for the ladies at the end of Week 4 of Veg, I have uploaded a video for you guys with all the information, any questions just ask away 👍🏾🔥😎
Likes
24
Share
@Smokwiri
Follow
Added some extra nutes today 😁 Will be topped in the coming week.
Likes
2
Share
Increased Buddy to 1mm p/l. Really impressed with these nutrients so far, there's been no problems or defeciences the entire grow. All plants look happy, healthy and green. This plant is on the left of the timelapses.
Likes
4
Share
@S2993
Follow
Buds have developed really quick and the whole room smells like gas and candy
Likes
7
Share
Gorilla Glue #1 - Harvest Comment - I Am Very Satisfied With What I Got, I got 3 ounce 7 grams - I Uses Advance Nutrients PH perfect In veg then I switch to the iguana juice organic juice for the flowering stage. I notice a much more slower growth when I switch to organic nutrients.00
Likes
17
Share
Thank you soo much Humboltd seeds. I love your qualitty. Another my favorite indica strain. 🍀 i love this strain ❤️
Likes
2
Share
Que pasa familia, vamos con la quinta semana de crecimiento de estas Gorilla Melon feminizada de fastbuds. Vamos al lío, de las 3 plantas, me quede con 2 por espacio, siempre pongo alguna semilla de más por si no abriese alguna por no perder ese hueco del indoor. También se trasplantaron a su maceta definitiva, en este caso de 7 litros. Y ya superaron el shock provocado por el mismo trasplante. El ph se controla en 6.2 , la temperatura la tenemos entre 20/22 grados y la humedad ronda el 50%. Hasta aquí todo, Buenos humos 💨💨💨
Likes
4
Share
@AustinRon
Follow
OG 4Q24 Seedling Bolt III Orangegasm (Fem) [ IRIE Genetics ] 12/12 @ Bolt (Day 21) Germination: 20 November 2024 #3A Earliest Harvest Date: 9 February 2025 #3B Latest Harvest Date: 19 February 2025 _________________________________________ Start of Week: [Wed Dec 25, 2024 CR2 4Q24 1:B:1:1] End of Week: [Tue Dec 31 , 2024 CR2 4Q24 7:B:1:7] OrangeGasm Fertigation: Max EC: [ 2.4, mS] _______________________________________ Week’s Objectives: - IFF We’re still HAND WATERING, ADD First Resin Bloom to Full @ 4ml/gal. - We can’t replace RLA’s Carbon Component with/out ~300 ml/Gal Ful-Power (Fulvic Acids) We WON’T be doing that. Rather, we’ll see a diminution of Carbon provided, look for 3-5 days to stabilize after switch to auto-irrigation. EC Starting Water: ec: 0.0 mS/cm, pH: ~7  __ Wed Dec 25, 2024 # Christmas Day OG 4Q24 15:B:2:1 Watered late tonight (~2200). - NO RUNOFF - Barely the beginning of Burnt Tips - Grew 2” overnight - raised light 2”, Canopy Distance is 19.5 @ 77% (770 ppfd) After Watering - With REDUCED Light, Plants are FRISKY Leaves raised (but no fingers in light sockets) - # We’ve got Pistils (Noted Yesterday) - Ceasing Foliar . . . IT’s been good. ;-} Runoff: NO RUNOFF Fertigation: - [x] Primer A&B: [ 10.2, ml] - [x] CalMag Fuel: [ 6.8, ml] - [x] Silica Skin: [ 6.8, ml] - [x] Lush Green: [ 5.1, ml] - [x] Root Anchor: [ 5.1, ml] - [x] Peak Bloom: [ 5.1, ml] - [x] Photosynthesis Plus: [ 6, ml] - [x] Quillaja 60 Powder: [~scant~] - [x] SLF-100: [ 5, ml]  Standardizing Lighting __ Thu Dec 26, 2024 # BOXING DAY OG 4Q24 16:B:2:2 Scotoperiod: [ 12, h] EC: [ 2.4, mS/cm] Temp: [ 79, °F] RH: [ 68, %] VPD: [ 0.85, kPa] NOTE: If we’ve no runoff today, Water AGAIN at Midnight, Install Auto-Fertigation Tomorrow Raised Light 6 Clicks - Grew 2” Overnight - Light Distance ~20” @1900 - Fertigation Fertigation: - [x] Primer A&B: [ 10.2, ml] - [x] CalMag Fuel: [ 6.8, ml] - [x] Silica Skin: [ 6.8, ml] - [x] Lush Green: [ 5.1, ml] - [x] Root Anchor: [ 5.1, ml] - [x] Peak Bloom: [ 5.1, ml] - [x] Photosynthesis Plus: [ 6, ml] - [x] Quillaja 60 Powder: [~scant~] - [x] SLF-100: [ 5, ml] IPM: - [x] Zymes Bomb - Top to Bottom, including Airpot Sides.
Foliar DRENCH w/ Zymes at 1:31 water dilution. Drenched top and bottom of leaves, stems, JOINTS, Coco Top, and spraying down ALL Airpot Side Holes, and BOTTOM OF AIRPOT. Letting the girls run up to 82°F, RH @ 69%, VPD ~9. Plants are HAPPY w/ EC: 2.4, w/ Moderate High Lighting (~770) If they’re happy before lights out, and I know it - Let’s raise light to 80% (800 µMol/m2/s), adjust airflow for overnight Temp (Humidity Down). And call it a night. After Raising light to 83%, REDUCED again to 77% @0600 __ Fri Dec 27, 2024 OG 4Q24 17:B:2:3 Runoff: [ 500, ml], EC: [ 1.7, mS/cm] Raised Light 6 Clicks (Grew 1.5” Last Night). Light Distance back to ~20” 1.5 Gal fertigation - let’s do 1900 & 1200  Fertigation: 1.5 Gal # 2000 & 0100, .75 gal Each, EC: 2.5 - [x] Primer A&B: [ 14.8, ml] - [x] CalMag Fuel: [ 9.9, ml] - [x] Silica Skin: [ 9.9, ml] - [x] Lush Green: [ 7.4, ml] - [x] Root Anchor: [ 7.4, ml] - [x] Peak Bloom: [ 7.4, ml] - [x] Resin Bloom: [ 4.9, ml] - [x] Photosynthesis Plus: [ 9, ml] - [x] Quillaja 60 Powder: [ 0.125, tsp] - [x] SLF-100: [ 7.4, ml] After 2:30 Feeding - Raised light to 83% __ Sat Dec 28, 2024 OG 4Q24 18:B:2:4 Temp: [ 82, °F] RH: [ 68, %] VPD: [ 0.96, kPa] Light Distance: [ 19.5, “] Fertigation: RLA Heavy, Flower Week 3; EC: 2.4 Notes: - Evaluate 83% Dimmer at Lights On - Back off to 77% if any indication of Light Stress - Let’s ramp to EC: 2.7 mS As max. Beyond here, we probably don’t have sufficient CO2. Light Intensity (IDEAL): 83% # ~830 µMol/m2/s EC: 2.4 422 ml/plant, runoff, EC 1.5. Fertigation: 1.5 Gal # 2000 & 0100, .75 gal Each, EC: 2.5 - [x] Primer A&B: [ 14.8, ml] - [x] CalMag Fuel: [ 9.9, ml] - [x] Silica Skin: [ 9.9, ml] - [x] Lush Green: [ 7.4, ml] - [x] Root Anchor: [ 7.4, ml] - [x] Peak Bloom: [ 7.4, ml] - [x] Resin Bloom: [ 4.9, ml] - [x] Photosynthesis Plus: [ 9, ml] - [x] Quillaja 60 Powder: [ 0.125, tsp] - [x] SLF-100: [ 7.4, ml] 420 ml/plant op Crinkly LOWERS - EC Too High Too Fast? __ Sun Dec 29, 2024 OG 4Q24 19:B:2:5 EC: 2.3-2.4 The Max Hydro comes in at 2.36 EC. RLA Hydro Chart set 3.4. How Can Be? DROPPING SILICA SKIN from RLA Hydro (Eliminate Brown Patina, and Small Orifice Build-up) RLA Hydro  Nutrient Element Ratios ppm mS/cm NER N 262 0.5 21.8% P205 143 0.3 11.9% K20 476 1.0 39.7% Ca 214 0.4 17.9% Mg 48 0.1 4.0% S 57 0.1 4.8% Si 0 0.0 0.0% C 333 TOTAL 1533 2.4 100.0%  
RLA - Full - [x] Complete Irrigation Install Defoliation I We want to eliminate All Vegetation from TOPPED NODE (3) Down. - [ ] Count NODES FROM SPLIT - [x] Measure Plant Heights: 11 - 17” - [x] Remove Each Pot and Trim OUTSIDE OF TENT (Get it RIGHT!) - [x] Can we adjust the pot positioning to get ONE UNDER CANOPY Fan? - [x] Eliminate FANS and Growth tips NODES 1 - 3 (3 is TOP SPLIT) - [x] Eliminate FAN LEAVES from First Node of MAIN STEMS - [x] INSTALL DRIP RINGS (No Manifold, Yet) - [x] Apply LABEL to Each Plant - [ ] Consider Eliminating FAN LEAVES from Second Node of Mains _______ Fertigation: 1.5 Gal # 2000 & 0100, .75 gal Each, EC: 2.5 - [x] Primer A&B: [ 54.1, ml] # EC: 2.4 MAX - [x] Photosynthesis Plus: [ 24, ml] - [x] Quillaja 60 Powder: [ 0.25, tsp] - [x] SLF-100: [ 15, ml] Time Set Initiate Complete Event 1 18:45 18:45:25 Event 2 20:05:00 20:05:25 Event 3 21:25:00 21:25:25 Event 4 22:45:00 22:45:25 Event 5 00:05:00 00:05:25 Event 6 01:25:00 01:25:25 Event 7 02:45:00 02:45:25 Event 8 04:05:00 04:05:25 Event 9 05:25:00 05:25:25 CHANGED TO 25 SEC EVENT (from 20) Tuesday - / / / __ Mon Dec 30, 2024 OG 4Q24 20:B:2:6 - [x] Harvest Dehu Water Continuing to RAISE LIGHT ~ 2”/day (6 Clicks of the support ratchets). Runoff: - [ 422, ml, plant!!!!] # Reduced Event duration to 20 Seconds (from 30). - [ 1.4, mS/cm] Lowering light to 70%, see if lower fans relax. They’re electric. :-). They relaxed. Inner fans surrounding apical stems are laying @ 30°, rather than Reaching for 60°. I have perhaps been overnighting. HUMIDITY IS CRANKING. It’s impossible to get VPD above ~8.3! Trying to keep humidity below 68 drives Temp below 78. I forgot about the part. ;-( Dehumidifier is ON, Doors are Closed, Room Vent is CLOSED. Dehumidifier is delivering 50%RH to the room. Orange Gasm is quickly filling the air with moisture. At MIDNIGHT, Raised light to 77% ( ~770 µMol/m2/s] pH Adjusted 2 Gallons of Filtered Tap to pH: 7.2, EC: 0.3 (Used for Dilution when refreshing reservoir with DEHU and Fresh Supplements. __ Tue Dec 31, 2024 OG 4Q24 21:B:2:7 @0630 Took a peek in the tent. SCANT RUNOFF @ 20 Sec Feed Events. JUST Touched TIPS (Burning). Bumping Fertigation Events to 25 Seconds, after Feeding 9 * 5sec (45 Sec) To bring DAYS delivery to 25 Seconds. Check Reservoir: - We’ve 4 - 5 Gallons. @LIGHTS ON - Reset Light Height - Reduce light to 73% (See if we can avoid more tip burning) Harvest Dehu: - [x] Amount: [ 5.7, l] - [x] Primer A&B: [ 27, ml] # For EC: 2.4 mS/cm, Nailed it, First Try. ;-} Orange Gasm likes to SPREAD when Topped. - Which makes her a funny candidate for SOG. ;-} 
Likes
7
Share
@Athos_GD
Follow
D22. Defoliated, gave plain RO water and dimmed the light. Next is auto irrigation. D23. Finally received all of the Athena nutrients and fed for the first time. D25. Removed the small runt plant with the twisted stem. The plant started growing pollen sacks. D26. Raised light as much as I could without using zip ties. PPFD now 650-790. EC tonight 2.4.
Processing
Likes
10
Share
Start of week 8 (week 7 feed for the super Lemon Haze, she's going one extra week in total (9)) th blueberries are packing on serious weight, size and stickiness, while also smelling dank as hell! The Super Lemon Haze is still nutrient hungry, I continue to feed her extra each week and she's packing on serious weight and size now as she goes into the last 2 weeks of her grow. Overall the last week 7 was great and the plants are looking good, approaching the end.
Likes
10
Share
@L1lium
Follow
Es ist soweit! Am Freitag habe ich die fünf Easy Buds nach knapp 11 1/2 Wochen abgeschnitten und geerntet. Leider musste ich feststellen, dass eine Pflanze ziemlich stark befallen war. Ich vermute eine Milbenart oder möglicherweise Fliegeneier. Unterhalb der Blätter waren etliche dunkelgelbe und dunkelbraune Eier, die man auf den ersten Blick kaum erkennen konnte. Bei genauerem Hinsehen sieht man jedoch, dass sich der Befall auf die ganze Pflanze ausgeweitet hatte. Glücklicherweise blieben die vier anderen Pflanzen verschont. Aus diesem Grund trockne ich die Pflanzen auch getrennt voneinander. Die befallene Pflanze wollte ich nicht direkt wegwerfen, sondern erstmal trocknen lassen. Im Nachhinein werde ich schauen, wie ich mögliche Schadensbegrenzung betreiben kann. Die vier gesunden Pflanzen werden in einem geschlossenen Zelt in einem Trocknungsbeutel getrocknet. Die befallene Pflanze habe ich in dem Folienzelt aufgehängt und mit einer Plane abgedeckt. Nach wenigen Tagen der Trocknung sieht soweit eigentlich alles gut aus. Die Eier scheinen nicht mehr zu schlüpfen, sondern fallen von der Blüte ab oder verschrumpeln zu Kompost. Ich hoffe, dass es dabei bleibt. Der Geruch hat sich nach dem Abschneiden deutlich verändert. Schon nach der kurzen Trocknungszeit kann ich einen intensiveren Geruch feststellen, der sich noch nicht so richtig beschreiben lässt. Die Blüten waren stark mit den sogenannten "Sugar Leaves" verwachsen, weshalb ich sie grob getrimmt habe, um sie zum Trocknen aufzuhängen. Nachdem die Blüten vollständig getrocknet sind, werde ich die Buds noch einmal einzeln trimmen und durch meine Trimm-Maschine von Vevor jagen. Der Ernteprozess hat zu zweit circa eine Stunde gedauert. Die Pflanzen waren zum Zeitpunkt der Ernte noch sehr gesund und kräftig. Die Verwurzelung war trotz des geschlossenen Topfes sehr gut. Die schönste Bud hat definitiv die zentrale Pflanze, Greta, ergeben. Nass hätte ich den Bud auf mindestens 12 g geschätzt. Ein Gesamtgewicht des nassen Pflanzenmaterials habe ich nicht ermittelt. Sobald alles trocken und fertig beschnitten ist, werde ich das Tagebuch um den trockenen Betrag ergänzen. Stand jetzt würde ich schätzen, dass der Ertrag aller Pflanzen bei circa 40-50 g liegt, was mich für meinen ersten Grow ziemlich zufrieden stellt, besonders in Anbetracht dieser wirklich sehr simplen Strain. Mehr Infos und Fotos folgen in Kürze, wenn das Curing beginnt. Bis bald! :)
Likes
15
Share
We are in the middle of week 7 and flowering has started about 4 days ago. Big gal started budding 2 weeks ago.
Likes
371
Share
D71. Week five of flower and the girls are simply doing their thing. I scouted the plants today and found thrips on the second girl. I was hoping the lacewings would have gotten them all by now, but no such luck. I'll give them a week before ordering another batch. For some reason, the thrips avoid the first girl. Visually, there's also a clear difference between the two girls, with the first girl being darker and having more buds. ------------------------------ D73. I brewed a short (6 hours) compost tea today consisting of worm castings, kelp meal, neem meal, humic and fulvic acid, rock dust, biochar, and molasses. After the brew, I added homemade Bokashi juice, which lowered the pH of the tea to 6.6. Each girl got 2.5 liters of tea (5% of pot volume.) I also did another light round of defoliation, down low on the plants. ------------------------------ D75. Each girl got 2.5 liters of water @ pH 6.5, with 5 ml of FFJ. The plants stretched SO MUCH after flipping them into flower that it's challenging for the light to penetrate the canopy, and it's pretty dark further down. I bought some LED grow light strips and installed them in the tent to provide additional side lighting. It's only 36 W of extra lighting, but I hope it will help to develop the numerous buds down low. I put the lights on the left side of the tent, around the first girl, since she has a lot more buds, but now that it looks like the concept works, I might get another set of lights for the right side of the tent. ------------------------------ D77. We've reached the end of the fifth week of flower, and all is well in the tent. Ahem, almost all since I still have the thrips to contend with, BUT I just put a bunch of Cucumeris predatory mites in the tent, so the war rages on. A friend suggested adding white cloth below the plants to reflect more light toward the lower buds. Sounds plausible, but I didn't have any fabric, so I went all ghetto by simply putting strips of kitchen paper on top of the scrog net. Not the most fantastic reflector material ever, but it's what I had at hand. Plus, it's easy to work with and costs next to nothing. I doubt it will make a big difference, but even a slight increase is still an increase, and I could see a visible difference in the amount of light hitting the lower canopy. Finally, each plant got 2.5 liters of water @ pH 6.3, with FFJ and Bokashi Juice. ------------------------------