The Grow Awards 2026 🏆 


Likes
Comments
Share
@SgtDoofy
Follow
5/8
Watered both with plain PH'd water yesterday. Both of the plants are sucking up leaves. Trichomes are only really looking amber on the brown leaves, but otherwise milky.
5/10
Decided that these brown-leaved buds on Trainwreck were ready, so I tried a little bro-science and watered an hour before harvesting. Noticed there were some really nice green young buds intertwined, so I did my best to trim around to leave them for another week or so. No weight measurements yet, will wait till after trimming and before curing.

Likes
4
Share
@MistaOC
Follow
17.04. Day 36
Grow Diary Entry – Day 36 (Flower Day 16)
Strain: Sour Frootz by Karma Genetics
Plants: 4 clones
Training: HST + SCROG
Today is Flowering Day 16, and the Sour Frootz ladies are officially deep into the early-to-mid bloom stage. Bud sites are now well-defined, and the pistils are stacking up nicely. The stretch phase has slowed down slightly, giving a good window for structural management.
To keep the canopy even and under control, I applied high-stress training (HST) by bending and tucking the taller tops through the SCROG net. I also reduced overall plant height by about 25 cm, evening out the top layer across all four plants. This should help maximize light penetration and bud development across the entire canopy.
The plants handled the stress well—no signs of wilting or shock so far. With this structure locked in, the SCROG net is now fully supporting the horizontal spread, allowing more light to reach secondary bud sites. The aroma is intensifying slightly, a sweet, fruity tang starting to build up when brushing against the leaves.
Everything is on track. From here on, the focus shifts to flower bulking, maintaining stable environmental conditions, and avoiding excess humidity as the flowers start to pack on mass.
*******************************************
6L RO Water // ph 6,4 // 0,6ml Aptus Regulator // 12ml BioBizz CalMag // 6g Greenhouse Feeding BioEnhancer // BioBizz ph-
*******************************************
Likes
21
Share
@BLAZED
Follow
Week 14 (2-5 to 8-5)
2-5
Temperature: 27.3 degrees (lights on) 19.5 degrees (lights off)
Humidity: 69% (highest) 52% (lowest)
Watering: 2000 ml.
3-5
Temperature: 24.2 degrees (lights on) 19.3 degrees (lights off)
Humidity: 68% (highest) 50% (lowest)
Watering: None.
No pictures.
Increased the light's power output to 90%
LUX: 22.500
4-5
Temperature: 24.1 degrees (lights on) 20.3 degrees (lights off)
Humidity: 63% (highest) 43% (lowest)
Watering: 1000 ml.
5-5
Temperature: 24.8 degrees (lights on) 20.3 degrees (lights off)
Humidity: 66% (highest) 43% (lowest)
Watering: 1000 ml.
No pictures.
6-5
Temperature: 24.4 degrees (lights on) 19.4 degrees (lights off)
Humidity: 66% (highest) 44% (lowest)
Watering: None.
7-5
Temperature: 24.4 degrees (lights on) 19.2 degrees (lights off)
Humidity: 66% (highest) 44% (lowest)
Watering: 1000 ml.
8-5
Temperature: 24.2 degrees (lights on) 19.4 degrees (lights off)
Humidity: 65% (highest) 48% (lowest)
Watering: 1000 ml.


Likes
252
Share
@Tropicannibis_Todd
Follow
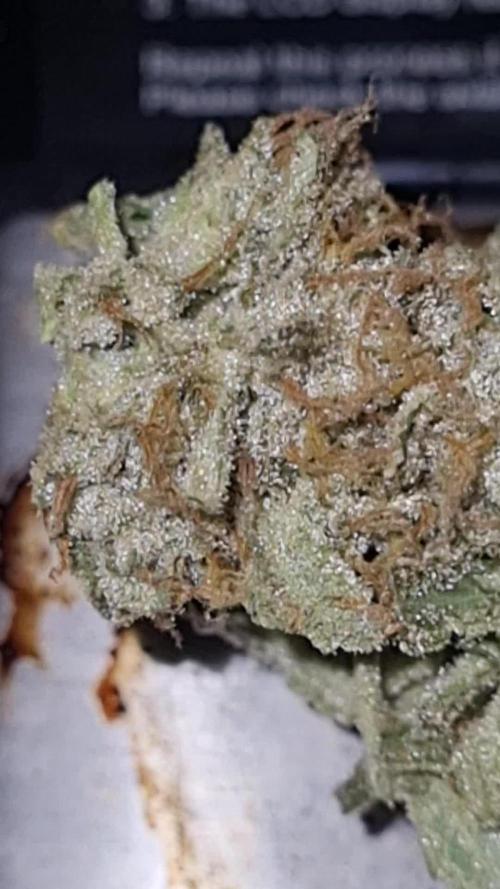
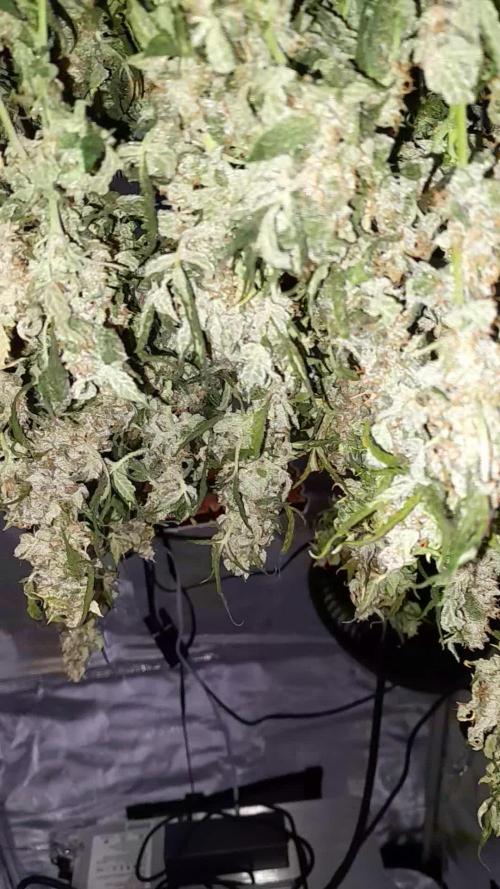
Well folks we chopped the Ztrawberriez 😁
And the second of the Strawberry Blast 🍓 🍓 🍓 🍓 Shes a killer for sure , incredibly frosty , and sticky , not the best of nugs as I said a bit airy , the smell is sweet and berry-licious ......
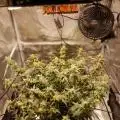
FC4800 from MarsHydro Lights being readjusted and chart updated .........: 1:I've added a RU45 to the mix : 1:
www.marshydro.ca
👉I am using Agrogardens for nutrients for my grows and welcome anyone to give them a try .👈
👉 www.agrogardens.com 👈
Agrogardens Cal MAG
Agrogardens Grow A B
Agrogardens Bloom A B
Agrogardens Bud Booster
Agrogardens PK13/14
I GOT MULTIPLE DIARIES ON THE GO 😱 please check them out 😎
👉THANKS FOR TAKING THE TIME TO GO OVER MY DIARIES 👈
Would you like to hang with the growdiary community 👉 https://discord.gg/gr4cHGDpdb 👈

Likes
24
Share
@Dingle
Follow
Excited see this strain develop their bud structures now.
They are definitely a lot hungrier this week and seem to showing a ton more trichomes.
More defoliation and lst to help spread airflow and light.
Still no major issues.
✌️

Likes
4
Share
@Jay84lawrence
Follow
Looking like veg is heading in the right direction for now no issues just early signs to feed nutes soon.
Quarter strength to start if that doesn't much happen well. Then I shall bump up the feeding.
I am starting to enjoy autos for their turn around rates most have been more than acceptable as well as exceptional smoke.


Likes
26
Share
@TheCannaProphet
Follow
WEEK 5
8/16- Alrighty! Start of week five and all the ladies are in flower and starting to look sexy as hell! Even the Crystal Meth #2 in the SOHUM Living Soil that had a soil ph of 5.2-5.4 and 4.2 ph runoff on a 4 1/2 gallon flush of 7.7 ph water is doing well! I checked the ph on her soil this morning and she's at 6.4...PERFECT! I gave all the girls a drink of de-chlorinated water in the amount of 2 1/2g with 1 tsp CalMag+ added and ph'd to 6.9 split evenly between them.
8/17- Day 30- The girls are all really growing like crazy filling out their 10g fabric pots. I went through all of them today and, using the green horticultural wire LST'd the crap out of everyone! I know, I know....LST on Day 30??? I've LST'd this late before and had really good results so giving it a go this run. Gave all the girls a small drink as they were moist 2" down using 2 1/2g de-chlorinated water ph'd to 6.8 @ 75 deg. After I LST'd all the girls, I selectively tucked shade leaves and defoliated a couple here and there and also removed all the shitty little undergrowth down low on the main stalks. Can't believe the FastBuds Crystal Meth #2 came back from the edge of oblivion. I checked her medium(SOHUM Living Soil) ph which is still @ 6.4...whew! I think she's gonna do just fine, although not as good as her sister who's an obviously different phenotype.
8/18- Cranked up the HLG 650R's to max today. Now drawing 1300w at the wall-650w each and raised both lights to 42" high which is giving 800-1100 umols depending on what place on the canopy you check.
8/19- I administered the second dose of live Nematode's with the girls morning watering. I put the Nematodes in 2 1/2 gallons of de-chlorinated water ph'd to 6.8 @ 74 deg. and split it evenly between all eight pots. I tightened up the LST on all the girls to keep spreading them out and getting better light penetration into the lower canopy.
8/20- I started a batch of Compost Tea this morning- 4 cups worm castings, 1 cup of Alfalfa Meal, 1 cup Kelp Meal, 2 tbsp Bat Guano into 4 1/2 gallons of de-chlorinated water with a 6.9ph in which I added 5 tbsp of unsulphured molasses as a catalyst for the microbes. I'll brew this for 48 hours.
The ladies all were moist enough that I felt safe skipping the water for today, I'll give them a light watering tomorrow, then a heavy feed with the compost tea. I went through and tucked the heck out of leaves blocking bud sites from light (this is a chore as the girls are getting BUSHY as hell!) and removed a few scattered fan leaves that refused to be tucked and were really blocking light into the lower canopy....can't be having that, need the LIGHT!
8/21- Ladies were all looking very perky this morning and the FastBuds Crystal Meth and Purple Lemonade are both getting beautiful purple shades to them especially the FastBuds Crystal Meth #1 in Natures Living Soil Autoflower Concentrate, she's absolutely on FIRE although her node spacing is very wide. The #2 Crystal Meth in SOHUM that had the ph issue with her medium seems to have recovered after I flushed the shit out of her. She's behind her sister and definitely has a different structure than the #1 phenotype. The Purple Lemonade #1 & #2 are both flowering with #2 looking way better. The #1 Purple Lemonade has some thick kushy leaves and she's a short little biatch, in contrast to the #2 which is tall and lanky with wider node spacing. The #2 Purple Lemonade is having a little issue apparently with the nitrogen level in the medium as she's getting 'claw tips' on several of her leaves and judging by her dark green coloration, she's nitrogen rich right now. I'll keep an eye on her but don't think it's a big issue at this moment in time. The Seedsman Gelato OG in Natures Living Soil Autoflower Concentrate is getting bushy and has filled out the 10 gallon fabric pot. She's got a ton of bud sites and it's a struggle training to keep all the sites exposed to light. The #2 Gelato OG in SOHUM is doing about the same as her sister but she's not quite as tall. The Seedsman Zkittles #1 slowed down on her stretch and just decided to get bushy instead! She's still in pre-flower but is very healthy and will be getting it on very soon! Her 'Sin Twisters' Zkittles #2 & #3 are beautiful and in flower. The Zkittles 'twins' were previously the shortest plants in this run but have caught up and are as tall as the Zkittles #1 @ 14".
8/22- End of Week 4! The girls got Compost Tea ( 8.1 ph, 840 ppm and 1636 EC @ 78 deg.) for breakfast this morning along with a top dress on the six ladies growing in Natures Living Soil Autoflower Concentrate / Fox Farms Happy Frog mix. The two SOHUM pots with the Seedsman Gelato OG #2 and FastBuds Crystal Meth #2 got 4 tbsp of 2-8-4 slow release dry amendments by Down To Earth top dressed and worked in by hand. I gave them each 1/2 gallon of Compost Tea after top dressing to help water in the nutrients. I went through all the girls and tucked and gently spread their branches to continue to train them as they get ready to really start flowering. The FastBuds girls are getting MORE colorful each and every day and I can't wait to open the tent each morning to see them....BEAUTIFUL!!!

Likes
17
Share
@Shugz_Nugz
Follow
Mouth watering flavour, clean smoke, and it only gets better ! Barley a week into the cure and I'm already craving more of this strain
Updated True Wattage, and fixed square footage of tent
harvest was easy, could of gotten more yeil but she flowered early from some LST, would let this girl grow naturally in the future
Buds turned out nice and chunky lots of sugar leaves just packed with sticky trichs
She pressed out alright, could try a again but .4 return on 3.5 grams of bud gives 14-15% return on the first press of this strain
none the less this girl puts out some wicked flavors can't wait till shes fully cured in a month :)

Likes
5
Share
@EKWCR
Follow
I was happy when i've seen the weight, i expected 70 or 80 grams and it's the double.
I'm not sure if i will grow this strain again soon, there is plenty of strain waiting to grow.


Likes
16
Share
@w33d_zm00k3r
Follow
Day 45: The plants are growing strong, and looks healthy. I do not dare giving them any nutrients yet, but I still think I will give theme some soon
Likes
19
Share
@PariaGrow
Follow
Hasta ahora no se ha usado fertilizante, solo hemos estimulado raíces.
Se pasaron de la carpa pequeña a la carpa grande donde tendrán 240w de iluminación modular cob.
Likes
16
Share
@Easygroow
Follow
We entered 5th week today. 👀
I'm really happy with everything so far.
Bare in mind we still have around 3weeks to go, so them buds hopefully will double or triple in size on those upcoming weeks🤞
But if not, i will be happy anyways because they are so frosty already 🤩
Smell in a room is also nice. Sweet, and really strong.
See you next week🙃
Likes
10
Share
@rickytpb
Follow
Week ten. I started giving booster one week ago, so her flowers are getting better every day. What do you guys think? How does she look? Shall I do more defoliation? But my tent is pretty small too. Consider that while responding, please.

Likes
19
Share
@Sublyme_ness
Follow
this diary is a week ahead. will get in back in line soon. day 0-7 to be as week 1 not including the germ week.
This banner kept much shorter than its brother. its also in a slightly shallower tub of soil so this one is flowering a bit quicker than its counterpart too. to keep it at the same height as all my others ive raised it from the floor slightly and then put the screen over top to bend the top cola. buds forming nicely now. i said fuck it. full organic feed for you.! nutes then fresh water twice then nutes again. deinking now a litre every 3 days. hardy plant but a couple white spots on the leaves... slight calmag to give prob.. end of week 5 flowering up to day 35. week 6 as of 36-->
ps if anyone has a spare grow tent that they could donate me that would help a brother out ;)
day 40. adjusted to normal schedule