The Grow Awards 2026 🏆 


Likes
Comments
Share
@GrapevineGrower2
Follow
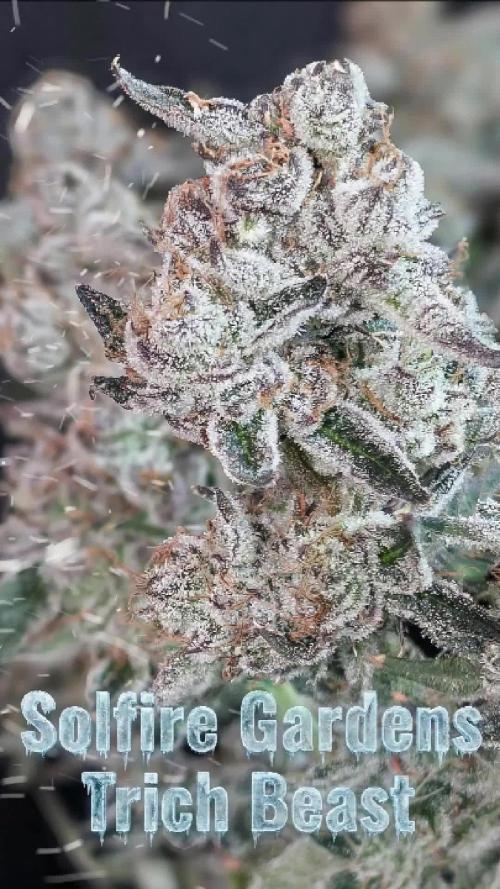
Week 9 of Flower and the Punchberry Cookies Rbx just about ripe at 63 days of flower today (5/12). I've never had to time a DWC bucket flush before, so going purely on instinct. Specifically, Trichomes are mostly milky with amber development. I am hoping a 3-5 day flush with ph'd RO water will bring out any potential color AND that Trichomes will continue to ripen bringing amber to about 15-20%.
As for the week in review, I'd say pretty uneventful, which is good. Continued daily water and ppm level drops with stable ph range readings - zero wild swings. She's kicking up some incredibly strong smells of fruit. She's frosty and does smell a bit like Hawaiian Punch as advertised. Looking forward to completing the DWC bucket flush and harvesting the girl. She and I got off to a rocky start. Fortunate that she recovered and produced the way she did. Next couple of posts (i.e., Harvest & Cure) will end this spring 23 run.

Likes
5
Share
@TheGreenDisciple
Follow
Day 73 ~ Plant 1 is looking great and hopefully will be ready to harvest by the end of the week. Been checking the trichomes and while most are getting milky white, there are still a couple sites on the plant where I find clear trichomes.
Plant 2 seems to be about a week or two behind the first plant...I will give plant 2 their final Nutes tmrw and then begin to flush.
From reading about this strain it seems like it should take around 90 days from seed to harvest. So I would think plant 1 is running a little ahead of schedule and plant 2 is right on time.
Day 75 ~ Both plants looking and smelling amazing! I was hoping to be harvesting the first plant by this weekend, but she is still growing and her trichomes are still not all milky and I haven't yet to find an amber one. So it might be another week or so before I can start drying her out.

Likes
113
Share
@PEAKYPLANTERS
Follow
the growth of my girls is slowed down, due to the techniques of hst ..... in return my tops are becoming dense and robust.
we will see some beautiful ones
see you around friends


Likes
Comments
Share
@TyRun
Follow
Still have 4 clones just flipped to flowering in my main box, so stay tuned. Will see how they'll show up in more spacious tent.
Likes
5
Share
@The_Doctor_Green
Follow
Hola a todos!!!
Como estan??..espero que bien, a esta cepa GORILLA COOKIES FF, sigue estirandose😃🙌 .
Esta semana he regado con top veg 3ml x litro de agua.
Se la ve creciendo bien verde.
El video corresponde al día 28/12/25
No tengo más para contar😅.
Solo deseo que todos tengan un buen 2026.
Y de nuevo gracias a @Fast_Buds por hacer posible este diario🙌🙌🙌👏👏👏🤩🤩🤩🤩
Likes
3
Share
@LAShugars
Follow
Her buds are much bigger than my other outdoor grows. Im excited to see how they develop!
Likes
19
Share
@GuerillaSweed
Follow
Had alot of fun this season!Only 5g got moldy, but it took heavy rain and bad weather for 5-6 days in row.
Bud smells super fruity and exotic

Likes
19
Share
@Igrowneil
Follow
Hey guys and girls this run is sponsored by some brand names , VIPARSPECTRA (LED) ZAMNESIA, GHE , VITALINK and LUMI BLACK (HPS)
VIPARSPECTRA sent me out two budget lights which are on there Pro seriers , these lights to start off with put out mass amount of light for consumption of power draw only being 200watts each of the two lights . They are full spectrum Quantum boards emitting 2k , 5k , IR and deep red
I'm a great fan of this light already and I have only run it to get the room climate stable before running anything after my last run. Was running at 20oc without any hps which is pretty good I don't know over winter will they still hold there temps when it's lights off so investment into another heater wouldn't go a miss .
Total LED power draw 400watts
The soil is canna terra Pro+ soil perlite and coco coir , this soil is very light and will provide massive amount of drainage and will provide plenty of oxygen and allow soil to dry daily allow me to tailor the GHE flora range slighly more to achieve beautiful fall colours towards harvest . This is my frist time using this soil and it seems like really good for autos alot better than there regular soil. There is also some added nutes to start the plants there frist couple of weeks . I'm using GHE BIO ROOTS from seed which I will place in a cup of water mixed with bio root , I'll transfer the popped seed directly into substrate in a jiffy pot until harvest this way we don't stunn the plant will transplant is taken place . Autos are very aggressive in nature so where gonna make that trait come to light.
Started 14-11-21
Use code IGROWNEIL FOR 5% DISCOUNT ON viparspectra lights onto of other discounts
Or become an allfiate
https://www.viparspectra.com/?aff=jursrsaof8&utm_source=affiliate
Use code growitGD for 10% of ZAMNESIA products
Link to the strain grown
https://www.zamnesia.com/uk/5408-zamnesia-seeds-girl-scout-cookies-Auto-feminized.html


Likes
12
Share
@ELPIRATA
Follow
Todo parece ir bien por estos lados, Lo importante es que las raices estan haciendo una fiesta en el sustrato!!! 😎
Hoy comienza la 4ta SEMANA! Dia 22 de cultivo, y 100% motivado por este mundo maravilloso!
- Se realiza una pequeña poda en las partes bajas de las 4 plantas, por motivos de precaucion a la aparicion de algun agente perverso que pueda estropear lo avanzado.
(Se aplica folear Knactive X3 ML)
*El día de hoy 28/05/2020 se han regado 3 plantas en macetas de 11 litros:
X2 Semillas Auto Lemon Kix= 500 ml [3mlKnactive+3ml/L ATAGrowth-C+2mLTopCrop-TopAuto] PH 6.0 / EC= X Tº=22
X1 Semilla Auto Tutankhamon= 500 ml [3mlKnactive+3ml/L ATAGrowth-C+2mLTopCrop-TopAuto] PH 6.0 / EC= X Tº=22
(Proximo riego se incorporara al parecer Flower-C de ATAMI)
*El día de hoy se han regado 1 planta en macetas de 7 litros:
X1 Semillas Auto Lemon Kix#3 = 350ml [3mlKnactive+3ml/L ATAGrowth-C+2mLTopCrop-TopAuto] PH 6.0 / EC= X Tº=22
*El dia de hoy 29/05/20 se realiza de manera experimental, LST nivel novato, Me gustaría sus consejos. próximamente incorporare Red SCROG de 49 espacios.
*El día de hoy 01/06/2020 se han regado 3 plantas en macetas de 11 litros:
X2 Semillas Auto Lemon Kix= 500 ml [1mlKnactive+3ml/L ATAGrowth-C+3mL ATAFlower-C] PH 6.2 / EC= X Tº=23
X1 Semilla Auto Tutankhamon= 500 ml [1mlKnactive+3ml/L ATAGrowth-C+3mL ATAFlower-C] PH 6.2 / EC= X Tº=23
*El día de hoy se han regado 1 planta en macetas de 7 litros:
X1 Semillas Auto Lemon Kix#3 = 350 ml [1mlKnactive+3ml/L ATAGrowth-C+3mL ATAFlower-C] PH 6.2 / EC= X Tº=23
CONSEJOS ?
BUENOS HUMOS!!!


Likes
12
Share
@GREENPHOENIX6262
Follow
*Week 4 Flower 09/24*
Both Mimosa girls appear to be running fine with Mimosa (1) running a little behind but is catching up accordingly. Small oversight in early growth resulted in a minor stunt but she is improving dramatically.
Water Feed has increased by half a gallon ( 1gallon clean - .5 gallon nute feed)
*Week 4 Flower 09/28 - Mid week update*
Both plants are flowering accordingly - Mimosa (1) is a bit taller then Mimosa (2)
Buds are becoming dense and covered in trichomes.
No deficiencies - No areas of concern - Potassium and Phosphate feeds continue
*Week 5 Flower end of week recap - 09/30*
Both Mimosa's are flowering nicely - Budsites covered in frosty trichomes.
Mimosa (2) looks shorter but that is because her COLA was tied down to expose bottom budsites.
Likes
51
Share
@eldruida_lamota
Follow
Bueno resumiendo cookies gelato es una variedad híbrida muy fácil de cultivar pero ojo, cuidado con los últimos riegos si no queréis perder cosecha por moho. Lo demás de 10 pegada heavy sabor increíble, cogollos duros como rocas y bañados de una gran capa de polen.
El ambiente del secado se mantuvo en 23 grados de media y la humedad estuvo por debajo de los 45% en todo momento.
Poco más la verdad estuve encantado de poder cultivar una genética tan potente .
Un saludazo que paséis un final de año increíble y por supuesto buenos humazooos💨💨💨.

Likes
6
Share
@Dengued
Follow
28 days later....worm poo and coffee grounds not made much difference to colour of leaves, although all are growing nicely...trying some spirulina powder next to see if that helps


Likes
1
Share
@HoneyBlunt42
Follow
Day 94 - today the temperature inside the tent dropped to 10-12 degrees Celsius. So it's harvest time.
I trimmed almost all the leaves and hung the plant in a dark place to dry at a temperature of 12 degrees. This is not enough, but unfortunately there are no other conditions. Drying may take longer than the usual 10-12 days.
The plant itself has stretched almost a meter in height, the roots are also impressive.


Likes
36
Share
@Comfrey
Follow
💚💜
Mein erster Indoor Keller-Grow neigt sich dem Ende zu. Es ist bunt geworden im Zelt. Die erste Blüte habe ich bereits vaporisiert und bin ziemlich begeistert vom Geschmack und der Wirkung.
Leider habe ich aufgrund persönlicher Umstände nicht im Ansatz geschafft hier ein paar Tagebücher zu führen. Es war für mich ein extrem stressiger Winter und ich bin froh, dass ich wenigstens regelmäßig ein paar Fotos machen konnte.
Der Anbauraum hatte zwischen den Pflanzen gemessen eine Minimaltemperatur von 17,4 Grad und während der Vegetationszeit konnte ich die Auto-Damen Tagsüber mit bis zu 28 Grad unter einer Sanlight Evo 4-120 1,5 verwöhnen. 18/6 - Licht/aus. Die Luftfeuchtigkeit war in der Veggiephase bei ca. 65-75 Prozent im Zelt und in der Blütephase konnte ich sie Stück für Stück absenken auf 55-43 zum Ende hin.
Gedüngt habe ich ein einziges Mal mit 1:20 sauberem Urin am Ende der dritten Woche. Ansonsten gieße ich auf das Terra Preta ähnliche Substrat ausschließlich mit hartem Leitungswasser mit Ph 7,6.
Das Substrat wurde kurz nach der Sämlingsphase mit einer dicken Schicht Laub, Braun- und Grünschnitt Mulch abgedeckt, welchen ich zuvor dreißig Minuten bei 150 Grad im Ofen gedämpft habe (Sterilisation). Es kamen Nematoden, Raubmilben und Gelbtafeln zum Einsatz, weil wir mit einer ziemlich unangenehmen Trauermückenplage zu kämpfen hatten.
Anfang der Blütephase kam es zu einer Nährstoffblokade aufgrund von Überwässerung. Das Substrat hält die Feuchtigkeit sehr lange und die Mulchschicht verhinderte ein Austrocknen des Substrats. Wir haben anfangs deutlich Zuviel gegossen und das Substrat nicht etwas austrocknen lassen. Nach Anpassung des Gießintervalls auf alle drei Tage mit ca. 2-2,5 Liter, löste sich das Problem nicht in Luft auf, aber wir konnten es aufhalten.
Meine Pflanzen sind bereits geerntet und hängen zum Trocknen. Viel Spaß mit den farbenfrohen Bildern. Happy Growing! 💚


Likes
60
Share
@MrSpooky882
Follow
Also was kann man abschließend sagen, ich finde die Sorte echt sehr sehr stabil und robust, verzeiht auch Fehler 😅🙊😁
Ich finde nächstes mal muss ich weniger Lampen Leistung in der vegi Phase nutzen und oder höheren Abstand, denn sie hätten noch größer / bzw bisschen mehr Strecken können, aber das lag halt daran das ich die Lampen mit zuviel Leistung zu nahe, an den Pflanzen hatte während der vegi Phase und nächstes Mal mehr auslichten, aber das sind Erfahrungs Werte die man sammelt von daher bin ich sehr sehr zufrieden, und Runtz Muffin von Barnys farm hat voll und ganz überzeugt, die Farben während des grows waren einfach toll und der jetzige Geruch und Geschmack ist fast nicht beschreibbar ha ha aber unnormal lecker schön mit meinem volcano bei 185 grad, einfach köstlich ha ha ha und die6 Wirkung is bombe 😅😁😁😁💣
So what can you say in conclusion, I think the variety is really very, very stable and robust, also forgives mistakes 😅🙊😁
I think next time I have to use less lamp power in the vegi phase and or a greater distance, because they could have been larger / or a little more stretch, but that was because I had the lamps with too much power too close to the plants Thinning out more during the vegi phase and next time, but these are empirical values that you collect, so I'm very, very satisfied, and Runtz Muffin from Barnys farm was completely convincing, the colors during the grow were just great and the current smell and taste is almost indescribable ha ha but abnormally delicious beautiful with my volcano at 185 degrees, simply delicious ha ha ha and the effect is bombshell 😅😁😁😁💣

Processing
Likes
21
Share
@LittleBigTrees
Follow
Fed once this week with a weak feed including top max.
I use kombucha vinegar as pH down. Water from my tap is ph6.8-7.0 and 38-42ppm so I might start using calmag supliment as the ppm at my old house used to come out of the tap at ph7. 2 and 200-220ppm.
I had 2 plants that didn't like the light at 30000 lux and started bleaching so I took them out.
I've defoliated today day 35 as humidity was getting over 80% and also to let light to the lower bud sights.
Pre flower pistils showed on some plants around day 33 (some still have none) so I'll consider this the end of veg start of flower. The kalimist indica pheno is still not showing pre flower pistils but is always hard to force flowering when it's not mature for some reason. It's always 7-14 days behind everything else 🤔
Likes
16
Share
@LittleBigTrees
Follow
Strawberry lemonade and Acapulco gold Potted into 4ltr pots with peat Moss based soil and fresh Bunny buttons.
I'll put pineapple chunk into bigger pots soon.
Started some other seeds to as spares, some will get the chop soon as I've got way to many !!
Light at 16000 lux.


