The Grow Awards 2026 🏆 


Likes
Comments
Share
@I_Identify_As_A_Dan
Follow
Week 27 for Gelato 41 by seedstockers,
Shes survived the caterpillar attack 😂 Have found a few spots from bud rot from high humidity cant really help that as weather has been terrible just storms after storms of heavy rain 😐 dark clouds not much sun, we still have more rain coming with highest of 21 degrees...😒
Shes coming very close to her harvest window maybe 2 weeks time. Shes probably ready to come down but i want to push it a little longer because of those sativa traits.

Likes
16
Share
@Mopish
Follow
24 Jan - 30 Jan
Started Flushing on Sunday night (23 Jan)
----
25 Jan
A lot of leaves are starting to die, from all of the plants, maybe due to nutrients maybe due to climate, or maybe is just the strain on the end of its life.
Either way, I'm planning to harvest next week.
Likes
4
Share
@SamDo
Follow
Vegetative Week 6 – Pineapple Upside Down (Round 2)
This week confirms a full recovery in vegetative growth.
The plant clearly regained vigor and momentum.
Growth is strong, foliage is dense, and overall structure looks healthy.
Internodal spacing is noticeably tight, resulting in a very compact and bushy plant.
This could be influenced by the full-spectrum lighting, which appears to promote dense vegetative development.
Although topping or defoliation was considered, no structural work was done this week.
The priority is to let the plant continue growing naturally and fully stabilize before any training or shaping.
Nutrition remains unchanged from the previous week.
The nutrient solution is maintained around EC 1.4–1.5, with pH close to 6.0.
The plant is responding well, showing no signs of deficiency or stress.
While some time was lost earlier in the cycle due to initial issues, the delay is clearly less significant than in the previous run.
Progress has improved, and this recovery phase highlights areas to refine in future germination and early-stage management.
This week ends on a positive note.
The plant looks healthy again, and the focus moving forward is simply to let her grow and maintain consistency.
See you next week. Take care.
-Update: 04/02/26-
•Structural work update:
Today, a full structural intervention was carried out on the plant.
Defoliation, topping, and pruning were all done in one session.
The plant had become too bushy and overly dense, with poor airflow and excessive humidity trapped inside the canopy.
To correct this, the structure was reset: four lateral branches were selected and kept, while the main apexes were topped to start defining the future shape of the plant.
At this stage, the goal was not refinement but foundation.
This intervention marks the beginning of the plant’s final structure, or at least the first clear step toward it.
A significant amount of foliage was removed, leaving the plant with much less leaf mass than before.
The work is now finished, and no further cutting is planned for the moment.
From here, the plant will simply be left to recover from the stress of this heavy intervention.
The focus now shifts to recovery, stability, and healthy regrowth.

Likes
Comments
Share
@TexasJack0418
Follow
Day 30; Both plants showed signs of going into bud stage so I top dressed & feeding. 1st, 24hrs before I prepared worm tea. I put 3tbsp Molasses, 5ml/gal Cal/Mag, 10ml/gal Seaweed/Fish extract, .5ml/gal Orca, 2-packs Green Tea, 1-1/2cups worm castings. aerated 24hrs. 2nd, Prepare coir for top dressing, remove all LST ties & stakes, Scoop out cedar chips from surface. Add 1/4cup Dr. Earth Organic 4-6-3, 1/4cup Bone Meal, 1/8cup Bat Guano, 1/2cup Coffee Chaff, 1/2cup Worm Castings to surface. Hand mix in dressing into top 2" of coco coir. Re-apply Cedar chips, do LST. 3rd, Top Feed 3/4gal per plant, Bottom Feed 3/4gal per plant. By day33 plants had doubled in size so I re-LST & light leaf removal, sprayed Neems Oil on both ladies, the stretch was on... Day35, watered 1-1/2gal ea. 5mil/gal Cal/Mag, 5ml/gal seaweed/fish extract. Lil LST and light leaf removal.

Likes
11
Share
@TrickzGrowz
Follow
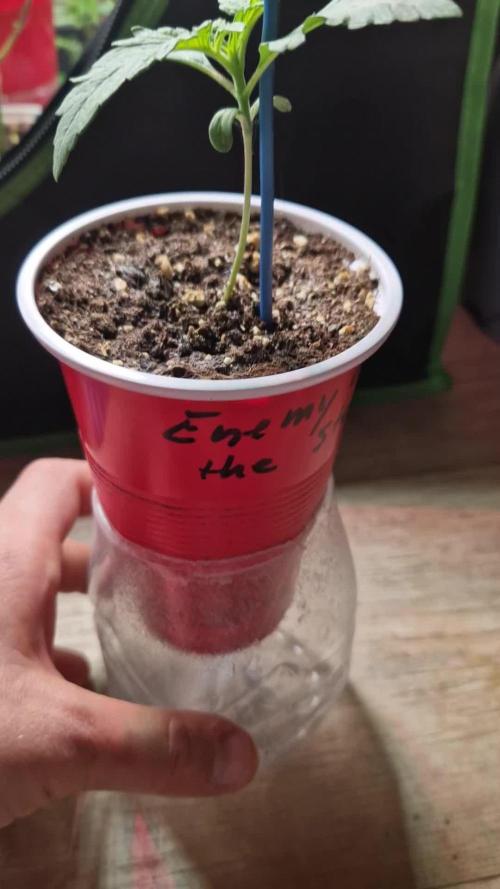
Konnte leider diese Woche noch nicht düngen, weil der kleine Topf immernoch nass war. Sieht nach einem kleinen Wachstumsstop aus.

Likes
2
Share
@BioGrowBayer
Follow
Ich habe die Pflanzen erfolgreich in größere Töpfe umgesetzt. Alle Ladys sind nun in 6-Liter-Töpfen mit BioBizz All-Mix untergebracht. Der Umzug verlief reibungslos, die Wurzeln sahen gesund und kräftig aus – ein gutes Zeichen für ein solides Fundament.
Seit dem Umtopfen zeigen die Pflanzen ein gutes Wachstum. Der All-Mix scheint gut angeschlagen zu haben, erste Anzeichen von Nährstoffaufnahme sind sichtbar: sattes Grün, aufrechte Blätter und ein insgesamt vitaler Eindruck. Gießen erfolgt aktuell noch moderat, da der All-Mix gut vorgedüngt ist.
Ich beobachte die Entwicklung genau, halte Temperatur und Luftfeuchtigkeit stabil und freue mich auf die weitere Wachstumsphase.
Likes
10
Share
@MG2009
Follow
09/26/2021
Starting week #7 of flower still picking caterpillar, and eggs of leaves, not to serious as we are on top of it.
Starting the week with banana peel tea drench 2 gallons per girl, which is all she will get besides water till harvest.
Still small flushes of pistils coming out I believe she (Hulk) is in final stage of flower (4) lots of orange hairs (pistils) but fresh one coming out daily albeit slower. Hopefully she fatting up in coming weeks.
09/28/2021
Week7
Day #3
Definitely seeing more calyx swelling.
#1 is chunking up nicely
#2 looks good little bud rot were caused from cattipillar poop!
#3 coming from behind Will be last to harvest for sure.
Likes
20
Share
@Elysian_gardens710
Follow
This is week 10 for our AK-47 Auto Goxuak by Genehtik. She is finishing out great! For the most part she yellowed out but some sugar leaves and caylxs have purple in them.
Her buds just keep stacking! Ashoka is already way past her estimated period and still showing white pistils(stoma?) And clear Trichomes.i tried to get some shots.failed mainly lol. When that changes we will chop her.
Taking advantage of the longer flower I decided to pull a few of her branches back down to expose the buds to more light. Thicken them up I hope!
I flushed her again. This time just in the sink with running tap water(our water is horrible too!) I didn't pH the water or add any Kleanse this week. I also stopped giving her Real Growers recharge.
She smells great! Like Pepper and a little skunk.

Likes
4
Share
@everythinggrowz
Follow
05/13/2025
Growing well, don’t have to do anything but refill the nutrient water whenever needs (usually every 2 weeks or so)

Likes
13
Share
@SzkolaZiola
Follow
First week of florwering is over. They all already show pistills so induction was successful.
I did a little defoliation to uncover bud sites and LST-d Strawberry Cough since it was much higher than the rest of the ladies. Now I do have even-ish canopy.
CA$H and Mimozz are going superb. Cough is okay, not great, not bad. Grandpa's Cookies is a runt but I'll try to have at least some weed from this one also 💪


Likes
241
Share
@Tropicannibis_Todd
Follow
💩Holy Crap We Are Back At It And Loving It💩
Growmies we are at DAY 56 and she's just killing💀it👌
👉We are in full on flowering , gotta say the pink to redish hairs have gone away which is a bummer 😕 but the frost 🍦 is strong 💪
So Shit , I gave them just a tad to much nutes on the first few feeding 👈 But I have since fixed it
So I'm still doing some low stress training 🙃 and some defolation 😳
Lights being readjusted and chart updated .........👍rain water to be used entire growth👈
👉I used NutriNPK for nutrients for my grows and welcome anyone to give them a try .👈
👉 www.nutrinpk.com 👈
NutriNPK Cal MAG 14-0-14
NutriNPK Grow 28-14-14
NutriNPK Bloom 8-20-30
NutriNPK Bloom Booster 0-52-34
I GOT MULTIPLE DIARIES ON THE GO 😱 please check them out 😎
👉THANKS FOR TAKING THE TIME TO GO OVER MY DIARIES 👈

Likes
18
Share
@Stonyways
Follow
lights up to 66w, 28 inches from the top of the plants, fox farm nutrients for this grow..... already anticipating my next grow...
start to the the Peet Pods I used were/are garbage, first and last time I will use them
Processing
Likes
21
Share
@Siriuz
Follow
Starting week 10
Day 77
Ladie is getting some nutes plus water
Day 78
Whoa she's growing a lot
Day 79
Gonna start scrog soon
Day 80
Root its thriving like crazy, uploaded new video, check it out!
Day 81
Time to feed the lady again plus added more ffof soil with perlite and clay peebles
Day 82
All good, no nutrient burnt @ 1810ppm
Day 83
Had to expand the net, added scrog plus some other features, she's a monster it's Giving me a lot of work to do but I'm really happy with this huge lady growing up!!
End of week 10 with some videos to show progress!

Likes
5
Share
@WillWeedon
Follow
Watering 3 times a day (200ml/per plant)
Turned MarsHydro from 50% to 70% power
Still dont have a fan for plants😓
Want to try LST
Likes
5
Share
@Ryno1990
Follow
The Tropicana Cookies has been growing great feeding on Cronk Nutrients an thriving under the medic grow fold 6 she is almost done another week or so an then flush time she's deffinetly finishing up amazing packing on the frost
Likes
Comments
Share
@psychonaut420
Follow
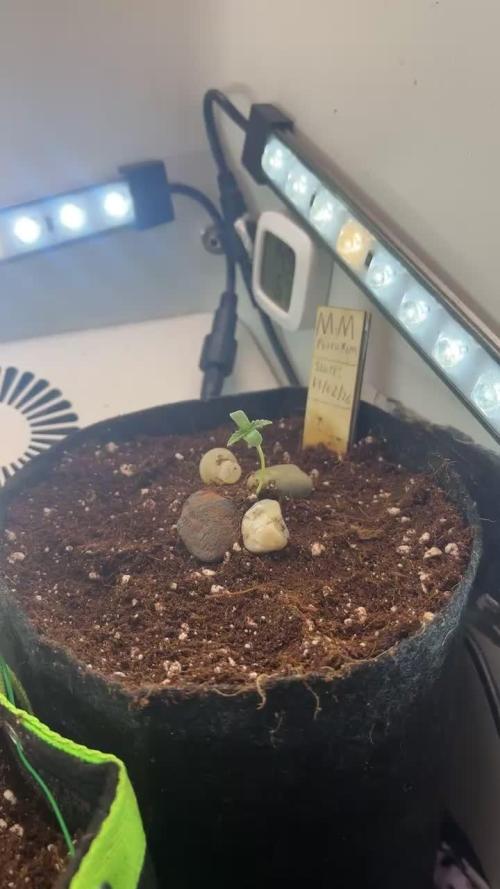
Seeing first set of true leaves emerge and has handled being transplanted from root riot cube to a 3.5L fabric pot with some Mycorrhizal for root growth looking forward to more development the first set of the true leafs are getting bigger as well as another 2 tiny leaves emerging for the 2nd node
Likes
48
Share
@DreamIT
Follow
There isn't much more to say. The quality of the photos is not excellent because they are extracted from a direct instagram. I was hoping for a better result but it lost a lot of quality while saving the video. I'll make up for it with the photos of the dry plant trichomes and with the next cycles 😜 Thanks for following my diary and see you soon with the smoke report 🤘🦄

Likes
34
Share
@Basementganja
Follow
Plucked a few leaves that were looking at me funny ;) Not much to do!
Very strong lemony smell!!
Watered with 2.5 gallons of the above listed nutrients, every 5-6 days. (when the soil becomes 95% dry)
10% of the solution watered runs out the bottom of the pot, and is removed with a wet-vacuum.
Likes
22
Share
@Afterglow
Follow
Тупанул с удобрениями. Первую неделю растиха еще чего-то жрала, но под конец вижу, что чего-то не так: ну медленно растет, не должно быть так.
Потом понял, что кокос промывал двое суток, а растиху поливал через раз чистой водой, хотя по сути нужно постоянно проливать слабым компотом. Чуток словил хлороз.
На второй день после хорошей промывки растишка очухалась и начала развиваться. Хлороз остановился.
PH понизил с 6.5 до 5.6.
В целом неделя закончилась положительно. Растишки оклемались после жестокой голодухи, снова позеленели и начали расти дальше. Отставание от графика примерно на 4 дня из-за стресса.
В следующий раз надо не забыть заправить кокос под 1500-2000 PPM и потом неделю поливать чистой водой.
Likes
1
Share
@CaliJ
Follow
white widow auto from RQS, harvest of 200 grams dry for 6 plants in 7 liter pots, really happy for my first 🤩. after 4 weeks in a jar (which breathes 10/15 minutes a day), the taste and the smell are magnificent, the effect is excellent for the day, I will grow again, for sure, really a pleasure to smoke 🤩
Likes
36
Share
@Xpie77
Follow
This week I sprayed the purple haze with silver water and will be mixing this beautiful purple haze with the cheese to get some purple cheese 🧀🤪
The 9 cheese girls are doing greet. Now I'm going to let them restore for a week. Check you next week
