The Grow Awards 2026 🏆 


Likes
Comments
Share
@I_Identify_As_A_Dan
Follow
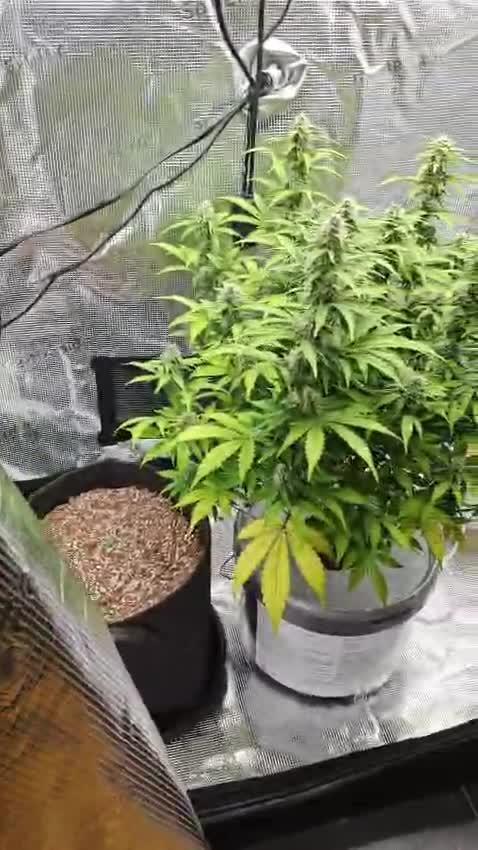
Week 10 for Kalini Asia by Zamnesia seeds,
Shes now fully bounced back from her last training and shes filling out really nicely.
Now just have to toughen up her branches and keep her nice and flat.
Being watered once a week atm.


Likes
2
Share
@YAMA47
Follow
Dia 67 desde germinacio.aqui muestro las 2 mas avanzadas.comparando cultivos de bsf Arg. Con Bsf España. LLEGO A LA.CONCLUSION QUE A NOS NOS TRATAN DE SUDACAS Y NOS MANDAN SEMAS DE CALIDAD MEDIA.PROX CULTIVOS CAMBIO E BANCO¡

Likes
3
Share
@AcidBurn_41
Follow
17.09.25
BT#19
Servus ✌️ zusammen
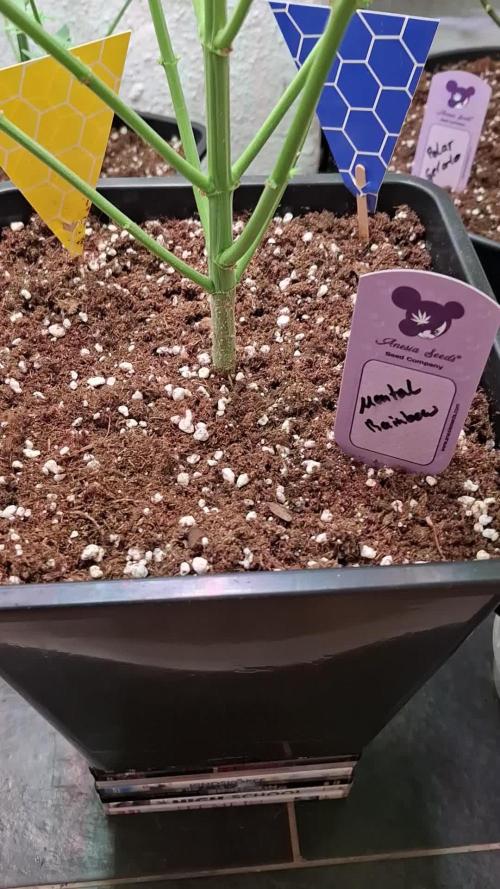
Einen Wunderschönen guten Abend 😁 die Mental Rainbow legt eine Performance an den Tag.
Die Stigmen werden immer mehr die Lady ist in der Blütephase angekommen .
Der Hesi Blüh Complex steigt um 1ml pro L der Hesi TNT Complex geht runter um 1ml/L
Dann gab es heute noch Hesi Boost 2ml/L.
Der PPFD wert liegt Aktuell bei 600 der PH wert im Medium wie Gießwasser 6,5.
Wünsche allen ne gute Nacht bis nächste Woche zur selben Zeit.
Stay High and chill 🙂
Mögen all eure Ladys Gesund und prächtig wachsen und euch mit schmackhaften Stuff versorgen 🤟
■■■■■■■■■■■■■■■■■■■■■■■■■■■■■■■
17.09.25 BT#19
Hello ✌️ together
A wonderful good evening 😁 the Mental Rainbow is putting on a performance.
The stigmas are getting more and more and the lady has reached the flowering phase.
The Hesi Bloom Complex increases by 1ml per L, the Hesi TNT Complex goes down by 1ml/L
Then today there was Hesi Boost 2ml/L.
The PPFD value is currently at 600 and the PH value in the medium and irrigation water is 6.5.
Wish everyone a good night until next week at the same time.
Stay high and chill 🙂
May all your ladies grow healthy and splendid and provide you with tasty stuff 🤟

Likes
10
Share
@Lucidite
Follow
I’m at the home stretch now. Two weeks till harvest. This grow has flown by! The buds are really swelling. They don’t yet look as big as some of the clusters on the last harvest. But those were all untrained and had way fewer bud sites. The difference this time is there are way more buds.
PH is now good too. Soil is 6.5-7.0 in most tests. I’ve just given the final feed. From now on I’m just flushing them with PH adjusted water. The Biobizz nutes are PH neutral. I suspect micro organisms in the soil are raising the PH with their waste. I’ll always add PH- to the feed from now on.
There are rusty spots appearing on some of the leaves of the most stretched plant. Possibly low in magnesium. I’ve feed with calmag. The affected leaves were all close to one of the lights though. Maybe that has something to do with it?
Temps and humidity are bang on. The rig in the tent is keeping the temps in the high 20s. Outside the tent it is sometimes dropping into the high teens. The humidity in the tent is around 50%. About 10-15% down on the outside room.
I’m really pleased with the impact of training Seems to have had on the plants. The LST, topping and super cropping has definitely had an impact. Even with autos. Ok. So one plant stalled. It was the weakest plant, was late and was not planted in the centre of the pot. I should have LSTed only. But I topped it. Pushed it too far.
I’ve learnt a massive amount on this grow.

Likes
3
Share
@ChubbyBudBros
Follow
-
Day 64
Redid the reservoir today, I upped the nutrients as she is starting to show signs she is very hungry and quite some leaves had yellowed completely in the bottom half of the plant.
Day 65
Seemed like she drunk a lot less today, didn't have to add any water. Just had to pH the water from 6.6 back down to 6.1
Day 66
Today she drank a lot more than she did yesterday somehow. Had to top up again with 1.5 liters of 6.7 pH water...pH was down to 5.5 again, brought it back up to 6.1 now. A lot of the lower fan leaves are still yellowing quite a bit. seems like she might need a stronger dose of N still.
Day 67
pH has been dropping a bit less since I've been topping up the bucket with more water, seems to confirm my suspicion that the pH can drop so much just because it is a small reservoir, which she drinks a lot from in one day. It went to 5.7 from 6.1. Topped her up again with 6.5 pH, which brought it back up to 6.1. The buds are really fattening up, looks beautiful.
Day 68
Not much too report, she still keeps drinking a lot every day, pH drops from 6.1 to 5.6 over 24 hours and I top up the water with about 1.4 liters with a higher pH to bring the pH back to ~6.1.
Day 69
Same as yesterday. pH dropped only to 5.8 now, I guess nutrients are being used up by the plant towards the end of the week, so pH stays more stable as the nutrient concentration lowers. Topped up with 1 liter of water 6.6 pH, back to 6.1 pH.

Likes
7
Share
@Adam22
Follow
Flushed for 3 days so far so good. No yellow tips on the leafs yet but I may just have to pull this plant down today I have just 1 plant in the tent it doesn't seem worth running this just for 1 plant so I will pull down later today I think and upload pics and remember where I went wrong for next time. I have some new seeds just been delivered I think next time I will try to have an additional tent slightly bigger so I can have 2 different strains growing at the same time. Definitely using feminised seeds also as don't have time to waste vegging for 6 weeks a plant to just end up with balls. Next run will be:
4 x cookie dawg
3 x velvet moon
1 x sherbert punch
I will be looking for a decent led light for the next tent also I would like to run the same strain in both tents and see what the difference in the results are using my hps light vs led
Harvested plant 1
5oz budd
14g popcorn buds and leaf trim
Likes
6
Share
@Viridios
Follow
Hi all..
Lady's are very happy..still stretching a bit..looks like the push is almost over.
Very faint sweet smell starting to come form them. Im going to do another light defoliation soon. Humidity is a bit high and i want to avoid WPM.
Sorry for all the wierd couler photos , i try take picks as the lights come on..
I will upload some more picks on friday.
Other then that..Perfect!
😁 420 for life.

Likes
2
Share


Likes
80
Share
@Ganjagrandaddy
Follow
Hi all. Welcome to this run withbthe Viparspectra XS1500 which i was kindly sent to try by their helpful rep Valerie. As I have a fairly good space to use for my main grow , it seemed an ideal time to explore a few options while I wait for space to appear following upcoming harvests. The opportunity hit at a good time and has now driven the future play time. lol
The light is a full spectrum 150W( at the socket) , Dimmable and very well made unit. As summer is here now , my concerns of more heat being an issue have stopped me from adding my other light so the smaller 2ftx2ft area covered by the XS1500 is a good option , The heatsink is built into the case design with a finned top to dissipate the heat so no noisy fans. Switching it on to full power was a nice surprise as the footprint was way wider than I had expected and the actual coverage is even better for my Nursery to harvest plan....
I am growing autos perpetually at present and have been able to throughput the plants with just 2 lights and using the overlaps at the edges to bring seedlings along to veg/flowering, as harvesting is finishing. The timing had been working well but the plants were getting smaller towards the last runs . I gave it some thought and Rh % came to mind. With the perpetual runs not having a higher rh in their veg periods due to other plants needing a lower Rh% in flower , the vapour pressure deficit (vpd) was not within veg periods healthier range. This current run has exploded and filled my normal space very quickly which in turn means I cannot use the same principle as the last perpetual run of bringing the next ones along ready for the exchanges. The XS1500 takes care of this issue with it being perfect for an initial nursery light that is easily covering all the new seedlings but is also able to cover my experimental "5 plant 1 Pot" attempt. I have placed 5 of my own autob seeds from a previous seeding in a single 60 L pot and intend to strip them to their 4th nodes and only allow 2 mains per plant to develop and flower. Inam hoping to have 10 mains growing in it that will be under the xs1500 solely as the other plants outgrow the lights footprint and space they are in. They will go into the main grow space once able so i can really see how well this new light can flower with the 10 mains to fill the space. Until that point , I will diary as we go and see what we can achieve.

Likes
68
Share
@KingSalomonsWeed
Follow
Soweit, pineapple hat 51 cm. Lsd hast 49 cm. LSD, hatte übernacht defiziete. Eisen, denke ich. Habe dann direkt noch cal mag dazu gemacht. Hat sich innerhalb 2 er tage erholt. Die GrennCrack hat 45 cm in einem ca 2 liter pot(versuchslauf).

Likes
12
Share
@VeeDro203
Follow
These 2 have slightly different structures. One more purple and heavy jelly smell! The other a lot more pale green purple and a creamy jelly smell. Similar to one of my Miami Miami with the cream

Likes
11
Share
@TerpTurtle
Follow
Earthbox pics of Strawberry Truffle s1 | Perpetual grow 👽🐢👽🐢
harvest coming on new moon, flipping veg tent👍


Likes
44
Share
@Chedderbob112
Follow
Just flipped everything is growing like mad all the revegged monster cropped clones n that had been in flower n now hav fresh growth am buzzin will need to go in n defoliate a bit lolly pop and clean it up a bit bit yeah oh yeah chedder does it well @chedderbob112 @s2340420


Likes
Comments
Share
@Alejangrow
Follow
Shes reached 4 feet tall this week😎🌿
Did some defoliating to unblock some of the bud sights.🌺
She took well too last weeks flush & is back on the recommended regimen. 💉
Cant wait to see how these 2 turn out.
This is supposed to be a 7 week flower strain but probably gonna let go for 8 weeks flower.🤷♂️🏽


Likes
9
Share
@BLAZED
Follow
Week 11 (26-8 to 1-9)
26-8
Temps: 20.5 to 26.1 degrees
Humidity: 50% to 56%
27-8
Temps: 20.7 to 27.3 degrees
Humidity: 50% to 56%
Watering: Both 1500 ml. (Only Calcium) EC: 0.4 PH: 5.6
Defoliated both plants
Dry Weight: Both 2.6 kg.
28-8
Temps: 21.5 to 28 degrees
Humidity: 51% to 56%
29-8
Temps: 23.3 to 27.4 degrees
Humidity: 55% to 62%
30-8
Temps: 19.9 to 27.7 degrees
Humidity: 50% to 60%
31-8
Temps: 20.2 to 26.6 degrees
Humidity: 50% to 55%
1-9
Temps: 21.1 to 29.1 degrees
Humidity: 49% to 55%
Watering: Both 1000 ml. EC: 1.4 PH: 5.6
Dry Weight #1: 2.5 kg. #2: 2.3 kg.
Recalibrated my PH pen and it was only 0.1 off, so i dont think the leaf problems are PH related.
Likes
7
Share
@GreenHouseLab
Follow
Harvested at end of twelve weeks, At week 11 the trichomes were 95% milky with 60% orange pistils.
Appearance of Plant: Short and Sturdy with Thick Leaves
Appearance of buds: Big & Dense
Density of Buds: 10/10
Resin: 8/10
Dry Time and Cure for Smoke Report: 7 days at 55% Humidity // Temp: 71°
Smoke Report: The smoke is really smooth that hit you instantly with a head high. Use cautiously as its quite strong if used in bigger dosage. I feel alert and can take on any project I have on the go at the time. Good for day time and also to relax at night.
Pros of growing this strain:
- Short and dense. Can be grown anywhere (very discreet)
- Would be great for SOG
- Fast and easy to trim barely any leaves on the flowers
Cons:
- Small yield
- Very Short plant (needed to raise the plant to keep it levelled with other plants
