The Grow Awards 2026 🏆 


Likes
Comments
Share
@Black_Widow
Follow
Привет садоводы
Вот и закончилась стадия вегетации и мой цветок зацвел
теперь 8 недель цветения и все будет в шоколаде
девочка вышла пышной , надеюсь вырастет 100% красавицей и не сомневаюсь , что будет качественной как и ее летняя сестра !
будем наблюдать и ухаживать
Еще раз похвалю SSSC за отличную генетику !

Likes
2
Share
@GasStation420
Follow
Currently transfered into 30l bags and freedom farm antifragile super soil

Likes
16
Share
@Ieiogrow94
Follow
Eccoci qui…
Manca davvero poco al raccolto finale…
NON VEDO L’ORA!!!
Grazie a tutti per il supporto 🔥🌲❤️


Likes
40
Share
@valiotoro
Follow
easy trim✂️
The buds are Absolutely perfect,exactly what i was looking for🤩
Green pheno : cookie,diesel & gelato🍪⛽️🍦
Purple pheno : flower,sweet & honey🌸🍯
After 7 days on the dry rack she was ready for the jar to start the curing process.😋


Likes
42
Share
@BLAZED
Follow
Week 16 (Harvest)
1-2 Drying day 1
Temperature: 24.5 to 19.5 degrees
Humidity: 65% to 50%
The girls are ready to be harvested!
Before chopping them down, i took a lot of pictures.
I was able to remove most of the soil from the Biscotti #2 to see the rootball.
I hang the plants as a whole to have a slow dry.
The exhaust fan is on setting 4.
2-2 Drying day 2
Temperature: 19.1 to 17.5 degrees
Humidity: 62% to 57%
I changed the exhaust fan to setting 2 because setting 4 was a bit high in my opinion.
3-2 Drying day 3
Temperature: 19.9 to 18 degrees
Humidity: 62% to 59%
Today i checked up on the drying plants, and i see there are some buds touching other buds, so i chopped the plants in half.
The buds are still to the main stem for a slow dry, but are hanging more spreaded out to prevent any budrot issues.
I changed the exhaust fan to setting 1, as someone told me that it was enough air movement for drying.
4-2 Drying day 4
Temperature: 19.8 to 18.5 degrees
Humidity: 62% to 59%
5-2 Drying day 5
Temperature: 19.9 to 18.8 degrees
Humidity: 62% to 59%
Today i checked on the drying plants and the buds are shrinking a bit, they are getting a little bit crispy on the outside aswell,
I hope they wont dry as fast, and i aim for a 12/14 day dry.
For the next grow i already germinated 2x Chemdog (GreenHouseSeeds) 2x Gorilla Kush (GanjaFarmerSeeds) and 1x Deep Candy CBD (GreenHouseSeeds)
And I have some upgrades planned aswell!
I bought a autopot kit with 4 15L pots, this way the plants will have water and air 24/7 whenever they need it. I have seen alot of great results using autopots so i am very exited to try it out!
And I bought a small camera so i can shoot some weekly timelapses!
Feel free to Follow me if you like to get notified for the upcoming diaries!
Thanks for checking out this diary, peace!
(More harvest updates coming in the next couple of days!)
Huge thank you to Zamnesia for the seeds, and Plagron for the collection of nutrients, and the opportunity to participate in the POWERBUDS contest!
It was a fun and learningful adventure!
Likes
2
Share
@Jotagrower420
Follow
Segundo teste de sementes.
Foram 5 dias de germinação no papel toalha sendo 12h na água com PH 5.8.


Likes
2
Share
@Bread_n_Buds
Follow
Our friends at Zamnesia have been working on strains for years and although they are great lovers of experimentation, novelties and know how to keep up with the times like few others, they also know the value of traditions and historical pieces, Blue Dream is one of these, great quality in genetics and stability in fact the plants started very well.
In this diary you will find the plant worked with the techniques in this case the first topping was carried out, we cleaned everything else creating the Mainfold and we are going to work everything with the main lining. We are at the first topping and we have two mini branches growing.
The other one you can find in the diary alongside worked without the application of techniques that involve cuts to preserve its speed.
Comparison is the salt of experience.
We have started the Plagron fertilization program, we are in 100% organic configuration, the soil is recycled Promix + 1/3 fresh soil + 10% Perlite + RQS Mycorrhiza Mix (4gr in the mix, 1 gr under the small fiber pot).
We are administering // 1 ml/l of Power Roots - 1 ml/l of Pure Zym - 1 ml/l of Sugar Royal - 3 ml/l of Alga Grow
I have doubts about the compatibility of Pure Zym with mycorrhizae. If in doubt, ask the experts, do not mix too much at random.
https://plagron.com/en
Doubts about Pure Zym / Mycorrhizae compatibility have been dispelled, they can go well together according to Plagron experts. If someone tells you that enzymes eat mycorrhizae, which in principle may seem possible, explain to them that it is not true.
https://www.royalqueenseeds.it/growing/452-easy-roots-mix-di-micorrhize.html
Try this strain it promises more than good ---- // https://www.zamnesia.io/en/3271-zamnesia-seeds-blue-dream-feminized.html
Short Description Zamnesia // Exceptionally tasty and potent, Blue Dream by Zamnesia Seeds is a hybrid with a distinctive and sophisticated character. A blend of Haze and Blueberry strains that manages to bring out the best of both worlds. Its short flowering time of just 9 weeks far surpasses other Haze strains!
You can find the whole world of growing at Zamnesia and much more take a tour of the site and you will find "all the best that nature has to offer" in various shapes and colors.
The new strains are exceptional and the old ones are no different... p.s. for now zero Hermaphrodites, growers can you say the same?
---- // www.zamnesia.com
Likes
28
Share
@No_Clout
Follow
06/03/19 - unfortunately this was my own fault for being gullible with a mix of just not thinking, but I got a cal deficiency on my OG which was fitting seeing as everything was going well, but I think I have resolved the problem as I’m not see the new growth being affected but I do think it has slowed down in growth abit but I’m guessing that’s understandable, I’m really happy I’ve turned to mills as I can tell a difference from my previous grows, this slight hiccup was my fault but they were that healthy I’m almost positive it’s gonna spring right back 🤞🏻
09/03/19 - definitely looks like it stopped growing for awhile as the gelatos are a hell of a lot bigger now compare to my OG but I think the problems been solved as their was only a little progression on some of the newer leaves but the newest set of leaves seem unharmed includeding the side branches.
12/03/19 - a lot smaller than the gelatos but never the less I’ve started the LST/leaf braiding with the OG aswell to make sure the side branches catch up as they were stunted from the cal mag def

Likes
22
Share
@eldruida_lamota
Follow
Que hay fumetillas, vuelta actualizar otra semana de critical, no me canso de cultivarla de verás, una indica con floración rápida con unos cogollos como rocas.
Semillas conseguidas en grow barato, a granel, por un bajo coste, y bien cultivadas salen genial sin fallo.
.
La humedad esta al 45% la temperatura está entre 21/25 grados , y como siempre el ph , ya que es de lo más importante,está en 5,8/6,0.
.
AgroBeta:
Ya tenemos el lavado de raíces realizado, y hemos retirado los nutrientes para aplicar un estrés hídrico.
.
Hasta aquí todo familia 🕸️ , un saludo y buenos humos fumetillas💨💨💨.

Likes
8
Share
@GREENPHOENIX6262
Follow
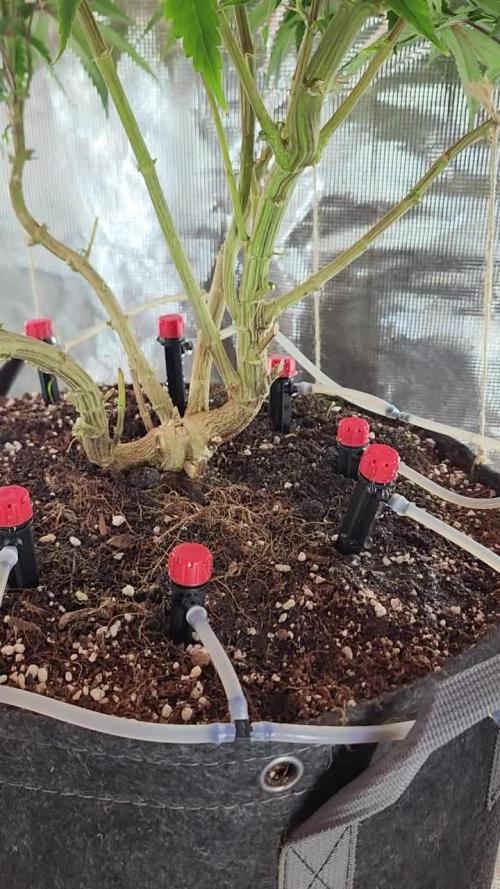
02/23 (M) (Pre-Flower) flipped mother into flower last week - flushed with clean water for 2 days then began giving flower nutes in small doses for now - still feeding off the drip lines seems to be working as planned. Feeds will become more often (once/twice a day - 1 min feeds.
02/23 (C) - 7 of the 15 clones have rooted successfully with thick multi strands in each clone - Green color starting to come back as well - Have begun applying nute feeds to help recovery - Will give the other 8 sometime to begin rooting but if nothing happens in the next week then I will keep the 7 rooting now and cull the other 8.


Likes
19
Share
@SebastianFastBuds
Follow
Week 4 – Veg Victory & Pre-Flower Moves!
The first week in the big tent and wow — these girls absolutely took off! 🌱 Under the SANlight EVOs they didn’t slow down for a second, just kept pushing hard towards the light. The Lemon Cherry Runtz are now running neck and neck with the Papaytons, and both lines are showing super tight structure with thick stems and beautiful color.
Even better, the stem rubs are already screaming with terps — seriously, the aromas coming off them at this stage are insane. Couldn’t resist: I picked one standout Papayton, one Lemon Cherry Runtz, and one Biscotti Gelato. All three went into the flower tent after I took cuttings, so I can show you how their buds stack up much earlier.
The Biscotti Gelato girls are about two weeks behind, but you can tell they’re pushing hard to catch up. I left the other pheno with the rest in veg — she’ll have a bit more time to build herself up before the flip.
The rest are staying in veg for now to really bulk up. Next week I’ll top them, take another round of cuttings, and then it’s their turn to move into flower. These genetics are proving to be super impressive — vigorous growth, lush color, and already oozing character. Excited to see them show off what they can really do! 🔥💚


Likes
4
Share
@Bir7822
Follow
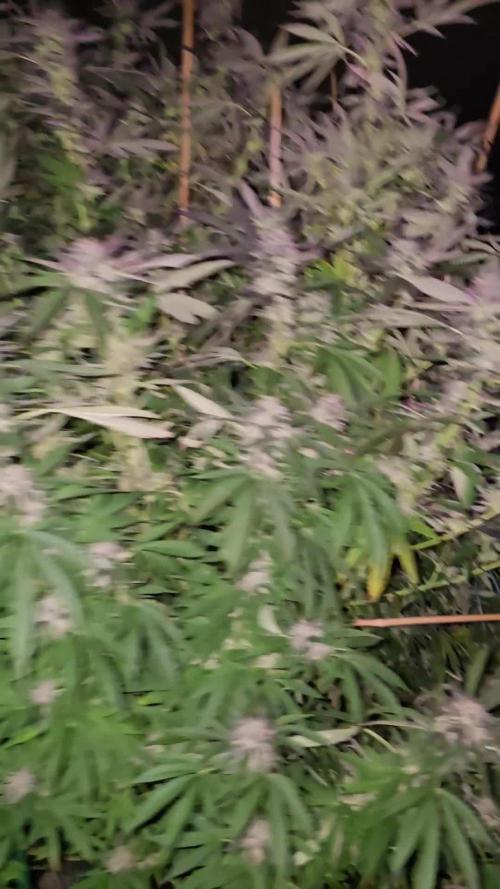
7-10-2025 . je commence mon rincage aujourdhui,le 9-10-2025. je prévoit de coupe rla plante en pot le 18 octobre. je surveilles les trichomes avec le microscope. il ya eut de tres grosses rafales de vent dû à la tempête... des rafales de 70,80 kmh.. une petite branche a cassé sur celle en pot. j ai coupé cette branche et nettoyé les buds pour les faire sécher... l'autre plante en pleine terre, une gross ebranche à cassé, mais hereusement pas totalement cassée... la seve passe encore dedans. les feuilles et buds ont l'air bien. pas fané ni rien. donc le 18 octobre je serai à la 8 eme semaine de floraison pour celle en pot. celle en terre à 2 semaines de retard comparé à celle en pot... je sais que c'est pas top de filmer quand il fait noir, mais c'est + impressionnant. ;-)

Likes
13
Share
@Arkain_Jenetics
Follow
The LUSH soil is providing plenty of nutrients. Some of the girls have remnants of the burn. I'll get em taken care of in two weeks. When I do the last small defol.
I believe my bx ibl skunk ( by my company Arkainjenetics ) .
is a male !
So pros and cons. Pros. It's short. Which is awesome and what I was going for. Stem smell is strong. And it handled my Nute burn and topping like a champ. So I deem him worth of his seed. ( His pollen ) 😂.
I'm working on where I want him to go. I don't want him to go into the 4*4. Cuz I'm starting my next grow in there.
I bought a 3*3*72 but I'm realizing I don't need that big of a space for one plant. ( Cus the 3*3 is still in its box I didn't want to put it together for just one plant.).
And I need to get all the right equipment for the 3x3 still. But that's for another diary lol


Likes
30
Share
@valiotoro
Follow
Week 3 has passed✔️
LST always with Ennio Morricone🏻♂️
She’s doing very well growing at fast pace with a beautiful green color on the leaves🔥
For the nutrients Plagron as always💜
Foliar spray Plagron vita race once a week💦
Likes
80
Share
@Roberts
Follow
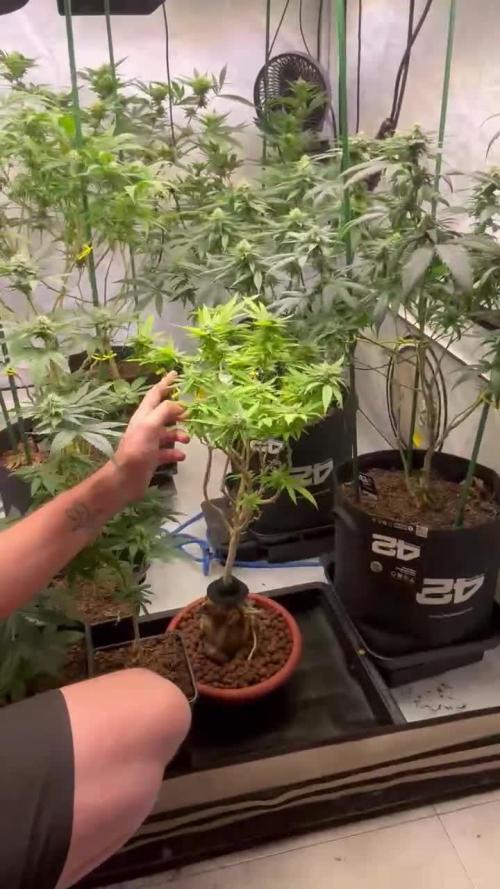
Pure Ice cream clone is doing great. Lots of normal growth now. She is growing fast and I may transplant her to a bigger potter of coco mix. I will prep the transplant coco with the run off from her as I feed her every other day. So when it all comes together then there is minimum ph, and nutrition differences with new coco. Everything is going great with her now. Thank you Pure Instinto Seeds. 🤜🏻🤛🏻🌱🌱🌱
Thank you grow diaries community for the 👇likes👇, follows, comments, and subscriptions on my YouTube channel👇. ❄️🌱🍻
Happy Growing 🌱🌱🌱
https://youtube.com/channel/UCAhN7yRzWLpcaRHhMIQ7X4g
