The Grow Awards 2026 🏆 


Likes
Comments
Share
@northsweed
Follow
happy new year, everyone!
plants are thriving, stretch is happening and the experimental is showing buds already (it's been switched one week earlier) 😊
---
another major defoliation done – Barney claimed that lateral branching is heavy and it's indeed 😂

Likes
41
Share
@MR_Poof_K93
Follow
Están creciendo bien! he aumentado la potencia de la pantalla a casi el 50%. Estaban en 25%. Están comiendo muy bien y asimilando el producto de lujo.
Dos de las tres ZKITLLEZ salieron con un solo cotiledón una de ellas está bien y la otra está mutante jeje. La otra nació sana con sus dos cotiledones y va perfecta.
🌴💚😎
Las Runtz dos de ellas no salieron y tuve que germinar dos mas un poquito más tarde🤦🏽 La única que salió bien está de lujo! 😄
Y las banana green están tirando como si no hubiese un mañana han salido perfectas y germinaron muy bien!☀️😃🤟🏼
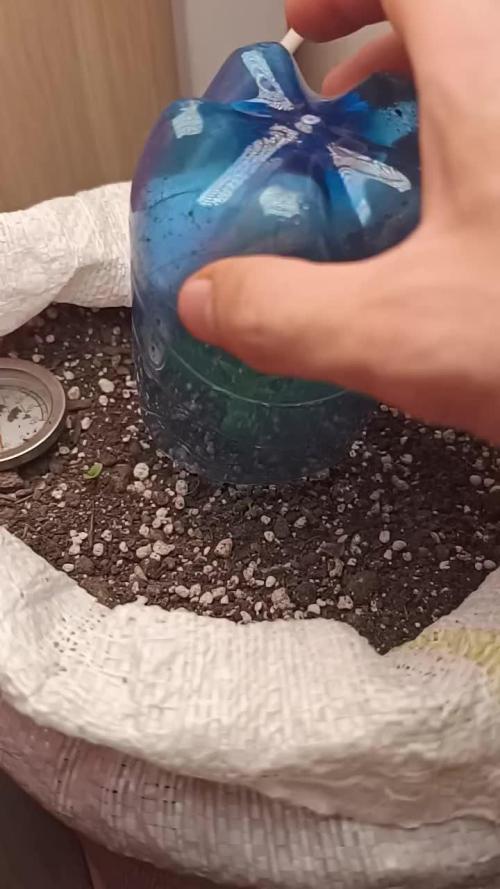
🛑Esta semana empezaré a echarle el Tripart de Terra acuática, en el enraizamiento he utilizado deeppeer underground, Rhino Skin y 1GR de Bactohemp por 1L de agua.


Likes
6
Share
@masterofsmeagol
Follow
4/6 Woke to see two seedlings have lost their shell. Only one had a weird long curvy taproot that has come out of the soil. I'm not sure if I should perform surgery or just wait it out. I mean I can see the seed on top and the cotylden leaves. It's like it dips and can't hold the seedling up. The other mk ultra popped excellently and another has the seed visible. I'll do some research but I'm now doing away with peat pellets and going right into soil from now on. It seems like these just cause problems. The seedlings under the hps are doing better. I think it was smart to switch the light. I can see what MIGHT ve burns on a couple seedlings and TWO haven't developed there true leaves or are very stunted. So if those three don't make it ill be replacing them with the ones I just popped. I may pop tge other two mk ultra but more likely I'll wait the three days until my 10th planet comes. I took apart some of the sour cherry seedlings just to see how they were growing. Makes me feel better as it might not look that great on top but they were working on developing roots. I'll update later. I've got a lot going on in my life but I need to make sure I take care of my seedlings.
4/7 Pretty sure I watered today. I'll have to check but I know I did. Things are going better. I think that bigger light stunted them. The 2 mk ultra and 1 chem dog #4 sprouted and were in peat pellets. I transplanted them into solo cups with happy frog and put them on the outskirts of the light. I thought i might've lost one because the taproot came out of the ground and bent. I'm suprised it came out of it to be honest. And fast too! My Etho's 10th planet came so I'm thinking of popping a couple of those as well. They won't be stunted and this strain has done the best by me.
4/8 WATERED EVERYTHING WITH A SHOT GLASS BESIDES THE FRESH TRANSPLANTS. Forgot my water yesterday so I'll pop a couple 10th planet today. I MIGHT not lose any seedlings. They seem to be coming out of being stunted. The ones that WERE stunted anyway. However there are a couple I'm not sure of. Better safe than sorry. I'm getting excited. I'm going to bring the other hps light to my cousin and he'll fix it quick. That way I might not even need to switch to the L.E.D (that I'm not as familiar with.) I'm sure it will be fine either way. Clones did great under the l.e.d. I think it's just a bit much for seedlings. Which is strange since they sprout under the sun? I have the least experience dealing with seedlings as I usually but clones. I forgot to take pictures too. I have to go back over and ill take some. ADDED A FEW PICTURES AND POPPED 2 ETHO'S 10TH PLANET SEEDLINGS. THIS WAY I CAN SAVE A FEW AND ILL HAVE MOST OF KY BEANS FOR NEXT YEAR. IVE GOT A BUNCH OF AUTOS TOO BUT IVE NEVER GROWN ONE. ONCE THINGS SETTLE DOWN AND AFTER THIS SEASON I MAY TRY MY HAND AT INDOOR AND THOSE AUTOS WOULD BE GREAT FOR THAT. NOT SURE IF I SHOULD START A SEPERATE DIARY FOR THE 10TH PLANET OR JUST KEEP GOING HERE. IF I DID IT WOULD BE A SINGLE STRAIN DIARY SO I COULD ENTER CONPETITIONS. BUT DO I REALLY WANT TOO?
4/9 DIDN'T WATER. MISTED THE TOP OF THE FRESH TRANSPLANTS. HAVENT CHECKED THE 10TH PLANET BEANS YET. ITS NOT TIME. I may end up losing a couple seedlings. I'm not sure. They may just be stunted bit I could've damaged them when I removed the seed from the seedling. Only time will tell. That's why I popped the two 10th planet beans so even of I lose a couple seedlings, I'll have what I need for the year. It's like those couple are growing taller but the true leaves had barely formed and don't seem to be getting any bigger. They probably got burned and stunted. I'll monitor them. CHECKED THE 10TH PLANET AROUND NOONTIME. WASN'T THINKING AND IT HADN'T BEEN 24HRS AND ETHOS SAYS TO WAIT 36 HOURS BEFORE CHECKING. BOTH SEEM TO BE VIABLE SEEDS ONE HAS A TAPROOT AND THE OTHER HAS SPLIT OPEN. I'VE LEARNED MY LESSON AND IM GOING TO GIVE THEM ANOTHER 24 HOURS. NEXT YEAR IM GOING TO INVEST IN A HEATING PAD FOR SEEDLINGS.
Edit: What a change in weather from two years ago. I got that intuition feeling so I went to check the girls. They seem to be stretching but not NEARLY as much and are now getting some leaf growth. They were all within 10 grams of dry soil weight save for one that is a larger plant. That was 217. Everything got watered with a shot glass and the soil slowly soaked it up. I even had to water the fresh transplants. They have grown to the top of the cups! I filled in the Ched dog #4 with soil and watered. The mk ultra is larger and the soil was a little chilly. I put a little under the light to warmup so I can fill in the other two plants. Man I feel better seeing them out of their slump. I never should've started with that 1000 watt led without testing it. No matter what the box says. I'll take pics tomorrow.
4/10 Had a crazy morning. Didn't take pictures as it was a hurried morning. I filled the 2 mk ultra cups with soil and watered a shotglass. Looking at the first series of seeds I started, (the pink kush and special kush #1) two of the 3 seedlings that are stunted SEEM like they might make it. I might cull them anyway if growth doesnt pick up with the others. I'll see what happens. The first true leaves are coming apart when the were straight up amd stuck together. They looked done for. Luckily we have SUCH a long veg season that even if something is stunted, we have time for it to come out of it. If it will. Things are going well since switching to the hps light. I noticed some slight yellowing on the Chem dog's first true leaves, so I pulled the tray away from the light a little bit. The two mk ultras in the same tray are fine though. I may start a new diary for the tenth planet. Not sure but the 2 seeds attempted germinated and had a nice taproot. I transplanted them DIRECTLY into solo cups with a little Happy Frog soil and Myko's and slightly covered them before misting the tops. I cut a powerade bottle in half and it fits IN the cup perfectly a humidity dome. I misted the tops as well and put them under the asrgarden light until they break ground and get their true leaves. Man I can't wait. I know it's been a rough year for EVERYONE but I've had some particularly difficult situations. Can't wait for this season to start. Next time I go over I'll get some pictures but nobody really wants to see seedlings. They pretty much all look the same. At least I learned something. Oh and I took apart all the sour cherry seedlings that were growing and dissected them and found why a couple had problems. Seedlings are what I have the least experience with so when my whole pack didn't pop I wanted to see if it was me but it wasn't. All those other beans popped and I got some hands on experience dealing with seedlings so maybe a blessing in disguise!.
EDIT: WENT OVER AND CHECKED THE PLANTS. I WEIGHED THEM AND I ASSUME THEY WILL NEED WATER TOMORROW. I DID WATER 3 I THINK AS THEY WERE UNDER 200 AND HAD BIGGER PLANTS. EXCEPT THE ONE THAT LOOKS THE WORST. THAT SEEMS TO DRINK A LOT OF WATER. I THINK THAT MIDDLE ROW (2 SPECIAL KUSH 1 PINK KUSH) WERE STUNTED. HOWEVER, I CAN'T SEE WHATS UNDER THE SOIL AND THEY ARE GROWING TALKER AND DRINKING. THE TRUE LEAVES THAT ARE TINY AND LOOKED DONE FOR ARE PARTING AND THOSE PLANTS ARE STILL STRETCHING. I'M TRYING TO LOOK AT MY LAST DIARY I DID SEEDS WITH AND AM TRYING TO REPLICATE IT. ONLY THIS TINE WHILE I AM REDOING MY HOUSE AND MOVING AS WELL AS BEING A MEDICAL CARE GIVER. ENOUGH OF THAT. THE SNOW IS GONE. ITS A LITTLE DISCOURAGING LOOJING AT SMALL SEEDLINGS INSTEAD OF BIG CLONES BUT BY THE END OF THE SUMMER THE SEEDS WILL SURPASS ANY CLONE I BOUGHT AND I WONT HAVE TO DEAL WITH ALL THE PROBLEMS THAT CONE WITH CLONES. I NEED TO EMPTY AND CLEAN MY BAGS AND CLEAN AND STERILIZE MY GROW AREA. I ALSO NEED TO POISON THE CAGE AND BLOW ALL ORGANIC MATERIAL OUT AND POISON THE STRUCTURE ITSELF.
4/11 Seedlings are doing ok. I'm wondering if I should put up the other hps as thats what I did the year before when I did seeds. However they weren't "stressed" or "stunted." I think I MAY lose one but the other two had the true leaves stuck together and looked crispy. They've since started to open and I can see new growth. Other seedlings seem to be taking off and finally developing some leaves. The 2 mk ultra and 1 chem dog #4 didn't experience that other light and they seem to be doing great! Checked the 10th planet and one seed is poking out of the ground. I can't see the other one yet but it was a little further behind and I may have sowed it deeper. WATERED everything but the mk ultra and chemdog. I just misted the top of the soil.
4/12 WATERED ALL THE KUSH WiTH A SHOT GLASS. The mk ultra and chem dog didn't need it. Weighed cups and the lowest was 199 to about 207. The three stunted or (damaged) plants seem to be coming out of it. At least new growth is coming and they are drinking just as much as their siblings. I'll play it by ear and see how it goes. The jumped in size just since this morning bit phone was dead. Both 10th planet are now showing in the soil! Things are going good. I'm stoked!


Processing
Likes
20
Share
@CanadianFillmore
Follow
Start of week 2 of flowering, both girls were drooping heavily and the medium was dry and pots were very light feeling. Removed the worst leaves from each plant and a few large fan leaves. Overall, I'm very happy with the weeks growth and development.

Likes
13
Share
@m0use
Follow
Plant did ok, not the best result and far below my expectations for it. I found that growing them in pots with other plant is a no go from now on for autos. they just don't grow all that well when their root space is being shared, all my autos from a few breeders did poorly when I grew them like this. however the ones I kept in their own pot did much better, the Ganja farmer brand is good, just wish they had some CBD/CBG strains in their catalogue. This will all be for friends and family.
@GanjaFarmerSeeds, If you like the images or videos I can send you raw files that have not been shrunk/resized and contain no watermarks, if you feel I am in the top 3 of your BDOTY Contest that is :D


Likes
10
Share
@BruWeed
Follow
☘️19/07 - A la semilla la hidrate por 24hs, utilicé el método que BSF recomienda.
☘️20/07 - Puse la semilla en papel húmedo para que brote.
☘️21/07 - Ya brotó, creció 2cm aprox y la mandé directo a una maceta de 3L. En una o dos semanas ya la voy a estar trasplantando a una maceta Root House de 10L.
☘️Ahora tengo que esperar que brote así ya empiezo a darle el estimulador de raíz.
☘️Voy a dejarla dos semanas en etapa de enraizamiento para que se preparen bien las raíces, tres semanas en crecimiento ya que es una semilla Faster y BSF me recomendó que tenga esas semanas y seis semanas en etapa de flora.
☘️24/07 - Ya brotó la plantula.
☘️26/07 - Le agregue 0.5ml de Deeper Underground y el 02/08 le voy agregar 0.5ml más, para ya finalizar con la etapa de enraizamiento y ya poder transplantarla.
☘️30/07 - Cumple 10 días de vida.
☘️02/08 - Le agregue 0,5ml de Deeper Underground.
☘️07/08 - Voy a transplantarla a una maceta de 10L y ya el día 9 entra en etapa de crecimiento.
☘️En estos dias seguire subiendo mas imegenes de como viene.
🍀😶🌫️🇦🇷Podes seguirme en Instagram como @bruweed_arg 🍀😶🌫️🇦🇷


Processing
Likes
14
Share
@Ashbash
Follow
60x60x120cm tent. Basic cheap one not sure what brand, if any. 200w CFL for veg, and a 250w HPS for bloom. Gonna continue with biobizz and maybe a couple of other supplements later down the road. Soil is biobizz allmix. Says pH ready so no need to adjust. Hopefully that's right!


Likes
2
Share
@EtnoGrow
Follow
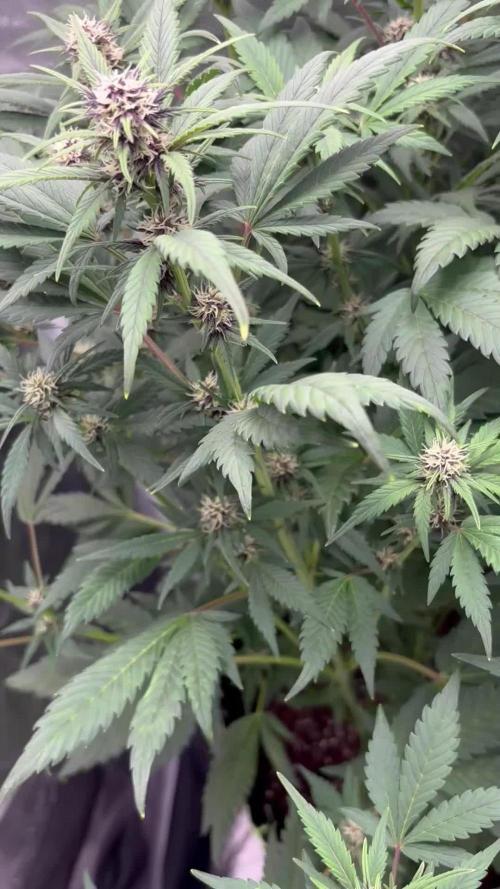
el segundo corte luego 15 dias o dos semanas, ya mas maduro punto mixto temprano, cogollos ambar y blancos nublados, predominantemente blancos . se ve con mejor pinta que el primer corte
Likes
20
Share
@clown420
Follow
Flush all this week and harvest for the end of this week.
looking good I think but a few have learnt a few things while on this grow.
excited for the next grow for sure but might need to hold off a bit to smoke and make use of all this good stuff :D
Will update once all has dried and smoked up follow along for an update. Already sampled this week but wanna see how it goes dry.


Likes
5
Share
@Chubaka26
Follow
First day of vegetative state. I use 125 ml of spring water mixed with 0,2 ml of bio-grow( npk 3-3-3) and 0,1 Gr of rooting powder. She looks healty . This is the first day that i let her to direct aire, without protection. I am curious how She will handel the aireflow from the fan
Likes
15
Share
@XperencdGmanXG
Follow
Well I love this Ya Hemi hits very strong. Shit is dank and stinky and WILL put you on your ass! Trying out a totally new way of growing for me. Also to help with costs I decided to make a 5 gal tea reactor, to grow out the EM1 which will save me about 75% on all microbe products, and also save on feralization when used in conjunction with foliar sprays. Using grassroots LivingSocial pots and a new full organic mix. Fingers crossed as we get on the ya hemi organic express!
Likes
5
Share
@Kominest
Follow
Just stretching a little.
I think she got done stretching slowly since I don’t need to adjust the light anymore since some days . So now to thicken up those bad buds 😎
I love the colors already but no big smells so far.
Gave around 4L of tap water on day 4
Likes
25
Share
@Cockpitloulou
Follow
So, this week I cut phosphorous intake in half, and did a small cleanup job, removing some leaves.
Plants look really healthy, except I would've expected they showed nitrogen deficiency signs since then, which suggest soil might be keeping some nutrients. Not sure if that's good or bad (certainly not a real issue tho). I started to flush yesterday; we'll see how it goes for the next few days.
I already see a few amber trichomes, so harvest is either for end of week or next one. I'll have to travel a few days next week-end, so I try to sequence everything the best I can :)
Also, I just heard about stem splitting, which doesn't seem to be a common technique among us; I'm not planning to do this to my plants (at least not yet), but I'd like to have your opinion on that; anyone tried ? What gives ?
See you next week friends !
Likes
13
Share
@CalimannpackZ
Follow
Sorry I didn’t upload week 5 Ngl it was a bad week i suffocated 4 plants I had to defoliate some leaves because of nutrient defeincies making the plant look diseased I managed to pull through there back healthier again I got a few yellow spots but there goint but other then them 4 there’s some nice bud and bud spots really starting to come through excuse the 4 shittier looking plants and the defoliated skimpy one! Other then those problems that I have resolved I’m happy again last week not so this week happy!!! It’s all trial and error first go I haven’t trained any plants I will do on my next grow definitely!

Likes
8
Share
@valiotoro
Follow
Hello everyone 👋
She grew fast and with a beautiful green colour on the leaves!
She has responded superbly to low stress training and topping & i defoliated her aswell and seems didn't even notice 😎
Wish you all a good day and happy growing 😁


