The Grow Awards 2026 🏆 


Likes
Comments
Share
@Hashy
Follow
Week 1
Light cycle=24/0
Light Power=73w 30%
Extractor controller settings
High temp= 23c
Low temp= c
Temp step=0c
High Rh= 70%
Low Rh= %
Rh step=0%
Speed max=5
Speed min=1
Smart controller settings (during lights on).
Lights on=am
Radiator on= not in use
Radiator off= not in use
Humidifier on= below 63%
Humidifier off= above 68%
Dehumidifier on= not in use
Dehumidifier off= not in use
Smart controller settings (during lights off).
Lights off=pm
Radiator on= not in use
Radiator off= not in use
Humidifier on= not in use
Humidifier off= not in use
Dehumidifier on= not in use
Dehumidifier off= not in use
VPD aim=0.4-0.8
DLI aim=15-18
EC aim=0.4
PH aim=6.2
Fri 22/12/23
#3 (Day 1)
📋 5.00pm Leaves open and working on its 1st set of true leaves.
💧💧💧💧💧💧💧💧💧💧💧💧💧💧💧💧
Method= manual
Neutralise=0.1ml/L
Roots=5ml/L
Feed=nutes
Volume=100ml
Easy Ph down=0 drops/L
Ec=0.36PH=6.3/6.0
Time=10.00pm
Runoff.
Total runoff=10ml
Ec=3.27 PH=5.6
💧💧💧💧💧💧💧💧💧💧💧💧💧💧💧💧
📋 Calibrated ph pens in ph 4/7 solution.
Older pen read 6.8
Newer pen read 7.1
Sat 23/12/23
#3 (Day 2)
📋 Looks ok. Root has hit the bottom of the pot.
H=5cm D=82cm DLI=16.1
Sun 24/12/23 (Christmas eve)
#3 (Day 3)
📋 Still working on its 1st set of true leaves.
Mon 25/12/23 (Christmas Day)
#3 (Day 4)
📋 Merry Christmas everyone. 10.30pm she looks ok. 1st set of true leaves are OK. Started developing 2nd set of leaves.
Tue 26/12/23 (Boxing Day)
#3 (Day 5)
📋
💧💧💧💧💧💧💧💧💧💧💧💧💧💧💧💧
Method= manual
Neutralise=0.1ml/L
Roots=5ml/L
Feed=nutes
Volume=150ml
Easy Ph down=0 drops/L
Ec=0.28PH=6.2/6.2
Time=10.00pm
Runoff.
Total runoff=30ml
Ec=2.94 PH=5.5
💧💧💧💧💧💧💧💧💧💧💧💧💧💧💧💧
Wednesday 27/12/23
#3 (Day 6)
📋 She has a bit of a lean I'd imagine it's from yesterday's watering. 9.30pm decided to stake her as she's nearly touching the soil.
Before changes.
H=7cm D=82cm DLI=15.2
After changes.
H=7cm D=79cm DLI=19.2
10.00pm
Light cycle=22/2
Light power was=73w=30%
Light power now=86w=36%
Lowered light by 3cm.
Extractor controller settings
High temp= 24c
Low temp= c
Temp step=0c
High Rh= 70%
Low Rh= %
Rh step=0%
Speed max=5
Speed min=1
Smart controller settings (during lights on).
Lights on= 02.00am
Radiator on= below 19c
Radiator off= above 20c
Humidifier on= below 64%
Humidifier off= above 67%
Dehumidifier on= not in use
Dehumidifier off= not in use
Smart controller settings (during lights off).
Lights off=00.00am
Radiator on= below 16c
Radiator off= above 18c
Humidifier on= not in use
Humidifier off= not in use
Dehumidifier on= not in use
Dehumidifier off= not in use
Thursday 28/12/23
#3 (Day 7)
📋 H=7cm D=79cm DLI=19.2
She has a major lean on from over watering and is supported enough for now. The single finger leaves are developed and she is working on the next set of 3 fingered leaves.
Conditions have been good for the week.
Back soon.
Take it easy.

Likes
Comments
Share
@squalino
Follow
🛠️ De la Fleur au Hash : L'Art du Dry Sift "Old School"
Quand la fleur ne suffit plus, l'artisanat prend le relais. Voici le résultat d'une transformation patiente et entièrement manuelle, réalisée à partir des restes de têtes de Purple Haze.
Le Processus : La Méthode Traditionnelle
Dry Sift : Tout commence par une extraction à sec rigoureuse pour isoler les trichomes les plus purs, créant ce "sable" doré et volatile.
Pression Humaine : Pas de presse hydraulique ici. Tout a été fait à la chaleur des doigts et par pression manuelle. C'est cette chaleur corporelle qui permet de briser la membrane des glandes de résine et de lier le kief entre lui.
L'Affinage : Le résultat est une Temple Ball lisse, dense et brillante, témoignant d'une belle concentration en huiles essentielles.
Le Résultat : Un Concentré de Caractère
Aspect : Une bille d'un brun profond et huileux à l'extérieur, qui révèle toute sa complexité une fois travaillée.
Texture : Malléable et collante, typique d'un hash pressé à la main avec soin.
Puissance : En concentrant les trichomes, on atteint enfin ce niveau de force qui manquait à la fleur brute. Les effets sont ici beaucoup plus marqués, profonds et durables.
"Rien ne vaut le savoir-faire à l'ancienne pour transformer une petite déception en une grande pépite de collection."
Likes
49
Share
@masterofsmeagol
Follow
5/3 WATERED EVERYTHING WITH A SHOT GLASS. STUNTED PURPLE PUNCH THAT TOTALLY SRIED OUT GOT HALF A SHOT GLASS. Doesn't seem possible but the plants look bigger and better than
they did yesterday. Cups are really drying out fast. Takes a while for it to drink up that little shot glass of water. Sits right on top for a while. I know they'll tell me when they're ready to transplant but I'm planning about a week week and a half until transplant to the 3's. I'm moving my cage and getting supports setup ahead of time. Soil is properly stored. Need to sanitize grow bags and tools. I'm super excited for this year. At least this year I don't have to start out fixing others problems from clones.
5/4 Plants still continuing to grow at a rapid pace. Stunted purple punch is doing better. Plants seem like they are using more water. Soil seemed dry. Ill stop qnd ask my buddy but everything LOOKS awesome.
UPDATE: I stopped and showed my buddy some pictures and videos and after getting some advice I'm considering increasing water intake on the 10th planet and the blueberry cheese. He said I could go up to 1 1/2 shot glasses or even two and he didn't think I'd see problems. Just watch for run off. I figured I'd weigh the dry cup of soil and see what the other plants weigh before I make my decision. This dude has definitely helped in the past and hasn't been wrong. I think either way it would be fine. I got a QUICK peak at them around 3pm and they were all "praying to the sun" and their was company so I didn't weigh the plants considering in that glance they looked even better than before!
5/5 SOMEWHERE HERE I MESSED UP THE DATE AND I CANT SEEM TO FIND WHETE SO IM JUST CORRECTING IT HETE AND MOVING FORWARD. I weighed a dry cup of soil which weighed about 180-190 grams today. One of the 10th planet seedlings weighed in at like 190 so they definitely are getting a dry cycle and need more water. Same with the Blueberry cheese. They were light and are growing like crazy. Thing is they look so perfect I don't wanna change anything. I spoke to my commercial buddy and he said I could increase to two shot glasses without issue he thought. I decided on a shot glass and a half for the 10th planet and Blueberry Cheese Cake. I talked to another grower (my buddies mom whos very familiar with the strain) about Barney's purple punch and I guess they look good and take a while to really "take off". When I weighed some of the purple punch the weight of a small plant was in the 220's. I decided to try 'half a shot glass' instead of a full one for the purple punch.
UPDATE: I watered between 5am and 6am and went to check around 11. It's 11:11 right now! I wish for a successful harvest and healthy plants! This morning the plants seemed a little droopy. It could've been in my head but looking at them after watering and they look substantially better. Leaves up! Praying to the sun! It's not going to be long until the 10th planet and Blueberry Cheese will need to be transplanted. I just want to make sure I've got a solid rootball before I even think of transplanting.
5/6 WOW. Adjusting the water made the plants take off faster! I felt the cups and they want more room! Unfortunately I left my soil in the garage. I'm wondering how long it will take to warm up otherwise these girls would be on their new temporary 3 gallon homes. Purple punch REALLY took off. Might be good to give the soil a day or two to warm up. Tomorrow's my wife's birthday though....hope she likes transplanting cannabis....that was a joke.
UPDATE: I sanitized a tote and mixed 3 part soil fox farm ocean forest, happy frog and 707 in a bin. I then chose the blueberry cheese cake to test for transplant. I was afraid plants were dry but I stupidly went ahead anyhow. I tried the cut the solo cup method and it wouldn't cut down all the way. Anyway u thought i lost that first one but I didn't. Not yet anyway. 45 mins later and they looked great. Still I had put everything away and decided to give the others a few more days. Plus my wife's birthday is tomorrow. I did get some outdoor prep done.
5/7 NO TRANSPLANT SHOCK. All 5 blueberry cheese are in their new homes and loving it. It's my wife's birthday so I'm gonna have to wait until tomorrow to transplant the 10th planet and maybe a couple more for the purple punch. We'll see. Watered the plants in solos. Purple punch got half a shot glass. 10th planet got a full one. Soil should be nice and moist for the transplant. Oh and that ripping the solo cup tip sucks. It NEVER goes all tge way to the bottom and it's like thicker or something down there. Important to have slim scissors or something to snip that tiny bottom piece at the end where it tapers.
5/8 Blueberry Cheese Cake is doing great and doesn't seem like it has any stress. Didn't water. Successfully transplanted 10th planet. Nice white roots. Looks like it's going to be a good year. More wotlrk to do.
5/9 10th planet is looking GREAT! Transplants have gone great this year. Purple punch will be transplanted tonight or tomorrow. I watered the purple punch with less than a shot glass. I'd like to get them transplanted today. I have an idea this is going to be a good season.
UPDATE: Went to the house around 6 and brought in a couple more bags of soil so that I can finish my transplants tomorrow. Team #nowater lol seems to be doing great lol. I'll give then water tomorrow. As long as they aren't doing so good. With everything that's going on seeing these succeed feels great. Healthiest plants I've grown so far.


Likes
237
Share
@1Right_Angle
Follow
Sept 12
- into week 6 of Flower for most of the strains, like Congo #3, Ford pink kush etc
- LSD is heading into week 7 of Flower, with a prediction of 9 weeks needed. Getting close...
- Russian Tzar Bomba is now in week 8. Big dinner Tomorrow, how do you say, The Last Meal w/ nutes. Flush follows
- Green Planet buffet + Amino Acid + Silica + Calimag, like the other two
13th
- russian tzar bomba is in great shape. Here at the start of her Last week in Flower; week 8 as per Nukeheads, she been fed and will be flushed for the next week. Clipped a small bud mid-plant and will scope it this aft. Def Amber, Def Cloud, still clear ones all over. Bloody gorgeous
- her trichomes show a lot of Amber presence and right now its about flushing her. She is ready. Let her dry a bit and flush Thursday and follow-up accordingly. Sunday maybe = CHOP. These buds are real firm and becoming irregular
- picture 13 is from one of the higher concentration spots where amber was found... nice to see, I'm ready at this end
14th
- tomorrow the Soil will be Amended for the Final application: Worm Castings: Bat Guano: Kelp Meal: Bloom Boost fert: Azomite. Scratched-in and Watered through. Volumes are directed at a 15-20 gal pot for the Soil Amendments
- Microbe / Enzyme Tea scheduled for Saturday. Hope to get a bit o rain in between
- turns out the Congo #3 has really gobbled up alot of moisture and she is recovering well from an overwatering
15th
- honduras x Panama, Panama Red, LSD and Black Tunas each had their Soil Amended, after they were fed.
- Panama Red is pushing red/pink hairs all over the entire plant. So beautiful to have 2 pink pistil covered plants, right beside each other. Decadent
- LSD is consuming Overdrive instead of Rezin, and has been for a couple meals. One more on the 17th then thats it.
16th
- its been decided to go and photograph these plants early tomorrow morning. Tirednof the high-noon stuff. Soft light and some Canna-porn ooh aah
17th
- actually got face to face with (Ford) Pink Kush x Vanilla Frosting plant. Its producing a really nice string if Medium-sized Nugs. Looks great and she’s strong and solid
- LSD given her last Nutrient packed meal… end of week 8 tomorrow. Flush is coming in a series of fresh-water rinses… (tues/wed = lites-out. Make the best use of this sun)


Likes
6
Share
@LX1977
Follow
J-64 rinçage eau (pH6.5)
Les Forbidden Runtz sont très collante, petites plantes mais des belles têtes, grosses et compactes 👌
J-66 rinçage eau (pH6.5)
J-67 les Forbidden Runtz seront prêtes pour la récolte de ce samedi. Elles ne montre pas trop de signe de carence malgré le rinçage de plus de 10 jours, contrairement aux Fastberry qui en plus ne sont pas prête.
J-69 récolte des 2 Forbidden Runtz 😁 grosses têtes collantes, dures et très odorantes ! C'est parti pour le séchage.
Toujours en période de rinçage pour les Fastberry.
Likes
145
Share
@biggreens420
Follow
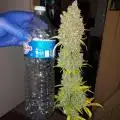
Love everything about this plant will be training better on the next run see if can improve the yield overall easy enough to grow would recommend this is a different strain than what im use to got a nice taste of its own lovinf the rqs strains at the minute .made some bubble hash from the trim and popcorn buds got 25.6 gram of it from ,3 plants and put a vid n few pics of the process on thanks fot following thid journey with me thanks for reading happy growing guys0

Likes
13
Share
@cookingwithninja
Follow
Pretty happy with this grow. Going to either reveg 1 and pop s2 for next or do all s2. Absolute 0 herm through all flower and all plants.
Chopped them. Will try to reveg 2
I am very baked
Likes
4
Share
@sunnykuyall
Follow
04 - 07 May 2023 - Germination Week
08 - 14 May 2023 - Veg week 1
15 - 21 May 2023 - Veg week 2
22 - 28 May 2023 - Veg week 3
29 - 04 June 2023 - Veg week 4
05 - 11 June 2023 - Veg week 5
12 - 18 June 2023 - Flower weel 1

Likes
30
Share
@420DeepGrow
Follow
Gracias al equipo de Anesia Seeds, Marshydro y XpertNutrients sin ellos esto no seria posible.
💐🍁 Captain Future:
Nuestros criadores en Anesia Seeds están siempre en busca de nuevas dimensiones en la genética del cannabis y están comprometidos a ayudar a dar forma al futuro de la cría de cannabis. Después de que nuestra Future # 1 fuera probada varias veces por encima del 37% de THC y se convirtiera en un éxito entre los dispensarios, teníamos claro que el viaje no podía terminar aquí. Después de numerosos intentos, encontramos el socio ideal para mantener o aumentar la potencia y llevar la experiencia de sabor al extremo.
Esta variedad Premium puede cultivarse tanto en interior como en exterior. En el interior, las plantas tienen un tiempo de floración de 10 a 11 semanas y deliever rendimientos de 500-600g por metro cuadrado, al aire libre una planta puede producir hasta 800g
🚀 Consigue aqui tus semillas:
https://anesiaseeds.com/es/product/captain-future/
💡FC6500: Eficiencia líder en el mercado: la lámpara de cultivo LED FC-E6500, que ostenta un estatus líder en el mercado, es una solución rentable con un PPE de 2,8 µmol/J y un rendimiento máximo de 2,5 g/vatio. Ofrece un PPF alto de 2026 umol/S y es adecuada para una cobertura de vegetación de 1,50 m x 1,50 m y una cobertura de flores de 1,20 m x 1,20 m.
Iluminación versátil y uniforme.
https://marshydro.eu/products/mars-hydro-fc-e-6500-730w-commercial-led-grow-light/?gad_source=1&gclid=Cj0KCQjw1qO0BhDwARIsANfnkv9IIrYSbmJqz8PqpJOIyWwJfp5bc3SGJgUV68USLQ4tjmXDYwoBuAsaAue3EALw_wcB
🚥 MarsHydro ADLITE UV/IR/RED:
Para lograr un crecimiento óptimo de las plantas y maximizar los rendimientos es un arte simple que depende en gran medida de las condiciones ambientales adecuadas. Reconociendo las limitaciones de la iluminación natural y las soluciones de iluminación tradicionales para satisfacer estas necesidades únicas, lanzamos ADLITE. Estas luces especiales UV, IR y roja están diseñadas para llenar áreas del espectro, proporcionando las altas longitudes de onda que las plantas necesitan para un crecimiento y desarrollo óptimos.
🚀 Consigue aqui tu Adlite:
https://marshydro.eu/collections/adlite-supplemental-lights/
🏠 : Marshydro 1.50 x 1.50 x 1.80, carpa 100% estanca con ventanas laterales para llegar a todos los lugares durante el grow
https://marshydro.eu/products/diy-150x150x200cm-grow-tent-kit
🌬️💨 Marshydro 6inch + filtro carbon para evitar olores indeseables.
https://marshydro.eu/products/ifresh-smart-6inch-filter-kits/
🍣🍦🌴 Xpert Nutrients es una empresa especializada en la producción y comercialización de fertilizantes líquidos y tierras, que garantizan excelentes cosechas y un crecimiento activo para sus plantas durante todas las fases de cultivo.
Consigue aqui tus Nutrientes:
https://xpertnutrients.com/es/shop/
📆 Semana 12:
Última semana de engorde de este precioso micrófono antes de lavar raices, el aroma es increíble y la cantidad de resina se acumula por momentos.

Likes
5
Share
@Mr_nugs_lover_David
Follow
Se le a aplicado aparte del lst supercroping en las puntas principales mas largas para abrirla y conseguir mas penetracion de luz y mas colas principales,Además se aplica una ligera defoliacion con el fin de q la luz penetre bien en todas las yemas apicales

Likes
32
Share
@ArtisticGrown
Follow
It’s the first week of flower!! I’ve been having troubles with knowing where to foliate and direct the growth with these plants. As 2 seem to be growing faster than the other 2! Over all looking good I think.
Likes
60
Share
@m0use
Follow
Nothing to exciting this week, plants are doing well. Little bit of stretching going on and starting to smell more and more now.
The newer growth is a bit lighter in shades of green then the old stuff. I think this is from me dividing the flowering nutrients into 4 weeks vs all at once as they tend to get a bit of N tox when I give it all at once so this seems to be doing better.
Clones are same old, just waiting for the weather to get nice. Found out that when I use Insect Frass as a fertilizer it's also adding in chitin "a protein found in bugs, crustaceans and fungi" to the soil, when that stuff breaks down it makes chitosan and that can help boost defences against pests and virus in the plant. There are plant additives out their that are pure chitosan in varying concentrations and they use this to make the buds extra frosty. To much can harm the plant though. I also found out I needed to water them a bit more then normal not that the stretch is happening. so they got 6L this week each vs the regular 4L but it was split up in 3 days. In the first bit they got all the additives i normally do and the other bit was just PH'd water, didn't want to over load em.
Big shoutout to Medic Grow for sponsoring the lighting in my tent, They have provided me with 2x Mini Sun 2's in the 240w configuration, They use the v1 growing spectrum that is a all purpose seed to harvest spectrum so their is no hassle of switching it mid grow. If you're interested in learning more about Medic Grow products please visit the web link below.
https://medicgrow.com/
https://growdiaries.com/grower/MedicGrowLED

Likes
2
Share
@smokeycropping
Follow
- LAS PLANTAS YA NO SE ALIMENTAN . Y SE LES HIZO LAVADO DE RAÍZ , EMPEZÓ EL COLOR AMARILLO EN SUS HOJAS Y OTRAS A CAERSE
- NO SE VEN CARENCIAS NI EXCESOS
- el hps de 600 MANTIENE MI AMBIENTE SIN MAYORES INCONVENIENTES
-SALIERON COGOLLOS DENSOS Y RESINOSOS , BASTANTES DUROS SOBRE TODO LOS GORILLA GLUE

Likes
11
Share
@Dirtysouthgrower27
Follow
I super cropped the orange sherbet today & wedding cheesecake wish me luck
Likes
19
Share
@Tropicannibis_Todd
Follow
Alright Then
We just hit week 2 and all is well , have to admit she's ahead of all the others of same age , nice Growth in just 14 days😃 .......
Middle of last week I decided to start a little training by pulling her over to the side 👌
Im happy with the internode spacing but not the branching , begun heavy lst to try and bring the internode branching up👌 haven't decided yet on Topping 👈
Very little water given ,so far and rain water to be used entire growth
Lights being readjusted and chart updated .........👍
👉I WISH GD HAD DISCORD SERVER SO GROWMIES COULD HAVE A PLACE TO HELP AND TALK THINGS RELATED TO GROWING IN REAL TIME.....👈
👉SO I CREATED ONE ALL YOU NEED IS TO JOIN THE GROWDIARIES DISCORD SERVER !!!!!!!!!!!👈
LINK IS 👉
https://discord.gg/zQmTHkbejs
AND SEE HOW IT PLAYS OUT !!!!!!!

Likes
9
Share
@northsweed
Follow
experimental one is going craaaazy, i mean look at those huge buds 😳
----------
as for the main box, well, it's strange to be honest, buds look soo small 😞 both plants are absolutely healthy showing no deficiencies whatsoever, root-balls are absolutely great, so I think the fattening is going to happen in following weeks?
----------
end of the week update:
– experimental box is in the ripening phase = res change to TA FinalPart 4ml/L; also did first under-microscope pictures and those trichomes look awesome! I give it like 2 weeks
– main box is fattening af, wonderful show going on!

Likes
2
Share
@BigGGrows
Follow
This week has yielded positive results from the FIM And LST. I topped the internodal new branching that grew from the FIM job as well this week and the 2 extra tops are growing in response on each branching. She is now under a 4 bulb vivosun T5 6500K fixture and is responding very well to the light changes. Her stems are begging to give off terpines when rubbed. She smells of tart sweet lemons and diesel fuel haha. I am very happy about this grow and am expecting preflower to begin soon.

Likes
15
Share
@All_our_small_plants
Follow
Bewässerung: 500 ml jeden 3 Tag in der ersten Woche
pH-Wert: 5,8
EC-Wert: 0,7 mS/cm
Temperatur: 22ºC
Luftfeuchtigkeit: 50%
Schädlingsbekämpfung: im Moment haben wir keine Anzeichen das es was zu bekämpfen gibt, sobald die ersten Anzeichen da sind werden wir handeln :)
PPFD: 200 µmol/m²/s
DLI: 15 mol/m²/Tag
Düngemittel: COMPO GROW ORGANIC WACHSTUM DÜNGER, Sie bekommen auch ab jetzt immer etwas CalMag von BioBizz zu Prävention. Ab Tag 19 haben wir angefangen sie mit einem Minerlischen NPK Dünger (NPK 7-3-5) zu Gießen .
Besonderheiten: Die Linsen wurden entfernt und wir haben mir dem LST begonnen
-Tag 16 Heute haben wir mit dem LST Begonnen und sie hat sich sehr gut vom Toppen erholt.
-Tag 17 Heute wurde sie Entlaubt
- Tag 19 heute wurden wieder die LST Sticks angepasst damit sie in form bleibt.


Likes
16
Share
@eldruida_lamota
Follow
Esa familia, otra vez actualizamos, vamos con estas Blueberry Cheese de Zambezaseeds.
Finalizamos la segunda semana de floración de esta genética, tienen buen color y buena ramificación y van progresando las futuras flores.
No e comentado pero se les a practicado una defoliación de bajos a ver si podéis ver en el video
Añadimos el BETASHARK de Agrobeta y esta semana no les dimos tetra 9.
Agrobeta:
https://www.agrobeta.com/agrobetatiendaonline/36-abonos-canamo
Mars hydro:
Code discount: EL420
https://www.mars-hydro.com/
Las maximas de temperatura no superan los 26 grados y las mínimas no bajan 20, así que no me puedo quejar.
Los niveles de humedad también son los correctos van entre 50%/65% de humedad relativa.
Por supuesto el Ph lo estamos dejando alrededor de 6.
Hasta aquí es todo, buenos humos 💨💨💨
