The Grow Awards 2026 🏆 


Likes
Comments
Share
@Spliffi
Follow
Heya🤙👍🤙🌱
This diary is going to show you guys my journey being a contender in a local Cannabis Cup🏆
22 Jan 2024
Got the tracking number for the seeds and packaging this morning. LET'S GOOOO!
Jon Dabs
Check them out here:
https://jondabs.com
@jondabs Instagram
The Sponsors
Check them out here:
Dutch Passion
https://dutch-passion.com/en/
Hydroponic.co.za
https://hydroponic.co.za/hydroponic/harvesting-and-growing-accessories/
Bud Juice
https://www.gohydro.co.za
The Best Grow
https://thebestgrow.co.za
Dynomyco
https://www.dynomyco.com
Nuclear Roots
https://www.nuclearroots.co.za
Photronic
https://shop.photronic.net
Special Thanks to Hydroponic.co.za. I buy all my products from them. Best service.
Daily updates coming...

Likes
40
Share
@GERGrowDesigns
Follow
Dear Growers ,
Welcome to Week 6 or Flower week 3 // Day 42-49 from Kannabia Lemon Auto .
Incase of Moving to a New Home . I Decided to skip 3-4 Weeks from every Diarie of the 12x12 Automatic Project . Everything should be Normal in the next Weeks .
Whether you're a beginner or an expert, you are warmly invited to join, ask questions, and share your own experiences along the way!
Project Setup & Conditions:
• Brand/Manufacturer: Kannabia Seeds
• Tent: 222cmx150cmx150cm
• Light: 2x 720 Watt Full Spectrum
• Humidity: 50%
• Soil: Narcos Organix Mix
• Nutrients: Narcos Products
• pH Value: 6
If you want Germinitation results like mine , check out Kannabia Seeds with my link [https://www.kannabia.com/de?ref=61966] and grab the germination device or the strains I used . Trust me – it’s worth it for sure !
Get another 20% Discount at all products using the code [GGD] at the Checkout .
Stay curious and keep up Growing —we look forward to welcoming you back for the next chapter soon!


Likes
48
Share
@Focus420
Follow
Dobrý den a áhoj vítejte v poslednim týdnu kvetení 🤟🌱
Poslušně hlásím proplachuji 4 den 🤗
7 dní schází k dokončení procesu🌱🤠
Květiny vypadají skvěle.👊😉 na první sklizeň teda. AŤ PŘÍŠTĚ VYPADAJÍ LÍP!!!!!!!!!
podle mikroscopu cca 15 - 20 procent jantar trichom☺️
106 den - po proplachu zdá se být vysoká vlhkost 😂 cca 40%
- přidán odvlhčovač👍po 2 hodinách 30%,
107.den 🌱 proplach ph 6.3 ec 0,42👏
108.den kontrola trichomu, průměrně kolem 40 % jantar 😉
mohl jsem o týden víc podávat živiny..
109.den nic nedělám jen se dívám✌️
110.den poslední 3 dny nechám vyschnout vodu a sekera🤫
111. Den video , kontrola trichomu 60% ,zítra sekera🌶️🌶️
112.den sklizeň proběhla dobře ☺️ ted 10 - 14 dní sušení a jedem bomby ,
Barneys farm těším se 🤗🤗🤗
jsem připraven na vaše kmeny !!!🥇


Likes
5
Share
@LeedsCityFarmz
Follow
Nice strain to grow overall especially for the terps it produced, yield was more on the low side as expected from one for these "hype" strains or whatever you want to call them.
Likes
6
Share


Likes
17
Share
@DutchFarmer
Follow
Week 4
Please check the previous Triple scoop i grew
(https://growdiaries.com/diaries/183670-grow-journal-by-dutchfarmer)
Check out my Cannabis Community, please👇like👇, follow, comment, and subscribe to my YouTube channel👇. ❄️🌱🍻
https://www.youtube.com/@DutchF4rmer
Join our discord community for weekly giveaways 👌
(Join the patreon for help advice and mentoring)
https://www.patreon.com/DutchFarmer
(Discord Server)
https://discord.gg/VMu6rH4a7V
IG
https://www.instagram.com/dutchfarmer1/
It will be appreciated! ❤️
Happy Growing 🌱🌱🌱


Likes
16
Share
@Bread_n_Buds
Follow
We have passed the month and we are madly in love with all our autoflowering plants, we have two per strain, one worked with a mainlining adapted according to the characteristics of the plant and one that grows straight, we can't easily give up the main cola.
For now we will show you those worked with the techniques that are more interesting to see and later planted earlier to make them finish more or less together with those that will grow straight and fast.
We really like our Green Cure CBD F1 worked with the Main Lining. It has an average interodal distance which allowed me to bend the lateral branches properly and obtain a great shape. I really like it to see.
So topping at the third internode, main lining, no pruning until the third internode and topping them again so we have multiplied the buds adequately.
The application of the techniques is a delicate moment also for fertilization. Topping slows down the growth of the plant a bit and does not make it require all that Grow fertilizer that is normally recommended. So you have to go really slow and understand when to reduce the nitrogen. Better to prepare the soil with fertilizers to mix with the soil probably. The problem is sweeping now that it is going into flowering, the plant has shown the first fluff, declared the sex, and the fertilizer will soon be needed indeed. You have to swell.
In any case everything is under control and I will demonstrate it to you during the flowering phase. Wait for the Uncle BreadandBuds and see what he does.
Remember the cold temperature makes the girls absorb food much more slowly than in summer so be careful to give the right amount and to dry the plant in maximum 2 days or you risk imbalances.
We are always using soil, feeding and all the recommended additives of Plagron 100& organic we have only lowered the amount of grow in this topping phase for the reasons given above.
---- Decide on the right soil and calculate your fertilizer card based on the soil on the official website.
-- www.plagron.com
Try a seed of this variety that drives us crazy..
---- https://www.zamnesia.io/en/10672-zamnesia-seeds-green-cure-cbd-f1-automatic.html
Description Zamnesia // Zamnesia's breeding team has harnessed F1 genetics to bring you Green Cure CBD F1 Automatic. This autoflowering cultivar is easy to grow, accessible and reliable for all levels of experience. Ready in just 11 weeks, growers can expect impressive yields of tasty buds with a clear-headed effect that's ideal for meditative moments.
All the best that mother nature can offer is on ---- www.zamnesia.com

Likes
11
Share
@Kardo
Follow
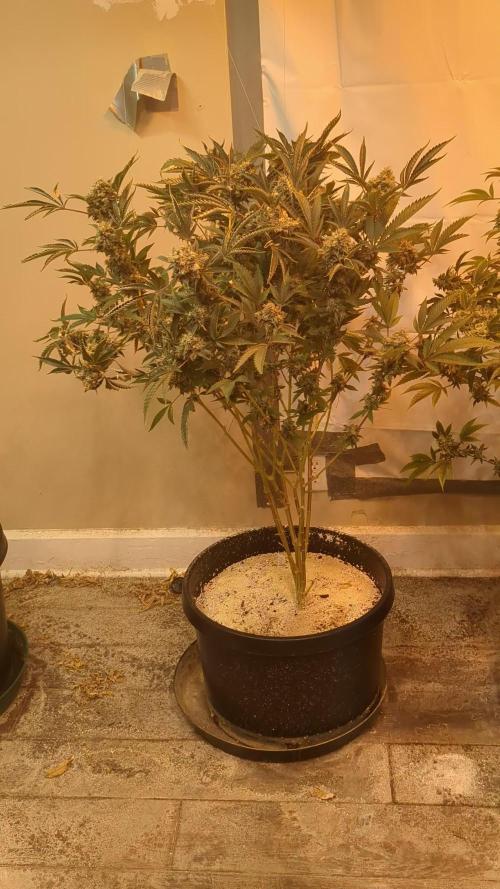
Die trichome sind alle milchig ich warte noch 1 letze Woche und dann kommt die Ernte 😊👌🏻
Danke @skunkydog für die Unterstützung mit vielen Infos
Mein erster Grow und ich bin bis jetzt zufrieden die Blüten sind richtig schön geworden
Likes
20
Share
@PureMedicin
Follow
Scrog installed and the ladies are growing closer to it everyday. One of the pink kush are growing very well and i Hope it have the qualities in flower that im Looking for. Very pleased so far 🙂
Likes
16
Share
@SeshHouseCannabis
Follow
Got the filter that could be used to clean the tap water, so we changed the water in the system to be filtered water and make some upgrade on the system.


Likes
17
Share
@Shugz_Nugz
Follow
This grow went extremely easy, I believe I held off on harvest till week 13
She dried for 7 days around 55-60 RH and 72-75° F could have been better but not the worst
Good moisture level still inside the buds been burping the jars and reloading them letting the RH slowly decrease inside the buds
This stuff gave me 1 gram of rosin off a 3.5 gram press at 205°f
Great returns overall and awesome smell!


Likes
45
Share
@chapadux420r
Follow
Wassuuuup my dudes
21 days into flowering and the results from the lst and defoliation are showing up. Multiple healthy tops and even the small nodes under the canopy are growing bigger, if all goes well I won’t have many popcorn nugs but I’ll have just big buds (let’s hope)
I guess this also means they won’t stretch much more but I think some more height would be good for yield, anyway, can’t complain for the 1st grow and this is a process, there are no perfect grows!
This week was also a week to add some more nutrients (the plagron) and it’s working very well for now!
Let’s wait for the next few weeks, can’t wait to see the fatty buds 😂
Tell me what you think!


Likes
10
Share
@23Savage
Follow
i cut head end leafs in mid week, after one day she start grows and i think it goes goooood sheeeeesh 🤩😂

Likes
149
Share
@CBD_Sweden
Follow
Hi all the happy people here in GrowDiaries.
This is my second cultivation ever and it will be fun to try a bigger space than my closet grow.
First, I'm just going to say I'm done with the construction of my new growroom.
I put some pictures on the construction here in week one.
The room is 2.14 meters by 1.7 meters and has a ceiling height of 2 meters.
It provides a floor area of 3.6 square meters.
I use a 54 Watt Lightwawe T5 for germination and 2 Pcs 400 Watt HPS lamps.
I have a channel fan that replaces the room air about 40 times an hour to get a comfortable theme in the room, the air enters a fresh air intake from the outside.
The air is purified through a carbon filter to then leave the room to the rest of the basement.
Then I use that heat to heat the rest of the basement.
I will use 8 pcs 15 liter Autopots to grow with and a 100 liter water tank that supplies the pots of water and nutrition.
I will grow completely organically in soil and will watercure my buds to get the best possible medicine for me.
But there are no cultivation rooms to be displayed here, so I continue with what is most important.
Today I have put my seeds in my moisture dome and hope the seeds have germinated within a few days.
I am very excited to see how the new growroom will work and how this Blue cheese Auto from Royal queen seeds will turn out.
Blue Cheese automatic cannabis seeds are a cross of Blueberry Automatic and Cheese Automatic that has been perfected over five years of breeding and careful selection. The result is a feminized, autoflowering strain with superior yield, flavor, and effects to either of its distinguished parent strains.
THC: 16%
CBD: Low
Yield Indoor : 325 - 375 gr/m2
Yield Outdoor: 60 - 110 gr/plant
Height Indoor: 40 - 70 cm
Height Outdoor: 60 - 110 cm
Flowering: 7 - 8 weeks
Harvest month: 9-10 weeks after planting
Genetic Background: Blueberry x Cheese x Ruderalis
Type: Sa 35% In 40% Ru 25%
Effect: Cerebral and uplifting
Climate: Mild
..............................................................................................................................................................................................................................................................................................................................................
Update 2017-08-15. All 4 seeds have germinated and planted in small pots inside the humidity dome.
I'm so glad it worked so well and now it's just hoping they'll start growing and become 4 big healthy girls :)
...............................................................................................................................................................................................................................................................................................................................................
Update 2017-08-16. I have mixed my own soil today. Its 40% sieved peat harrow H2-H4 0-30 mm, 45% sieved peat harrow H4-H6 0-30 mm. 5% sand and 10% of compost soil. And i use 15% of perilite and mix it all together.
................................................................................................................................................................................................................................................................................................................................................
Update 2017-08.20. Nr1 and 2 grow and thrive.
Number 3 just got rid of the seedpod and is folding out the sheets.
Number 4 is a bit shy and can only be seen if you look carefully into the soil.
.........................................................................................................................................................................................................................................................................................................................................
Update 2017-08-21. Nr 1 and 2 is doing well. Nr3 is trying to catch up and Nr4 is still shy.
--------------------------------------------------------------------------------------------------------------------------------------------------------------------------------------------------------
2017-08-23. Transplanted 2 girls from humidity dome and the small germinating pots to 15 liter autopots. The other 2 girls have to wait a little more before transplant to the autopots.
................................................................................................................................................................................................................................................................................................................................................................................
2017-08-27. The girls have settled in to there new home of the 15 liters autopot after a little transplant chock. Now the real week 1 starts for me and the girls.
--------------------------------------------------------------------------------------------------------------------------------------------------------------------------------------------------------
2017-08-28. New pic and movies.
---------------------------------------------------------------------------------------------------------------------------------------------------------------------------------------
2017-08-28. Nr3 is transplanted in 15 liter autopot.
-------------------------------------------------------------------------------------------------------------------------------------------------------------------------------
2017-08-29. New movie of the girls. Its no water for 3 days now for Nr1 and 2 so the roots develop more and match the plant above the soil. The temp controlled fan is awesome, its easy to set what temp you like to have in the room. Right now its 28 celcius. And humidity is 56%.
------------------------------------------------------------------------------------------------------------------------------------------------------------------------------------------
2017-08-29.
Hello to you who read my diary, I just want to say that I am pleased that you have chosen to check in with me and in my diary.
I just want to say that I do this for myself and for a steady flow of my medicine.
Everything you read and see in my diary is 100% honest and I will never distort or beautify anything here.
I document my crops so that I can learn from my mistakes and also to look back at those different crops.
I try to update with pictures every day and with text if something special has happened in the garden.
This is my strainhunt for the best medicine and the beginning of my journey with cannabis and the cultivation of it.
-----------------------------------------------------------------------------------------------------------------------------------------------------------------------
2017-08-30. Cleaned the room this morning, just vacuuming and cleaning with chlorine solution. Im testing the fan to control temp and humidity, it works great.
Added some pics with measurements and movie. Everything is looking great right now.
---------------------------------------------------------------------------------------------------------------------------------------------------------------------------
2017-08-31. New pics and videos.
---------------------------------------------------------------------------------------------------------------------------------------------------------------------------------
2017-09-01. New pics and videos. Gave each of the girls with 2 ml Alg-A-Mic, 4ml Bio-Grow, 4ml Bio-Heaven and 10 ml Formulex mixed in 2 liters of water.
I hope they like it :)
-------------------------------------------------------------------------------------------------------------------------------------------------------------------------------------------------------------------------------------------
2017-09-02. New pics and the girls liked the water and nutrients yesterday.
-------------------------------------------------------------------------------------------------------------
2017-09-03. New videos of the girls this morning. Nr1 and 3 looks great and nr 2 is looking a little funny, maby a little stressed.
Kl. 16.00. Did some defoliation on the girls. Added video.
Kl.. 23.00. New videos, defoliation and leaftucking.
-----------------------------------------------------------------------------------------------------------------
2017-09-04. Kl. 11.00. Week 3 starts. Trying to LST the girls and defoliate/leaftuck. New picks.
KL 23.00. New video.
--------------------------------------------------------------------------------------------------------------
2017-09-05. KL 08.00. Cleaned the room this morning, just vacuuming and cleaning with chlorine solution.
KL 12.00. The girls got 2 liters of water each with nutes in it, added a video.
----------------------------------------------------------------------------------------------------------------
2017-09-06. KL 08.00. The girls woke up after their beauty sleep, the leaves are always a bit down after 6 h of darkness, but they will stretch now when the HPS lamp starts.
Everything looks good and I keep trying to tuck the leaves so they get the maximum amount of light where needed. Added pics and video.
The Nr 3 girl is still a little bit behind the other 2 girls and all the 3 girls look like there 3 different pheno of the same plant.
KL 23.30. Did some LST.
----------------------------------------------------------------------------------------------------------------------
2017-09-07. Day 21 from sprouting, Nr3 is 17 days from sprouting. I have never tested PH in my grows, when growing organic in soil iv learned that it adapt PH by it self. But im curious by nature so i had to test.
Kl 10.00 Tested PH in the soil, it was 6.9 and tested my tap water and it was 6.8. Added a video of the girls, its 10 H after defoliation, LST and leaftucking. I think its looking good.
Kl 22.30. New pics.
Processing
Likes
18
Share
@Silverback_Guerilla
Follow
10/19:
This morning when I opened up the closet I wanted to rearrange a little, but they were so packed in, it was almost impossible. So, I went up in the attic and ran some cables and hooked up my other 200w light in the top section. I moved the 4 smallest plants up there and it created a little bit of desperately needed space in the lower section...but I still doubt very seriously that I'll be able to grow all 15 to completion in there..it's only 14.5 square feet of space!😳
10/20:
I foliar fed everybody with some SP-90 humic/fulvic acid and kelp me kelp you today. They will probably get fed again tomorrow. Drying out quickly-
10/21:
I applied Axiom again today..I sprayed a whole liter of the finest mist I could produce..tops and bottoms of all leaves to the point of runoff.
I fixed up a 5 gallon batch of nutes and fed everybody about a 1/4 gallon each.
Later the same day....
Several of them look very overwatered..and it's mainly the plants in the back in fabric pots that have seen a grow or two. I think my pots are mainly just too close together for airflow to dry the bottoms out well enough.
I put another big fan in the closet and turned off the evap cooler for the night.
10/22:
Most of them look better this morning, but a few are still droopy, so I used a stainless steel skewer to poke a thousand little holes in the lower part of all the fabric pots in the garden to try and improve oxygen availability to the roots. I also carefully arranged the garden so that there are gaps between all the pots. I think I'll also space my waterings a little further apart. The topsoil is drying out well enough, but I don't want their roots sitting in muck.
10/23:
Several of them are flowering now, and starting to stretch a little bit.
I raised the lights about 2 inches today and dialed the ac infinity's high temp trigger up to 88f for a bit to get them to dry out a little faster, so the RH climbed a little higher as well...so I also set the ac infinity's high humidity trigger threshold to 65%.
After observing signs of nitrogen toxicity on several of them, I realized that I made another rookie mistake...(where is my head??)
The new 5 gallon bucket I'm using to mix a batch of nutes must be about 2 inches shorter than the one I had been using, and I never bothered to calibrate it....which I did today. So, for the past couple of feedings, I've been mixing in enough nutes for 5 gallons, but in only 4 gallons of water!!!
I foliar fed them with BoomBoom Spray and gave them about 8oz each of boomerang and cal-mag early in the morning, and by 5pm they all looked happier. I'll give them a little drink of plain water tomorrow, then start them on flowering nutes the next day.
10/24:
Several are starting to stretch now...and all but one are flowering.
This morning I fed them another little dose of boomerang and cal-mag, and also added some bembe and open sesame to the mix.
This afternoon, I foliar fed everybody very thoroughly with some humic/fulvic acid, seaweed extract, yucca extract, and big bloom (for the earthworm castings and minor and trace elements)
I repotted the dwarf in a smaller container and gave it to my son. He's a bonsai enthusiast, so it's right up his alley...that's one less plant to deal with!
10/25:
This evening I mixed up 5 gallons of pretty much everything except grow big. and gave everybody about 1/4 gallon each. I plan to flush them with sledgehammer on Sunday or Monday and only do foliar feedings like BoomBoom spray and fulvic acid until I resume normal bloom feeding mid-week.
Because I've had such a good veg, I'm pretty sure the maximum number of plants I'll be able to fit into the lower section is 13...and maybe only 12. So, that will be my 4 or 5 shortest plants in the area above..in which case, I'll need more light...
I think the new UVB light will have to wait until my next grow because I've got so spend a couple hundred bucks on seeds to be able to start another batch right before my current run finishes.😖😞😩😡
Likes
51
Share
@KingSalomonsWeed
Follow
17.11. Day 43 Blüte 8
Hallo.
Sie ist jetzt die Größte im Zelt.
20.11. HST in diesem Fall habe ich ihre Makkaroni dicken Äste und Stamm zusammen gedrückt bis es Kracht und splittert.
21.11. Invasion der Thirpse Teil 4..
Die Antwort: Arnold Pyrolitenegger.
22.11. noch 51 Tage Blüte...(oh shit)
23.11. Pyrolytenegger. UND was ne Genetik. Der Stamm ist dick wie eine Maispflanze.
