The Grow Awards 2026 🏆 


Likes
Comments
Share
@DankyGenetics6661
Follow
I'm midway through the ninth week she is almost done probably a week left ATM I am just flushing her with H20 and a tbsp of molasses... I know on my next grow of Strawberry Gorilla from FastBuds I will be ordering another light of the same brand just one more 1000w and that would be the perfect amount. The buds are extremely sticky and smell like heaven they are turning purple the leaves are I'm thinking I need to water one more time and let that be it but the bud production is insane. I've learned a lot and I do plan on starting a Craft Cannabis grow... Proverbs 11:1


Likes
20
Share
@cpt420
Follow
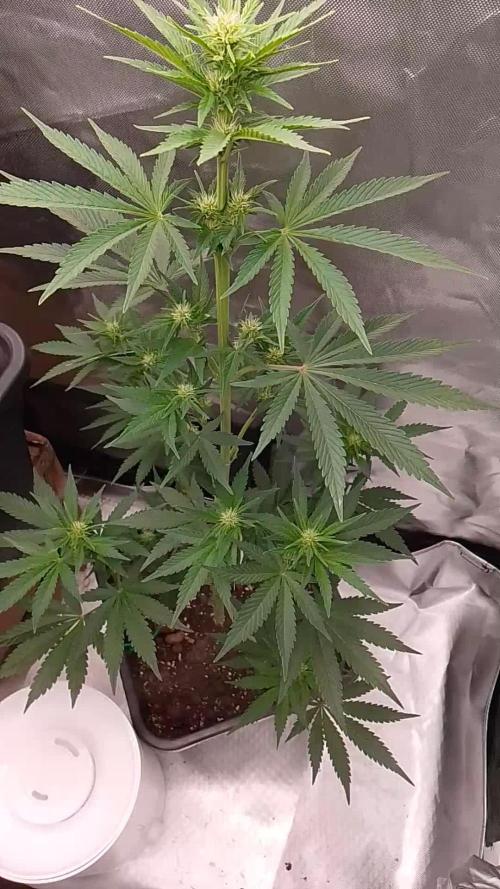
Last week of flowering then switching to 12/12 light cycle. Put the other plant into a bigger pot. Roots looking healthy and plants are still loving the nutrients.

Likes
7
Share
@Chubbs
Follow
Weekly update on these beautiful ladies. They're starting to stretch upward and started the preflower stage. Seeing no issues from the transition from Athena Grow A&B to the Bloom A&B with some added P&K. I did a light defoliation taking off the lower fan leafs and really anything at the soil level. All in all Happy
Likes
6
Share
@Plantinator
Follow
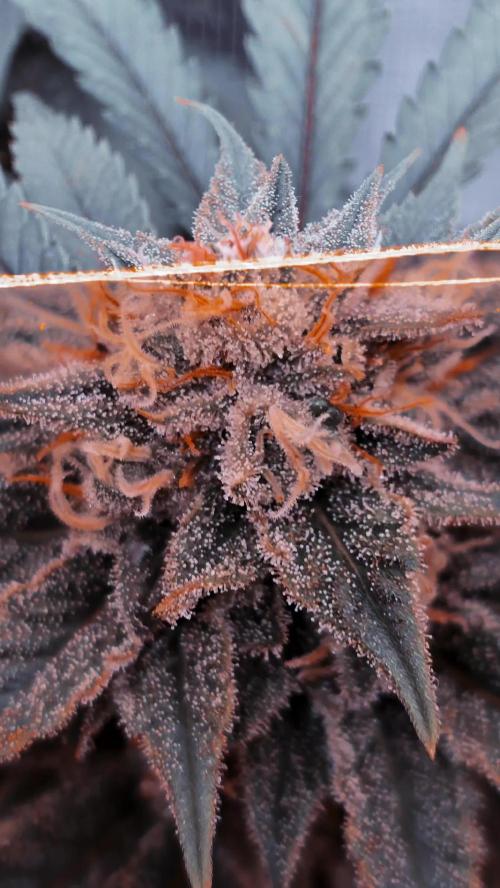
The pistils are turning brown and I’m checking the trics daily.
Flushing comes soon.
Lowered the DLI to 38, maybe I will go even lower this week to keep the terps and to avoid foxtailing.
Likes
26
Share
@Probation2Propagation
Follow
Week 3 of veg and we have topped and started our LST. We are watering every other day with dechlorinated tap water PH’d at 6.2. We use recharge once a week with our waterings usually after inducing stress.

Likes
18
Share
@valiotoro
Follow
Hello everyone, all good for this week 😎
They grow fast and with a beautiful green colour on the leaves!
In this grow i will be testing out Plagron Nutrients and Spider Farmer SE7000
Strawberry Gorilla from Fast Buds 🍓🦍
Likes
22
Share
@Ieiogrow94
Follow
Eccoci qui,
Purtroppo sono stato fuori ed ho lasciato il box aperto sono entrati dei ragnetti sulla strain 1 subito eliminati!!
Purtroppo ci hanno attaccato questa genetica fantastica vedremo il risultato a breve!!
Grazie a tutti per il supporto


Processing
Likes
28
Share
@No_Clout
Follow
Wasn’t planning on popping this seed but it feels wrong leaving an empty space in the tent so I thought why not, never done OG Kush before so I need to know if I’m missing out.
Strain: The OG#18 - Reserva Privada
Nutrients: Mills Nutrients
Medium: DNA x Mills Coco & Cork
22/02/19 - this bean germinated so fast it was unreal at least 1/2” tail within 24hrs of just being in the water & after 48hrs it was at an inch but twisted around itself but it did break through over night but again also has the wax holding the leaves together but over sprayed with ph’ed water.


Processing
Likes
28
Share
@TrueNorth
Follow
-Strain: Purple Lemonade - Fast Buds
-Tent: 5x5 Gorilla Grow Tent
-Lights: Budget LED Grow Lights 2 x 250 Watt
LED Full Spec/Red Spec mixed boards
-Light Cycle: 18/6
-Soil: Fox Farm
-Air Circulation: AC Infinity Cloudline T6 Inline Duct Fan
WECLOME BACK GROWMIES! Week 12 here with our PURPLE LEMONADE by Fast Buds!
February, 09, 2020 (DAY 78) - YOO GROWMIES! Welcome to week 12 of our PURPLE LEMONADE! week 6 of flower to be exact! she is just thickening right out, i cant believe my eyes daily. she is just exploding even when i think it wont anymore. and to think there are still 2 weeks or so left..... she is still a thirsty and hungry one. she has about 5L with food every other day lol.
The smell is such a sweet citrus, i love when i touch it by accident and i get SLAPPED with that wonderful smell. The nugs have hues of purple nothing to crazy though!
February 12, 2020 (DAY 81) - WHAT UPPPPP!!!! here we are folks another update. think she is getting flushed starting this weekend. this will be the last feed then its onto that FLAWLESS FINISH by ADVANCED NUTRIENTS. hopefully im making the right choice......maybe another week wouldnt hurt....
Likes
41
Share
@CannaTrope
Follow
I was selected to test some of Fastbuds new genetics. Seeds germinated and 4 days later it broke ground and is looking great.
This grow is in my 4x4ft grow space located in an uninsulated shed. Each plant has a dedicated 150-200w LED from Viparspectra or Mars. Winter Temps in my area spike to -15C or more in Jan and Feb, so this will be an interesting and challenging grow. The grow room is 20-30C above ambient temperature, so there is a little manual and auto manipulation of grow Temps. See my video
Lights 50-75%, 30 inches, 75-120w per plant
Soil temp: 21-25C
Light cycle: 5:1
Air temp: 18-27C
Likes
13
Share
@TrialAndErrorGrows
Follow
Week 9
Didn’t do anything this week except water the lady’s. My telescopes batteries died so I can’t take pics of the tricomes. Rest assured they are nice as hell. They are a massive mix of colour. You see purple, cloudy yellow and amber. Super excited to puff on these nugs!!

Likes
8
Share
@Calidoniacartel
Follow
First week under the Lumatek 600 Pro set to 50% and aporox 40cm away from canopy.
Day 7 applied some pruning and supercropped the few taller girls to even out the canopy.
I will add a CO2 bag next week as i increase the power to avoid potential light stress.


Likes
34
Share
@Grow420pice
Follow
Woche 9 Tag 63
Letzten Wochen sind im gange...
Purple Lemonade wird ab heute eine Woche gespült bzw geb ihnen nur noch ph Wasser. Ernte bei Tag 70
Blue Dream bekommt noch eine weitere Woche. Wird immer noch fetter! Es wird denke ich mein bisher bestes Ergebnis, mit dieser Box sein. In Bezug auf Quantität. Schätze so mit 400g trocken.
12.06.2021
Der Duft ist fantastisch!
Purple Lemonade ist so gut wie fertig! Trichome werden Bernsteinfarben, beginnend an den Sugarleaves. 80/20
Blue Dream wird immer noch fetter und beginnt zu Reifen. Trichome noch klare und milchige.
Mittwoch 16.06. werd ich die Lila Limonade hacken.
Blue Dream geb ich noch eine zusätzliche Woche... Die benötigt sie auch um einigermaßen bereit zu sein. Evt auch 2 Wochen.
🌱🙏😎
Processing
Likes
8
Share
@Max1973
Follow
Day 35 - few pics and vids..... everything going along nicely 👍
This is a pretty big update, so i'll add to it over the next few days, as i
finish building it all....
i'm building these 2 x SS haze, the full tent, just finishing up the setup.....
trimming them, changing solutions to 12/12 and flower.....
changed the exhaust fan and filter setup to the better outside the tent method....
and installed 12v CPU computer fan, lol ("alta9" fits in 4in ducting perfectly), drops wattage on extractor fan.... 10w tops...
got a few kg of active carbon and making/replacing the carbon filter ....
i'll add afew vids of the new setup in afew days...
Day 36 - few pics/vid of new tent setup...... "alta 9" fan :)
post tomorrow after i finish trimmin and settin up night mode etc......
and into tomorrow we go, lol ... Day 37....
slowly getting there..... little bit more to go...
this should make things abit more interesting..... right tank (short babie) has : 19 lts of tap water @18oC + 150 ml -dutch master one gold FLOWER.... 6.4 PH - 1400 PPM
left tank has : 19 lts of tap water @18oC + 50 ml of elements a and 50ml of b and 10 ml of nitro and 20ml of Crystalic (molasses/pot) .... 6.5 PH - 1200 PPM
more pics / vids of the finished tent setup.... roots, transfer, etc... Day 37 is alot of vids of the clean and change to flower.....
edit - day after build noticed left tank (nutrifield) not enough bubbles..... pulled out the 4 air pump and swapped to the 2 x original oxipumps...
much better, also to fix the problem with ph goin high, and bubbles not stirin the mix, was to add another 10ml of crystallic and another 5ml of nitro...
then pumped both tanks with ph down and set em to 5.8-6.2 - both plants have fully recovered from the big trim, and bounced back within 12-24hrs,
post pics/vid in abit.....
Day 39 - made a freaky video... was curious about what the plants would see looking up at the lights...
the lights and buzzing of air compressors and bubbling tank water, and dazzling lights turned out pretty cool in vid editor,
was in selfie mode....
and final vid of the bounceback from trim :)
👍😎


Likes
8
Share


