The Grow Awards 2026 🏆 


Likes
Comments
Share


Likes
41
Share
@Jjthejetplane79
Follow
All jarred up. This stuff is amazing tasting. Super smooth and tastes like real strawberry. 10 out of 10 fastbuds nailed this one.

Likes
34
Share
@Maggie_de_Block
Follow
started flushing, plant should be ready in about a week
nugs are still fattening up a bit with some new white pistils
some of the trichomes on the leaves are turning amber, waiting for the trichomes on the buds to turn completely milky and then she should be ready for harvest

Likes
3
Share
@weedelicious
Follow
Hey ihr Grower, sind am Tag 79 angekommen. Den Mädels gehts super! Blüten werden immer größer. Temperatur noch bei 23C und die LF habe ich etwas runtergedreht und auf 45% gestellt. 2.5L Wasser mit Hesi Bio-Bloom bekommen sie alle 3 Tage, mit einem Ph-Wert Zwischen 5.5-6.0. Die Lumatek 200W Pro ist nun 30cm entfernt und auf 100% gedimmt.
------
Tag 80 angekommen. Nachtbilder. Den Mädels gehts super! Blüten werden immer größer. Temperatur noch bei 23C und die LF habe ich etwas runtergedreht und auf 45% gestellt. 2.5L Wasser mit Hesi Bio-Bloom bekommen sie alle 3 Tage, mit einem Ph-Wert Zwischen 5.5-6.0. Die Lumatek 200W Pro ist nun 30cm entfernt und auf 100% gedimmt.
---------
Wir sind an Tag 82 angekommen. Den Girls gehts bestens! Blüten werden immer noch größer. Temperatur bei 23C und die LF ist auf 45% gestellt. Der Heizer von Spider Farmer macht eine super Arbeit - Temp. und LF noch konstanter. DDD bei 1.5.
2.5L Wasser mit Hesi Bio-Bloom bekommen sie alle 3 Tage, mit einem Ph-Wert Zwischen 5.5-6.0. Die Lumatek 200W Pro ist nun 30cm entfernt und auf 100% gedimmt.


Likes
5
Share
@Mr_nugs_lover_David
Follow
This is mt favorite sativa dominant strain, I had the chance to grow her before and each time has the same fruity cocktail 🍹 aroma very sweet and fruity, gives you tropical vibes, and it's fantastic the quantity of quality resin glands that she's able to produce, very good strain as always from Royal queen seeds, I'm growing another 2 plants of haze berry in a diferent run right now, I just love that aroma of her, stay tuned to see this ladies from start to finish! Can't wait! 🔝❤️💚💛


Likes
29
Share
@GrownwithLED
Follow
The KRITIKAL-K from Kannabis Seeds grew very well with lots of side-branching and developed HUGE buds. The plant KK#1 had the BIGGEST harvest amount from any single plant, this one plant harvested 92,1 gram of dry bud! Unfortunately the plants also develop a huge amount of leaves on the buds, therefore she is lot of work during harvest time. The dried buds have mildly spicy aroma to it and smoke very smoothly. The potency is above average and helps well against my back-pain. All in all a nice daytime smoke and a HUGE HARVESTER!


Likes
14
Share
@Northfork
Follow
8-31-25 all of the girls are doing good no big problems. All of the girls are getting heavy with buds. Really frosty looking really good. Should be about 6 weeks out from harvest.

Likes
30
Share
@Silverback_Guerilla
Follow
11/9:
I fed them today. Started tapering off the One. Stopped giving Beastie Bloomz and started them on Cha Ching, plus the normal doses of silica, signal, and sweet & sticky.

Likes
74
Share
@AsNoriu
Follow
Day 82. First of two is down.
Day 88. Second down. Both will be decent by weight and structure, but smell and taste .... maybe after cure ? ;)))
Day 92. First went to jars. Will be hard to keep fingers away ... ;)))
Day 98. Both in jars ! 170 g of my very likeable smoke ;)
Will update later
Happy Growing !!!


Likes
19
Share
@Naujas
Follow
everything turned out very well :) and it's only with 50w and with 40x40cm space :) It was an interesting journey with her, a slightly different cultivation and old mistakes were discovered :) the flowers are not dense, but they are really very, very sticky :) I'm happy:)
Likes
15
Share
@Duggster
Follow
Ran into a lot of problems this week unfortunately. Some of buds developed a fungus(botrytis). Don't know how to stop this as I'm growing outdoors. Nevertheless, the buds that are clean are growing nicely. Hopefully into the home stretch of the grow now.

Likes
6
Share
@JoseTodoLoco
Follow
I am not that happy with this grow, plants are too small :( I have been very careful this time but looks like something I am doing is not right

Likes
21
Share
@SmithicusAlbertaCanada
Follow
Brown leaves, decent sized buds - that's the name of the game right now - Bertha is still looking the strongest. This first run with the new tent and auto pot system has gone better than I expected, and I'm glad to have worked out some of the kinks, still lots of room for improvement. Thanks for taking a look! 🙏
Likes
34
Share
@RFarm21
Follow
Boas growmies! Tenho dado uma alimentação alta por causa da deficiência de nitrogenio para ver se melhora.
Alimentada dia 12 de Dezembro, nutrientes misturados em 2l de água. Runoff pH: 6.3/ EC: 2.10
Já se.comeca a sentir o cheiro delicioso desta strain.
Likes
5
Share
@Libanese
Follow
The weeks go by, the buds get thicker… at least once a week I have to defoliate to let the light pass through.
I'm curious to see the final harvest, I can't quantify a possible yield…
This will determine how to set up the next cycle.
A new tenant has joined our friends


Likes
28
Share
@Chubbs
Follow
420FASTBUDS
FBT2307 Week 8
These 3 ladies are growing great. All at different stages of flower seems like. Stacking nicely in-between nodes. No really big issues and still feeding nutes every 3rd watering. All in all smooth sailing. Happy Growing


Processing
Likes
9
Share
@Kushizlez
Follow
Day 60F
The PM on the cheese has gotten significantly worse in the last few days. I think it may have something to do with the constant humidity spikes every time I water. I haven’t been running my humidifier at all in flower so maybe it’s having trouble keeping the RH up during lights on. Just another reason to follow a daily watering schedule. The cheese and slurricane look fucking disgusting and I’m starting to doubt that a peroxide wash can totally fix it. It worked well for my outdoor crop so it should be fine but this time there is probably 3x the amount. I’ll make sure to really soak the buds and rinse them off good.
Bbb#1 is flopping over like crazy from the weight. Too late to stake it up now so hopefully it holds until next week. Starting to foxtail a bit but nothing too bad. It is now 100% done and ready for chop.
Bbb#2 is just getting frostier and frostier by the day. The purple fade is really coming along nicely too. Might reveg. It is now 100% done and ready for harvest.
Black garlic #1 is finally filling out! I can’t believe it. Never heard of a plant packing weight on like that in week 8. The breeder did mention that it packs on weight later but I’m stunned. Taking her to 9.5 weeks.
Black garlic #2 is looking very average. Average color, average size buds, average frost, average smell, probably an average yield. And it’s starting to get a bit of PM. Overall not happy. Will be taking her to 9.5 weeks.
Zkittlez #1 has pleasantly surprised me. It was a bushy runt in veg but came through. It’s the third frostiest in the tent, super dense, stacked tight, smells great and looks great. It’s already got a nice amount of amber so it’s 100% ready for chop.
Slurricane #4 looks insanely frosty even under all that PM. If I can’t wash it off it’s going in the trash. I want to chop this asap but have to cut everything at once unfortunately. It’s 100% ready for harvest.
Badazz OG cheese is looking like a decent yielder but doesn’t have much else going for it. I think it still has some filling out to do. I can’t even smell the final profile change yet. The leaves are rotting off very quickly. Taking her 9.5 weeks.
I don’t mind harvesting a bit later rather than early. From my outdoor experience, when a plant is picked early it smells like hay and wet grass clippings until it’s been curing for 3 weeks. When I harvest late or at 30-50% amber trichomes it smells like same scent profile it had when growing. Just my experience.
I’ve read that the tobacco industry adds calcium and potassium carbonate to their crops to help promote fire holding capacity and to increase the whiteness of ash. Turns out some of the organic amendments I bought last week contain exactly that. I’m going to give each plant a light top dress to see if the tobacco industry is onto something.

Likes
14
Share
@Wenz004
Follow
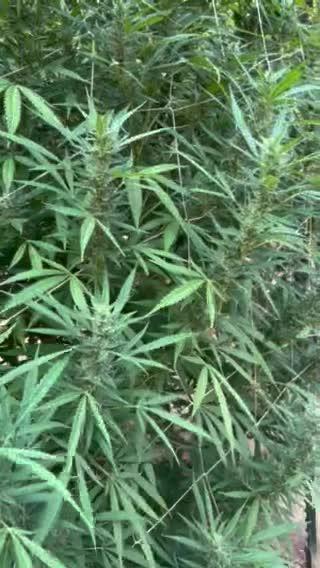
F-MILF takes 70 % of my tent now...wtf
Hope all this green gives some good buds at the end.
Deficiency from last week is under control...added some Silicate from TA...no idea if that helped or anything else...of course...there is too much light photons for the above area...but wtf I cannot do the plant smaller...lamp is on 75% now und lower would be bad for lower buds.
NL untopped (F-MILF) getting this week:
(TA nutrients mentioned above are for NL topped from other tent...pictures follow)
Aptus Topbooster 6 drops/l (increased)
Aptus P-boost 12 drops/l (increased)
Aptus regulator 3 drops/l
Aptus All in one 0.6 ml/l
Aptus CaMg 0.6 ml/l
TA Silicate 0.4g/l
4-6 litre each day nutrified (thats a real problem) F-MILF cannot get enough...just makes me poor that fat big milf

