The Grow Awards 2026 🏆 


Likes
Comments
Share
@MiyaguiOkPolilla
Follow
Hola amigo!
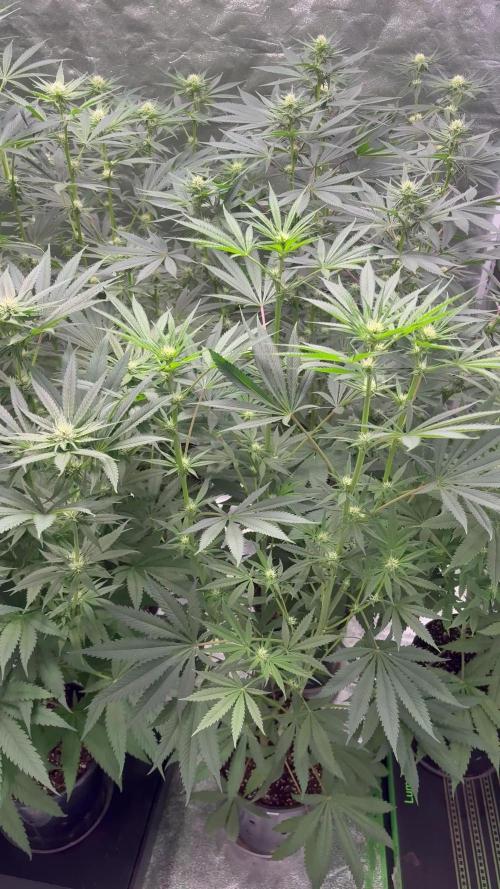
💐 Quinta semana para estas Dos Green Crack F1 Automatic. 💐
_ CRIADERO DE ERIZOS _
Plantas bien rápidas, muy contento con cómo funciona.
La línea de @xpertnutrients en el orden adecuado es muy estable! Trabaja en sincronía con el suelo vivo del fondo, que contiene la poca humedad de la maceta textil. Algunos tréboles quieren brotar en el bajomundo del sustrato pero el poco riego les limita.
Ph: 6.1-6.5
EC: 700 PPM 020+/020-
HR: 65% 5+5-.
C⁰: 19-26%
Manta térmica 24 x 7 con plato.
. !! 19 hs 2 x TS600 + 18 hs 100watts led max dim !! .
Los soportes laterales se encienden antes y se apagan más tarde que el led central en el ciclo lumínico diario 🤜🤛 🌅🌄🌌
PREGUNTA IMPORTANTE:
Debería poner una lampara central más potente a partir de la cuarta semana de floración? Que recomiendas?
Saludos gente buena y mucho ánimo a todos! ✌️

Likes
20
Share
@eldruida_lamota
Follow
Vamos familia, aquí traigo la 3 semana de crecimiento de estas Lava Cake de Zamnesia.
Y es que vaya ritmo y que sanas que se ven hasta ahora no me puedo quejar, se realizó el respectivo trasplante a su maceta definitiva.
Añadimos flash root, tucan ,gold Joker y la base de crecimiento de Agrobeta , (Blue line).
Aparte aplique tetra 9 de Agrobeta de manera foliar.
Os comento que tengo un descuento y para que compréis en la web de Zamnesia de un 20%, el código es ZAMMIGD2023
The discount 20% and the code is ZAMMIGD2023
https://www.zamnesia.com/
Agrobeta:
https://www.agrobeta.com/agrobetatiendaonline/36-abonos-canamo
Mars hydro:
Code discount: EL420
https://www.mars-hydro.com/
Espero que lo disfrutéis, buenos humos 💨💨
Likes
4
Share
@eldruida_lamota
Follow
Que hay familia, vamos con la tercera semana de floración de estas Runtz de Zamnesia y empezamos con riegos intercalados cada 48 horas controlando siempre el Ph, que ahora mismo lo dejamos en 6.5
Temperatura y humedad dentro de los parámetros correctos.
Seleccioné de las 5 plantas, 3 , que creo que son los mejores ejemplares que por el momento están creciendo bien y tener tienen un buen color, se ven bien sanas, todo normal hasta ahora, ya empezaron a formarse las flores, están increíbles.
Vamos viendo cómo progresan. Hasta aquí todo, buenos humos 💨💨💨.
Likes
16
Share
@DeepWaterGrower
Follow
🗓️ WEEK 3 / DAYS 15-21 (flo)
💧 There is no changes to the DWC solution this week. The EC, pH, and her daily water uptake all remained identical to last week.
🌱 The third week of flowering began with a substantial defoliation session. The plant was becoming incredibly bushy, and this could be counterproductive later in advanced flowering, both for light exposure and for managing humidity levels in the grow box. She's continuing to develop her preflowers nicely, and absorbed the stress in a couple of days. She's still stretching too, going from 42 cm to 54 cm in height this week.
Likes
9
Share
@Smokwiri
Follow
Welcome to my 2nd diary within diary.
The first diary is already harvested.
The second one has been in veg for about 20 weeks, while it was in veg, i trained it with lst and hst, now we are a in flowering for a couple of weeks.
Third diary will come within this diary too, i took a monstercrop clone, it's revegging now, curious of the outcome, since this strain already has tight internodes on the branches.
Well, this looks good, looks like shes loving the lights, gave some green sensation booster this week.
Let the buds fill up a bit...

Likes
9
Share
@shabazz411
Follow
Final month of veg left all are still healthy and bug free ,another 2 weeks and will start flush them and reduce feeds to 1/2 dose then none the last few weeks

Likes
36
Share
@PureMedicin
Follow
Had these 2 girls from a friend growing them in the window. He cannot finish them so i put them in my tent that just have finished 4 other girls the same day. Cannot wait to grow the fat banana especially.
Growing them under Mars hydro epistar 80 and added another 110 watt cfl to the grow. Doing one 12/12 from seed
They are suffering from over watering in most of veg so i am starting out with a dry period before giving them the first Bloom nutrients

Likes
13
Share
@GrowGuy97
Follow
Got everything moved around & the new carbon filter, fans & lights so hopefully I got better coverage with less power👍🏼 Topped 1 of the Gelato OGs today was getting way taller than the rest we will see how she bounces back! Everything else seems to be going great!
Day 22 topped & trimmed them up a bit
Day 23 started LST on a few
Day 24 started mainline on one of the GZ
Day 25 trimmed them a little more today


Likes
20
Share
@Ganja_Victoria_Aus
Follow
Unfortunately I have to change the dwc sysyem. Why, Emerald Harvest ph fluctuation are to rysky. Plant cut at the 2 node. Main lining at the 4 nodes. Ready this week to cut and accive 8 nodes. Aming to over 60. Wish me luck 🎲


Likes
1
Share
@Ninjabuds
Follow
Week three of flower is off to an amazing start! At day 22, the ladies are looking incredibly healthy. They're praying like crazy, reaching for the light, and stacking nodes like it's their job. The buds are starting to plump up, and the trichome production is getting intense. I'm so excited to see how they develop over the next few weeks!


Likes
12
Share
@ELPIRATA
Follow
DIA 50; Comienza una nueva semana, durante estos dias habia tenido problemas con la humedad; dia 25 se instala Deshumidificador
El día 25/06/2020 se han regado 3 plantas en macetas de 11 litros:
X2 Semillas Auto Lemon Kix= 1,5L [1MlBLOMBASTIC+1mlKnactive+3ml/L ATAGrowth-C+5mL ATAFlower-C+] PH 6.4/ EC=1.84Tº=23
X1 Semilla Auto Tutankhamon= 1L [1MlBLOMBASTIC+1.5mlKnactive+5ml/L ATAGrowth-C+5mL ATAFlower-C+1mLAutoTop] PH 6.2(?) / EC= 1.84Tº=23
*El día de hoy se han regado 1 planta en macetas de 7 litros:
X1 Semillas Auto Lemon Kix#3 = 800 ml [1MlBLOMBASTIC+1mlKnactive+3ml/L ATAGrowth-C+5mL ATAFlower-C+] PH 6.4/ EC=1.84Tº=23
*Se comienza a usar Bloombastic en semana 6, dia 42 (0.5 ml/Lt)
Me gustaria realizar foliacion en esta etapa, sera recomendable ?


Likes
44
Share
@RakonGrow
Follow
Note : jegliches Zubehör wird in der GermniationsWoche aufgelistet .
Day 29:
+ PPFD 550 * 20h = DLI 39.6
+ Flaschenwasser mit Canna-Boost 1.5Liter
Die war komplett Trocken ... kaum zu glauben lol
Day 30:
Sie alles recht normal aus . Es entfaltet sich noch .
Day 31:
+ Flaschenwasse 2L EC 0.26 PH 7.3
+ + mit Dünger EC 0.7 PH 5.7
+ Drain 0.25L mit EC 0.9 PH 6.8
Fazit : ich übe noch mit dem Dünger und dem "zuviel" an Urgesteinsmehl :))
Day 32:
Das Wetter ist eine Katastrophe . Draussen ist es 21°C mit 90%rH . Hier drinnen sind es im Zelt 26°C und 67%. Im GrowRoom ,also praktisch meine 1 Zimmer Wohnung mit 2x2m Niesche hat so 25.5°C und 60%rH. Luftentfeuchter läuft , sonst geht hier gar nichts, aber der produziert Abwärme .
Will ich nun kalte Luft von draussen wirds hier mit 77%rH geantwortet aber die Temperaturen gehen runter :)) Lass ich es bleiben und entfeuchte , ich habe eine undichte Hütte was die Luftfeuchtigkeit betrifft , dann steigt die Wärme wieder . ES IST EIN TEUFELSKREIS :)) Aber wie gut das ich weiss das auch die ganzen CSC's und auch die Profis ihre liebe mühe haben die Temp und Luftfeuchtigkeit zu regeln . Und nein , ich werde mir keine Klimanalage einauen die beides regeln kann. Ich wollte nicht ewig viel Geld für das Gras ausgeben :))
Also liebe Brüder und Schwester des gepflegten Ganja komsumes und Produzenten , wir sitzen alle im selben Boot . Und jeder versucht der beste Kaptain zu werden :))
P.S. ich weiss, ein neues Bott wäre gut :) Aber dadurch ändert sich nicht das Meer :))
Day 33 :
Das Spiderfarmer Zelt 70x70x140x200cm ist fertig und Einsatzbereit . Meine kleinen Zwerge ziehen um . Im großen Zelt läßt sich die Luftfeuchtigkeit und Temperatur besser regeln. Klingt komisch , ist es auch :)) Aber Ihr müsst auch nicht in denkbar schlechtester Bausubstanz leben und gärtnern :))
Day 34 :
+ Flaschenwasse 2L EC 0.26 PH 7.3
+ + mit Dünger (Terra Vega 3.8ml/l , Rhizotonic 2.0ml/l , Boost 2.0ml/l , CannaZym 2.5ml/l ) = EC 0.7 PH 6.5
+ + Final PH 6.1
Nach einigen Problemen mit der Abluft und der Umluft und die Luftfeuchtigkeit , versuchen die Zwerge sich jetzt im neuem Zelt zu aklimatisieren . Ich drück die Daumen .
Day 35:
Die Düngung war genau richtig . Meine Luftfeuchtigkeit geht auch . Temperaturen sind etwas hoch . Aber Sie entfaltet sich . Videos gibts heute Nacht.
P.S. Da ich mal wieder zu schusselig bin eine Zeitschaltuhr und das Sanlight DIM System richtig zu nutzen , haben wir ein paar Lichtaussetzer gehabt , somit sind nicht an allen Tagen 20h Licht . In der nächsten Woche kommen 18h * PPFD 750 + 1h sonnenaufgang und + sonnenuntergang wird zu DLI 46.29 was etwas über das Limit von 45.00 geht . Schauen wir was passieren wird :))
Likes
18
Share
@ganjameister
Follow
The buds are bulking every day. A slight defoliation was done to expose the inner buds.
From next week onwards, Nitrogen will be cut and the first phase of flushing will begin. Harvest in approx 2 weeks!

Likes
15
Share
@NokEternal
Follow
Entering the 9th week things are going Splendidly, I had to adjust the lights up a bit as NLA#1, Suffered a little bit of what looks to be Light Burn, Other than that, The Girls are filling out nicely, and the aroma is kicking in good. I also decided too go ahead and start using Fox Farm Bembe, which to my understanding is a Molasses backed with Microbes for the Root Zone, That and I've Heard it's a natural sweetener as well. Thanks everyone thus far for the views and likes, One Love...

Likes
17
Share
@CanadianFillmore
Follow
Week 8 begins! Strawberry Banana is doing great, nice buds super frosty, sticky, heavy and dense. I continue to be impressed by this light and how this plant has grown under it.

Likes
13
Share
@Alpha_Green
Follow
Some of you may have wondered:
Why do I use CO2 at average 950 ppfd μmol/m2/s (moral flow)?
The answer is quite simple. Because of lack of space in some regions of my cultivation area, I simply cannot keep the ideal distance to my Sanlight high-performance lamp, due to some height growth of various strains. And so some of the main colas have ppfd values of 1250 μmol/m2/s and even more...
So this is how I manage to achieve and compensate for such high radiation levels even with a CO 2 balance. And I have to say, my strategy to avoid various light stress symptoms works just fabulously. In combination with CO 2 implementation, my babies are simply unbeatably insensitive to light. Thats it!
Beginning of 3rd week flowering:
Again feeding my babies by 36 hours fermented potions of Bio Tabs Kompost Tea PK-Booster (15 g pro Liter) and added:
5ml Orgatrex/Liter
1 Spoon of Bactrex
1 Spoon of Mycotrex
1 Spoon of Mycco-Vital
1 Spoon of Dynomyco
A little tip for those who are interested in small modifications that have a big difference or influence - on the result - effect - beauty - health - taste! Before adding microorganisms or beneficial bacteria or Mycorrizae and Trichodermas, please use oxygen-saturated water. On the one hand, unwanted chlorine gases evaporate and the small world of the microbiome becomes even faster and more rewarding in compost tea to sprout.
Last but not least for this week, I would like to introduce my reasons, why I prefer growing biologically and sustainably.
First of all, it’s something which suits very well in these times/days we are living now. Sustainability is a big need and task for our planet. 🌎 Nature means life. Our home, the air we breathe and everything that surrounds us. Not just today. Hopefully tomorrow as well.
Maybe I'm starting to protect our environment on a small scale, but maybe I can also make a big difference at all.
If you change the way you look at things, the things you look at change...
I thought about what’s the difference, between Mineral Feeding and Super Soil Feeding.
It’s very easy. Biologically Growing is a similar process than the natural soil activities out there in the lap of nature’s. So plants has to work and interact with the microorganisms and microbiomic communities in the soil. So the plants will never get lazy like the lazy ones of mineral feeding growers.
If you grow biologically, you will feed the soil first and the microorganisms will support every parameter next to your plant conditions. And that will generate an unbelievable spectrum of Terpenes and Trichomes you will never forget.
It’s the same comparison, when you daily visit McDonalds and you eat only fast food. How does your body and mind react on this shit for money?!?!
May I invite you to think about it…
See you next week dear Growmies! Have a nice Weekend and take care…
Peace out!
Addendum for Day 53:
At the moment we unfortunately have another winter onset here in Germany. This means that I am forced to take additional heating measures due to structural facts in order to be able to keep the temperatures constant. After all, just tonight the thermometer climbs again to -1 degree Celsius.
In addition, my exhaust air system runs out of my bedroom terrace and I therefore grow winter and summer with the patio door open. Well, sometimes I experience real weather-related challenges. But all in all, no problem...
"Where there's a will, there's a way."
Addendum to pouring out the fermented PK tea: I always administer half a liter of lukewarm aerated water with 3.5 ml of cannazyme per liter to each plant. This means that the "root machine" is not supplied with supplies unprepared and the nutrient solution can thus also be better distributed in the soil. Since I also work with cloth shoes, I spray them evenly moistened everywhere with water that is also warm before pouring them out from the outside. This has the advantage that the moisture stays where it should: in the pot!
... I did the math today ;-) We are still in week 7 until this Friday. And week 8 starts on Friday! OMG... still so much time yeahh!
Today my Fast Buds Sour Jealousy and Sweet Seeds Big Devil and Dark Devil Automatics arrived. I'm looking forward to it.
This time Fast Buds next Time Sweet Seeds. Love them too. Very beautiful genetics.
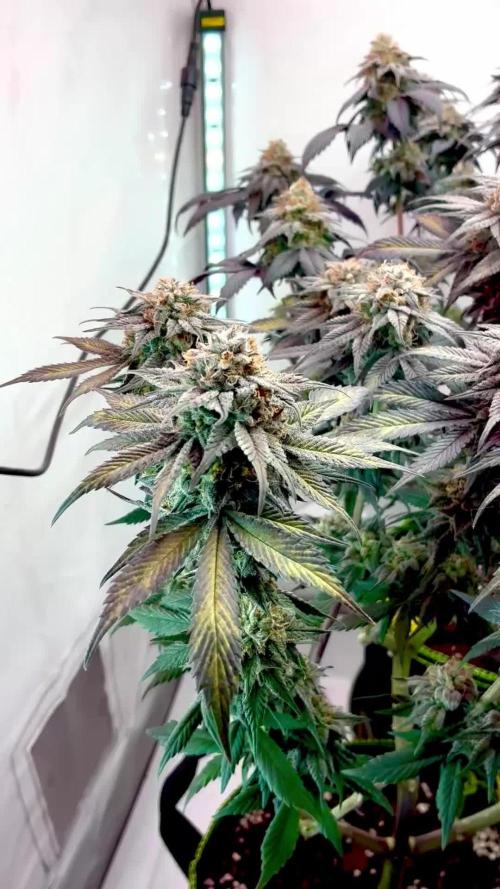
Today a review video of the beginning of week 3.
At the time of the pictures, I had minor signs of nitrogen excess. (Light peaks first at the crown of the roof and then slightly continuing to the middle section.) I then painstakingly racked my brains as to why this could be. I found that very slight dry spots had formed and therefore the root found small accumulations of nitrogen that caused its problems. But then, when I carefully homogeneously checked the moisture content in the substrate, the problem evaporated again. However, they had not shown any loss of growth rate during this time. Nevertheless, they developed as expected.
They Strawnanas had no problem with that.
In the end, I always have a hard time killing them. But I guess that's the way things go.
We live and die.
We come and go.
But it's not there yet. ;-)
Tomorrow is day 56.
Tomorrow’s updating day!
Can't wait to see their progress.
Have a good time and see you tomorrow… 🏽🕊️
🏽 ☮️🕊️


Likes
2
Share
@lolasher
Follow
Die letzte Woche ist angebrochen.
Viel wurde nicht gemacht. Alle 3 Tage 3l Wasser pro Pflanze.


