The Grow Awards 2026 🏆 


Likes
17
Share
@4chuk
Follow
Oct.16 - Week 2 begins.
I need to stop editing my diaries high.
Oct. 18 - Looks like a slight calcium deficiency on the oldest leaves, I'll watch the newer leaves for spots before I increase CaMg though.
Oct. 20 - I have been watering with 20ml twice a day, growth rate seems to have increased, but still developing spots so I will increase CaMg today.
Oct. 22 - It's growing pretty well considering how sick it seems. Time lapse uploaded.

Likes
3
Share
@DelightfulCannaCo
Follow
Buds are stacking! Terps are really coming in now, smell has switch to massive fruit! Moved fan to the floor to blow upwards on the plants to prevent the buds from shaking around too much now that they are covered with trichromes. At this point I’m am mostly concerned with humid management and air flow to prevent mild as these big buds fill out. This was the last week of feed, next res will be be close to pure h2o for a week and pure h2o for the final week. Wean the plants off the nutes. Ph adjusted to 6.3 now too to better facilitate late flower needs

Likes
15
Share
@Ferinky
Follow
En esta actualización se incluyen 2 semanas ya que por trabajo me fue imposible añadir la semana anterior.
El día 15 de Agosto recibió la segunda pulverización de Bacillus Thuringiensis para prevenir el ataque de las orugas.
Sigo alternando riego de agua un día con riego de Ascophillum Nodosum al día siguiente. He dejado de regar con Cannazym.

Likes
16
Share
@AUTOBUDDHA
Follow
Talk about fire.... fire... jesus..
these double grapes 🍇 are absolutely dumb! I'm quickly learning that mephisto isn't about quantity. But more so quality. These will be the strongest autos i have grown to date.
Frosted, is an understatement..
They got the chop today at day 99.. look for total weights in about 12 days.

Likes
46
Share
@Mr_Motalovah
Follow
Hello growers and tokers! 👋 👩🌾 🧑🌾.🔥💨
It's my first harvest on this community and I'm loving it.
Everyone always ready to help each other and have great feedback.
Tracking my grow on here has made it way easier.
There were times that I misplaced notes or forgot what I did or when with a certain strain and all I had to do was come on here and check it.
Also motivated me take more pictures and do more logs. All out great site. Don't know how I haven't found it earlier.
HIGHLY recommend for all growers.
The grow cycle went pretty smooth.
She's easy to grow and flowers early so you can't do much training. That being said it's great for beginners. 👌
Had no problems with pests on these, while on the other plants (none cannabis) in the balcony I had issues with spider mites.
They grew better than expected given the few hours of direct sunlight they received.
Results were good, I was expecting 10-15 grams per plant and ended up with a tad bit more.
Drying went a bit fast because there were few buds.
I probably could have took it down a few degrees as well.. my fault on that part.
They dried in 4 days, they've been curing for 10 days.
I normally test them after 15 days but they smelled so good I had to try them.
Smell: Lovely earthy, woody, slightly like diesel. Quite pungent for being autos.
Taste: Just as it smells.. leaving a nice after taste of diesel.
Touch: Very sticky, dense buds.
They break down finely in the grinder.
Cleaned the grinder before testing and after 4 joints ( 2 grams or so)
I already have a good amount of kief collected in the bottom. (Check photo)
Might grow this one again just to make some bubble hash.
The high is awesome nice uplifting, long lasting energetic but without a heavy euphoric rush.
Reminds me of a smooth haze high, although if you smoke a lot even being an experienced smoker, she'll get to you.
Only down side is dry mouth, very dry mouth!
Have some water on hand because your mouth will transform into a desert. 😂
Great strain to kick start the day.
Beginner smokers take it easy with this one. She hits hard! 👊

Likes
3
Share
@Doobster42
Follow
This week i moved the Gor cookies to my new 3x3 tent and noticed white pistols when moving so next week update will be flowering. Cherry Cola stayed in the 2x2 with no white pistols as of yet.


Likes
29
Share
@Crazy_Doofus
Follow
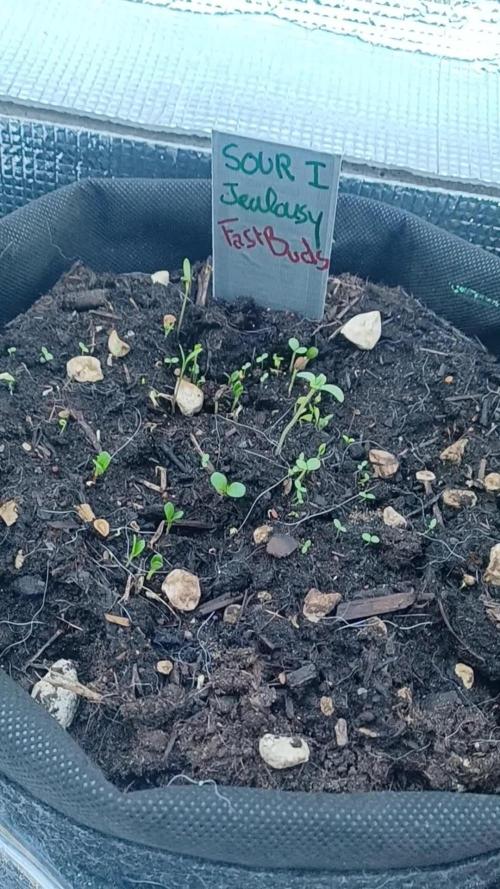
30/08 They both on the surface
So, lil amount of water + low DLI about 10 to 15 to start with. That´s about the advice I have gotten the last month... cause we need to do somethin about our succes rate!!!!!!!
Hi ladies 👐👐👐😊 all good... 2 identical seedlings... they are both against the side of the wall, out of the sun, into the shade. The outdoor sunscreen is very reflective, so enough light! Not too much water... 🤞🤞🙏
31/08 flower mix is jump startin 👍
Feelso right man!! ❤️❤️ in the tent 👍 gonna keep an eye on the DLI !!!! Not too much water 🤭 spray the surface daily
Moved into the tent, lookin to create some shade, 10 tot 15 DLI... 🤞🤞🤞 first 2 days doin excellent!! 😍😍😍
3th day and still goin, sprayin them with water, stretchin a bit... Looks good, Fastbuds doing it again!! 🤞🤞🤞
😍😍😍😍😍😍
One has stopped growing, falling down... Dying...


Likes
17
Share
@420DeepGrow
Follow
Gracias al equipo de FastBuds y XpertNutrients sin ellos esto no sería posible
💐🍁 Ztrawberriez:
Ganadora de la AAC 2024, con hasta un 25 % de THC, la Ztrawberriez Auto surge del cruce de dos variedades californianas conocidas por sus extraordinarios perfiles de terpenos y su potencia. Esta variedad no solo produce hasta 600 g/m² de hermosos cogollos duros como rocas en 9-10 semanas, sino que también llevará a tus papilas gustativas en un viaje en montaña rusa por toda la gama de terpenos dulces y afrutados
🚀 Consigue aqui tus semillas:
https://2fast4buds.com/es/seeds/ztrawberriez-auto#description
⛽ XpertNutrients: es una empresa especializada en la producción y comercialización de fertilizantes líquidos 🍶y sustratos🐛, que garantizan los mejores resultados y cosechas de la más alta calidad. A través de una cuidadosa selección de materias primas y un proceso de producción avanzado, sus productos son sinónimo de resultados confiables.
🛒 Consigue aqui tus fertilizantes:
https://xpertnutrients.com/es/sobre-nosotros/#:~:text=Xpert%20Nutrients%20es%20una%20empresa,de%20la%20m%C3%A1s%20alta%20calidad.
Gracias al equipo de FastBuds y XpertNutrients sin ellos esto no sería posible
📆 Semana 7:
Por fin se ha acabado este temporal maldito y se pueden apreciar unas lindas preflores. Ahora espero que crezca algo mas y se hagan unos buenos cogollos resinosos.
Todo va bien hasta ahora 😊
Likes
22
Share
@Spliffi
Follow
Week 11👍🤙👍🌱
I can see the end. This Contest have been a eye opener!!
Jon Dabs
Check them out here:
https://jondabs.com
@jondabs Instagram
The Sponsors
Check them out here:
Dutch Passion
https://dutch-passion.com/en/
Hydroponic.co.za
https://hydroponic.co.za/hydroponic/harvesting-and-growing-accessories/
Bud Juice
https://www.gohydro.co.za
The Best Grow
https://thebestgrow.co.za
Dynomyco
https://www.dynomyco.com
Nuclear Roots
https://www.nuclearroots.co.za
Photronic
https://shop.photronic.net
Special Thanks to Hydroponic.co.za. I buy all my products from them. Best service.
Daily updates coming...


Likes
11
Share
@DeepRootsGrowTrees
Follow
FORBIDDEN 🚫 RUNTZ by FASTBUDS
Week #7 Overall
Week# 6 Veg
This week I gave her some nitrogen supplement to her with her yellow in the leaves to fix that she should be good by next week for the most part she also stated to stretch this week so that's great to see. Stay Growing!!
Fastbuds
FORBIDDEN 🚫 RUNTZ
Likes
Comments
Share
@DansHampf
Follow
20JUNE2025: Buds are forming well. Water them 1 liter every third day.
Likes
62
Share
@balansa
Follow
pretty excited afyer my forst harvest we had som problems but we were fighting so gether for this day )))))))) 1) i did not balance ph so they had growth problem 2) spider mite )))) tose little bastards almoast killd my babys but we won so foght till the and and everything will be just fine. i will keep updates to let you know how many gr i harvested cheers !!!!!33687336870
Likes
10
Share
@hobozoo
Follow
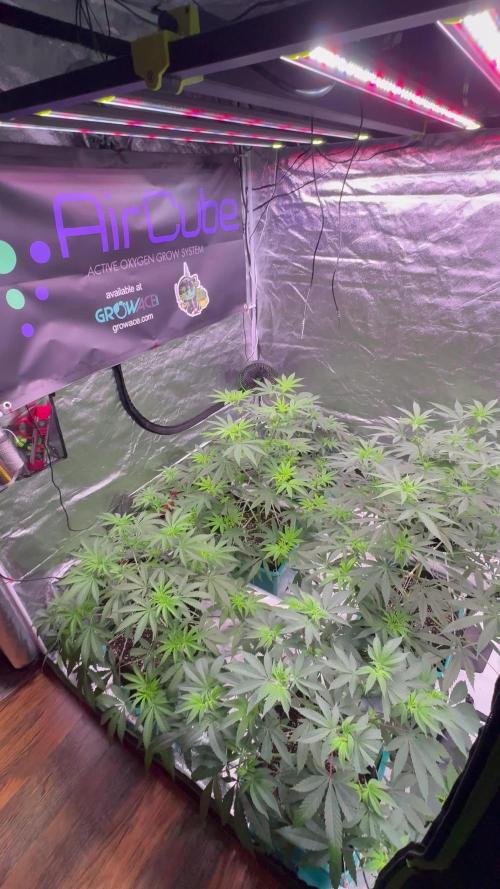
поменял отточный вентилятор на более мощный, температура в боксе снизилась.

Likes
6
Share
@Dendegrow
Follow
Apricot Auto – Week 6 of Flower 🍑❄️
Hands down the best terps so far – she smells absolutely amazing! 🤤🌬️
Sweet, fruity and loud – you can smell her before you see her 🍬🍊
And she’s easily the frostiest one of the whole run ❄️✨
Covered in trichomes from top to bottom – this girl’s got it all 😍🔝
Can’t wait to see how she finishes – this one is special! 🔥🌟
Apricot Auto – Blütewoche 6 🍑❄️
Ganz klar die besten Terpene bisher – der Geruch ist einfach unglaublich! 🤤🌬️
Süß, fruchtig und richtig intensiv – man riecht sie, bevor man sie sieht 🍬🍊
Und sie ist mit Abstand die frostigste Sorte im gesamten Run ❄️✨
Von oben bis unten voll mit Trichomen – die Lady hat alles, was man sich wünscht 😍🔝
Ich bin mega gespannt, wie sie sich zum Schluss entwickelt – die ist definitiv was Besonderes! 🔥🌟
Likes
63
Share
@AsNoriu
Follow
Day 125. Chop day.
Report will follow, maybe smoke quality will be that only positive thing in all dirt that this strain brought me ....
Dry triming chosen.
Plants where such crap that never got names even, so Smaller and Taller plant is chopped.
Other two went hermie.

Likes
6
Share
@Mannabis
Follow
Time for the stretch! Lots of flowering growth happening now. I can see where the bud spots will be so I’m going to have to stop moving the branching around in the Scrog, also the branches are getting thick and less pliable.
