The Grow Awards 2026 🏆 


Likes
Comments
Share
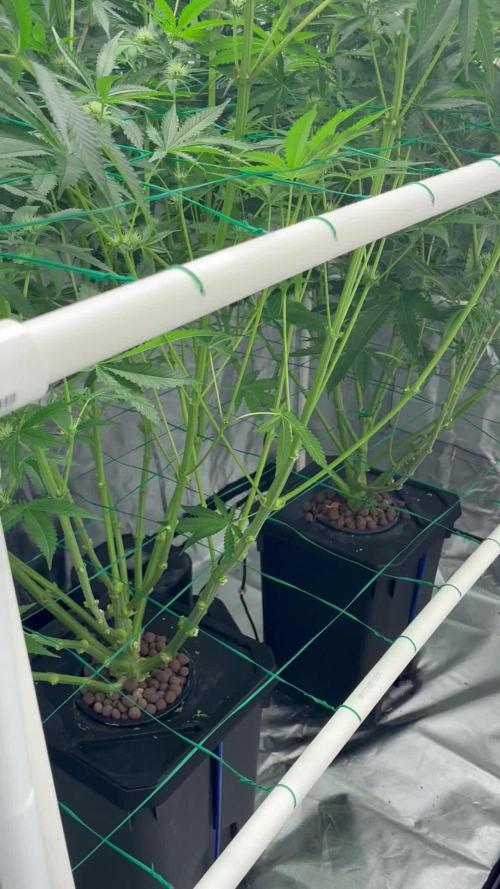
@RookGrow
Follow
They’re getting juicy, just feed some compost tea made from Dr Earth Tomatoes Veg and herb fertilizer and some Molasses. Just seen a Nat so I don’t think I’ll be doing the tea again, I want to prevent bugs as much as I can. I’ll be putting up a sticky trap to catch it I only seen 1 but 1 is enough for me


Likes
57
Share
@Regenwurm
Follow
Jede der Ladies wurde mit 30 l Regenwasser / Flawless Finish von Advanced Nutrients geflusht. So lange bis im Drain ein EC von 0.3 war. Die Buds werden im Moment sehr schwer und der Ertrag wird gut werden 😍Tricome sind weitestgehend trüb noch nicht Amber..... jetzt geht es bis zum Harvest Day mit 16 Grad Nacht/24 Grad Tags und Feuchte 35 % weiter✌️🏾

Likes
7
Share
@Bread_n_Buds
Follow
Our Monster Dwarf Automatic #2 is the most resin-producing monster of this autoflowering season, bursting with energy from every stomata, trichome, and the fantastic microcosm I photographed for you.
The buds are firm, truly of high quality, especially in terms of resin.
Maturity - The resin content is excellent. The trichomes are amber, with some very beautiful red heads when ripe (about 60%), with some white/cloudy ones (20%), and a few transparent ones (20%). There are quite a few beautiful red-headed trichomes, as mentioned. The pistils are almost all red (about 85%). Remember, the plant should be harvested according to your tastes. Since it's an indica-dominant plant, I want to make the most of the relaxing side, and I let this plant mature quite a bit longer than usual for me. Remember: Amber is a sign of THC oxidation, so don't overdo it!
The overall shape of the plant is truly splendid.
Techniques chosen: As mentioned, we performed a not-too-intensive LST here, followed by just pruning, lollipopping, and defoliation. Essentially, we cleaned the lower parts, which, as mentioned, helps us achieve better results on the surface.
We're 100% organic and 1000% Plagron, as always.
The soil we chose is the recently launched Plagron Bio LightMix, which will allow us to start with smoother and more reliable watering, without the sudden changes that liquid fertilizers can cause. A week's worth of soil is sufficient, so don't overdo it.
Choose your preferred style and calculate your results on the website:
www.plagron.com
Visit the new Growshop area on the Zamnesia website:
Z - https://www.zamnesia.io/it/531-growshop
A fantastic strain, a heavenly scent,
above-average resin production!
Z - https://www.zamnesia.io/en/4330-zamnesia-monster-dwarf-auto-feminized-seeds.html
Z - Monster Dwarf Auto is a new addition to the Zamnesia range. Extremely compact, it's the size of a bonsai tree. This autoflowering strain boasts numerous qualities. To create this hybrid, Zamnesia combined some of the best autoflowering strains with an exceptional Skunk female, preserving all of its autoflowering characteristics.
Its name should already give you an idea of what to expect from this plant. Monster Dwarf Auto is small and mighty! It maintains a very compact structure, never exceeding 40-60 cm in height, proudly displaying a large quantity of compact, elongated buds towards the end of flowering. This strain is suitable for small grow spaces. It performs equally well in larger grows, both indoors and outdoors, and requires no special growing skills to achieve excellent results in about 8-9 weeks. Given its autoflowering nature, even less experienced growers can easily achieve excellent yields of 60 grams per plant, without requiring any special attention. Thanks to its Skunk genetics, it's no surprise that Monster Dwarf Auto is capable of releasing very intense aromas and developing beautiful, compact buds completely covered in resin. Its Skunk lineage is also evident when smoking it: the effects are worthy of an incredible Skunk hybrid, full-bodied and very relaxing, yet capable of keeping you sociable without being excessively heavy.
Monster Dwarf Auto is a small, fast, and easy-to-grow plant. Despite its small size, it stands out from other autoflowering cannabis strains!
You know it, but I recommend it. Here you will find many wonderful things, essentially "the best that nature has to offer."
Z - www.zamnesia.com
Music //
www.radionula.com
+ Feng Shui Music
+ 432 Hz Frequencies

Likes
3
Share
@Rodburn
Follow
Went out of town for the weekend, things nearly got out of control. Stretch should be near over. Defoliating tomorrow, healthy girls


Likes
24
Share
@BlumenBot
Follow
7/26 - shes in flower and got her first feeding. Debating removing some bottom growth or just letting her run as is with no modifications.
5.8pH
73.6*F
740ppm
Bloom 2.18g
Phosphorus 0.32g
Kelp 0.28g
Cal/Mag 0.32g
Amino Acids 0.58g
Enzymes 0.12g
Terpinator 12ml
Great White 1.19g
Real Growers Recharge 0.1g
Rezin 2ml
7/27 - removed bottom 4 branches as they will never be close to the top. Want her focusing energy on the rest
7/28 - she was thirsty today, really dry...did a quick flush feeding, probably full feed Friday. This an heat is making it really difficult to keep the temps down in the box!! Running high 80s :/
7/29 - it's a girl!!
8/1 - looks like I may have a deficiency.
Gave her a good feeding today.
Bloom 3.08g
Phosphorus 0.57g
Potassium 0.76g
Kelp 0.38g
Cal/Mag 0.55g
Amino Acids 0.62g
Enzymes 0.15g
Terpinator 12ml
Great White 1.1g
Real Growers Recharge 0.12g
Rezin 3ml
5.8ph
73.4*F
1030ppm

Processing
Likes
18
Share
@Silverback_Guerilla
Follow
11/16:
A few of them are in a bigger hurry than the others, and that's just fine by me....very tired of buying weed to smoke..
I fed them again today with about 1/2 gallon each and put a couple of 24w 3000k bar lights under the canopy to increase light to the lower branches. I also took some photos and a video.
11/17:
A few of them are protesting about their proximity to the lights, so I raised them as high as possible, which was only another 4 inches. Hopefully that's enough!
11/18:
I checked their moisture levels and rotated the edge plants.
11/19:
I watered them today with about 1/2 gallon including bembe, signal, cal-mag, myco, and started them on cha ching. At least one of them will get flushed for the first time at their next feeding. Already fading...
11/20:
I rotated some edge plants and started decreasing humidity in the closet. I set the AC Infinity to come on whenever it gets up to 45% RH., plus the new dehumidifier I ordered will be here tomorrow.
11/21:
I fed them today with about a half-gallon each. I started cutting back on everything except cal-mag, bembe, signal, and cha ching.


Likes
209
Share
@BioBuds
Follow
At the beginning of this week, I have been fighting the gnats, which are less and less now. Just some watering and gradually lowering the light and going to full power. The Orange Hill Special has been filling out great and I must say, she is a pretty plant. With some manual bending and super cropping, I'm bending the longer stalks sideways and we are off. What I actually do is more of an intuitive hybrid between mainlining (where I bend the whole plant 90 degrees at the third week), LST (where I bend branches outward slightly, without tying), HST / Super crop (where I bend the stems 90 degrees with the clips or manually), after which I keep bending outward to SOG and, put the net over to end in SCROG.
This same method gave me the canopy in my prize-winning Gelato 33 grow. Check it out if you haven't seen it, it was my first experimental accident that led to beta test of Super Soil mixture 0.7, now we are at Alpha version 1.00 and testing great so far if I say so myself. I haven't seen such lush greens in my own grows, only outdoor. They seem uber-healthy and resilient, with very sturdy stems and leaves. Way more resilient than previous strains I tested in the beta soil.
The light is performing, the natural color of it makes everything pop. Mars Hydro has a winner with the SP-3000. Check out their site: www.mars-hydro.com
Thank you @MarsHydroLED for letting me test it, hook them up for a great deal or info on their products!
Halfway through this week, I took the clips out, AND...... we switched them to go into flowering. After a day the stretch is already visible. I had to bend them again after a couple of days. Now we have almost a tent filling foundation for a maximum result canopy of buds.
I was wanting to amend the soil with flowering additions (see recipe in yellow image), but I'm holding it off for two reasons. A/ The leaves are still so green and lush, I think there is an abundance of nutes. B/ @Haoss mentions his suspicions on his OHS grow (@#CannapediaProGrowersCup Orange Hill that very sadly went hermie on him) that nutrition in this phase could have had an influence, after asking what happened to him. I would have loved to see that grow to full harvest. But it makes me a bit cautious. if Haoss (whom I consider to be one of the star growers here) couldn't prevent this, what chance have I?
I'm waiting until the girls start asking for nutrients. They'll show me what they need in their own time. For now this soil is the shizzle (also quite literally) and Im happy with how everything is going. I remember much more hassle and steering in the last grow. This grow, even the Gorilla runt seems happy.
I now water them 3 liters of water / Perma tea mixture every 4 days, every 3rd watering I don't do the tea. This makes for fewer gnats and this soil seems to hold water nicely, also due to the hydro corn.
What I like is there is always some unforeseen circumstance, a tilt of the tables, some battle to be fought which delivers in big harvests or, in worst case, no harvest at all. It makes it more exciting, when your heart is at stake, we pour a lot of love and attention in the ladies.
So with hopes, but not too high, we go into flowering. Thank you all for joining me again in this Orange adventure! I hope you all had great weeks, germed seeds, extreme growth and buds bursting with trichomes!! See you next week!
Hug Bud
PS Sunshine made her first appearance, as she promised on the Gelato 33 grow. She is still a bit camera shy, so her digital alter makes an appearance first, if you all want to see more of her and my other helpers, let me know in the comments. Sunshine will make a real appearance if yall are real nice to her.


Likes
36
Share
@Gorrilla420
Follow
Another week gone for these 2 girls, they are looking very good and strong, getting some lovely autumn colours coming on the one at back so think she will be down soon. Will start to check trichomes on her next few days, as for the other one she’s just starting to fill out now, keeping the feed going for another week or so. Amazed by the amount of thc that’s on the girl looking forward to getting her down and trying her.
Happy growing🌱

Likes
4
Share
@The_Projexx
Follow
Welcome to week 2 of flower on this lovely project! The ladies are stretching like crazy and it won't be long till we see some lovely flower tops starting!
Some really cool genetics featured this run by a really cool breeder Hidden Vault Genetics.
Genetic breakdown:
Banana Smoothie ( Banana Split x G.O.S )
Creamy Cereal Crunch ( Watermelon Z x G.O.S )
MacMelonz ( Mac Burger x Zour Watermelon )
Huge shouts go to both the breeder and @MarsHydroLED for the awesome gear they make! Huge huge shout out goes to all my followers and supporters you guys inspire me to become the best grower I can be!
Be sure to follow along for the latest updates cause this shows getting juicier by the day!
-The Projexx
Day#8F Put in net , trained down some of the taller plants. Plants are stretching along nicely.
Day#9F Plants bounced back from the scrog training very quickly. They're picking up the pace with stretching!
Day#10F Plants are just bursting in new growth, Creamy Cereal Crunch is getting huge!
Day#11F We got the start of cotton balls going!
Day#12F Pictures N/A. Ladies continue to explode in growth, defoliated some of the older leaves that aren't getting any light.
Day#13F The ladies continue their stretch! Creamy Cereal is absolutely beasting out!
Day#14F Cotton balls are getting bigger and bigger. Plants continue to stretch with minor signs of slowing down.
Recap: Things went extremely well this week , the plants absolutely exploded in growth and have developed cottons balls. With some time left on the stretching period and lots of time left overall on this grow I'm very excited to see the end results with these cool genetics.
Likes
46
Share
@crazy_haze
Follow
So week 2 was a bit of a fuck up, I think.
The scrog went into flower and by the end of week 1, it was looking far to busy and leafy, zero light was getting through so I decided to thin down a little.
Also I wasn't happy with how the scrog was over developing, so I took away the net and allowed them some free growth and little more spread across the canopy.
I think this work stressed them a little, who knows?? Ideally I should have given them a far more comprehensive prune a week before flower, alas I didn't so here I am.
This weekend will mark 3 weeks of flower, and apart from the prune I've seriously left alone and will have for a couple weeks, so this weekend they will get some serious defoliation and probably a few straggler tops will be removed to thin down a little.
After this weekend, again, just feed and monitor.
So looks like I was just being a bit of a drama queen, the plants are doing superbly as I near wk 3, lots and lots of colas. I will be thinning these as needed whilst I prune by taking out any stragglers.
I've also added back in some boost nutes just to help overcome any stress I may have caused.
I've also raised the lights slightly to reduce stress at this important stage.
Last one for this week, all plants fully defoliated which I'm stoked about, no problems, I think I'll need the odd support cane since a binned the scrog, but apart from that not much else left to do other that monitor all aspects to make sure of no silly mistakes.


Likes
16
Share
@Operation_A51
Follow
Germination began at 2pm, 1400 hours today, Friday, September 10, 2021

Likes
25
Share
@Greengirl420
Follow
Sorry I’ve been so behind! 😬 This catches up to this last Friday 02/21/2020 day 41.
I’m a weed smokin momma of 4 kiddos lol and it’s been a crazy two weeks!! 😰 they’ve all been taking turns being sick 🤦♀️ so I’m glad it’s over and everyone is feeling better!
As for these girls, they are rocking strong and filling out! They smell great and look good too! 😋 🤩 💨 💨
Ps. Still two plants here. Both 420Fastbuds G14’s.
Thanks for checkin me out 🤗
Follow me on Instagram @greengirl420mipotfarm or check out my Husbands diaries for updates on our other grows @mi.pot.farm #Mipotfarm
And don’t forget...
Puff, puff, passssss 💨 💨
Likes
25
Share
@Cannibalgardens
Follow
Man any strain I grow from @fastbuds has the best all around terps of any auto flowering plant I have grown yet .
They have strong genetics and a great customer service as well I've never been let down . To be honest when I popped this seed I knew she was special it cracked and got moving do quick that it was evident she wanted to grow . She was put into a 3 gallon fabric pot with living soil . I used NextGen soil out of Sudbury and the stuff is amazing. This whole grow was organic and the plant was at one point near death . I had over watered and let her go to the point that I wasn't sure she would make it . But she did and outperformed my expectations completely . The buds are long and dense with lots of trichomes . The way I fixed my issue was way less water and a couple top feeds of an organic flowering mix .
The strength in this plant to turn around and come back strong like that was super impressive like no slow in growth and no hermies or lack of bud Growth .
The newest strains that keep coming out are fire and I'm very happy to be able to try these at all . The next round of autos I do will again be of the fastbuds company . This plant in the end is around days 85 from seed and had it been trained better and more wattage could have been a super monster plant .. cheers and happy growing ..keep their plant going it's medical for so many people.
Update smoke report - the plant cured nicely and the buds are hard with decent trichomes ! Not the sticky buds I expected but she was dried a little to long and so it's to be expected 🤣.. but in all honesty it's a great plant for bubble hash and I'm putting it into the hash bag mix for washing can't wait .. again cheers to fastbuds for letting me try their new strains cheers
Likes
9
Share
@alejandrogo_chile
Follow
Día 34 🤙🏼
.
Luego de varias podas apicales, pueden ver plantas con 8 puntas o apices, menos una que tiene 4 porque se me rompió una rama (me sentí de lo peor 😰) ✌️🏼.
.
Quisiera recordarles que no hay una sola manera de cultivar y llegar a buenos resultados 💚.

Likes
21
Share
@Mrs_Larimar
Follow
2024-06-22
Yesterday i had to Harvest them,
weather was very bad . The are having tropical Climate in the raintime,
very Humid and rainy, sometimes changes to cold and windy
so very bad Season until now.
They would have needed 7 days more to ripe perfect.
But they started to mold. so i harvested them quickly, and sorted out all moldy stuff
this is very sad.
Buds are more open and supersticky. you can see with eyesight the loooong and dense Trichomes,
iam going to add more Pics if they are cured
and i add some Pics from the microscope.
i give this Strain 8 from 10 Points for Outdoor Growing, because of their tendency to catch mold , despite the fct they were under a Roof,
But yeah we had avery cold, rainy and humid Season
i really like to grow them again, but indoors!!! because of their Juicyness
