The Grow Awards 2026 🏆 


Likes
Comments
Share
@Jimmy89
Follow
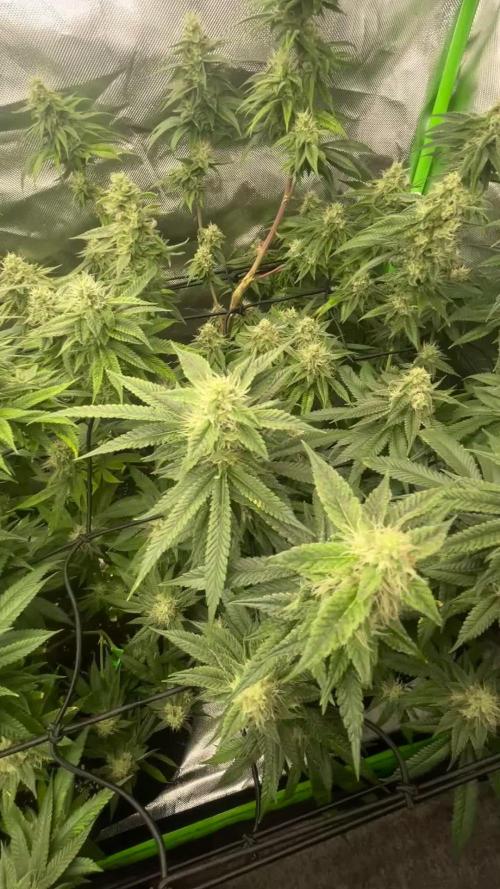
All photos taken day 25 of flower. Started to develop a nice aroma now, I’ll have a little de leaf in a day or two to help lower humidity and uncover some flower sites. Can’t wait for it to warm up so I can switch my heaters off! ✌️


Likes
43
Share
@Organic_G
Follow
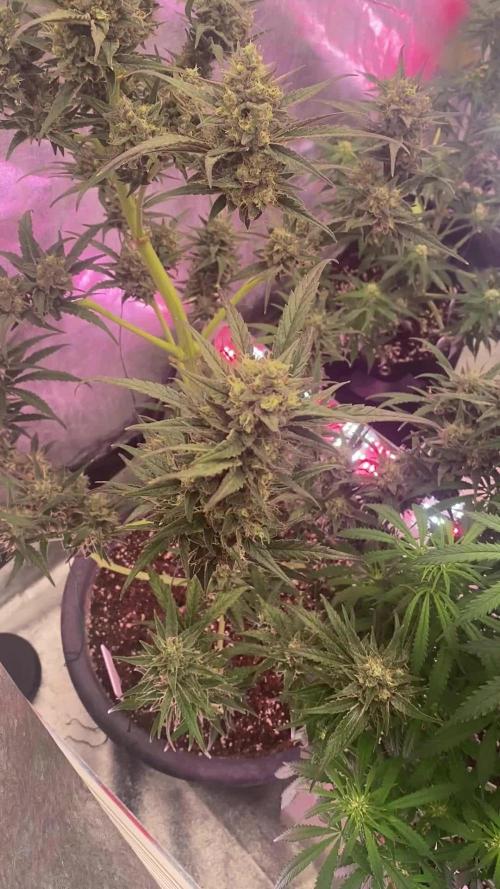
Ernte ist ziemlich nah, werde die Ernte in 3 aufteilen, damit der mittlere und untere Part nachreifen kann…
Da ich die RH nicht wirklich runter bekomme und kein Schimmel riskieren will werde ich mit hoher wahrscheinlich das obere Drittel morgen ernten und direkt zum Trocknen aufhängen…
Time will tell


Likes
15
Share
@Sergi0
Follow
A lo ultimo tuve una pequeña plaga de araña roja que pude mantener a raya cortando hojas afectadas, subiendo la humedad y bajando la temperatura... No voy a pesar en húmedo, cuando se sequen nomas... Luego de cosechar las The Ultimate pasare a revegetar ambas, espero que no muera antes jeje... Porque a las otras creo que le quedan mínimo 2 semanas más.

Likes
3
Share
@skipakz
Follow
Man sieht es der instabilen Pflanze leider an… die blütenbildung ist sehr schlecht, die restlichen Triebe lasse ich trotzdem bis zum Ende dran mal schauen was draus wird…
Likes
Comments
Share
@BakedBotanist
Follow
Getting huge, upping nutrients slowly. All drinking 1.5 litres over 2 waterings a week, they all drinking fast! All Seems to be loving it. going well so far. Weekly updates to follow 😎
Likes
3
Share
@ChunkeyMunkey420
Follow
Orange Sherbet is flying. An will finish way before the other two. All happy.
I was adding PK juice from first week of flower just forgot to add it on my list

Likes
3
Share
@710dreamin
Follow
She is doing well overall other than a little over watering upon transplanting into the living soil. I didnt plan for drainage like I should have but it is what it is I believe I'm getting her kinked out. Any tips are always appreciated... debating on topping her this coming week or just running lst on her. Maybe both who knows
Likes
4
Share
@TerpeNauta
Follow
Hola Chicos Humos !!
Black Jack Regular con tan solo 2 días de germinada en la tierra , tambien tenemos 3 Afghan de Sensi Seed Regulares con 2 días de germinada en tierra.
Por ahora vamos a ir regando con agua de lluvia con un PH de 5.9
Se viene ese seguimiento Humitos

Processing
Likes
6
Share
@Mr_nugs_lover_David
Follow
Everything seems to be going great! She's developing very fast and looks very good,no problems at the moment,let's see how big she gets before flowering starts we're not very far away from that,I'm enjoying a lot growing her,she's an excellent genetic she's being fed just like every single plant that I grow full organically with mycorrizae by florians living organics bat guano by guanokalong,seaweed powder,lactobacillus microorganisms and love,peace guys ❤️💛💚🌱

Likes
11
Share
@McShorty
Follow
not much to say here, transplanted into bigger pots and so far still growing without any complications, picked some of the leaves. thats it. Hopefully i can switch the light cycle in the next 2-3 weeks, lets see what happens next.


Likes
16
Share


Likes
3
Share


Likes
13
Share
@shwable
Follow
Everything looking fine so far.
I gave them a little amount liquid grow enzymes with distilled water on 19.04. what seemed to boost the growth.
If You have any tipps or recommendations feel free to let me know.

Likes
48
Share
@Nvchods3
Follow
esta semana le aplique big one de forma foliar para empezar a estimular la Pre-floracion !
Likes
38
Share
@DeepRootsGrowTrees
Follow
TROPICANA COOKIES FF / FASTBUDS
WEEK #17 OVERALL
WEEK #9 FLOWER
This week all is well no issues this week she's looking good buds are dense and covered in trichomes she smells sweet. Stay Growing!!
Thank you for stopping by and taking a look it's much appreciated!!
Thank you FASTBUDS!!
TROPICANA COOKIES FF/ FASTBUDS


