The Grow Awards 2026 🏆
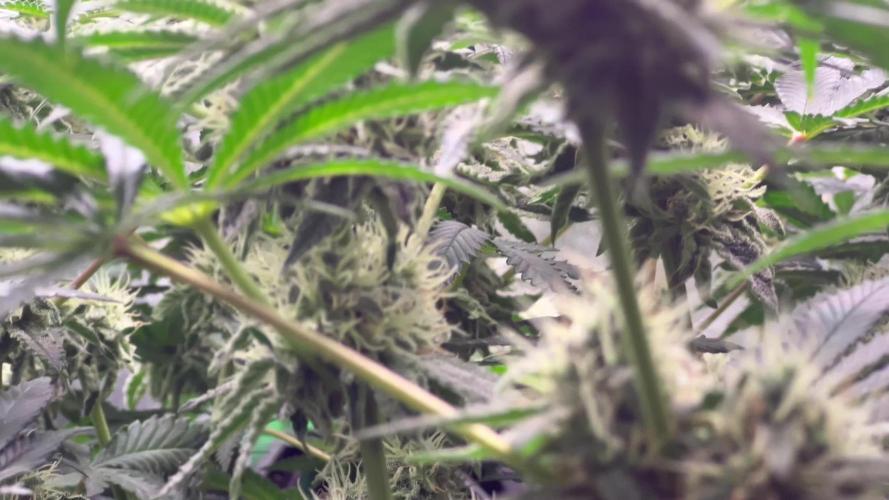
Likes
Comments
Share
Likes
7
Share
@BIYEI
Follow
Vegetación (Tiempo estimado 28 días) Quinta Semana de Vegetación 04/01/2024 - 5:00hrs y 22hrs: Se verifican parámetros básicos del agua, mantener cuidados específicos. Agua de osmosis: Ph 6.0, PPm 1050-1300, Ec 2.1-2.5, Temperatura 20°C - 24°C, Humedad 75% Ambiente: Temperatura 22 °C, Humedad 75%, Ventilación 15%, 18 hrs de luz , 6 hrs de obscuridad. 05/01/2024 - 5:00hrs y 22hrs: Se Hace cambio de solución nutritiva y se limpia el recipiente, se verifican parámetros básicos del agua, mantener cuidados específicos, el Ec y PPm Varean por los aditivos. Agua de osmosis: Ph 6.0, PPm 1050-1300, Ec 2.1-2.5, Temperatura 20°C - 24°C, Humedad 75% Ambiente: Temperatura 22 °C, Humedad 75%, Ventilación 15%, 18 hrs de luz, 6 hrs de obscuridad. 06/01/2024 - 5:00hrs y 22hrs: Se verifican parámetros básicos del agua, mantener cuidados específicos. Agua de osmosis: Ph 6.0, PPm 1050-1300, Ec 2.1-2.5, Temperatura 20°C - 24°C, Humedad 75% Ambiente: Temperatura 22 °C, Humedad 75%, Ventilación 15%, 18 hrs de luz, 6 hrs de obscuridad. 07/01/2024 - 5:00hrs y 22hrs: Se Hace cambio de solución nutritiva y se limpia el recipiente, se cambia la lampara en la madrugada por una de 1000 w, se empiezan a hacer pruebas a 50% de la potencia, pero el calor en la mañana estresa a la planta demasiado y evapora casi toda el agua, se hace cambio de agua por la tarde y de recipiente, se verifican parámetros básicos del agua, mantener cuidados específicos, el Ec y PPm Varean por los aditivos. Agua de osmosis: Ph 6.0, PPm 1050-1300, Ec 2.1-2.5, Temperatura 20°C - 24°C, Humedad 75% Ambiente: Temperatura 22 °C, Humedad 75%, Ventilación 15%, 18 hrs de luz, 6 hrs de obscuridad.
Likes
9
Share
@Krissci
Follow
Now on 8x nodes per plant.x Day 1 - SB2, 1 stem got broken during training 😩😭😩😭😩... Hoping it will be saved but Day 2 - more aggressive training on both plants to level the main frame
Likes
25
Share
@Luna91
Follow
Hey guys, Week 7 and the buds are growing fast! After defoliation my girls are happily continuing to suprise me everyday day by day, they are turning huge! I just did ScrOG training, Hoping did it right cuz its my first grow ever!
Likes
3
Share
@Kickdrum
Follow
They're behind the Jack Herer but at least the ladies showed up to the party at least! I have named them Shasta and Sky. They both have made the journey towards the light. I am maintainin a 21-23 C with around 67-75% RH, and with all 3 beans now popped, I am very excited about this grow day 5 of germination. Temp: 21.5c RH 75%. The sunset sherbert autos x2 (total 3) are also freshly emerged, and for now the SF-1000401h Evo 100W will be powering the babiesd, swapped out for the Mars Hydro FC-E1500 150W (+complete adlite set). later on this afternoon. Spider Farmer's 6L humidifier with sensor is doing a great job, and so is the dehumidifier , both are operating fine in the 70x70x1,60 tent. Air flow at 25% on a 4" inline fan with 204CFM. Light at 30% at 18 inches. No Adlites in operation. Let's quickly review the key new components I've planned to integrate or have already: Circulation Pump - Adding this to the 14L Mars Hydro reservoir will ensure even fresh, circulated-for-a-miniute-every-hour, batch of water (and later nutes) to the auto-drip system, maintaining optimal feeding for my plants when I am away, next week. Biobizz & BioTabs Supplements - These organic nutrient and microbial products will provide a comprehensive and balanced feeding regimen for my plants. Auto-Drain Potted Plant Stands - The wheeled, auto-draining stands will simplify watering and prevent any spills or overflows. Inkbird Humidity Controller - Pairing this with the Spider Farmer humidifier and dehumidifier will allow me to precisely maintain the ideal VPD (Vapor Pressure Deficit) levels. LST Clips, Trellis Net & Shelves - These will help me maximize my grow space and optimize the plant canopy for optimal light exposure. Pest Control Strips - An important preventative measure to stay ahead of any potential pest issues. Smart Soil Sensors - The Zigbee-enabled sensors will provide vital data on soil moisture, temperature, and more, which I can monitor remotely. Air Purifier/Ion Generator - Ensuring my grow environment has clean, high-quality air circulation. With all of these elements in place, combined with my existing setup and the automated control via the iGrow app, I'm truly creating a "hands-off" grow operation. (theoretically, with a bro, coming to phiscally check too)....The ability to monitor and adjust key parameters remotely while I'm away in Italy. Running on Sunrise/set mode(18/6) over the "seedling" scene, in iGrow app, keeping track of DLI and later on, the Adlites will come into play. Temp at 23.5 and RH is at 60%
Likes
92
Share
Week 10 - Second Week of Flowering 🌸 As week two of flowering begins, the garden’s growth is unstoppable! These ladies are thriving, stretching up while staying beautifully vibrant and green. Every inch of this tent is optimized—each plant is soaking up light, nutrients, and water precisely as they need, filling the room with energy. Room Conditions 🌡️ • Temperature: 27.3°C • Humidity: 62.6% • CO₂ Levels: 800 ppm • VPD: 1.36 kPa (excellent range for robust flowering) • Lighting Intensity: 818 PPFD Solution & Medium 💧 • Solution Temp: 21.5°C | TDS: 470 ppm | pH: 6.02 • Medium: Moisture 100% (recently dried to 67%), TDS 510 ppm, Temp 22.5°C The “dry-out” to 67% was a strategic move, helping boost nutrient uptake and root strength. Meanwhile, our slight increase in reds seems to be having the desired effect, nudging these ladies further along in the flowering process. Eye Safety & LED Lighting 🌞🕶️ With powerful LED systems like the ThinkGrow and ICL-300, eye protection is critical. LED grow lights emit high-intensity light across the full spectrum, including intense UV and infrared components that are not easily detected by the human eye. Long-term exposure without adequate protection can lead to eye strain, and in extreme cases, damage to vision. • Blue Light Hazard: LEDs often have elevated levels of blue light, which can harm the retina over time if proper precautions aren’t taken. • UV Protection: Even low doses of UV can accumulate and harm eyes, so grow glasses with UV protection are essential for any indoor gardener. Investing in quality grow room glasses can help protect from glare, UV, and infrared rays, making plant care safer and more comfortable. Lighting Enhancements: ICL-300 In-Depth 🔆 The ICL-300 is our newest addition, specifically designed for inner canopy illumination. This LED offers a targeted light boost under the canopy, enhancing flower growth in lower and shaded areas—ideal for maximizing yield and light efficiency. • Dual Spectrum Technology: The ICL-300 provides a custom spectrum designed to penetrate deeper into the plant canopy, promoting robust bud formation throughout. • Enhanced Light Distribution: With strategically positioned diodes, the ICL-300 reduces shadowing and balances light distribution to all parts of the plant. • Energy Efficiency & Heat Management: This light is designed to be energy-efficient, running cooler and reducing the risk of heat stress within the grow space. The inner canopy light gives the plants exactly what they need, particularly during the flower stage when bud sites deep in the canopy can benefit from more direct exposure. However, after noticing slight leaf burn on some plants, I’ll hold off a bit longer before fully integrating this light to ensure optimal adjustment. Looking Forward 🌟 As we continue dialing in conditions, it’s all about balance, precision, and taking proactive steps to optimize every aspect of the grow environment. We’ll keep a close watch on the canopy height, and next week, I’ll aim to fine-tune the light integration even further with the ICL-300. P.S. - ICL-300 and CO₂ Sensor 🌱 The TrolMaster CO₂ Sensor (MBS-S8) has been crucial for real-time CO₂ adjustments, ensuring the plants get exactly what they need without constant monitoring. Combined with the ICL-300’s spectrum flexibility, these tools make an unbeatable setup, allowing for nuanced control over plant growth and development. As always, a huge thanks to the Grow Fam for the tips, support, and enthusiasm! I’m excited to see what these next weeks will bring as these plants reach their full flowering potential. Stay tuned for more updates, and don’t forget: eye safety first, growers! 🌞🌿 Discount Codes so you can save big on your next check out 💚💚💚 Kannabia - DOGDOCTOR 30% off SeedsmanSeeds - DOGDOCTOR 10% off CannaKan- DOGDOCTOR 15% off terpyz.eu - DOCTOR 15% off The Neutralizer - PORKIT5-DOG 15% off As always thank you all for stopping by, for the love and for it all , this journey of mine wold just not be the same without you guys, the love and support is very much appreciated and i fell honored and so joyful with you all in my life 🙏
 With true love comes happiness 💚🙏 Always believe in your self and always do things expecting nothing and with an open heart , be a giver and the universe will give back to you in ways you could not even imagine so 💚 Friendly reminder all you see here is pure research and for educational purposes only Growers Love to you all 💚💚💚
Likes
207
Share
Hi guys... welcome back I wanted to dedicate this diary to my resilience, to my constant ambition, to my desire to always try again to never stop chasing a dream....To all those who opened their doors to me this year, but also to those who closed them to me!...Yes, especially to those who closed them in my face.... Because it is precisely thanks to these people that they have become increasingly stubborn in telling you... I can DO it! And in particular I dedicate it to you....to all the people who love and enjoy watching and appreciating my growth.... thanks guys Happy and abundant harvests for everyone👩🏼‍🌾
Likes
5
Share
Nothing really Changed. Did a topping today. She's A little taller. Love to See her growing ❤️
Likes
8
Share
@Kayotic
Follow
Day 58 Watering every 2 to 3 days Gave blood meal with last water Not much of a change this week Defoliation and retied down Forgot to turn fan back up for one night, so humidity was at 77%
Likes
16
Share
@JBOrganix
Follow
1 - 03/27 - Starting up week #2. New light is installed, will be monitoring the set up now since the new light is 800w. Tent temperature peaked yesterday at 85. Added a big fan in the tent and an additional fan for circulation outside of the tent as well. Going to need my air scrubber sooner than later to help keep my temps in check. Likely need a cool mist humidifier as well now. Woohoo. At least they are all still standing! 2 - 03/27 - The new LED at 800 watts is far too much. The tent was heating up uncontrollably past 86, so I decided to take it back and grab the single 400 for the time being. That way at a later date I can upgrade to a secondary 400 and still pull equal wattage. Also added a 6in inline fan to help keep the tent cooler. Sitting around 76 -80 now so I'm pretty happy with it. The 400 run quite a bit cooler than the 800 does. The 800 brought my tent up another 10 degrees whereas the 400 unit sits my tent up at 3 degrees. All in all, feeling good about the swap and new lights. Time will tell if I need anything additional come first week of flower 03 - 03/31 - Almost nearing the end of week 2. The girls are doing amazing. Candy Cane is finally catching up and everybody is filling out now. Super cool to see what a week does! 🌱 Each of the ladies received some very light LST last night. Light pull on the leaves downwards to pull the top open and create some more developmental growth. I also decided to run a really light liquid nutrient cycle. I'll post the product and details tonight. Happy growing! 🌱 - Made an executive decision mid morning and decided that 1.5/2g is not a big enough finished pot size for the EM Auto. I moved her to a 5. I was really sceptical since she's doing the best for vegetative growth out of the group but decided to embark on the risk. I consider it a move and not a transplant at this point. When I moved her, I cut the fabric pot in 6 spots down to the base. I let some of the loose dirt fall into a tray and prepared the 5g to accept the 1.5g transfer. I used a single table spoon of the gia green power bloom and coated the hole. I gently misted the outside of the remaining dirt and the EM root base and picked nearly the whole plant up with little to no disturbance whatsoever. (80% of the total potted plant and coco stayed in tact). She went in beautifully and still looks happy. I guess we'll see how much damage has been done come harvest. Fingers crossed that she didn't feel a thing. 👍🌱
Likes
18
Share
@Nune2021
Follow
Hey Leute ich hab bei den Pflanzen Ungeziefer bemerkt kann nur aus der plagron Erde vom Grow Shop sein Trauermücken thripse bei zwei Pflanzen außert sich das Schon negativ die Pflanze sieht kränklich aus gelb Stich von oben nach unten überdüngung ausgeschlossen, hab die Pflanzen mit combo neem behandelt 4 Tage gewartet und wieder behandelt das Pflanzbild der Zustand kann auch davon kommen !!! sobald die Pflanzen sich erholt haben schick ich die endlich in die Blüte
Likes
54
Share
Day 77 of flower Week 11 Just waiting for the Afghan hindu kush to finish and will be cutting down the rest. 1 blue dream 1 Afghan hindu kush Grow light: mars hyrdo tsw2000 at 100% power 14inches above 🌞☀️ Medium: coco coir mix with compost at a 50/50 ratio with 30% perlite added⛰️ Nutrients: fox farm dirty dozen 🦊🚜 Grow space: 4x4x7 Water: tap water (my tap water is allows 110ppm) left out for at least 24hours
Likes
27
Share
Our Ghost Train Haze Automatic by Zamnesia started off very well, they had a good sprint since I added Alga grow and they had the chance to start metabolizing the powerful additives from Plagron. We quickly got to the first topping, as with all the others I decided to make a plant with the techniques and a tip. I'm not completely ready to give up the main cola. Applied Techniques - Given the numerous requests from growers, we decided to show you what happens when you apply the topping + Lst to autoflowering plants. It is very important to anticipate it as much as possible, autoflowering plants start flowering at about the 5th intenodo, you need to anticipate that moment to give the plant the chance to vegetate as much as possible. In general, when you see that there are two good side branches, you can do topping, they will go into veg as much as possible and you will have a split plant, I have seen very nice results, especially in warm periods when the plant tends to vegetate a lot, in winter we could have a bit of dwarfism but with a lot of resin for sure. So I cleaned everything and cut at the top leaving only the main growth line, called Main Lining, the florets will be lowered during growth and the plant will eventually be like "split" in the main line with the various branches. On photoperiodic plants, however, we will do topping repeatedly, which is not recommended with autoflowering plants so as not to lengthen the times of plants born to finish in 10 weeks. The second week (including a few days of germination) we gave Power Roots 1 ml/l, Pure Zym 1 ml/l, Sugar Royal 1 ml/l, Alga Grow 3 ml/l - Plagron nutrients are available at Zamnesia in convenient pack formats for all growing styles. I used this one with a simple search you can find the other products. ---- https://www.zamnesia.io/it/12119-plagron-top-grow-box-100-naturale.html Try a seed of this variety that drives us crazy... ---- https://www.zamnesia.io/en/12511-zamnesia-seeds-ghost-train-haze-auto.html Description Zamnesia // From the day its cotyledons emerge from the substrate, Ghost Train Haze Auto will surprise you with its rapid growth and robustness. When it starts to flower, this short sativa will develop long and compact buds with pungent scents of spice, citrus and fuel. Growbox and Air System - Secret Jardin DS120w + fans + exhaust fans and DF16 filters kit ---- https://www.secretjardin.com All the best that mother nature has to offer is at ----www.zamnesia.com
Likes
8
Share
@Chubbs
Follow
420Fastbuds-Week 6 What up, fam. Weekly update on the Photoperiod Femenized strains. GorillaMelon,RainbowMelon, LemonManderian,LemonPaya,PapayaSherbet, and some FastFlowering GG4/Sherbet. For just putting them outdoors 3 weeks ago, they've adjusted to the heat like a dream mid 90's and tripled in size. To think there's probably 4 more weeks of veg. These are going to get big. I might have to raise up the greenhouse or make it a convertible. I'm still just feeding well water, probably 2 liters, each straight from the hose daily. All in all Happy Growing.
Likes
15
Share
@SamDo
Follow
Hello, fin de la semaine 2. Quelques petits problèmes pour bien gérer mon EC, du à une eau vraiment très dure. Au niveau des arrosages, je suis passé à un arrosage tout les jours depuis quelques jours, les plantes semblent apprécier. Elles ont repris de la vigueur, à confirmer avec le temps. Voilà pour cette semaine. Happy grow...😎
Likes
20
Share
Hey folks, I'm finally back at it again. It took me a while for a couple of reasons: 1) I usually only grow in the winter. 2) I completely revamped my grow room after the issues I ran into with the last setup. 3) It took me a while to brainstorm exactly what I wanted to do. I bought these seeds from D.C. Seeds and was very pleased with the experience. I'm very happy to give business to a fellow American and Veteran. I've only ever purchased seeds from the UK in the past and that experience has been "dodgy" to say the least (not the vendors fault, but the transit). I've only ever grown photo's, but chose to go with all auto's moving forward. After calculating the intensity of my current light, with it being on a 20/4 rotation I'm very close to hitting 40 moles per day, at least directly under the light. It doesn't quite cover my 2' x 5' trellis. I'll eventually upgrade my light, but auto's should get me the best bang for my buck with this light. Also, I spent a pretty penny building this new grow room. The other obvious reason for growing auto's is their shorter seed to harvest time. I've got a small grow area, and never plan on expanding. Theoretically, auto's will allow me to produce the most out of my room. A few things about my grow room: 1) I lined the whole closet with 1/2" plywood and put that piece of ply the air intake/outtake/power as the divider between each side of the closet 2) The grow room itself has ply on all wall surfaces so I could mount stuff to it and paint it 3) The other side of the closet is my storage/prep/power distribution/etc. area. Maybe I'll take a pic one of these days 4) My last grow my carbon filter/fan was venting into the other side of the closet. This created a headache for a number of reasons. I tapped a 4" hole through the floor and am now venting into my crawl space below the house. 5) I moved to bubbleponics to speed up my grows even more. I will be removing the drip system once the roots hit the water in the res. 6) The larger res. will hopefully make my life much easier. Late in the last grow I could only fit 3 gallons of water in the bucket and that sucker was pounding down at least a gallon a day. That required too much micro-managing for me (both ph and refills). 7) I no longer have a fixed trellis with chicken wire. The trellis is held in place by dowels that I can pull out by hand. The short sides of the trellis have hinges on the bottom, so I can fold it and pull it out easy-mode. Lastly, I'll be using string for the trellis so come harvest all I have to do is cut the string instead of dealing with trying not to destroy buds pulling them through chicken wire (it takes forever). 8) I built a light diffuser on the other side of the air intake 9) My res. is on a motorcycle lift I'm using a drill to move up and down I have now started using Jack's as my primary nutes. They tell you the full break-down of each macro and micro nute, giving me more control and understanding. I think House & Garden is a good product, but when stuff goes bad it's more difficult to troubleshoot when you have no idea what each piece of their full lineup contains. I'm assuming it's kind of a proprietary type thing, which I understand, but knowledge is power. I am still using their Drip Clean (while the bubbler is going) and Roots Excelurator Silver, both excellent products. I'm still using Hydroguard, and will FOREVER. I'm a true believer now of why Hydroguard is necessary for any hydro application, IMO. I also purchased water soluble fulvic acid, but have decided not to use it for this grow....or at least while the bubbler is going (I'll elaborate below). Ok...now that all that is out of the way.... I really wanted to use my well water instead of R/O to make my life easier. Soooo....I filled up my res., and put two seeds in the system immediately. Nothing happened after 1 1/2 weeks. I finally opened up the cubes and saw that the beans had popped, but it looked like maybe I drowned them, or they ddin't grow straight up or something. For round two, I didn't change the water out, and decided to soak the beans for 24 hours in R/O water first. I had the exact same problem. I'm still not really sure what happend, but I suspect it was the well water. My PPMs were sitting at ~500 with the well water, which was probably too spicy for the beans just starting. Also, my well water is questionable (even though it's at 165ppm), but I won't elaborate further....it's a long ass story and I've spent an absurd amount of money on it. Lastly, I did put the Fulvic acid in, and it was very messy. I really want to avoid having to clean my res. Once the roots get big it will be a real pain in the ass to clean. I'm leaning towards not using the Fulvic acid this grow just to see how things go. I had 10 beans total of the Sour Apple and have already ruined 4. So here's hoping third times the charm. So, I went back to my tried and true method: 0) R/O water for everything. Ditching the well water idea. 1) Soak beans in R/O water for 24 hours 2) Paper towel method between plates on a heating mat 3) Once the roots pop, I place them pointed down in the hole of the rockwool cube 4) Hand water once a day by dipping the cube in the pre-mix of 1/4 strength Jack's and everything else I've listed above. This put my PPMs at 300...a way more reasonable value for starts. It's been exactly 7 days since I followed the above. It's probably hard to see but the cotyledons came up, and multiple roots have come out the bottom of the cubes....way faster than I've ever seen since I started growing. That means even though I'm doing my old process this already shaved at least a week off of when I'd normally put it in my bucket in the past.
Likes
Comments
Share
🗓️ Veg – Week 4 complete (2 days late 😅) Nothing but good news this week: The 15L pots are already fully rooted after just one week – much faster than expected. The plants are looking healthy and full of energy 🌿 I’m still going very light on the nutrients – currently at about 50% of the Advanced Nutrients schedule. Still, they’re clearly starting to take in more – you can feel the momentum building 🚀 Regular LST has also paid off – the structure is opening up nicely, staying compact and well-exposed to light 🔧🌱 And here’s a major milestone to wrap up veg: I switched to 12/12 right at the beginning of Week 5 – flowering phase is officially on! 🌸
Likes
8
Share
Really don’t have much to say been a real easy grow even tho temps been getting in mid to high 80’s lately I got a jewelers jewel think it’s cheap cause it’s 10X can’t really see the trichomes to well I seen some amber but I’m sure if it’s not cut down this week may23rd it will definitely be cut next around May 27thish