The Grow Awards 2026 🏆 


Likes
Comments
Share
@captaincondor
Follow
going ok gave them the boost and pk warrior hopefully this will maximise results


Likes
10
Share
@Canadian
Follow
the plans have been doing very well and despite being very hungry they seem to be doing very well I just need to start feeding them instead of once a week probably twice a week because they are very hungry now that they are in full flower mode .
thank you for reading I will continue to update have a happy grow

Likes
5
Share
@LittleBigTrees
Follow
I've defoliated a little as I go.
One of the watermelon candy has a flat stem (Fasciation) I've been trimming the leaves as they are growing in abundance on the affected branches.
The black orchid smells so good it's very pungent and captivating, I'm really looking forward to trying it now.


Likes
26
Share
@Magic_frequency
Follow
I gotta say this seed is very strong once the roots are established and healthy I’ve been hurting her since day 1 still she fought back like a true legend. But hey enough hurting her time to give her 2 weeks of getting fat. 😂💚


Likes
8
Share
@TheGreenLeopard
Follow
easy enough week. added dehumidifiers in both tents as i really have them packed and its best we take care of that now than run into diffs later. nutrients all good, much the same. harvested bday cake auto 45g wet weight. maybe was hard on her at the start but whatever.. looks good, hopefully tastes as good. 3rd week in and these girls are massive.. like really impressive. no hype.
Likes
18
Share
@Chubbs
Follow
420Fastbuds
Gelato Auto
Week 3
What up grow fam. Weekly update for these three beautiful girls. All are growing absolutely amazing. Showing no signs of any issues at all. I'll introduce nutes this week using General Hydroponics Flora 3 part flora series. Will continue the same routine as they seem to be responding great.
All in all Happy Growing

Likes
40
Share
@Kirsten
Follow
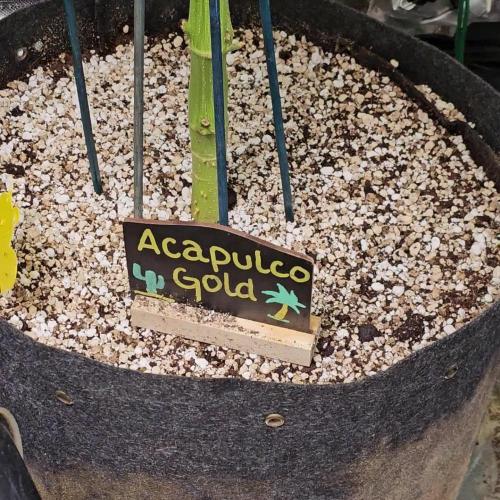
Acapulco, gold has gone absolutely crazy, and we have so many branches. I have lollipoped her this week, too.
She is still stretching, hopefully that's gonna end real soon, because we have no room left in the tent, and we're getting light burn.
I have been moving the plant around to maximise the light exposure and minimise the light stress and heat damage, she has been drinking a fair amount.
I'm just trying to get the fungus gnat population under control with some sticky traps.
Here is what I did this week.
ACAPULCO GOLD Top dress:
🧡 1/2L Canna Coco
🧡 1/3L Perlite
Amendments:
💚 1/4 Cup Diatomaceous Earth
💚 1/4 Cup Ground Cinnamon
💚 1 TSP Ecothrive Grow
💚 1 TBSP Ecothrive Bloom
💚 2 TBSP Ecothrive Life Cycle
💚 1 TBSP Ecothrive Charge
Top dressed 27.8.25.
27.8.25:
I watered with 6.5L of dechlorinated water PH'd to 5.8 with;
💜 1 TSP CAL-MAG
💜 40 ML FLOURISH
💜 1/2 TSP BUD EXPLOSION
💜 1 TSP MEGA CROP PART A
PH: 5.8
PPM: 910
28.8.25:
I watered with 4L of dechlorinated water PH'd to 6.5 with;
💜 1TSP Sea K(elp) Greenleaf Nutrients
PH: 6.5
PPM: 418
29.8.25:
I watered with 4L of dechlorinated water PH'd to 6.5 with;
💜 1ml Trace
PH: 6.5
PPM: 321
31.8.25:
I watered with 4.5L of dechlorinated water PH'd to 6.2 with;
💜 2ml Trace
💜 1 TSP Biosys
PH: 6.2
PPM: 373
Thanks for checking out this week and for hanging out in the comments 😁💚✌️🌱🤞

Likes
43
Share
@Sejnik
Follow
Biobizz květy se od posledního týdne o něco zvětšili a vypadá to ze ještě trochu porostou. Zvětšil se i objem pryskyřice. Vůně ale není moc výrazná.
Florganics nevykazuje nějaký pokrok ani po přidání dodatečných živin.
Rozdíl můžete vidět na fotografiích.

Likes
33
Share
@Rollex420
Follow
22-05-21 (Day 8)
Today begins a new week for the Kosher Cake.
I must say that it has a very rapid growth..
Maybe it will be that I am not used to growing autoflowers and therefore for me it is as if it were a new thing, being used to growing only photoperiodic plants.. 🤷♂️🏻😇
I am very curious to see what she will have to give ..
As always, see you at the next update! 😎
Happy growing to all you guys ☮️💚
23-05-21 (Day 9)
Today, bio-grow (0.7ml/2L) has been added to start giving sugars and vitamins to the plant essential for the initial phase of vegetative growth.
Much love fam! ☮️💚
24-05-21 Day 10
She’s starting to grow some new shoots on her main stem, Now it is starting to take shape. 👏🏻☺️
Stay blessed fam, much love! ☮️💚
30-05-21 Day 16
The girl is growing at her best, I'm sorry to have to move her outside in the future..😕
She seems to really like her environment where she is living now.
I started with a slight LST in order to let the light penetrate also in the lower branches..
Thanks to all of you for your support!
☮️💚
Likes
16
Share
@DabBod
Follow
I didn’t see a lot of vertical growth this week but the buds are starting to really fatten up and get frosty. Humidity was a real problem this week and I had to purchase a dehumidifier as this far into flower consistent levels in the 60’s we’re quite concerning. I’ve still been watering every morning at around half a gallon and will feed a compost tea tomorrow.

Likes
3
Share
@The_Lonely_Farmer
Follow
Overall grows with ease and with the right conditions can produce beautifull flowers and colours as it begins its fade into harvest...
Such a shame too see the bud rot as the colours began too come through as she was at the end of her cycle with all trichomes clear let's hope the few buds I've managed too save are okay too review the flower 👌💚


Likes
125
Share
@SlowpokeFuegobud
Follow
🍊 🍋 🍮 🍭 🍊 🍋 🍮 🍭 🍊 🍋 🍮 🍭 🍊 🍋 🍮 🍭
Welcome to week 9, dear friends!! 😘
DAY 58
Watered with 2ml A+B und 1ml c4 und 2ml PK + enzym+ und 2ml calmag und vitalize 💧
DAY 60
Watered with 3ml A+B und 1ml C4 und 2ml PK + 2ml calmag + enzym+ 💧
DAY 62
Watered with 2ml A+B + 1ml C4 + 2ml PK 💧
Thanks, everybody!! 💚 💚 💚 Grower love!!! 😘🙏 🌱
_________________________________________________________________________________
SETUP:
80x80x180 cm Zelsius
240W Full Spectrum LED IR UV dimmable
DW240H-A6-HS
Heatsink color red
LED Chips:
512pcs SAMSUNG LM301H + 24pcs Osram 660nm + 8pcs Osram IR 730nm + 8pcs UV 385nm
Color mix: 2700K + 4000K
2,8umol/J
Driver HLG-240H-C2100B
Coverage: veg 5x3ft / flower 4x2ft
Product size: 628x205x68mm
Green Buzz Nutrients
Shouts go out to my sponsors @GreenBuzzNutrients, thanks so much for your support! ❤️
If anyone would like to try their amazing organic products, use code GD42025 for generous 25% discount (for orders of minimum 75€) ✨
https://greenbuzznutrients.com/
Mills Nutrients
Biobizz Lightmix
custom exhaust fan 320/270cm³/h
Carbon Active Granulate 240cm³/h
tab water pH 8 - EC 0,25 with Calmag to 0,5
Advanced Hydroponics pH minus Grow + Bloom to pH 6.2
🍊 🍋 🍮 🍭 🍊 🍋 🍮 🍭 🍊 🍋 🍮 🍭 🍊 🍋 🍮 🍭

Likes
26
Share
@Mrs_Larimar
Follow
2022-11-07
Strarting into second Week of Flowering.
Girls get very day Some Feeding and benefical Solution to drink, so the stay happy and green.
website for for my Fertilisers:
https://greenbuzzliquids.com/en/shop/
Code: mrs_larimar
Breeder Info:
👉Black Sugar is an indica dominant hybrid of Black Domina, L. A. OG and Critical.
It has kept the medicinal properties of L. A OG, a good flowering rate on the Black Domina lineage,
and the compact size of the classic Critical strain. With its small growth, the strain produces large yields
of up to 600gr/m2 on bushy branches. The buds are very dense and stinky.
Black Sugar has a high THC level. The variety has a fruity citrus aroma. Dense smoke gives the effect of relaxation and body buzz.
Good for Smoking before going to bed. It can become one of your favorite Seedsman strain
Genetics Black Domina x L.A OG x Critical
Harvest 450 - 500 g/m²
Flowering 50 - 55 days
THC 20.0%
CBD 1.0%

Likes
54
Share
@Kirsten
Follow
Black Opium this week!
It's looking very nice, a good deal of progress with the flower production and bud development.
Here's what I did this week.
27.8.25:
I watered with 3.25L of dechlorinated water PH'd to 6.5 with;
💜 1ml Trace
PH: 6.5
PPM: 321
29.8.25:
I watered with 2L of dechlorinated water PH'd to 6.5 with;
💜 1ml Trace
PH: 6.5
PPM: 391

Processing
Likes
25
Share
@Greengirl420
Follow
These plants are exciting! 🤩 (Today is day 22 (from sprout with green).
We have two plants here. Both are G14’s. Plant #1 we topped on day 11.
Plant #2 we are letting it ride out to see what it does, but with a bit of help from LSTraining.
Plant #1 is measuring around 7.5 inches but that’s on an angle as pictured, next time I untie it to rearrange I’ll try to get another measurement.
Plant #2 is around 5.5in. Both are just doing great and changing daily! Even from night to day we notice a difference! Both are receiving fox farm plant food and calmag each watering. I removed those super big fan leaves today so I’m hoping they do ok with that. 🤞🏼💪🏼🤩
As I’ve said in my other journals, I take a lot of pics lol. I’m here to learn and to help when I can and I love to see everyone’s baby’s grow 😍 Thanks for checkin mine out! Cheers to another week 💨 💨🤞🏼🤞🏼💪🏼💪🏼🤩🤩
Processing
Likes
14
Share
@DonPato
Follow
Fin de la semana siete y soló veo un proceso hermoso, lleno de gratificación, sin hojas quemadas ni exceso de nutrientes, todo se ha dado en las dosis justas de cada componente, los nutrientes orgánicos funcionan de maravilla. Creó que las palabras están demás después del registro gráfico.
Saludos a todos!
Don Pato.
___________________________________________
End of week seven and alone I see a beautiful process, full of gratification, without burnt leaves or excess nutrients, everything has been given in the right doses of each component, organic nutrients work great. He thought the words are there after the graphic record.
Big Hugs !
Don Pato.
