The Grow Awards 2026 🏆 


Likes
Comments
Share
@Elk419
Follow
4/9/24 attempting to pop Challah Bread from DNA Genetics. "Upgraded" to the Evo 4 from s33 board from ac Infinity for this grow. Moved surge outlets to outside of tent, cleaned up wiring a bit, and still debating where to put the driver. Moving from two aqua culture units to one active aqua 15. Put bigger bubble stones in and replaced all tubing. Decided that the active aqua 15 was too loud/ motor seemed to be struggling. Ordered a hitop 10 watt unit. Can't speak to durability, but really glad I bought it. It's a bit more powerful, super quiet, and less expensive.


Processing
Likes
4
Share
@4F1M6
Follow
I started germination of 4 Gelat.Og beans on 29/12/2020. I pre moistened my rockwool cubes with ph balanced water to 6.4. Made sure the plugs were just damp and not soaked. Using a small wooden dowel I increased the size of the plugs pre made holes. Than I sowed my beans into the holes. Ripped off a small piece of rockwool and mulched it up. Lightly filled the holes in with the mulched rockwool. Than stuck the plugs into a misted humidity dome, to complete germination.
Shouldn't take anymore than 4-5 days to see some sprouts. Once I see some cotlydon leaves bursting to the surface. I will get the plugs planted into some 1 gallon pots. Plus get these ladies situated into their home. Cant wait!
Some background information on my experience with Gelat.Og. I've grown this one out several times and I'm just absolutely in love with these genetics. One of the best terp pallets I've came across. Extremely creamy and rich aroma with a kush kick... majestic!
She packs amazing bud structure and is a real branchy hauler. She packs a pretty large stretch, about 200% on average. Plus she has a bit longer of a flower time for a indica dominant... in my experience about 11 weeks.
She gets a strong demand for more phosphorus mid flower. A good spike with the pk booster and shes happy as Larry! Another Seedsman masterpiece right her! Amped to dive In to this grow.

Likes
26
Share
@pifflestikkz
Follow
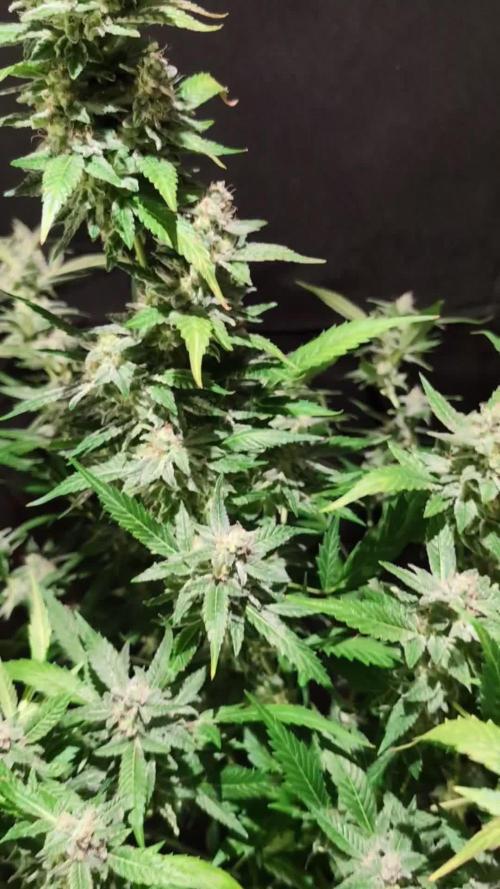
Day 51
20/08/24 Tuesday
Feed today using de-chlorinated tap water pH 6. With Plagron PK13-14 and power buds.
Noticing the stretch stop, and now packing out there bud sites 💪💚
ACOP , Melonade Runtz have Xmas tree structure where as orange bud is pure tall sativa structure... The Overdose is a compact indica looking dwarf but the bud sites are packing out a punch 👊🤣
Day 54
23/08/24 Friday
Watering only today using de-chlorinated tap water pH 6,
I'm watering in 350ml no run off. 400ml I'm seeing tiny run off.
Day 56
25/08/24 Sunday
Water today using de-chlorinated tap water pH 6. Added bud candy and rhino skin 1ml per litre


Likes
13
Share
@STAYINGONMYMAINCBATORUNTWO
Follow
04/01/21
Amazing colours have came through during cure showing off her red and purple! And she’s frosty all over and tastes like a tropical dream!mango pineapple tones with a side of lime! Would defiantly recomiod
Update; colours are coming through got some amazing hues just uploaded some vids 😍
Got the green pheno on both???! But it’s but either way I love this strain tastes a lot like the black cream auto I’ve done of sweet seeds too. So many colours in the bud and the flavour is immense throughout! Tastes like tropical mango and slight pineapple with a lovely pungent limeish taste it’s so nice and the high sent me to sleep when I tested the result! Just had to lay there and close my eyes and enjoy it and woke up to the end of my film ahahah would defiantly recommend Anyone growing very easy and amazing results!


Likes
5
Share
@GoodTimesOrganics
Follow
Hi liebe Community and Welcome back! 💚
Jetzt war es Zeit für den Trichomcheck und ja, es sieht genau so aus, als wäre die Pflanze exakt in der 8 Wochen Blüte Range.
Nächste Woche ist es dann endlich soweit und die DMO Grapefruit kommt unter die Schere ✂️.
Ich habe die Pflanze nochmal Stark ausgedünnt und es zeigt sicher eine sehr stark ausgeprägte Blütenstruktur. Absolut im XL Bereich.
Es lässt sich beobachten, dass die Blütenbildung im mittleren Bereich der Colas stark ausgebreitet hat und die Pflanze Richtung Spitze eher etwas dünner wird.
Sie bildet die Blüten sehr vielseitig aus, von dünner kompakt bis hin zur breiten dichteren stellen.
Ihr Geruch ist nun sehr stark ausgeprägt und eine Grapefruit Note zeichnet sich als markante Hauptnote ab.
Abgerundet wird dass ganze durch etwas skungige, Säure und etwas Zwiebel/Pfefferigel Noten. Auch eine leichte Süße Komponente kommt etwas hindurch.
Die Wachstumsbedingungen im Growzelt sind aktuell wieder super!
———————
🌞 Temp: 23°C
🌚 Temp: 20 °C
💨 RH: 53%
VPD: 1,00 kPa
😎PPFD: 830 mqm
———————
Stay Tuned! 💚
Likes
4
Share
@Urunascar
Follow
Sigo haciendo defoliacion y poda bastante intensa, dejando solo las 2 o 3 hojas satélite de más arriba de cada rama principal, la idea es evitar plagas y sobre todo hongos por falta de circulación de aire


Likes
178
Share
@NuggetPawn
Follow
Another breezy week however, we had some hot weather here, temps were up to 34°c in the room for a day or so which caused a bit of tip burn. When plants are forced to transpire more in a high VPD scenario, one should reduce the EC of the water by 10-20%, this helps the plant take water easier through osmosis without taking up more nutrients than it needs, unfortunately as I spent most of last week high and didn’t notice it until the second day.
Will start to post more pictures every week now they’re looking a bit more interesting 😁
EC is currently at 1.4 due to hot weather, and I’ve noticed when it hovers around 1.6, the EC drifts up to 1.7-1.8 after 3-4 days so thought it was best to cut it back a little.
UVB during lights on will soon be introduced, possibly at the start of week 15.
Thanks for stopping by!

Likes
38
Share
@Ukfarmer420
Follow
Hi guys
So end of week 7 entering week 8.
Blue cheese stinks buds are solid the dark phoenix scrog is frosty asf!!! They still have a way to go yet tho. I reckon by day 70 all will be well and done
There under a 600watt hps light now to finish them off as using the led lights in my pot noodle grow off with wifey. I just started a YouTube channel I will be doing daily videos on my current run, like subscribe and comment on there for shout outs.
Happy growing guys! 😁


Likes
46
Share
@PureMedicin
Follow
2 of my Blueberries were root bound one more than the other.. i transplanted them into soil in a bigger pot. I Have a bunch of strains going on but one vegging mother soon ready to get in under the CFL. Loving the HPS tho wont go back to LED any time soon. Feeding with CANNA terra nute line and using the last Bud candy and big bud from Advanced Nutrients before going full canna. The monster crop was a succes but it took long before shooting. Hope my other clone will do better. I have a very healthy strawberry banana that will be my motherplant as well as a sweet valley kush that are just a seedling now. I am very happy with the HPS from phillips it work wonder in my oppinion :) I started 12/12 as well this week

Likes
24
Share
@PrairieFrostGrow
Follow
***** Week 4 Veg - December 26/20 to Jan 1/21 *****
The girls were transplanted on Christmas day, after three weeks in the solo cups from seed. They had been growing well in cups but I must admit that I feel the root mass should have been larger after that time period. I am working with a new nutrient line that I have not used before and have not been adding microbes to the feed schedule thus far.........or hardly any. I feel this is why the root system, while looking healthy, is looking too small. Over the next couple weeks will ensure they get lots of microbes in the 1 gal pots to fill those up with roots before moving to 5 gal pots.......the last upsize for this girls. Counting my weeks for finish I am wishing that I had started these girls a couple of weeks sooner so they may not get to veg in the 5 gal pots for a couple of weeks before flipping to flower.
For these girls it is still pretty early on in their lives and not many exciting things to happen the first month of seedlings. We have done one upsize and another to go. Keep the feeding in line and follow the week 1 veg feeding for these girls, bringing up the ppm closer to 700ppm range.
Overall, happy with first couple of weeks of veg. Need to get more roots going, we will, but otherwise just give them the time to mature and take it easy......they will come along😀 She is looking very nice and even so far and keeps catching my eye when I open the tent😂😎
Little more detail.......
Dec 26/20, Day 22 Veg
- Dry out day after being transplanted yesterday.
- Pots were still heavy.
- Let the microbes in the media do their thing and start pushing root growth harder than what has been happening.
Dec 27/20, Day 23 Veg
- Gave the girls a little splash of the left over nutes from two days ago to add a little oxygen and they can take the extra microbes and bacteria right now😀
- 200ml with Microbial Mass and Piranha @ 2ml/L = 650ppm and 5.7pH
- They are really happy today!!!! Loving the bigger pot to let those valuable roots expand into nice fluffy new coco and soak up the nutrients👍
- This girl has always had wider fan leaf blades than the other two girls. She is shorter but wider.......hell, kind of like me
Dec 28/20, Day 24 Veg
- feeding day today with more water to get some runoff from the 1 gal pots. They have not been watered to runoff yet.😀
- 0.5L each girl with the full line for this week. No other additives, just the IPP line = 700ppm and 5.7pH
- seems a little high to jump from around 300ppm to 700 but will follow the companies recommendations👍
Dec 29/20, Day 25 Veg
- Dry out day.
- they are happy today......not much to add otherwise today
Dec 30/20, Day 26 Veg
- going to give them another day without watering.
- I feel like I should be watering today but I am not as I am not sure how much moisture they will have consumed and the roots need some air to breath so holding off.
- think it is a CalMag only feeding tomorrow.
Dec 31/20, Day 27 Veg
- feed day today since it has been a couple of days.
- 500ml with CalMag @ 2ml, Gold Storm @ 7ml, Sea Storm @ 5ml, Blackstorm @ 2ml, Vitamin B @ 0.5ml = 525ppm and 5.7pH
- keeping the humic and fluvic acids going in, plus Kelp and CalMag👍
- the girls are happy and seeing forward movement everyday, looking for more aggressive though from the girls.
Jan 1/21, Day 28 Veg
- doing very well......like really well💪
- didn’t push them today and left them alone for watering, pots of course still had some weight and I didn’t expect them to need today.
- Optic Folier Overgrow given today. Folier spray to give them just an extra boost since everything is otherwise dialed in👍
Finishing off the week very strong!!!!!! They have been looking very healthy and perky everyday. The roots are a concern and will be taking it easy on the nutrients for another week yet and keep up the microbes and beneficials. Will get them in line......my hope is too keep their time in the 1 gals down to two weeks max......maybe 10 days??
Looking pretty good ETS as we move through the first upsize and get veg going here. She has been very steady right from the start and continues with steady growth in early veg. Her branching is growing laterally and keeping short node spacing in her growth, perfect!......again, still pretty early on but its all good so far😎


Likes
6
Share
@IQuSX
Follow
Первое, что можно подметить - растение полностью восстановилось.
>>
Начато полноценное кормление на 2 неделю вегетации!
>>
Отсчитываем недели…хочется увидеть эту ZZ во всей красе
Processing
Likes
20
Share
@Mr_nugs_lover_David
Follow
She's looking so beautiful,very nice strain to grow for sure,I'm trying to give her a good shape before flowering starts. I add organic liquids nuts only once a week and looks like she loves it,let's keep up the work!! 💚💛❤️🌱🤩

Likes
12
Share
@GrowNugzCanada
Follow
The last two weeks of been fantastic you can follow all diaries individually this is just an overall diary for all three strains. But it has been in school the week call me foliar spray with Neem oil water and it drops soap with a pretty standard mix they seem to be doing very well powdery mildew to seem to of went away and it doesn’t look like we’re too far from harvest now thank you for following

Likes
14
Share
@Rock_n_Roll_Randy
Follow
COMING SOON!!!
Ran into some problems with the basement. Winter snow melt and flooding 😩. Everything is cleaned up and the tents are sanitized 👍
FOR EVERYTHING MARS HYDRO VISIT:
www.mars-hydro.com
www.marshydroled.ca
PROMO CODE: rocknroll
VISIT THE ALIEXPRESS STORE:
@marshydro_aliexpress
Instagram: @marshydropenny
https://youtube.com/channel/UChU5ZWwNi-DvnO3oWVU3ceA
https://greenbuzzliquids.com/
#greenbuzzliquids
@GreenBuzzLiquids
https://greenbuzzliquids.com/en/shop/
PROMO CODE: rocknroll
https://www.youtube.com/watch?v=8hEqyS1jPpI
https://growdiaries.com/diaries/112437-grow-journal-by-rock-n-roll-randy/week/593118
Thanks for taking the time to read and check out my diary🤜🤛
FC-E6500 LED GROW LIGHT:
FC-E6500 grow light with 3978pcs OSRAM BridgeLux Diodes & Moso Driver, market-leading PPF 2.7 µmol/J, Max 2.5g yield/watt with 30% higher Average PPE, more cost-effective when compared to same style type lights. Only consumes 650W, perfectly cover 5x5ft (personal), 4x4ft (commercial) grow space. Innovative Precise Uniform Lighting-Built-in removable bars interval & dimmability enable the exact & dynamic PPFD control over each of the plant growing stages, FC-E6500 detachable bars deliverSuperior Heat Dissipation: Real Aluminum heatsink together with 6 slim profile passive cooled bars (THINNER & LARGER surface) and detachable Meanwell Driver, create less heat. save 50% hydro than other old grow lights! Driver can be mounted remotely on the side of a grow tent/rack or on an adjacent wall to remove heat from grow space. Full Spectrum UV IR LED: With Yield Max spectrum (660nm Osram enhanced Deep Red,2800k-5000k,730-740nm IR,380-410nm UV LEDs), Average PPFD the FC-E6500 LED grow lamp enables cultivators to produce BIG FAT Dense Buds, perfect for full-cycle hydroponic, soil, grow tent/grow room.
Dimmable Commercial Grow Light: Cost-efficient, easy dimming & daisy chain With a max up to 20 lights, IP65 Waterproof, master light easily controls the rest. Perfect for commercial & home horticulture.
FC4800 LED GROW LIGHT:
GET THE MAX FROM MARS👍: Welcome one of the newest members of the Mars Hydro family🤜🤛🤘. The Mars Hydro FC 4800 480W LED Grow Light can accommodate up to a 4' x 4' area for flowering. It has OVER 2000 LED chips consisting of the best selling Samsung LM301B diodes which has a Luminous Efficacy of: 220 lm/W
0.2 W, 3 V mid power,
Osram 660nm Diodes, Infrared light and UV LIGHT👍. It boasts the incredible efficiency of 2.8 µmol/J, maximum 2.5gram yield per watt with 30% higher Average PPFD. This High-intensity spectrum is beneficial for plants at all stages - from veg to bloom, and creates Big dense Buds👍. achieve 50% higher yields & quality compared with the old lights! Only consumes 480W for 4x4ft personal grows, and 3x3ft for commerical grow. It comes with a dimmer and daisy chain function with a maximum of up to 15 lights, the master light controls the rest👍. Wide 6-bar design offers even & wide canopy coverage and can maximizes your grow space. slim 180° FOLDABLE DESIGN... YES I SAID FOLDABLE🤘🤣 , making it compact and easy to install, it's IP65 WATERPROOF and will give you no worries while growing in a humid environment and makes it a flexible high performance commercial grow light for enormous SUPER FROSTY yields.😛😛😛. MARS GETS EM FROSTY BOYS👍
AWESOME HEAT DISSIPATION: The Low energy consumption FC4800 growing light has 6 passive-cooled bars and an aluminum heat-sink a removable driver you can upgrade later or have it outside your tent. with zero noise you can save up to 50% in your electricity bill compared to HID's or HPS lights!
It also has a removable driver so you can upgrade it in the future or have it outside your grow space for better heat control in your growroom👍
UPGRADED FULL SPECTRUM: Yield Max Spectrum with enhanced red (Top-Bin Samsung 3000k-5000knm, Osram 660nm Deep Red), speed up blooming & fruiting, perfectly suited for full-cycle growing. The FC4800 LED grow lamp was born for Big Buds, perfect for commercial, grow tent, grow room, hydroponics, and all soil grows.👍
THE BEST SAMSUNG DIODES: THE FC4800 has Top Bin genuine Samsung Osram Diodes, combined with remarkable 2.8 µmol/J Efficacy, 30% higher Average PPFD, 50% less energy consumption, to maximize your yields. They give you a TRUSTED 3 years warranty 100% Satisfactory guaranteed!!!
TSW2000 LED GROW LIGHT:
INCREASE YIELD AND CROP QUALITY WITH MARS HYDRO LED GROW LIGHTS: NEWEST SMD LED technology provides the highest PAR/LUMEN output (1122umol@18") and can make you get 30% higher yield compared to OLD blurple led lights. Max 2.5g yield per wattage and achieve maximum quality and quantity, much better than traditional HPS grow systems
LOW ENERGY CONSUMPTION LED GROW LIGHT: Consuming only 300W true output with 684 LEDS! It saves up to 50% energy than other led grow lights. Perfect for 3.5x3.5ft bloom stage, 4x4ft veg stage. Over 90% light energy can be absorbed by plants, it will have higher intensity in a MARS HYDRO grow tent with diamond design mylar, or by crossing over using multiple TSW2000
HIGH EFFICIENCY FULL SPECTRUM INDOOR GROW: 3000K 5000K and IR 660nm 760nm RED, makes it close to natural light, highly engineered to provide improved growing performance for plants at all stages of growing, rapid plant response from seed to flower; Uniform and wide-beam light distribution for your plant's optimal growth
8x8 1680D GROW TENT
The MARS HYDRO 8x8 Grow Tent interior is made of a unique diamond design mylar which is highly reflective. (Other companies mylar and reflective rate is as low as 50%, and it won't provide efficient light. They use thick 1680D oxford canvas, and being double stitched, it is tear proof and perfect for locking in the light. Their grow tent keeps 100% of the light inside the tent and helps your plants absorb more light. EXTRA-THICK material means No light leaks or rips at all.👍
Strong Stable metal corner adapters and poles are the trustful supporters of the tent. It's very sturdy, neither rusting or paint flaking off. quick and easy tool-free setup. They use heavy-duty metal zippers, with double layer black lining, by far the best on the market which creates a light-proof seal.
The Easy observation windows are made by double layers of cloth. Observe the growing conditions of your plants without opening the tent and avoid disturbing your plants. The observation windows also serves to dissipate heat and ventilate the air.
The tent includes 2 removable waterproof floor trays to hold soil and water. The removable tray can be taken out to wash easily.
They guarantee the grow tents are easy to install even if you've never done something like this before. Clear Instructions and no tools needed! They also offer 30-day unconditional refunds for quality problems. Just contact their friendly 24 hours customer service 👍
Likes
7
Share
@CampaCavallo
Follow
8ª Settimana di Fioritura 💐💐💐💐💐💐💐💐
Che bello vedere i suoi bud esplodere di cristalli 🤩🎇💚

Likes
9
Share
@Canadian
Follow
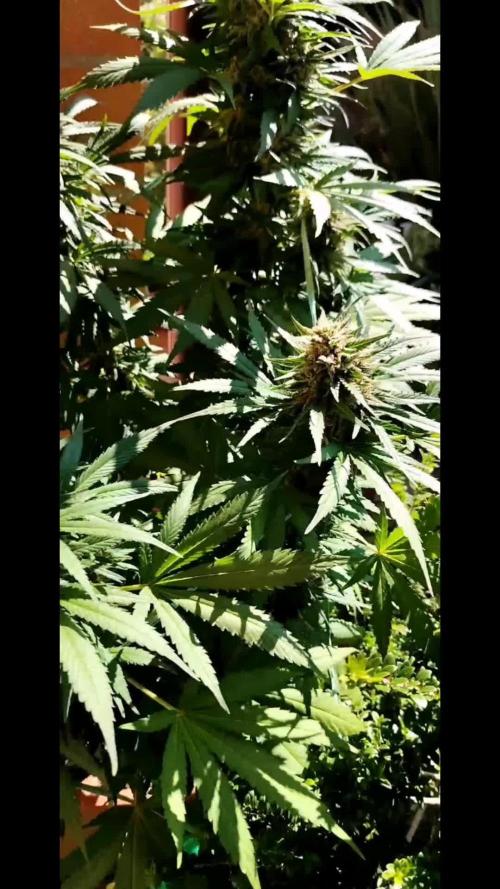
Day 50 and the plant seems to be growing very fast very strong .not too much leafs which is a relieved and very nice for light penetration but be aware with the flowering stretch if your lack of Headroom other than that the plant seems to be growing without any problems developing a very lovely smell.
Day 53 I have to Super crop several branches Unfortunately they were growing straight into the light becoming burned by the intense light I hope the plant doesn't react to bad to HST and still deliver awesome buds. Also I will stop to give her any nitrogen nutrient like the micro and the grow and I will only gave her the bloom and other additives when I feed.
Thank you for reading I will continue to update have a happy grow


