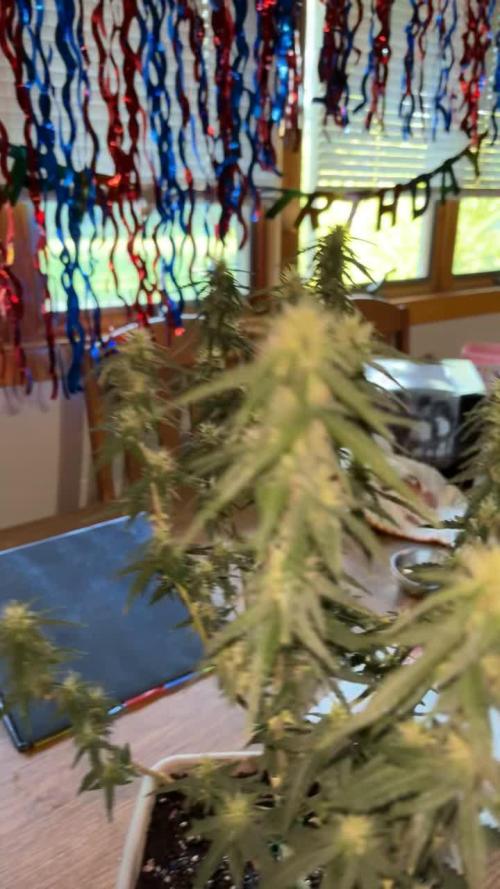
The Grow Awards 2026 🏆 


Likes
Comments
Share
@DogDoctorOfficial
Follow
Greetings, fellow growers! Week 4 has been a whirlwind of excitement and progress in our Anesia garden, filled with transplant triumphs, nutrient delights, and promising signs of growth. Let's dive deep into the heart of the action and uncover the secrets behind our thriving plants!
First up, let's talk transplant magic. We took the bold step of moving our beloved Anesia beauties into their final 15L autopots, setting the stage for a journey of epic proportions. But we didn't stop there – oh no! We pampered our plants with a special super soil mix from Aptus Holland, carefully crafted to provide the perfect blend of nutrients and microbial activity for optimal growth.
Let's break it down:
Super Soil Mix: Our super soil mix is a concoction of all-in-one pellets, substrate buffer powder, and micromix soil, meticulously blended to create a nutrient-rich environment that promotes robust root development and vibrant plant health. The all-in-one pellets release essential nutrients slowly over time, ensuring a steady supply for our hungry plants. Meanwhile, the substrate buffer powder helps maintain pH stability, while micromix soil provides essential trace elements for overall plant vitality.
Mycormix: To give our plants an extra boost, we incorporated Mycormix during transplanting. This powerful mycorrhizal inoculant establishes a symbiotic relationship with the roots, enhancing nutrient uptake and promoting drought resistance. It's like giving our plants their very own team of microscopic helpers!
With roots looking as impressive as ever, it's clear that our Anesia beauties are settling into their new homes with gusto. But we didn't stop there – oh no! We treated them to a refreshing drink of Aptus Veg Mix, a nutrient-rich cocktail containing regulator, camg boost, all-in-one liquid, and start booster. It's like a spa day for plants, complete with all the essential nutrients and pampering they could ask for!
And just when you thought things couldn't get any better, we topped it all off with a luxurious spritz of Nutrispray, because why not spoil our plants rotten? This foliar spray is packed with essential nutrients and trace elements, giving our green friends a little extra love and attention.
With each passing day, our Anesia adventure grows more exciting, and I can't wait to see what the future holds. Stay tuned for more updates, more growth, and more green goodness as we continue to cultivate joy and growth together in our Green Oasis!
Genetics Red Banana Pudding = RBP
Apricot Oreoz = AO
Zoomiez = Z
Future#1 = F
https://anesiaseeds.com/
Plant nutrition - Aptus Holland - https://aptus-holland.com
LED Photons - Future of Grow - https://www.thefuturofgrow.com/
Controls - Trol Master - https://www.trolmaster.eu/
Watering - Autopot - https://autopot.co.uk/
Tent - Mars Hydro - https://marshydro.eu/
Love and attention - Me, myself and i
As always thank you all for stopping by, for the love and for it all , this journey of mine wold just not be the same without you guys, the love and support is very much appreciated and i fell honored and blessed with you all in my life, With true love comes happiness. Always believe in your self and always do things expecting nothing and with an open heart , be a giver and the universe will give back to you in ways you could not even imagine so
More info, the ocasional give-away and exclusive updates from all my adventures can be found - links in the profile description
Friendly reminder all you see here is pure research and for educational purposes only
Growers Love To you All 💚

Likes
Comments
Share
@BlackBear833
Follow
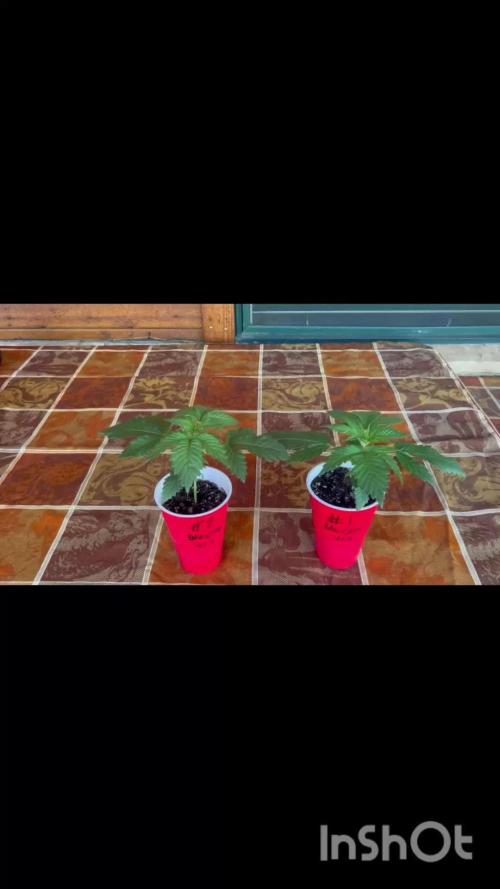
After three weeks in the solo cups I transplanted to 1 gallon pots and three days later I noticed yellowing on one of the plants so in 16oz of water I mixed in 1/4 tsp of Epsom salt and gave it to both plants in fear of magnesium deficiency but the other plant is thriving and growing strong. YouTube video:


Likes
12
Share
@SSKNFbyHAZE
Follow
** COST **
TO RUN
- Used previous ⛺️ setup : 0.00USD
- Monthly electricity : 36.73USD <-- other ladies sharing ⛺️
- 1 Gallon Fabric pot : 0.10USD
- Bonsai wire : Apx. 0.03USD
- Reused soil from last run : 0.00USD
FOR NUTRIENTS
- Jadam Microbial Solution : 0.00USD
- Fermented Plant Juice : 0.00USD
APPLYING
- JMS : 30ml / 1 Litter
- FPJ : 30ml / 1 litter
TOTAL COST : 36.91USD
Throughout the week, I give compost tea, and fermented plant juice once each ^^
These 2 plants have almost same birthdays, but there are in really different stage of flowering.
I am guessing drought shock had their growth stage all messed up ^^;
Hope you guys have a wonderful day today ^^v
*** Please Like, comment & share ***
Highly appreciated -----/-----<@

Likes
13
Share
@masterofsmeagol
Follow
7/13 It's maine-ing out. Overcast and misting. I guess it rained last night but not much. Today is my watering day although I think they could've made it until tomorrow. These drastic temp changes makes it hard to get a STEADY routine in place. I watered everything in the 20's a gallon the 10's 1/2 gallon. The 10th planet in the front was still heavy so I didn't water it. I'll keep an eye on it. Temps are much milder. I noticed a few more septoria leaves on the 10th planet which I promptly defoliated. This pheno is flowering. I could've put this week as flowering as several plants have started. I also saw ONE leaf on my chem dog that had septoria on it. ONE f-ing leaf! I was planning on treating this early anyway so I mixed one gallon of plant doctor 3 tsp gallon/gallon which was the recommendation. I'll monitor this plant and continue treating it the next two weeks. I may do foliar too but the mixture is different. It's a systemic so I don't think that matters as much. Considering getting mulch to protect from spores on the soil. My plants look GORGEOUS. I Hate to use such a nice plant as a guennie pig but I'm not going to sit here and watch it progress. I'm lucky it's really not that bad and that it's on a reveg. There's so many leaves that I would be forced to prune anyway. I'm seeing two MAYBE three leaves a morning but I want to get this under control. Last year u let a plant with septoria go and it finished but went to extracts. I've got a pretty good feeling about this plant doctor. I've used it before with good results. Only time will tell though.🤞
EDIT: WENT OVER AT ABOUT 1PM. ITS 2 NOW AND BLUE SKIES AND SUNNY. IM SUPER GLAD I WATERED AND EVEN MORE SO THAT I APPLIED THE PLANT DOCTOR HOW I DID. THE GIRLS ALL LOOKED AMAZING. THE TENTH PLANET I TREATED WITH PLANT DOCTOR LOOKS THE BEST IVE EVER SEEN IT. I FOUND ON LEAVE DEEP ON THE INTERIOR WITJ A SMALL SPOT BUT ITS SOMETHING IM SURE I MISSED THIS MORNING. IF THIS WORKS THIS GOOD ILL BE APPLYING IT TO EVERYTHING EVEN IF ITS JUST PREVENTATIVE.


Likes
8
Share
@Herbman420
Follow
Hi everybody this week went really well did a bit of LST to the lower branches and cleared up some van leaves that will cover in up the lower buds also put her onto bio biz top Max alongside biogrow and bio bloom can't wait to see how she performs this week and I have good hopes for this one thank you for looking at the diary and we'll be updates every week and always keep in mind it's 420 somewhere 🌱👍
Likes
5
Share
@Johnny_0G
Follow
Well she made it another week and tbh I think I'll go about two more days with her in dim light. She got another coating of terps a few days ago and she looks ready🧐😍😍😍
Likes
6
Share
@valiotoro
Follow
Hello everyone week 6 of flower has passed for this Mint Jelly auto ❄️
For the feeding schedule i stopped feeding Power Roots and Pure Zym and started feeding Green Sensation 0,5/l
Mars hydro FC-E6500 75%
have a great day and wish you all happy growing 😎👨🌾🏻Oui

Likes
4
Share


Likes
361
Share
@Ju_Bps
Follow
Hello my friendly growmies 👩🌾👨🌾🌲🌲,
This Fat Banana 🍌😋 continue to grow fast this week, look really happy in the 11l pot and look in love under the TS1000.
I've removed the 2 first stage, by experience I know will don't give good stuff.
I don't know if I'll let grow the plants or if lst, I'll have the week to think about.
💦I give water each 2 days and more and more this week
250 ml Water + RQS Grow Tab (1/2 for 2.2l )
300 ml Water + cannazym
350 ml Water + RQS Grow Tab + Boost
@PH6
Lamp @60%
Thanks community for follow, likes, comments, always a pleasure 👩🌾👨🌾❤️🌲
Mars Hydro - TS1000 💡💡
https://www.mars-hydro.com/ts-1000-led-grow-light
Mars Hydro - FC3000 💡💡
https://www.mars-hydro.com/fc-3000-samsung-lm301b-led-grow-light
RQS - Fat Banana Auto 🍌🍌🌲🌲
https://www.royalqueenseeds.com/autoflowering-cannabis-seeds/487-fat-banana-automatic.html
Likes
Comments
Share
@ORION1_1
Follow
The buds are early in flower but still stretching. Thick white stigmas popping out of all the bud sites. And there's a beautiful purple color that's beginning to show on the early sugar leaves. I defoliated only a couple of the largest fan leaves off the main stem. The were bigger than my hand and blocking nearly all the lower sites, so I felt it was beneficial. The spacing has been good on all the branches and I haven't needed to remove any other foliage besides the big boys. I did also remove the absolute lowest budsites because at this point there wasn't any chance they would ammount to anything
Likes
Comments
Share
@StillBlazin
Follow
Hier habe ich ein Phenom Hand gemacht mit einem Min Fuck Samen die Pflanze kommt bald in die Blüte.


Likes
5
Share
@TheSpoonieCrone
Follow
The aroma. So yummy. Now that the buds are frosting up and getting chunkier, I get impatient. I want to roll one up and pack some bowls! Soon old lady, soon!

Likes
1
Share
@Vincentmad
Follow
End of week 3, last week we removed bottom node and this week removed last node from bottom tpp, heavy lollipoping for pre veg for 2/3 weeks then flip to 12/12


Processing
Likes
2
Share
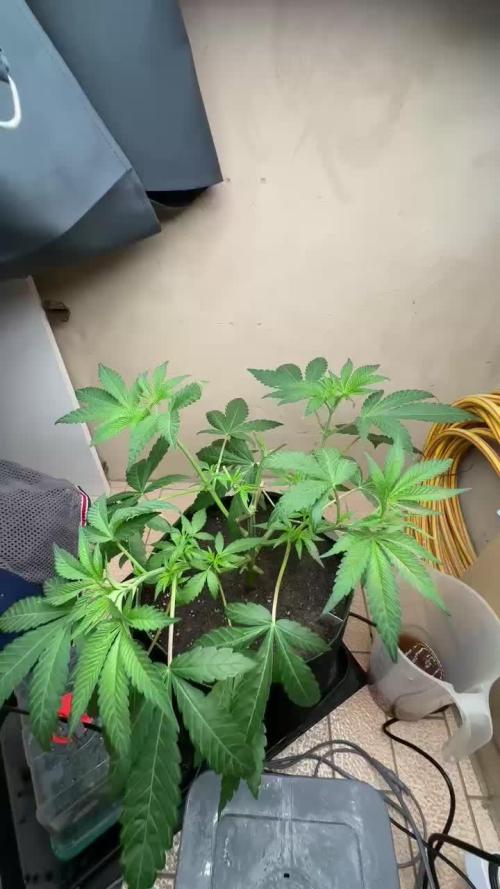
@GirlGoneWeed
Follow
Recovery at its finest, that's what you will see on week 4 around here! Guess who's loving the CO2 with high temperature? Thats right, all plants are!
The comparison of last week with this week have such a difference, on day 24 I introduced a DIY CO2 bottle, the recipe consist in:
-CO2-
2 cups of sugar
1 tablespoon of yeast
1 tablespoon of baking soda
1 later of warm water
Mix all ingredients on a bottle, make a nail hole on the cap shake a little (when shaking put your finger on the nail hole, you should hear a hissssss when you release the hole) use it when lights are on, increase temperature to 30-35C, watch for high levels of humidity, and voila! Any other details you want to know ask way :)
I haven't started any LST yet, I am waiting for a bit more growth to start bending, I have to make sure all 5 plants will have enough space inside this 2x4 tent.
All suggestions are welcomed :)
Thats is for now, Stay Lit folks!
Processing
Likes
9
Share
@Grey_Wolf
Follow
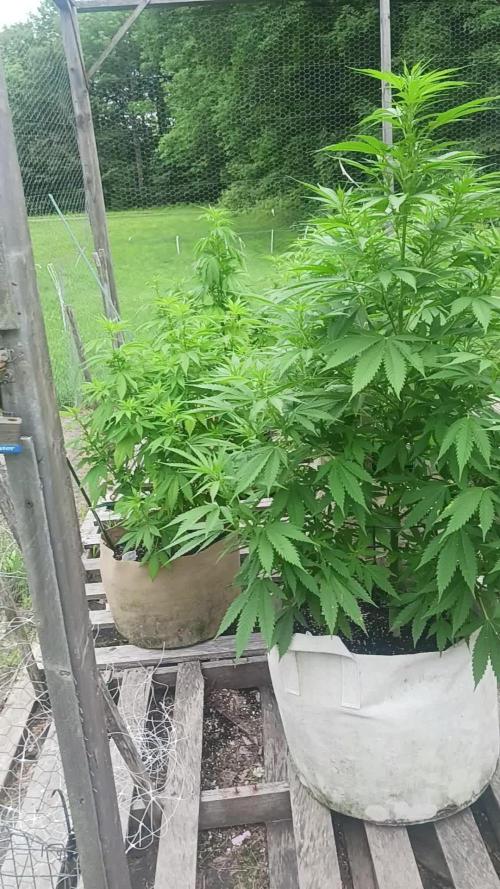
Barneys Farm Red Diesel
Revegged Cutting 4 weeks of Flowering completed
10th March 2020
Man this smell brings back all the good memories of the last time I grew this strain. 😍 I'ts pure Gas and still the best smelling Diesel variety I have tried so far.
It's also tasty as all fuck and I was surprised and saddened to see that Barneys were discontinuing it as a Strain variety 😓
But I suppose if it wasn't a good seller then it had to make room for New stuff and thats also a good thing .
Back to this grow and I'm very happy with this plants size considering it started out as a tiny clone from a good Mother and is now looking likely to yield me a few
Jars of Top shelf Buds. 🙏 I do worry about what the weather will be doing in about 5-6 weeks time as she's relatively unprotected from heavy rains unless I
construct some type of Cover for her. 😏
Checked Soil ph and temp and it was 6.4 and 23 c Also gave a good feed of a few goodies and watered it in well . The native bee's seem to like her too
as there's always a few hanging around during the day.
Thats it For this week
Cheers for taking the time to check out my update 👍

Likes
21
Share
@Mrs_Larimar
Follow
2025-10-02
The weather changed to the good-
its clear and dry
means short foggy mornings and then comes the sun- and stays until evening
in the night its pretty cold
so maybe we will see some purple?