The Grow Awards 2026 🏆 


Likes
19
Share
@valiotoro
Follow
Hello everyone 😎
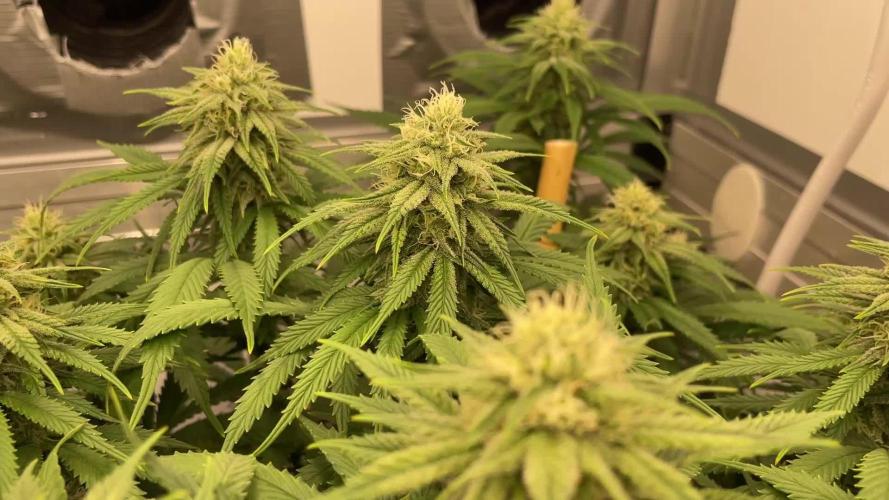
Day 30
she grew fast with a great structure and with a beautiful green colour on the leaves.
She is responding superbly to topping and Ist aswell growing like nothing has been done to her!
Have a great day 👨🌾🏻

Likes
46
Share
@Dr_Rook
Follow
Encarando ya la recta final. Calculo que en una semana y unos pocos días más cómo mucho cortaré.
Al principio de semana di su última comida con Ec baja y a mitad de esta hice el lavado de raíces, drenando un agua con Ec ya aceptable, con lo que presagio que va a tener buen nivel de sabor.
Les estoy haciendo pasar ya bastante frío, buscando un extra de resina; con lo que se está llenando de colores. Estaba un tanto preocupado con los cogollos porque no los notaba demasiado apretados, pero en esta semana lo han hecho y mucho. Espero esta semana terminen de apretar como rocas.
Comienza la cuenta atrás, tic tac, tic tac…

Likes
3
Share
@LST420
Follow
Week 12 The buds are slowly fattening up. Dutch Passion issued a warning on their website that certain strains like this one can cause them to produce male flowers when exposed to too much stress. So I only do careful rounds of minimum defoliation in order to hopefully prevent this from happening.

Likes
8
Share
@skaterblasted
Follow
Lamp Brightness: 100% @ 16" - estimated 914 PAR
(top of GMO 2/back left)
Waterings only, daily
crop steering - reduced water temp + introduced dry down period
IPM once-a-week visual inspection - no foliar applications
notes: GMO 1 side branches supported w/ more twine + also showing signs of senescence, darkening buds
GMO 2 + 3 fading on upper leaves/branches
contemplating harvest next week, trichomes check out great continuing to ripen
Likes
25
Share
@Mr_Awesome_Badass
Follow
Pretty happy with the outcome so far. This style of growing will not yield the the most or greatest stuff due to all the stress but it's for the looks.
And this girl looked awesome.
Very happy with this grow and looking forward to doing something else.
Think I will do a photo period next so I have more control.
Thanks for following!!

Processing
Likes
9
Share
@Kushizlez
Follow
Day 60F
The PM on the cheese has gotten significantly worse in the last few days. I think it may have something to do with the constant humidity spikes every time I water. I haven’t been running my humidifier at all in flower so maybe it’s having trouble keeping the RH up during lights on. Just another reason to follow a daily watering schedule. The cheese and slurricane look fucking disgusting and I’m starting to doubt that a peroxide wash can totally fix it. It worked well for my outdoor crop so it should be fine but this time there is probably 3x the amount. I’ll make sure to really soak the buds and rinse them off good.
Bbb#1 is flopping over like crazy from the weight. Too late to stake it up now so hopefully it holds until next week. Starting to foxtail a bit but nothing too bad. It is now 100% done and ready for chop.
Bbb#2 is just getting frostier and frostier by the day. The purple fade is really coming along nicely too. Might reveg. It is now 100% done and ready for harvest.
Black garlic #1 is finally filling out! I can’t believe it. Never heard of a plant packing weight on like that in week 8. The breeder did mention that it packs on weight later but I’m stunned. Taking her to 9.5 weeks.
Black garlic #2 is looking very average. Average color, average size buds, average frost, average smell, probably an average yield. And it’s starting to get a bit of PM. Overall not happy. Will be taking her to 9.5 weeks.
Zkittlez #1 has pleasantly surprised me. It was a bushy runt in veg but came through. It’s the third frostiest in the tent, super dense, stacked tight, smells great and looks great. It’s already got a nice amount of amber so it’s 100% ready for chop.
Slurricane #4 looks insanely frosty even under all that PM. If I can’t wash it off it’s going in the trash. I want to chop this asap but have to cut everything at once unfortunately. It’s 100% ready for harvest.
Badazz OG cheese is looking like a decent yielder but doesn’t have much else going for it. I think it still has some filling out to do. I can’t even smell the final profile change yet. The leaves are rotting off very quickly. Taking her 9.5 weeks.
I don’t mind harvesting a bit later rather than early. From my outdoor experience, when a plant is picked early it smells like hay and wet grass clippings until it’s been curing for 3 weeks. When I harvest late or at 30-50% amber trichomes it smells like same scent profile it had when growing. Just my experience.
I’ve read that the tobacco industry adds calcium and potassium carbonate to their crops to help promote fire holding capacity and to increase the whiteness of ash. Turns out some of the organic amendments I bought last week contain exactly that. I’m going to give each plant a light top dress to see if the tobacco industry is onto something.

Likes
43
Share
@Just_Weed
Follow
In the last week, smell changed. Very nice odour coming out of the tent every time I open it.
Cause of issue with very high ppm in last week watering I decided to water once with only 200 ppm water with a bit of calmag (runoff 1700) and
second 500 ppm watering with only flowering nutrients 4 mL BioBloom and 2 ml TopMax ( runoff 1000 ppm)
So ppm issue seems resolved and I'll try to aim for 1000 ppm for next watering.


Likes
15
Share
@moritz
Follow
Week 6 is a short one. Humidity is high as shit but I've just ordered a dehumidifier. VPD sadly is only at about 0.8 mPa during the Day and wayy lower at night.

Likes
2
Share
@TheGourmetWeed
Follow
Day 29 - 13/6
13/6 - General:
Another week starts for #3. She looks strong and vigorous, produces a different kind of foliage when compared to #1. Regarding the heating and RH problems, after a full morning and afternoon working inside the grow and outside, they're finally solved now. I didn't have the thermo-hygrometer in the right place, and made some adjustments in the setup that brought me back to desired values. Having the fans in the right place and speed and the same with extractor made all difference.
Techniques:
Just got everything tighten up, tomorrow will have a big training day.
Feeding:
Gave her the week 6 biobizz schedule. Tomorrow will do the same and maybe from monday will start going over, depending on her response.
Smell:
She rocks! when it comes to this subject, she's really different from #1. Funny how different they can be coming in the same package. I wonder if topping the plant had any influence...
Temps and RH recorded today:
30c - 18c
63% - 28%
Pests and plagues:
Nothing to record.
Day 30 - 14/6
General:
Another day goes by, and she keeps growing. Starts to pre-flower. Today during some training, accidentally broke a little one, which is always sad. Anyways, start to think I have a nice couple plants to make a SCRoG, and will eventually consider it during the week, while the plant grows. May be a nice way to support the weight if needed.
Techniques:
Today i start bending everything around, to make a spiral. Let's see tomorrow how it responds to it. Took some extra foliage that was on the way, covering other budsites. She really grows leaves fast!
Feeding:
Nothing today. The pot looked heavy enough to skip a day. There'll be more coming tomorrow.
Smell:
Bam! Opening the tent equals to getting a weed breeze straight in the face. It's really the smell you wanna feel coming from a cannabis plant. Great smell. I'm in love with it.
Temps and RH recorded today:
30c - 18c
87% - 30%
Pests and plagues:
Nothing to record.
Day 31 - 15/6
General:
The pre flowering stage is more evident, and one of the bigger signs is the way she's starting to grow foliage and size. Definitely different phenotypes this 2 ladies. Today didn't touch the plant at all, been just around the tent trying still to get the perfect environment, which is not being that easy task to accomplish. Got it going very well, steady temp and RH (25 celsius, 45%) until the afternoon when the high temperatures outside thrown the temperature values to the 30c for some minutes.
Techniques:
Just checked everything out. Nothing done in this area.
Feeding:
The medium looks good enough to skip a day on the feeding. The pot feels heavy enough to wait at least 12+ hours.
Smell:
With the increase of the heat and RH going down, the smell got a bit more intense, bringing all the good stuff from this fine plant. What a weed puch you get in your nose when you approach. Smelling her makes me smile and wonder how it'll be if we make it until the end.
Temps and RH recorded today:
30c - 19c
71% - 36%
Pests and plagues:
Nothing to record.
Day 32- 16/6
General:
Enormous growth of new foliage. It's everywhere! If it keeps going like this, some of that extra foliage will go down over the weekend. After 48h without watering, today was time to feed her again. Was expecting her to drink more than it did. It's the second day I don't touch the plants, and will keep this way until tomorrow, when I'll just rearrange her a bit.
Techniques:
Just checked everything out. Nothing done in this area.
Feeding:
Same feeding you can see above. Going heavier in the next days.
Smell:
I have the impression some days and sometimes it has much more smell than other times. Weird. Today was a low smell day, which is always disappointing to me as I love to feel that unique smell they have.
Temps and RH recorded today:
29c - 21c
60% - 38%
Pests and plagues:
Nothing to record.
Day 33- 17/6
General:
She keeps growing foliage at a very high rhythm. In the weekend she'll be defoliated and re-adjust a little the stems. She looks much more Indica compared to her Sativa looking sister. I'm still amazed with the different phenotypes. Finally get a hold on temps and RH, which makes me super happy. Today I'll delay the feeding for 12h, fastening her for 36h.
Techniques:
Just checked everything out. Nothing done in this area.
Feeding:
No feeding today.
Smell:
Quite powerful for her age, really strong smell coming from this little one.
Temps and RH recorded today:
28c - 21c
64% - 36%
Pests and plagues:
Nothing to record.
Day 34- 18/6
General:
Another day has passed, not much to tell about this one. She stinks, she got big fat leaves, massive amount compared to her older #1 sister. Starts to drink more water than #1 soon, the foliage color isn't as green as #1, which makes me wonder if I'm giving her too many nutes for the time being. Besides that, she really needs training and a nice defoliation to get her going.
Techniques:
Just checked everything out. Nothing done in this area.
Feeding:
She's a drinker. Same strains, soil and everything and how can they be so different? Anyways, she had the nutes mentioned on the chart.
Smell:
Quite powerful for her age, really strong smell coming from this little one. The whole tent smell to it, and it's quite pleasant on the nose. Get a lot of tropical aromas, almost like a pineapple/mango/passion fruit mix. It's the exact opposite of #1 that has this earthy/woody smell, like when it starts raining.
Temps and RH recorded today:
28c - 21c
50% - 40%
Pests and plagues:
Nothing to record.
Day 35- 19/6
General:
Accentuated growth this last few days. She's very bushy and growing upward very vigourously. Leaves are looking great, she's drinking good amounts of water, and looks like it'll take her longer to flower than her older sister. We'll wait and see.
Techniques:
Just checked everything out. Nothing done in this area.
Feeding:
Normal feed, nothing new here.
Smell:
She's still the queen of the tent when it comes to this topic.
Temps and RH recorded today:
28c - 22c
50% - 34%
Pests and plagues:
Nothing to record.
Likes
26
Share
@Rock_n_Roll_Randy
Follow
SORRY TO EVERYONE WHO TRIES TALKING TO ME....I STILL CANT TALK TO ANYONE BECAUSE I TRIED CHANGING MY EMAIL ON HERE AND IT MESSED EVERYTHING UP. I CANT LIKE ANYTHING OR COMMENT ON ANYTHING. THE WORST IS I CANT JOIN CONTESTS😪😢😭
FINALLY STARTING ANOTHER GROW. MY BACK HAS BEEN FUCKED FOR MONTHS. CANT WAIT!!!! IM DOING 24 AUTOFLOWERS FOR THIS GROW AND IN 5 WEEKS IM STARTING ABOUT 20 FEMINISED PHOTOPERIODS IN MY 5X5 WITH A TSW2000 SO THEY CAN BE READY TO MOVE INTO THE 8X8 TENT AFTER THE AUTOFLOWERS ARE FINISHED. HOPE MY TIMING IS GOOD🤞🤞🤞🤞 LOL


Likes
3
Share
@gr3g4l
Follow
A los 15 dias terminé deshaciéndome de la nº6 y resitué las plantas dejando en medio la segunda más peque , la nº2.
A los 17 dias una poda de apicales nº1 nº3 nº4 y nº5 . La nº 2 la dejé para que crezca un poco más y así también poder hacer la poda sin dificultad.
A los 19 dias podé el apical de la nº2. La del medio.
After 15 days, I finished removing plant #6 and rearranged the plants, leaving the second smallest one, #2, in the middle.
After 17 days, I performed apical pruning on plants #1, #3, #4, and #5. I left #2 to grow a little more so I could also prune it more easily.
At 19 days I pruned the apical bud of number 2. The middle one.

Processing
Likes
7
Share
@gablmo
Follow
The temperature is better with ac, took me sometime to get humidity high. I think I gave it double the food it needed. And I think the hlg 100w v2 3000k was too far away, I set it on 18" for the 2nd week. I notice a lot of yellowing and light vibrant green everywhere and the tip o leaves crawling downwards. And I think they are asking for help. Please help

Likes
6
Share
@India_Calcoen
Follow
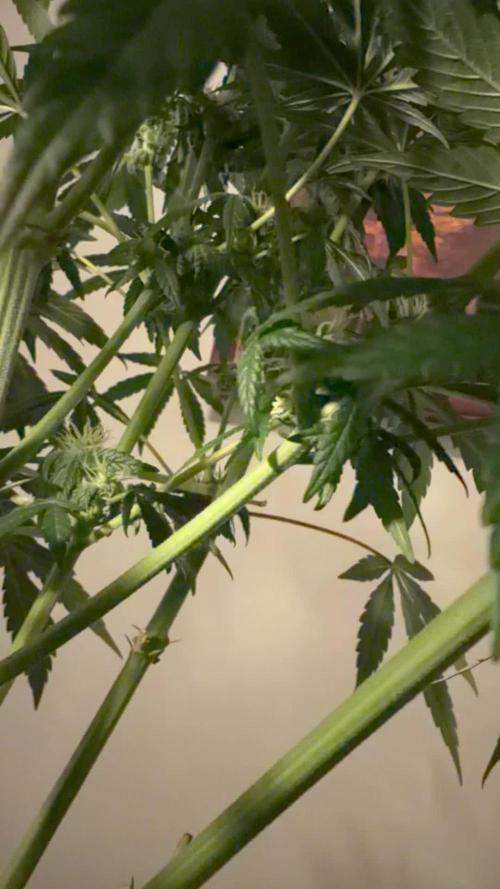
14-02-2026
I killed my Lamb’s Bread. The balls were everywhere and I don’t have the energy to remove them all and check her everyday for new ones. Unfortunately she pollinated my Afghani, quite a few pistils turned brown. My chickens will be happy, they love the hempseeds. I juiced my entire plant and drank it. Who knows, maybe it will do something good for me.

Likes
32
Share
@PEAKYPLANTERS
Follow
Respect for all of you, brother farmers! masters and beginners! thank you again for gathering on the pages of my diaries! we carry out our work with dedication and live on ambition! Come on guys!🙌👽🙌
WE WANTED TO CELEBRATE WITH YOU
OUR 3 YEARS OF AGRICULTURE ON THE PLATFORM.
GREETINGS TO THE FRIENDS OF @GROWDIARIES WHO MADE THIS POSSIBLE!
Likes
16
Share
@NMGDOC
Follow
Semana del 1 al 7 de marzo.
Lo apunto aquí porque sino luego no sé ni en que semana vamos jaja 😂
Las primeras fotos y vídeo son del inicio de la semana. Hemos retrasado el cambio de una semana a otra, ya que por el lavado de raíces no las pudimos alimentar antes.
Luego cambiaremos el PH a 5,8-9 y el EC también lo aumentaremos.
Edito: al final no lo hemos aumentado porque respondían bien y estaban recuperándose.
Respecto a la semana anterior, se ven mucho mejor después del lavado de raíces. Algunas plantas están muy bajitas, así que la luz para las más bajas está a 65 cm.
Mañana o pasado aplicaré jabón potásico con aceite de neem a modo de prevención. La vez pasada, que era mi primera vez plantando, llegaron trips y al final resultó todo bien, pero si no llegan los bichos, mejor todavía


Likes
3
Share
@ZzTooRightOGzZ
Follow
She's doing so well today with her last feed .
Gave her 5ml off micro boost from living Soils.

