The Grow Awards 2026 🏆 


Likes
Comments
Share
@PiusWaxis
Follow
Here we are at the end of my plant's wonderful eleventh week of flowering, another week full of exciting developments and new discoveries.
The constant and unstoppable growth of the plant has come to an end, showing a beauty and vitality that are a true spectacle for the eyes. 😎
The abundant layer of resin that has formed is a clear sign of the health and well-being of the plant, once again confirming the benefits of the premium nutrients used throughout the entire growth cycle.
TrollMaster's "TENT-X" environmental control system continues to prove its worth, precisely maintaining optimal temperature and humidity levels to promote vigorous plant growth.
The combination of advanced and precision technologies ensures that plants can thrive in a controlled and conducive environment😎
I am thrilled to share with you the latest video showing the temperature, humidity and VPD trends of this last week of flowering, providing further demonstration of the extraordinary performance of the TrollMaster control system and its synergy with the other elements of the grow room.With each week that passes, the anticipation for the new discoveries and challenges that await us continues to grow.
With the constant support of Plagron nutrients, trust in the TrollMaster control system and the excellence of MEDIC GROW LED lighting, I am sure that I am always ready to face any challenge!
Thank you again for being by my side in this extraordinary adventure, dedicated to exploring the wonders of plant cultivation. Together we continue to look to the future with confidence and enthusiastically anticipate the successes that each new week holds for us. 💪👽🌱✨
REVIEW TENT-X:
I was pleasantly surprised by the effectiveness and functionality of the TROL MASTER!
This device is simply amazing, as it has allowed me to monitor the environments I use it in accurately and efficiently.
One of the most impressive features of this device is its ability to operate LED lights easily and intuitively. Thanks to its user-friendly interface, I could easily customize the lighting of my rooms according to my tastes and different situations. I particularly appreciated the possibility of programming the sunrise/sunset simulation, thus creating a more natural situation.But that's not all: the device goes further and manages to keep me constantly informed about the humidity and temperature of the surrounding environment. This feature has proven to be very useful, especially in times when I am not present.
I was able to set humidity limits, so that the device would immediately alert me if the levels exceeded the desired threshold. This allowed me to intervene promptly and avoid excessive oscillations.
The accuracy of the temperature measurements was another welcome surprise. The device is equipped with a high precision sensor that allows me to constantly monitor the temperature of the rooms. Here too I was able to set temperature limits, allowing me to be notified immediately if they were exceeded.
Overall, I was really satisfied.
The TENT-X exceeded all my expectations. Its ease of use, precision of measurements and possibility of customization make it an indispensable tool for those seeking to monitor and optimize environmental conditions.

Likes
1
Share
@PalmaGrow
Follow
12 - 18 noviembre
Realizamos poda apical y dejamos crecer libremente quitamos únicamente hojas grandes

Processing
Likes
6
Share
@MissSolasolita
Follow
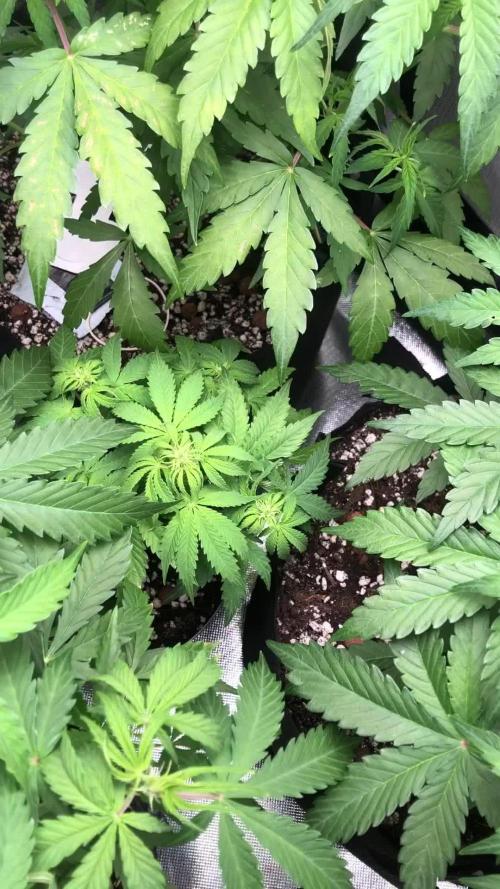
End of week 4
No sign of pre flowers yet
Looking healthy and strong

Likes
9
Share
@Luv2Grow
Follow
Day 43 - The start of week 7 and she’s doing great and the purple is starting to show up pretty nicely now. She’s doing good since tying down some branches yesterday and will let her grow up as much as she wants now. Should be ready for some water tomorrow.
Day 44 - Really starting to push out some purple. Gave her some water today, soil was completely dry. Just watching her as she starts to stretch a bit and might give some bone meal once she hits day 60, depending on how she’s doing.
Day 45 - Not a whole lot happening right now, she’s looking good and starting to put on a lot a purple and loving it. Tucked a few leaves to keep her open.
Day 46 - Nothing interesting going on with the girl right now. She’s filling in nicely and the purples look amazing. Probably another day or two before giving her some fresh water.
Day 47 - Looking good and dropped the light to about 10” the other day and it really seems to be helping her bud up more. Pot is just about dried up so will be giving her some water tomorrow.
Day 48 - She’s doing well, noticed a few lower leaves are becoming very light in color but all the rest seem to be doing ok. Not sure if I need to add another batch of bone meal to the soil or if she just needed a good watering so she got watered to runoff tonight and I’ll keep an eye on her for the next few days. Other than that, her bud sites are really starting to purple up.
Day 49 - It’s the end of week 7 and getting a little worried about this girl and not sure what’s going on. Yesterday she looked great and all of a sudden today, all of her leaves have turned a really light shade of green. This soil is not supposed to need nutes but I’m thinking no nutes is good for veg but I need to add them for flowering so I went and gave her a feeding of the foxfarm trio with some cal-mag and I’ll give it a couple days to see if it helps. Buds are producing nicely but leaves look like they’re dying so hopefully the feed helps.
Likes
36
Share
@JeyGanesha
Follow
Ultime settimane.siamo arrivati al finale anche con queste quasi...bella e sicuramente anche buona😜🤤😂 profilo terpenico forte intenso .un profumo delizioso...quando proverò questa strawberry 🍓 banana 🍌 vi racconterò com'è di sapore e potenza...le cime sono dure dure come una pietra
Likes
105
Share
@Green_Friends_Inc
Follow
Overall a great strain. Would def recommend to just about anyone!


Likes
35
Share
@Rangaku
Follow
Good week of fattening up , temps are on the rise by 2 degrees in the tent as summer gears up I would of liked to have had these done by now as the next few weeks are hot and humid . Just gotta keep that air flow up and cop the wind burn on the fan leaves .
Started feeding every day last week instead of every other day and they are hooking thru their feeds . Will feed another week then a 2 or 3 week taper to flush . The smell from this purple punch is so strong and the leaves actually taste like blueberries , home stretch now

Processing
Likes
4
Share
@GingaNinjaGenetics
Follow
She's starting to stretch well now and I'm seeing lots of pistils. Still feeding with med man brand kind bud base at 600 ppm and kick at a half g per l of water every third feeding


Likes
45
Share
@GreenHouseLab
Follow
I tend to forget about her as im mesmerized by others, she’s the one with the best perfume currently in the room. It’s very possible she starts busting late flower, trellis is up show me what you got girl. Coated top down she is some sticky icky oooooh weee!
Yep hydro still in Veg Ive topped for a second round shit will be bonkers and going in the flower tent after this round. Will most likely initiate flowering in aboit 2 weeks or until she blows the top off this tent.
Stay Safe Stay Fresh
GHL
Likes
5
Share
@killerjoint
Follow
10-8-2024 TOP DRESSING AND WORM TEA.....
NOTHING MORE
10-9-2024 22ND DAYS INTO FLOWERING
SMELLS CRAZY ON THESE STRAIN
GETTING SOME SNOW ON TOP
LET'S GO
10-11-2024 DO NOT HAVE ANY PEST BUT JUST IN CASE
NATURESGOODGUYS HOOK ME UP WITH LADYBUGS
JUST GOT HANGING PATCH ABOUT /WITH SHIPPING
10-14-24 NOTHING TO DO...JUST WATER (PH6.6)AND WATCHING THE PLANTS.......
COPY CAT GENETIX STRAINS ARE CRAZY!!!!!!!!


Likes
6
Share
@ReggaeShark_420
Follow
Happy about this harvest. Very strong orange citrus aroma with some dense buds along with it. Definitely a sativa dominant bud, with a smooth smoke. Have experimenting on self pollinating and tried it on one particular bud on this plant, and i have to say, it has worked! One seed has been found and is directly been placed in soil 3 days ago. Have not seen any faces submerged yet but hopefully fat monkey #2 is on the way soon with some new growing techniques 😏

Likes
51
Share
@eldruida_lamota
Follow
Bueno resumiendo cookies gelato es una variedad híbrida muy fácil de cultivar pero ojo, cuidado con los últimos riegos si no queréis perder cosecha por moho. Lo demás de 10 pegada heavy sabor increíble, cogollos duros como rocas y bañados de una gran capa de polen.
El ambiente del secado se mantuvo en 23 grados de media y la humedad estuvo por debajo de los 45% en todo momento.
Poco más la verdad estuve encantado de poder cultivar una genética tan potente .
Un saludazo que paséis un final de año increíble y por supuesto buenos humazooos💨💨💨.

Likes
1
Share
@Hydroponicfarm7
Follow
Subimos la temperatura de la sala y vaya si se noto, las plantas crecieron más en 2 semanas que en un mes, una pena no haber podido aclimatar antes la sala

Processing
Likes
15
Share
@DeepRootGrows
Follow
This is one of the happiest plants I’ve grown. She’s starting to really pack on weight and getting some fat dense buds. I’m so so excited for her to finish up these next few weeks. She’s gonna be a great final smoke.

Likes
27
Share
@Bncgrower
Follow
Another successful harvest. This time it was my perfect girl, a very good strain, easy to grow, fast, and without many demands. Besides the controlled environment, it has a wonderful smell. The buds were very dense and sticky. Every time I touched the scissors, a strong smell emitted that filled my room. I really liked the result, and this will definitely be the first of many. My favorite so far! ✌️💪🌿🍁


Likes
7
Share
@Scandic
Follow
It’s not getting attention. But I water it when it’s in need but I’m not sure how much light it gets. Putting the F1 Milkyway to the test! I may have to try it in a bigger pot at some time if it delivers under these circumstances.
Update:
While I lightburned my other plants, this must have been in a better position than i first thought. But it cost me alot on the other plants I got :/
Likes
1
Share
@VirginiaGrownExotics
Follow
She’s budding up nicely finally done stretching and starting to smell strong
Likes
23
Share
@Santica_Garden
Follow
Also guys I am new to Grow diaries and only recently realised that I have been filling in the weeks wrong....well not sure but I have seen how others start their diaries & and I'm taking notes for future grows and next updates. But apart from that everyone is doing great. I prefer to explain everything in a short video rather than have you guys sitting there just reading. Lol. Happy Growing guys & Stay Safe 👍🏾👊🏾🌴💯