The Grow Awards 2026 🏆 


Likes
Comments
Share
@Dennis_Bong
Follow
!!!!!!!!!!!!!!!!!!!!!!!!!!!!!!!!!!!!!!!!!!!!!!guckt euch letzen Report an !!!!!!!!!!!!!!!!!!!!!!!!!!!!!!!!!!!!!!!!!!!!!!!!!!!!!!
Blüte hat begonnen:
Edit:11.05
Die Pflanzen sind innerhalb von 2 Tagen explodiert. Ich habe das Licht nun auf 75 Prozent gestellt und noch einmal Cal-Mag nachgegeben, da die letzte Gabe nur eine halbe war. Die beiden Titan sehen fast identisch aus. Die beiden Epsilon sind circa 3 Tage unterschiedlich, eine ist etwa 5 cm kleiner als die andere und hat noch kaum Blüten. Ich denke, in 3 Tagen wird das der Fall sein. Die Cosmos F1 ist im Umfang circa 50-50 cm, kaum Blüten bisher. Ich hoffe, sie wird nicht noch viel größer, da der Platz langsam eng wird. Ich bin von dem Wachstum dieser Pflanze absolut begeistert. Mal gucken, was die Blüte bringt.
Edit ende
Ich habe alle Blüten entfernt, die nicht im direkten Licht sind, und alle Blätter, die die Blüten bedecken.
Die Pflanzen weisen einen Cal-Mag-Mangel auf, was bei der Blüte normal ist, gerade bei diesem Licht.
Ich habe dem Gießwasser etwas Cal-Mag hinzugefügt.
Die Pflanzen sind drei Tage älter als im letzten Report.
letzte Woche :
Die Pflanzen sind seit der Keimung auf diesen Fotos genau 30 Tage alt.
Ich habe eine Pflanze ausgetauscht, da es sich um eine Epsilon F1 handelte, die vermutlich Mutationen aufwies. Sie hatte verkümmerte Blätter, die nicht wie die ihrer Artgenossen aussahen, und wuchs deutlich langsamer. Daher habe ich sie nach 2,5 Wochen ausgetauscht. Der kleine Mann(die ausgetauschte Pflanze) leidet natürlich jetzt ein bisschen unter Lichtstress, deswegen werde ich wohl nur eine sehr gestauchte Pflanze erhalten. Aber besser, als die Fläche leer zu lassen.
So viel zu dem, was nicht funktioniert hat:
Die Sanlight stand die ersten 2 Wochen auf 20 Prozent.
Dann habe ich sie teilweise mit dem Dimmer höher gestellt: 2 Stunden auf 25 Prozent.
Eine Woche später bin ich auf 30 Prozent und 2 Stunden mit 35 Prozent gegangen.
Für Woche 4 habe ich 40 Prozent und 2 Stunden auf 45 Prozent gewählt.
Ich erhoffe mir, die Pflanzen so schneller an die starken Lampen zu gewöhnen.
Im Nächsten grow soll bei jeder Pflanze die TDS per Infrarot gemessen werden. Da werde ich dann ein Experiment zu machen, wie die Lichtsteigerung am besten umzusetzen ist.
Zu den Lampen kann ich bis jetzt nur Positives sagen. Im Gegensatz zur dazugehörigen App, diese ist wirklich nicht sehr gut umgesetzt. Das Menü und die Einstellungen sind teilweise irreführend und nicht sehr durchdacht. Ich muss mir immer wieder die Tutorials in der App ansehen, da diese immer wieder angezeigt werden.
Noch dazu hätte ich gerne die Möglichkeit, mehr Einstellungen treffen zu können. Das ist aber Meckern auf hohem Niveau, weil auch die App das macht, was sie soll, nur eben meiner Meinung nach nicht sehr gut umgesetzt.
Die Pflanzen wurden von mir mit Klipsen aus dem 3D-Drucker gestützt. Diese Klips kann man Stück für Stück im Winkel verstellen, so dass man die Triebe damit neigen kann. Das habe ich von Tag zu Tag im Winkel verstellt, so dass ich am Ende einen 45-Grad-Winkel habe. Das habe ich insgesamt über 6 Tage gemacht.
Die Pflanzen haben an sich ein sehr gleichmäßiges Wachstum. Die Cosmos F1 wächst so optimal, dass kein LST mit den Klipsen nötig ist. Ich habe an den Pflanzen keine Mängel entdecken können und auch keine Anzeichen von Mutationen.
Die Pflanzen haben im Durchschnitt eine Höhe von 35 cm, wobei eine etwas stärker abweicht mit 22 cm (wieder eine Epsilon F1). Der Umfang mit LST bei der Cosmos F1 liegt ohne LST bei 20 cm im Durchschnitt, wo wir wieder die Epsilon im Negativen haben mit 14 cm.
Die Pflanzen wurden alle entlaubt, das eine Woche vor der Blüte. Morgen werden die Pflanzen erneut entlaubt und ge-lollipoppt.
!!!!!!!!!!!!!!!zusätliche infos werden morgen ergänzt + Fotos !!!!!!!!!!!!!!!!!!!!!!!!!!!!!!!!
*1. Foto Mutation:
Dieses Foto wurde nur 5 Minuten nach dem Umtopfen der Pflanze aufgenommen. Vorher stand sie in einem größeren Topf, in dem sie genauso aussah. Ich habe sie umgetopft, weil ich den Topf brauchte, aber die Pflanze nicht wegwerfen wollte. Der Pflanze geht es gut, aber sie sieht im Moment etwas mitgenommen aus. Bilder folgen

Likes
28
Share
@MadeInGermany
Follow
Flowering day 52
since time change
to 12 / 12 h
Hey guys :-)
All ladies look very healthy and delicious :-)
We're slowly getting closer to the end.
This week it was poured 3 times with 1.2 l each (sewing materials see table above)
At the next watering there is a very light rinse with Clean Fruits so that the last nutrients can be slowly used up.
The trichomes are now checked every day.
I'm looking for my microscope with an app so I can take pictures of it 👍.
I wish you a lot of fun with the update and stay healthy 💚🙏🏻
👇🏼👇🏼👇🏼👇🏼👇🏼👇🏼👇🏼👇🏼👇🏼👇🏼👇🏼👇🏼
You can buy this Nutrients at :
https://greenbuzzliquids.com/en/shop/
With the discount code: Made_in_Germany you get a discount of 15% on all products from an order value of 100 euros.
👇🏼👇🏼👇🏼👇🏼👇🏼👇🏼👇🏼👇🏼👇🏼👇🏼👇🏼👇🏼
Water 💧 💧💧
Osmosis water mixed with normal water (24 hours stale that the chlorine evaporates) to 0.2 EC. Add Cal / Mag to 0.4 Ec Ph with Organic Ph - to 5.8 - 6.4
MadeInGermany

Likes
22
Share


Likes
168
Share
@BudBoutique
Follow
Welcome to Bud Boutique Grow Diary - really appreciate all your love and support :)
Dont forget to check out my other current grows!
🗓️ This Week:
- bud developing is going further
- really a lot of trichs already on buds and on the sugar leaves itself - see night picture
- 1/3 plants got some deficiency, so I will take more care about this and increasing nutrients for this plant
- in general plants looking a little hungry so gonna increase Plagron Bloom from 4ml/l to 5ml/l and see if further adjustment needed
- started Plagron CalMag (5-5-0) for all but especially for the 1/3
- stopped with Power Buds + Sugar Royal because of their high N to compensate the CalMag
___________________________________________
--- 🌱 Strain ---
🏷️ OG KUSH by Barney's Farm
https://www.barneysfarm.com/og-kush-646
---💡 Lighting ---
💡LUMATEK ZEUS PRO 600
https://lumatek-lighting.com/zeus-600w-pro-29/
--- 🥗 Nutrients and Feeding
* 🍸 PLAGRON Algae Baseline grow/bloom + Additives: Power Roots, Sugar Royal, Pure Enzym, Silic Rock, Power Buds, Green Sensation
* 📅💪 baseline grow/bloow: 4ml/l & additives: 1ml/l each
https://plagron.com/de/hobby/produkte
--- 🏭 Grow Setup ---
* 🏠🌿 Indoor: Homebox 120x120x200cm (4x4)
* 📐🌀 PrimaKlima exhausting Fan 1180m3/h (running on 60-80%) & Can Light Filter 800m3/h & 1x Fanbox 1x Dyson fan for Air circulation
https://primaklima.com/de/shop/ventilatoren-de/ec-ventilatoren/pk160ec-tc/
https://canfilters.com/products/filters/
All Likes and comments are highly appreciated!!!
don't forget to check out my Instagram: budboutiquee <3
- Bud Boutique

Likes
56
Share
@Prilyfe13
Follow
May 24, 2024 Day 99
This is the last week for these ladies. They have until the end of this week and then harvest no matter what. I'd much prefer to harvest them sooner, but I don't have space in my dry tent. It's only a 2x2 and the Tropicana Cookies just finished up and will be in there for about 7 days.
Banana Purple Punch A needs a half gallon of water today. She's not done yet and she's all dried up. So I'll give her that half gallon of plain water today PHed to 6.1 and that's it. She should be dry again in a week.
I'll be checking trichomes today as well. I'll update when I finish up.
Banana Purple Punch B is amazing. She smells wonderful and now with the Tropicana Cookies out of the tent, her aroma can shine. Wow.
I'll be checking trichomes as well today.
She also finished up her reservoir but she's still pretty moist. It must have emptied yesterday. This may last the week. I'll need a few days for her to dry out as well. So I might have to add a bit more water. Maybe a quarter gallon? Just enough for her to last the rest of the week. I'll see how she is tomorrow.
The environment is still a bit wonky. The humidity is still in the mid 50's% with the temp being around 73°. It's currently at 76° and 57% humidity.
Grow System Environment:
Temp: 73.2°
RH: 56.7%
VPD: 1.17 kPa
May 25, 2024
It's rainy today and naturally, the humidity in my room is stupid high. So in the tent the humidity is back to 60%. I'll be opening the tent door again every couple of hours today.
Banana Purple Punch A is starting to look like a hot mess. Tops are starting to flop over and there's a super weird fade going on. Leaves that just curled up and turned super dead yellow. Some of the leaves are showing purple, and the tops are getting purple hues. Still a bit of a mess.
Banana Purple Punch B is getting more and more purple. Her leaves are starting to lighten up as well. We can certainly see the start of the fade. The tops have nearly all purple sugar leaves. The buds are still pretty green. I wonder how it works with this one. We shall see over the next 6 days. I might have to add a half gallon of water to her reservoir. She's already a bit too dry to last the week. So I'll do that later today I think. Maybe first thing tomorrow.
Harvest time is 6 days away now. Both ladies are looking super close to being done. Hell, I may even go past the ideal time by a couple days. That's perfectly fine. I could use a good sedative.
The environment is back to being an absolute mess. The temp is at 75°, which is fine. But the humidity is back up to 60%. Hopefully I can get the humidity to drop a bit.
Grow System Environment:
Temp: 75.1°
RH: 55.1%
VPD: 1.30 kPa
May 26, 2024
These 2 are shaping up to be some heavy yielders. Both have massive buds and are on their way to being fully done. Another 5 days I think and they will be ready for harvest. However, I may have to keep them in there for a few extra days. The Tropicana Cookies in the dry tent are taking a bit longer to dry than I anticipated.
Banana Purple Punch A looks great. I ended up using a piece of a plant tie to prop up one of the most leaning tops. Looks great now. Much more light penetration to the lowers.
Banana Purple Punch B is absolutely amazing right now. MASSIVE buds that weigh a whole lot. She finally has a distinct purple look to her. And it's just getting more and more purple. When she is done, I believe she will have some beautiful foliage and lots of dark purple leaves.
She got about 1/3 of a gallon of water today to the reservoir. She was dry and she has much too long to go before she should be that dry.
The leaves are all starting to turn a bright green and fading into deep purples and yellows with orange. Fall foliage indeed.
I'll also be doing a full defoliation in 3 days I think. I want to clear as much foliage as I can before wet trimming. It doesn't seem as though wet trimming will be all that bad. There's sugar leaves, but they are big instead of plentiful. So it should be pretty quick. Drying may pose an issue. If the humidity keeps up like this, I'll have a lot of trouble keeping it below 62% in the dry tent. We have a few days left anyway, so maybe it will go back down by then.
The light is the same. I did take the DLI today and the average is about 40 mol/m²/d, so that's fine. I'd much rather it be closer to 36 mol/m²/d, but then it would interrupt the Sour Diesels in the tent that just started to flower.
The environment is really off today. It's super humid out and it's showing and killing my good vibes. The temp is a bit low at 73°. I would prefer it to be 75° during the day. It helps with all the plants in the tent. Oh well not won't stay low for long. It should start to creep up later today. The humidity is still super high at 63% today.
Grow System Environment:
Temp: 75.2°
RH: 60.9%
VPD: 1.15 kPa
May 27, 2024
Both ladies got a half gallon in their reservoirs today. Both were way too dry for now, sona half gallon should last them at least the night. Just 4 more days and we can harvest. Unless this humidity doesn't let up, then I have to wait even longer for the Tropicana Cookies to dry. AND risk mold! Damn it!
Banana Purple Punch A is starting to get floppy. I hooked some of the tops to each other so they will stand. A couple outer branches were starting to fall as well, so the were also tied up. Hopefully that solves the issue for the next 4 days. Maybe 5 or even 6 now. Too long in my opinion.
She doesn't have much in terms of fading but it's starting at least. Her leaves are all messed up. So I'm not bothering with the fade honestly. If she fades, she fades. I'll be defoliating in 2 days anyway. Then wet trimming, so the leaves aren't really a thing to bother with now.
She also has lowers with white pistils. They are developed, but the pistils are still white. Those are going to change in. Matter of days.
Banana Purple Punch B is shaping up to be the best plant of this run. She's actually the shortest, but has the best structure and the most solid buds and a lot of them. She's also doing quite well in her final days.
Her leaves are turning dark purple with the lowers turning bright green. She got a quarter gallon of water yesterday and drank it up almost immediately. I think I'll have to keep her watered for the next couple of days. She will certainly dry out quickly when I stop watering, so I think she will only need a couple days to fully dry out.
Currently, she is about 34% soil moisture content. Not bad at all. It might go up to 45% with the half gallon, but no higher.
I haven't done trichomes in a few days. I may get a video in today or tomorrow. Both plants could use a good viewing. Not that it matters, as I have to schedule my harvest, regardless of doneness. But we'll check them for science.
The environment is back to being the bane of my existence. Seriously, it's driving me insane. So the humidity is WAY up at 65% with the temp being around 74°. It's horrible. I really don't want to keep opening the tent. It just takes away precious light space.
The average night temp was also high at 70° with the humidity still being up at 64% I have no idea how these ladies haven't gotten bid rot or mold. Maybe it's because it's like a wind tunnel in there. Exhaust on full power, two 6 inch oscillating clip fans facing each other. There's no space untouched by some sort of airflow. It's not a heavy wind, but like a light breeze.
Update: I finally took some trichome videos and was a bit surprised at what I found. Both plants have tons of cloudy barely any clear and a good amount of amber. The extra 4 to 6 days may be a bit too long. We shall see. Some of the lowers still have white pistils and only have amber trichomes on the leaves. So there's time for them to finish up. We'll see how this works out.
Grow System Environment:
Temp: 74.3°
RH: 60.8%
VPD: 1.11 kPa
May 28, 2024
Very late entry today. I was quite busy wet trimming Banana Purple Punch A for the chop.
Yep, you heard it. The chop. One of the Tropicana Cookies finished drying today and I thought it was time to harvest her. So she got a full wet trim and is hanging in the dry tent.
She weighs in at a total of 22.26 oz wet hang. She has heavy buds, so the weight retention should be impressive. Maybe 5 oz? Maybe 4. Not bad.
Banana Purple Punch B will be harvested when the last Tropicana Cookies is done. That should be in about 4 to 5 days. Currently I have her moved to the back of the tent with the Sour Diesels taking over the rest. She looks great. More and more purple.
The environment is still crazy. Super high humidity and nothing I can do about it. I've tried AC, no AC and just started the heater. Something has to work.
Grow System Environment:
Temp: 72.5°
RH: 63.2%
VPD: 0.98 kPa
May 29, 2024
Nothing to do today.
Banana Purple Punch A is on her first day of drying and I expect it to take 10 to 14 days based on the current environment in the dry tent.
I did put a dehumidifier in there to help clear it out. It won't be permanent. Just until I can get the humidity back down to 60%. Then it will come out and go back in the 3x3. This will then help regulate the humidity for Banana Purple Punch B.
Banana Purple Punch B looks great! She will be harvested whenever the dry tent has a free spot. Should be in about 4 to 6 days, unless the humidity drops below 60% and then maybe 3, but I doubt it.
I also finally was able to take her off the risers and it worked a charm. The Sour Diesels in the tent aren't being overshadowed anymore and she is at a perfect light distance.
With the drop of the risers, the canopy DLI is now 38 mol/m²/d. Over the next few days, it should make the buds even more purple and dense.
The 3x3 environment is around 63% and at 73°. Still super high. The dehumidifier should start working soon. We will see a small drop in humidity. Maybe a jump in temp, but I need to get the humidity down somehow. The temp is nice and low for this lady, but not great for the other plants. I'd rather it be around 75° or even better 74.5°.
Because I was able to remove the risers from Banana Purple Punch B, I finally could lower the light for the Sour Diesels. The DLI is at 38 mol/m²/d with the power at 60%. Looking great!
Grow System Environment:
Temp: 73.3°
RH: 63.2%
VPD: 1.01 kPa
May 30, 2024
Lots to do today. Well, this afternoon. I finally pulled the final Tropicana Cookies out of the dry tent and now it's ready for Banana Purple Punch B. I may actually leave her in the dark for a day or 2 just under her sister plant that is currently drying.
Banana Purple Punch A is enjoying her second day of drying. It's actually a bit dry in the tent now. A good day out. But a bit too dry for a solid week. It should increase when I put her sister in the tent. She still has a good way to go. Maybe another 8 days if I can push it that far.
Banana Purple Punch B will be getting fully defoliated this afternoon. Then I think I'll put her in the dry tent for a day or 2. A nice dark period to stress her out a bit. Not to mention it will increase the humidity a bit in there as well.
I'll do a full wet trim in a day or 2 when she is done with the dark period. It should also give her time to fully dry out her container. And give a final push in trichome production.
I'm not going to bother with the environment today. It won't matter until tomorrow. Then I'll get dark tent data.
Grow System Environment:
Temp: 72.4°
RH: 57.1%
VPD: 1.13 kPa

Likes
33
Share
@FlavoursUk
Follow
So far things are going well. Bloom has started and already seeing purple/pink hues on the buds. Will be back to update properly just posting up a few pictures before i forget. Check out the YouTube channel.
Water change at day 31 and pH'd the water to 5.8. I also got a new RO 4 stage water filter for the best water quality for the girls so ill be using that on the next water change. The smell is sweet in the tent. All seems to be going ok.
Day 34 - The girls seem happy enough, a few colder nights than needed but all in all, happy with there progress.

Likes
23
Share
@Kynareth
Follow
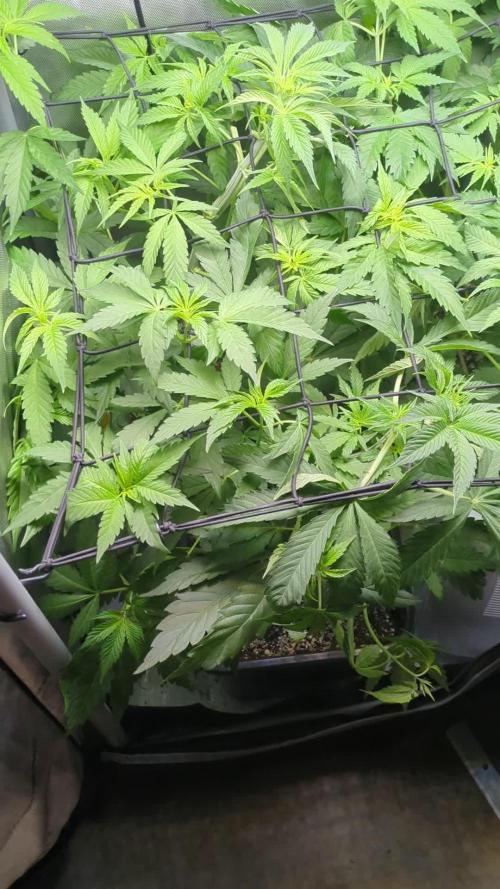
day 27 - Defoliation of big and first low leaves and start of LST. The plant hava some nutrient problem but nothing too serious, lets see how it recovers the defoliation and respond to lst

Likes
19
Share
@RakonGrow
Follow
5 Tage Zelt , aber ich glaub ich trenn da noch einige dinge . alles recht fett geworden .
So vom 4 Tag im Trockenzelt mal Photos gemacht. DAs ist also die aktuelle Budgröße .
Eine sehr fluffige Sorte !!!
Es ist endlich Zeit fakten zu schaffen . Die Ernte hat glatt ein 5 Liter Messbecher gefüllt und hat dabei 145 Gramm erbracht. Die Buds sind eher fluffig als fest . Ein gutes Beispiel dafür das die Buds zwar riesig aussehen , aber eigentlich nichts wiegen. Obwohl das optisch mein Größter Grow war, ist die Erntemenge doch weit aus geringer ausgefallen . Geschmack ist kräftig würzig mit einer Methol Note . Die Trichome sind von einem Sidebud genommen. So wirklich gut getroffen hab ich den Erntezeitpunkt nicht . Aber es klebt und klebt und klebt . Einfach perfekt fürs Vapen durch meine Wasserpfeife .

Processing
Likes
70
Share
@Kid_Colombia
Follow
Finally back to the garden after 4 weeks away.
They were really in need of love by the time I got back to take care of the garden.
BIG NEWS! Now running a California Lightworks Solarxtreme 500 as my main light.
Will add a second SX500 light into the room once I start flower.
Hit the LST on the again and just making sure they are getting fed and lots of love.
Will have to push back my starting flower by another few weeks. See how the recover


Likes
22
Share
@RDWCGrowing
Follow
1/11/2024 Vegetation Week 1 Day 1- I have a root almost in the water.. Yay!! Top feeding is almost done. she is looking a little sad as I work the transition Top feeding but once the roots are fully in the water she will start to take off. Ensured my PPFD is set between 250-300 it is set to: 258
1/12/2024 Vegetation Week 1 Day 2- I have a root in the water.... NO TOP FEED TODAY SIR!!! now that a root is touching the water and she looks stable, I am not going to topfeed, I will see how she looks tomorrow and as long as everything looks good I am going to go ahead and do a change and week 1 fill on Nutes.. I know it is a couple of days in but the same Nutes go through Week 2 and get changed at Week 3 So I should be good to go.. I will just ensure I fill to root touching the water when I change tomorrow.
1/13/2024 Vegetation Week 1 Day 3- Water Change Day!!
I added 36 Gallons of Water to the system:
Silica= .5mil/gal= 18mil
CalMag= .75mil/gal = 27mil
FloraMicro=3.0mil/gal = 108mil
FloraGro=2.0mil/gal = 72mil
FloraBloom= 2.0mil/gal = 72mil
PH DOWN= 30mil
Very important thing with this system is to now wait the 24 hours for the system to adjust.. Do not make any further adjustments to your PH up or Down for 24 hours to allow time for the system to balance.
1/14/2024 Vegetation Week 1 Day 4- Today I just adjusted the PH to ensure that it was right at 6.0
1/15/2024 Vegetation Week 1 Day 5- Today I Cleaned up the lower damaged leaves from the transition from top feeding to roots in the water. She looks good today.
1/16/2024 Vegetation Week 1 Day 6- Today I just took a picture of the beautiful lady for Log. Other than that just normal day to day operations, check the pH, check the Humidifiers and fill as necessary, check level of water in the Res. Everything looks great. onto Tomorrow!!
1/17/2024 Vegetation Week 1 Day 7- Today I filled the humidifers, checked the PH and just let her grow.. Grow baby Grow.....

Likes
30
Share
@SolitudeCorners
Follow
Last week of flowering (72days from the light switch) Gonna cut soon when the dirt is dry. A quite late harvest. Many buds denser more, and stem can’t longer resist.
This season so satisfy. Thank for all mentor and comment. You all are my inspiration for grows.
Feeding
23/1 Water 13.5L+Flawless 20ml ppm80 ph6.2
MDR 3L 2Lx5
Runoff
MDR 1400 /1155
Zkittle 1600/1300/1150
Pineapp 900/600
Purp 1300 /1200
Sapp 2000/1100
Dozdos 1100/1000
25/1 10.42 6L ppm9 ph6 1L per pot
3L+Flawless6ml ppm116 ph5.9 1.5/1.5 Purp, Zkittle
4.5L+ Flawless7ml ppm119 ph6 1.5/3 Sapp,MDR
Runoff
Purp 1300
Zkittle 1500/1200
Dozdos 1400
Sapp1300
Pineapp850
MDR950
27/1 runoff
Pineapp 500
Purp 900
MDR 600
Zkittle 400
Sapp 300
Dozdos 400


Processing
Likes
5
Share
@Kourtney80
Follow
This week I started low stress training, it’s very early for it as it may still be in the seedling stage🤷♀️🏼 Jus experimenting.
I’ve been giving them rain water mixed with spring water at a ph of 6-6.5, I spray them down daily.
I’m not Evan sure I’m LST’ing them properly but a girl can try😊
Feel free to correct anything I’m doing wrong, or give any advise☺️💗
Likes
25
Share
@Doubleb84
Follow
Fantastic week! Frosting up and packing on some weight!! She’s so pretty 😍
Processing
Likes
5
Share
@Ensign420
Follow
Week 02 Introduction
This week has been a bit of a struggle. Had my first experience dealing with slime and brown algae. But I think adding enzymes and increasing the beneficial bacteria helped to fix the issue. Also experienced nutrient burn for the first time. My nutrient solution strength got as high as 671 PPMs. So backed it down to about 430 PPMs during the end-of-week reservoir change. Also cut Hydroguard (expired?), CaliMagic, and Superthrive from this grow. Now she's still stunted, but is starting to recover. Hopefully...
[START OF WEEK 02]
Day 01 - Monday - 08/10/20 - Total Days: 008
-----------------------------------
- [0830]: Still looks a bit yellow. But getting larger!
--- Solution strength was at 248 PPMs.
--- Just topped off with a bit of distilled water
--- PH went up to 6.1 so PH'd down to 5.8
--- Ran the top feed for a bit to wet the hydroton.
- [2130]: She's looking even more yellow now.
--- Even the new leaves are really yellow.
--- Decided to add more base nutes.
--- Added 4ml of Sensi A
--- Added 4ml of Sensi B
--- Now at about
--- Solution Strength went up to 304 PPM.
--- PH was at 6,
--- Also raised the water level a bit more.
--- I really hope it's a nutrient deficiency and not an over-watering issue.
--- Please live!
Day 02 - Tuesday - 08/11/20 - Total Days: 009
-----------------------------------
- [0830]: Looking less droopy. But still yellow.
--- Decided to do a reservoir change.
--- 4.5gal of distilled water
--- 8ml of Sensi Grow A
--- 8ml of Sensi Grow B
--- 8ml of Voodoo Juice
--- 4ml of B-52
--- 4ml of CaliMagic
--- 4ml of Hydroguard
--- 4 drops of Superthrive
--- PH'd down to 5.8
--- Solution strength: 302 PPM
--- Since I didn't want to risk over-watering the rockwool, I did not to do a top feed, may do one tonight after the sleep cycle (lights are still set to go off at 10am and back on at 4pm).
--- As I was doing a reservoir change, I noticed that the tubes and bucket were a bit slimy. Didn't really stink or anything. Is this normal? Maybe due to the Hydroguard and Voodoo Juice?
--- I hope she gets better soon!
- [2215]: Getting larger! But still yellow.
--- Also can see a root growing through the net pot! Tiny little thing but it's there! Will have to start dropping water once more appear.
--- After looking over a few DWC diaries using AN nutes, seems like my solution strength is still too low. Most around this stage average around 500 PPMs with about 4ml per gallon.
--- Top fed for a minute to wet the top of the hydroton.
--- Solution strength went down to 263 PPM.
--- Added 8ml more of Sensi A
--- Added 8ml more of Sensi B
--- Now base nutes are at 16ml for 4.5 gal of water.
--- PPMs went up to 411.
--- Still lower than 500 PPMs, but that's okay.
--- PH was at 6. Not sure if I should adjust PH using AN nutes. So going to not ajdust unless PH goes above 6.1.
Day 03 - Wednesday - 08/12/20 - Total Days: 010
-----------------------------------
- [0830]: Looks like more root growth!
--- She still looks yellow. But leaves are perky.
--- PH was at 6.2 so lowered down to 5.8.
--- Solution strength was at 394 PPMs
--- Since roots are still growing, I decide to lower the water level a bit. Now water level is a bit below the net pot.
- [2200]: Root is getting longer!
--- Slime is returning. Not sure why.
--- Solution strength: 357 PPMs
--- PH: 6.1
--- Decided to add an enzyme along with more beneficial bacteria to hopefully cure the slime.
--- Added 16ml of Sensizym
--- Added 5ml of Hydroguard
--- Added 8ml of Voodoo Juice
--- New solution strength: 430 PPMs
--- New PH: 6.1
--- Top fed for a minute.
--- This slimy residue is really freaking me out! I hope the added enzymes will help eliminate the slime.
--- Going to do a full reservoir sterilization/nutrient change over the weekend. Please survive until then girl!
Day 04 - Thursday - 08/13/20 - Total Days: 011
-----------------------------------
- [0930]: I think the enzymes worked! There is little to no slime now!
--- Although I think the root was also dissolved in the process. It's now just a little stub sticking just below the net pot. The enzyme is also suppose to dissolved dead roots too but guess that root was too weak? Not sure what happened there. But I think the slime is cured!
--- Solution strength went down to 395 PPMs. Decided to add more base nutrients.
--- Added 8ml of Sensi A
--- Added 8ml of Sensi B
--- Added 4ml of B-52
--- Solution strength went up to 598 PPMs.
--- PH was at 6.1
--- As long as the PH is between 5.5 and 6.3, I'm not going to use PH Up or Down. But still will monitor PH levels.
- [1715]: Checked up on her after her nap and shes looking alive but stunted. But no slime!
--- Decided to add some sugars to help maintain the enzymes and beneficial bacteria.
--- Solution strength was at 587 PPMs.
--- PH was at 6.2
--- Added 8ml of Bud Candy
--- Solution strength went up to 671 PPMs.
--- PH also went up to 6.3
--- Lowered water level a bit to hopefully promote more root growth.
--- Top fed for a minute.
--- She is getting bigger, but still looks yellow.
Day 05 - Friday - 08/14/20 - Total Days: 012
-----------------------------------
- [0915]: Leaves look a little burnt on the tips. Still no slime.
--- Going to back off on the PPMs to hopefully fix the nutrient toxicity.
--- Solution strength was at 632 PPMs
--- PH was at 6.3
--- Added/Removed water until PPMs were at 536.
--- PH was still at 6.3
--- Raised water up a bit, then top fed for a minute.
- [2200]: Looking better. Still yellow though.
--- Solution strength: 514 PPMs
--- PH: 6.5
--- Added PH down.
--- New solution strength: 518 PPMs
--- New PH: 5.2
--- PH was kind of high. So decided to PH down. Had to use quite a bit to bring it down. But eventually got it to drop down to 5.3. A little low, but so far, the PH has always gone up so wanted to start it really low.
--- Ran the top feed for a minute to re-saturate the top of the hydroton.
Day 06 - Saturday - 08/15/20 - Total Days: 013
-----------------------------------
- [0830]: She looks stunted. leaves are still yellow.
--- Solution strength: 514 PPMs
--- PH: 5.6
--- Top fed for a minute.
--- Not sure what to do at this point. Going to do another reservoir change soon. Hoping she lives until then.
- [2145]: Looking pretty much the same.
--- A bit of slime has returned. Since I've been diluting the nutrient solution, the enzyme ratio has dropped. So I guess this is expected.
--- Also noticed that slime build up was on the air-stones. Never really checked the stones so not sure how long that has been there. Looks brown too, which can't be good.
--- Going to do an H202 sterilization of the system (minus the net pot) tomorrow so did not add anything.
--- Lowered the water level to below the net pot.
--- Then top fed for a minute.
Day 07 - Sunday - 08/16/20 - Total Days: 014
-----------------------------------
- [0900]: STERILIZATION DAY!
--- Decided to skip today's night cycle for a deep clean.
--- I'm hoping that skipping a night cycle won't be too stressful.
--- Temporarily moved her to a new bucket.
--- Used about a half of gallon of straight distilled water to flush out the net pot.
--- Drained the system and wiped up all the brown sludge. Also removed the air stones and cleaned up all the goo.
--- Filled the system with 2 gallons of distilled water and at least 30ml of food grade hydrogen peroxide (35% strength).
--- Yea its a lot, but since I'm not going to sterilize the system overnight, I went with a really high doseage. Basically I kept adding until I started to see little bubbles start to form.
--- Then I ran the water pump.
- [0915]: Boiled the air stones in tap water for about 10 min. Then reconnected them to the airlines.
--- I let the air stones and hose soak in the sterilization solution for about 5 minutes so the peroxide can absorb into the stones. Then ran the air stone to help mix and agitate the solution.
--- Occasionally, I'd repeat the process of turning the air pump off for a few minutes to let the stones soak.
- [1000]: Covered the top two row of holes of the net pot with some aluminum tape. Hopefully this solves the light leaking in through the hydroton.
- [1200]: Used an old toothbrush and scrubbed the pump clean. Then drained the system.
--- Refilled with more distilled water and peroxide. Again added a lot.
--- Ran system again to sterilize even more.
- [1530]: Drained the system and refilled with distilled water to rinse.
--- Ran the system for a few minutes, then drained and rinsed again.
--- Did this a few more times over about an hour.
- [1630]: Added 4 gallons of fresh distilled water.
--- Added 15ml Sensi Grow A
--- Added 15ml Sensi Grow B
--- Added 12ml of B-52
--- Added 16ml of Voodoo Juice
--- Added 16ml Sensizym
--- Solution strength was at 430 PPMs
--- PH was at 5.6
--- I was going to add Hydroguard, but I think the bottle is expired. Since 2017 or 2018!? I think Hydroguard is good for up to 2 years from the date on the bottle or 6 months after opening. So not going to use from now on. I wonder if this could have contributed to the slime build up.
--- Also removed the CaliMagic and Superthrive too. Going to only use AN products to eliminate the chance of incompatible nutrients.
--- Placed her back in the bucket and top fed for a minute.
--- Here's hoping for the best. Going to let it ride until morning! Please feel better!
[END OF WEEK 02]

Likes
4
Share
@Chitown_grower
Follow
This tent is just crushing it this week! Everyone and their mother is covered in trichome-y goodness. These ladies definitely have a heavy diesel smell coming on this week smell going on for them!
Likes
Comments
Share
@Angelgrows
Follow
I harvested early due to stuff going on but majority of the plant besides the lower inside nugs are all ready and the rest are just about there. Super fruity smell rn


Likes
19
Share
@UnorthadoxDude
Follow
So the final week was week ten, and onyl just a few days in. I will be interested to see how this dries and cures out.
I will be back in six weeks with a proper smoke report.

Likes
11
Share
@GorillaZativus
Follow
👑Actualización Jardin 30-33 días . 6 macetas de 18 , 4 genéticas .
⌛️Videos , en este orden :
Primer Video
🎥 🎥🎥🎥🌬️🌬️
🌱Slurricane x Tropicanna Cookies F2
@crisol_seeds
🌱Og Strawberry Starkiller x Tropicanna Punch F3
@secretfile.cl
🌱Gorilla Glue 4 @bsfseeds @bsfseeds.usa
Segundo Video
🎥 🎥🎥🎥🌬️🌬️
🌱 Gorilla Glue 4 @bsfseeds @bsfseeds.usa
🌱 Skywalker Haze @dutchpassion.official
🌱 Skywalker Haze @dutchpassion.official
📸
Fotos :
📸Todas
📸Gorilla Glue 4
📸 Og Strawberry Starkiller x Tropicanna Punch F3
📸 Slurricane x Tropicanna Cookies F2
🌱Hoy foleo a sustrato : King Crab 👑
0,5 ml en 1 litro .
Ec : 0,5
Ph: 6,2
🌱metimos más amarres al y full lst ,
y podas .
🌱 @baconlinecl @bac_online_nl
