The Grow Awards 2026 🏆 


Likes
Comments
Share
@Aedaone
Follow
Temperature and measurements listed in grow conditions are averaged for the week. The listed pH is the soil pH. Nutrients listed in nutrients section are ml/per gallon of soil.
Day 1 we had rain showers in the morning and throughout the day. They showed first sign of flower.
Day 2 we had rain in the morning, drizzle and showers in the afternoon. The ferrous sulfate reduced the soil pH from just above 7 to just below. I added 10ml blood meal and 10ml ferrous sulfate top dressed to each pot. The nitrogen should boost the stretch during early flower. The additional ferrous sulfate should keep the pH in the 6.5-7 range and help with chlorosis during early flower.
Day 3 we had more rain, drizzle, and mist all day. The soil pH is coming down slowly. It's 6.9 on day 3.
Day 4 it rained all morning. The pots are soaked.
Day 5 we missed the scattered showers but it was 80-90% humidity all day. We did have lots of sunshine
Day 6 we had lots of sunshine and temperatures above 80°F.
Day 7 we had sunny skies. Temperature was in the mid 80'sF. I had to water about .5 gallons directly from the hose. 7.6 pH and 50°F
Both plants doubled in height. There's still a small excess of phosphorous in the soil. The plants will grow into the phosphorus during flower. Overall a successful week.


Likes
4
Share
@eldruida_lamota
Follow
Vamos familia, actualizamos la tercera semana de floración de estas Thunder Banana de Seedstockers, salieron las 3 de 3, 100% ratio éxito.
Aplicamos varios productos de Agrobeta, que son increíbles para aportar una buena alimentación a las plantas.
Temperatura y humedad dentro de los rangos correctos dentro de la etapa de floración.
La tierra utilizada es al mix top crop, por cambiar.
De 3 ejemplares seleccioné los 2 mejores para completar el indoor, cambié el fotoperiodo a 12/12 y también apliqué una poda de bajos, se ven bien sanas las plantas, tienen un buen color progresan a muy buen ritmo por el momento, las flores están empezando a formarse.
Agrobeta:
https://www.agrobeta.com/agrobetatiendaonline/36-abonos-canamo
Hasta aquí todo, Buenos humos 💨💨💨.

Likes
13
Share
@valiotoro
Follow
Hello everyone 😎
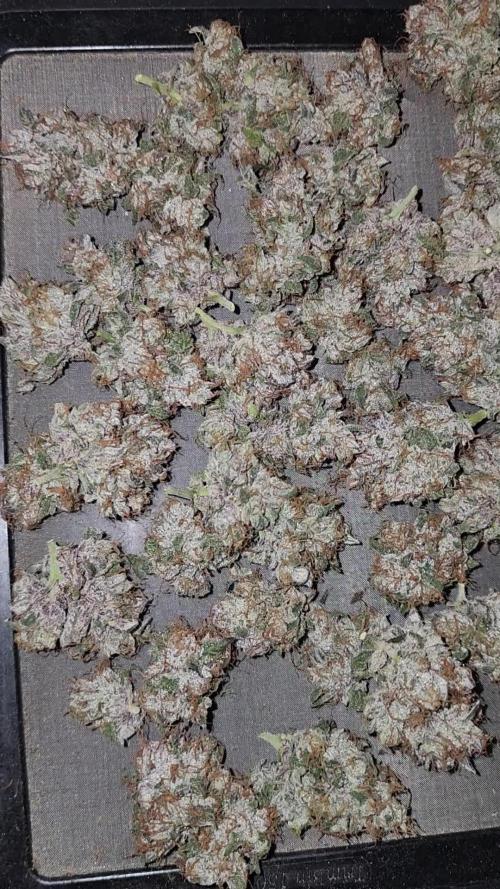
Week 7 of flower for the Amnesia HazZzzze🤯
All the tops buds are ready✂️
3 different pheno🤩
Purple : the smell is citrusy & earthy very strong!🍋
Green : tropical 🤤 it reminds me the Pablo Escobar !
Max 2 more weeks & finito ✔️
Likes
27
Share
@Lady_NugWitch
Follow
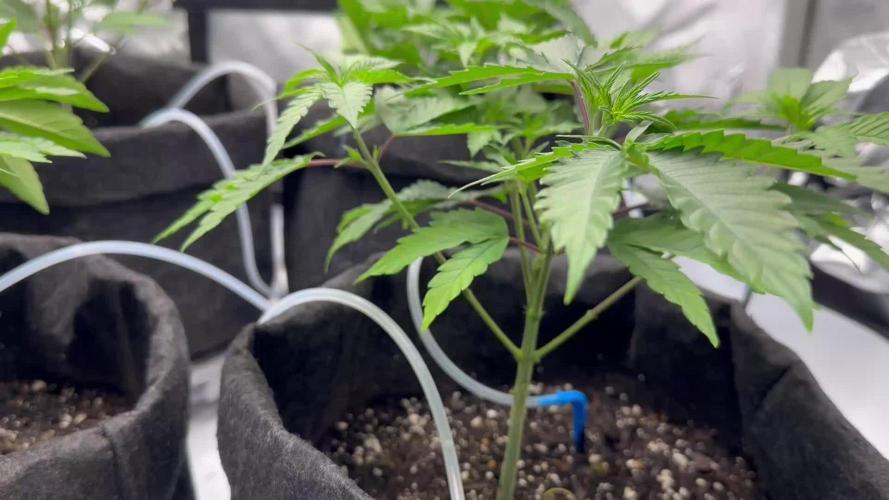
No issues since transplant. Mixed coco and fox farms.. Girls are so green I've missed that. Led by viparspectra!

Likes
Comments
Share


Processing
Likes
41
Share
@FoxyLoxy
Follow
switched the plant to 12/12 so far really not much difference other then a few inches of height. i do have some questions with leaves if anyone can take a look. for pretty much throughout this plants life as a clone ive had issues as it was my first photo and first plant in general. now after many recoveries the plant consistently having a decent amount of leaves look a little either burnt or deficiency stricken. now on another forum i was told nute burn. but im not really doing strong nutes, even after just water its still exhibiting this issue. the ph has been consistently alright. i just dont see what im doing wrong and a little nervous for flowering whats to happen.


Likes
38
Share
@Green_Mountains
Follow
Another solid week of growth!! The two big plants nearly doubled their height and both had a lot of undergrowth this week! I plan on trying my hand at LST tomorrow. I added more soil into the pots yesterday. I still feel it is too low but I don't want to shock the plants too badly. I watered after lifting the plants up some and adding the soil. I plan on feeding them tomorrow night.
The first white pistils have sprouted and there is a distinct aroma of marijuana in the air!! I hope they hold off another week before really start to flower. It's amazing how fast a month can go by!
I may not keep the little plant past this week. We'll see if she makes it that far...
Here's to another week of healthy growing!! Peace!
Likes
Comments
Share
@MrGrOH1008
Follow
I will say this is the best veg I’ve ever had. The drip irrigation has kept them happy. I’ve fed cronk every other feeding when the res was low. Top dressed with craft blend and Gaia and some worm castings and plan to flip this week. They’re short and stout . Gonna give them a day to recover, Scrog em out, then we’re gonna flip.

Likes
50
Share
@Mrs_Larimar
Follow
Normally I wanted to do a Mainlining// SCROG. But the Stalks of the Gorilla_ladies are so Sturdy and strong. No way for SCROG. So i just let them grow. They turned out resinous and very smelly.


Likes
3
Share
@Cupboardgrowuk
Follow
Blueberryz had lockout problems so flushed now looking better, had alot of problems with her but have learned alot for first auto.
Limoncello been perfect the whole run 2 3 week more max be starting to flush this
Likes
4
Share
@HowtoBubatz
Follow
The transition is officially happening—the plant has now fully entered the flowering phase!🌱
The stretch is kicking in, and it’s growing rapidly, really taking off this week.
It looks incredibly healthy, with vibrant green leaves and strong development.
Thanks to the LST, it has spread out beautifully, allowing for even light distribution and great bud site exposure.
I’m really happy with how things are progressing and excited to see how the buds start forming in the coming weeks! This one is looking very promising.💪😎
Likes
22
Share
@Mr_Mister
Follow
Siguen creciendo bien pero están empezando a mostrar deficiencias de nutrientes. Estuvieron un par de días con las hojas muy decaída, he abierto las ventilaciones de la tienda para que no pasen tanto calor. La semana que viene la pondré en floración.
Processing
Likes
27
Share
@lMorphine
Follow
In week 8, she has been growing nicely. i think i will stay in Veg stage for 1 week further before turn to 12/12 because i want her to grow a bit more after she was stunned for a while. i also increase a ratio of nutrients for my plant and i think i will increase a bit more on next feed. if anyone has a recommendation feel free to let me know. Thank a million in advance 😁
in front of her i have a Blue Dream clone. i decided to do like a little bonsai in 1 gallon pot and turn to FLO with my Glookies 😍
Likes
53
Share
@BudBoutique
Follow
! this is my current status, gonna upload my last veg weeks within the next week - got a bit busy around Spannabis - thank you for your understanding! 💚
Welcome to Bud Boutique Grow Diary - really appreciate all your love and support :)
Dont forget to check out my other current grows!
🗓️ This Week:
after 48 hours of complete darkness (important for seedlings to make sure all plants switch into flower same time), I finally switched my lights to the 12/12 schedule and sent my ladies into the flower.
- both Phenos super strong and praying up,
- more than healthy and going well, just one of them needs a little more water and attention than the other ;)
- Day 3: Foliar spray with APTUS Regulator and APTUS Nutrispray to give them extra micronutrients and give them a little shell for protection.
! always use APTUS Regulator first and mix well with your water before adding any other nutrients for Feeding or Foliar!
Thank you for still staying with me 💚
___________________________________________
--- 🌱 Strain (Sponsor) ---
🏷️ P.C.R. by Art Genetix
https://www.artgenetix.world/product-page/p-c-r
--- 🥗 Nutrients and Feeding (sponsored by APTUS: APTUS Ambassador) ---
🍸 APTUS: full nutrient schedule extreme
-- Regulator, N-Boost, P-Boost, CaMg-Boost, K-Boost, Allin1 Liquid, Startbooster, Topbooster, Enzym+ every feeding
-- Fulvic-Blast, NutriSpray as Foliar each once a week
🔗 https://aptus-holland.com/
--- ♻️ Grow Control (Sponsor) ---
TROLMASTER: TENT-X + LM14 Light Adapter to dim/sunrise/sunset lights + Temp & rH Sensor all remote on App
🔗 https://www.trolmaster.eu/
--- 🏭 Grow Setup ---
💡LUMATEK Zeus Pro 600
* 🏠🌿 Indoor: Homebox 120x120x200cm (4x4)
* 📐🌀 PrimaKlima exhausting Fan 1180m3/h (running on 60-80%)
* 🌀 Can Light Filter 800m3/h & 1x Fanbox 1x Dyson fan for Air circulation
🔗 https://lumatek-lighting.com/zeus-600w-pro-29/
🔗 https://primaklima.com/de/shop/ventilatoren-de/ec-ventilatoren/pk160ec-tc/
🔗 https://canfilters.com/products/filters/
All Likes and comments are highly appreciated!!!
👨🌾 don't forget to check out my Instagram for daily educational content: budboutiquee
- Bud Boutique

Likes
5
Share
@Rizza78
Follow
My first issue with a deficiency happened on 4/20. I’m hoping it was Molybdenum deficiency vs Nitrogen. But added a little base veg in to boost up N in case. Feel free to let me know what you think the issue could be. Seems to be coloring its leaves a week early. But the nugs are looking great and smelling like jet fuel. Putting into fall simulations this weekend. Day 32 on 4/22.

Likes
17
Share
@Lazuli
Follow
August 1: These clones are now next to the motherplant and august 3 will be the start of flowering when the light goes off.
The nutrients are now just calmag, micro and bloom at 500ppm untill they hit week 3 flower
August 10th: the clones are now at day 7 flower and they just got trimmed (lower branches and biggest leaf on top of the plants) i dont go too agressive on defoliation with this strain, on the last short video of this week u can see what i cut off at this stage, this was done at day 7 flower

Likes
71
Share
@Roberts
Follow
Blue Dream Extreme has been doing good since the over stretching. Roots are finding the solution now. I am growing her under a Spider Farmer SE5000. Growing her in a New Level Hydro 5 gallon bucket links below. Thank you Spider Farmer, New Level Hydro, and Amsterdam Marijuana Seeds. 🤜🤛🌱🌱🌱
SE5000
https://amzn.to/3qFpAML
Spider Farmer Official Website Links:
US&Worldwide: https://www.spider-farmer.com
UK: https://spiderfarmer.co.uk
CA: https://spiderfarmer.ca
EU: https://spiderfarmer.eu
AU: https://spiderfarmer.com.au
Coupon Code: saveurcash
Thank you grow diaries community for the 👇likes👇, follows, comments, and subscriptions on my YouTube channel👇. ❄️🌱🍻 Happy Growing 🌱🌱🌱
https://youtube.com/channel/UCAhN7yRzWLpcaRHhMIQ7X4g
www.newlevelhydro.com
www.hygrozyme.com


