The Grow Awards 2026 🏆 


Likes
Comments
Share
@biggreens420
Follow
loved growing this one she grows well reacts to fimming well withstands mould well .the plants structured well buds grow all to a good shape and size no foxtails would recommend to anyone sorry about not updating as much will get back to it properly on the next grows thanks for reading happy growing guys

Likes
17
Share
@farah4weed
Follow
Hello guys😍😍
We have reached the sixth week of flowering
All phenotypes are now visible😍
The color of some plants has completely changed due to the temperature difference I observed between night and day.
The very dense and snowy buds are the result of my genetic cross (OGcream) of course the real result in my opinion is obtained after drying😈
This week I used feeding and advance fertilizers.
Thank you for following and commenting😍
"farah4weed"
Likes
16
Share
@bro8006
Follow
alright, how y'all doing?
this week I did defoliated both plants, for the last time, I hope.
The Rd started to flowering few days earlier, and the SS on the other hand, is very small in size, I confess when defoliating the next day it looked I didn't do lol. 😵, but yeah I noticed the plants now are going int flowering so no more defoliation for now.. SS its showing it gender but still very shy 😜, I keep telling her, hey, don't be shy be like your friend right there all showing off.. 😇.
alright.. feeding schedule..
I was doing some research and couldn't find much at all about mixing different types of fertilisers brand...
so I got this advanced nuts ( carlbooad was sent cause they ran out of bud candy but in the website it was available nd on the email I said to send me the big bud then but whatever.. 😕..
I did made a mistake with the nirvana. ( the bottle says> 2 ml/l during all grow fase and during weeks 3 till6 of blooming. ( on the website doing some research found only tu use during weeks 3 till 6 on bloom.)) so with that said I just used as the bottle said, and it was too late, I mean when I realised I had done it already, some lets hope and prays for the best kkkk....
so for the next feeding this week I won't add nirvana yet..will wait 2 more weeks and then put back inside 😆.
so. I guess its all for today.
let me know ur comments below and suggestions, if had the experience mixing different fertiliser and etc.. even if it was a bad experience pls comment..
thanks y'all c u next week...
👊

Likes
6
Share
@eldruida_lamota
Follow
Vamos familia, actualizamos la sexta semana de crecimiento de estas Papayton de FastBuds.
La temperatura que estuvo entre los 24-26 grados y humedad dentro de los rangos correctos.
Todavía estamos en el ciclo 16 horas luz, 8 oscuridad, estiraron bien y ensancharon bastante también, el color es verde sano.
Se nota que los nutrientes de la marca Agrobeta hacen sus funciones.
También realicé una poda de bajos que yo si las veo necesarias para explotar después la flor.
- os dejo por aquí un CÓDIGO: Eldruida ,descuento para la tienda de MARS HYDRO.
https://www.mars-hydro.com
Hasta aquí todo, Buenos humos 💨💨💨

Likes
32
Share
@PEAKYPLANTERS
Follow
Hello everyone,! brother farmers!
welcome back to the beautiful flower gardens of Peaky
these girls are really very sexy
I hope you like my content ... leave a comment and follow me on IG
see you around
Likes
9
Share
@Krautbauern
Follow
The tip from a friend to use the Bio Enhancer has absolutely paid off. The plants grow excellently and really soak up the nutrients from the soil. It will soon be time to start flowering, as the plants should not get too big.
Added some more LST Clips, unfortunately we broke up 2 braches from the rainbow. She is a very sensitive girl tho.

Processing
Likes
16
Share
@Iop420
Follow
Hi all and thanks again for watching my post🤗. From now it's all about waiting and patience😁. Next step is flushing, I think to start next week. I let the pictures and grow log to speak. Peace✌️
Likes
29
Share
@Prilyfe13
Follow
March 29, 2024 Day 43
It's a new week and things need some changing. First off, the light was changed around. Secondly the reservoirs are all clean now and have a fresh gallon of nutrients. Finally, environmental factors.
Both plants look absolutely beautiful. They have buds popping up everywhere. They are both 14" tall and have the same structure. They are seriously hard to tell apart. Flowering just started and we are in the beginning of the stretch. With the current stage and current growth patterns, hopefully I can expect between 24" and 36" plants. They are also perfectly level with the other 2 plants in the tent. So it's quite a nice ocean of tops. Some of the branches are a bit lower than the majority. I'm not worried. They are pretty strong branches. They just need more time to adjust from the training. I'm also considering the SCroG net more. It looks like I'm going to need it for a few branches. Mostly the main side branches, but the auxiliary branches are roughly the same height. I won't be doing any more structure training. Now it will be keeping the canopy level and minor adjustments. The shape and structure of both plants are exactly where I want them. Not too wide and just barely touching the other plants. Now it's a matter of upward growth. Personally, and based on experience, I think a 36" to 48" plant is fine to manage. Anything bigger in this size tent and it becomes unmanageable.
As for lighting, the light was about 22" from the canopy today. I raised it back up to 24" and increased the power back to 90%. The DLI is roughly around 44 mol/m²/d. The PAR is around 675 ppfd. Something like that. Also, the very outside of the tent walls, the DLI is around 40 mol/m²/d. So it's still in range for the whole tent. Perfect footprint.
Watering was reset today. All reservoirs were cleaned out and a fresh gallon of nutrients went in. That includes the B-52. Next watering I'll be adding Sensizym when it arrives.
As for the nutrient regimen, I undecided to stay with a half dose. Especially considering the fact that I'm running a bottom feed system which provides a constant water source. So the uptake could get a lot of build up with too much nutrients. This happened with some nitrogen toxicity last week. It was cleared up in no time, but that was just too much nutrients. So half I go. It should turn out perfect.
The environment is looking great! I won't be changing anything up yet. The temp is spot on around 77° and the humidity is at 55%. Exactly where I want it. I will keep this environment for the rest of the flowering stretch and then I'll start to drop things down. Down to 75° and humidity of 50%. The last week of flowering, I'll try to drop the temp down to 73° and 40%. It shouldn't be a problem. The light will also be backed off with a decrease in power. But that's not for weeks. Maybe even a couple months.
But the way these are growing and the reputation FastBuds has, they should be ready in 3 to 5 weeks. According to FastBuds, the veg time is between 30 and 45 days. And flowering time is the 40 to 45 days. So around 8 to 10 weeks. It took 41 days to hit flower, so that's on the high end, but within range. Maybe it will be the same 40 days in flower. Maybe 30 days. I'll take 4 weeks.
Grow System Environment:
Temp: 76.0°
RH: 53.8%
VPD: 1.38 kPa
March 30, 2024
Not a lot going on for these two today. Both ladies drank about a third of a gallon yesterday and seems to be holding steady. I also checked the roots. Tropicana C isn't showing any at the moment. I was sure they would be showing by now. However Tropicana Cookies has roots showing. The funny thing is that they are the same size and still look the exact same.
Both ladies got a haircut today. Not much, just some outer leaves to keep them more compact and within their quadrant. However, based on their size and growth, I may have to put the SCroG net up at 18". That should do the trick if there are any branches that take off.
I also ordered the crossbars by AC Infinity. Very happy with this purchase. Now I can run the SCroG net across the entire tent without it sucking in. I can also mount my supplemental lights on it horizontally. That will give even more lower light coverage. The goal is to have no larf this go. Popcorn buds are fine as long as they are dense. This strain is supposed to produce massively dense buds. So with the setup I'm running, I should be expecting some quality bud throughout the whole plant.
The light also got lifted again today. I kept the power the same, but the DLI was high at 55 mol/m²/d in the center. Much too high. Also, Tropicana Cookies was drooping before the lights got shut off yesterday. A sure sign of too much light. It seems that quadrant, in the back left corner, has more light. Maybe the grow light isn't level. Anyway, I lifted the light to 25" above the canopy. The footprint is amazing. With the center of the tent producing 48 mol/m²/d with the outside at 44 mol/m²/d. Not much of a difference and the lighting is great everywhere. I'll have to check back and see what Tropicana Cookies looks tonight.
The environment is mostly alright. The temp is a bit high at 79.5°. But the humidity is perfect at 55%. Unfortunately the temp is throwing the VPD off by a decent amount at 1.50 kPa. It needs to be around 1.33 kPa. The daily average is spot on though, so that's great!
Neither plant needed watering today. They both drank about a third of a gallon last night. So I expect to have to refill the reservoir in a couple days. I'd like to note that the new nutrient schedule i found didn't have Tasty Terpenes in it, so I will be adding that at 4 ml and Big Bud as well at 4 ml for the next refill. Oh and I'll also be adding the Sensizym next watering. I believe it calls for 4 ml.
Basically this nutrient schedule runs at half dose. So it's pretty easy to work with. There are a few things missing, like bud ignitor and bud factor x, but everything else seems to be roughly the same as what I was using before. The major difference is the schedule itself. The old schedule was based on a photoperiod grow and that meant it was way too far extended than that of an autoflower. This new schedule takes out the guess work and makes for a really good starting point. I'm sure over time I'll change a few other things, like adding the rest of the nutrients and tweaking the amounts here and there. I'm definitely not that good yet, so I'll be learning along the way. It'll be slow going with my small setup, but I should be able to figure out the precise dosage of each nutrient based on the plant. Someday. One last thing. I increased the Cal/Mag back up to 8 ml/gal. This schedule calls for it.
Grow System Environment:
Temp: 75.9°
RH: 54.5%
VPD: 1.35 kPa
March 31, 2024
These two are identical. They even have the same single top slightly taller than the rest. It's wild! They are looking great in every way now. Beautiful color green. Nice growth, they aren't quite as tall I had hoped by now, it maybe they are just low to take off. Afterall, they really just started to flower. Still kind of in pre-flower. Anyway, these two should start to take off anytime. If they don't, bummer but I'll still get some quality bud. I think it has mostly to do with the medium. It's reused and probably drained of all its original nutrients. That being said, I missed a few nutrients for the veg stage, and that could be the issue with the lack of vigor these plants are supposed to have.
These ladies will be needing a reservoir top off today. Later this afternoon. They aren't quite empty enough yet, but will be in a couple of hours. Then I can refill the reservoirs. Unfortunately I still don't have the Sensizym yet, so I'm watering without again. But, I do have the bud Candy, B- 52 and Big Bud. So that's good. Oh and the Tasty Terpenes too. All at half dose of course. This should at least pump some crazy goodness in the bud development.
I didn't change the light at all. No need. Both plants are happy as can be. They are reaching slightly and look great. This should also help with the stretch. I've also decided to put the SCroG net at 18". That should give me enough time to let the rest of the ant catch up but also tall enough to take care of any renegade tops from overshadowing the rest of the plants.
Also, the plants are only 14.5" tall so far, so the light need not be moved.
The environment is quite happy as well. It's hovering between 76° and 79°. The humidity is great! Hanging out just at 55.5%. The VPD is also in a great place around 1.35 kPa.
Grow System Environment:
Temp: 77.4°
RH: 54.6%
VPD: 1.43 kPa
April 1, 2024
Not much today. I made 1 adjustment to Tropicana Cookies. One branch was starting to take off from the others and happily it was closer to the center of the plant so I pulled it out and tied it down to be just under the rest of the canopy.
Neither plant needs watering today. They may not need it for a couple more days. The bottoms of the containers are nice and moist, but they aren't taking in a lot of water. Tropicana Cookies has tons of roots and still isn't taking more in than her sister plant. It's strange. Tropicana C has only a few roots popping out of the bottom sides. This could mean a root ball building up and soon will grow roots downward. At least, that's what is supposed to happen.
They both grew a couple inches last night as well. Now they are 16" and climbing.
I also raised the light today. I raised it nearly 2" To make up for the canopy. The DLI was kind of high at near 50 mol/m²/d on the outer parts of the tent and was over 58 mol/m²/d on the inside. Now it's back down to 45 mol/m²/d in the outside of the footprint and 53 mol/m²/d on the inside. The plants aren't in the center for this exact reason. So there is a small open space dead cell center where my dehumidifier is. Near perfect coverage. I just need a bar style light and all my lighting issues will be solved.
The environment is a bit of today, but not too far off. The temp is a little low at 74.7° with the humidity being closer to 58%. It should adjust in a few hours and all will be good.
Side note, I really can't tell the plants apart in the pictures. Just clues of other things in the pics. Still hard to tell. So they may be off for a bit until I can figure out what is what.
Grow System Environment:
Temp: 75.4°
RH: 55.2%
VPD: 1.31 kPa
April 2, 2024
A bit of a to do today. Both ladies got a small haircut. It's been a few days now and they both kind of needed it. Mostly to keep them compact and not to overtake any other plants.
Both plants have reached 19" and climbing. If I'm correct, I think the math shows 3 ft plants. It took a couple days for them to start taking off, but they were 16" yesterday and are now 19" today. That's 3" of growth over 24 hours. The stretch should take another week or 2. At this rate, 36" is quite possible.
Tropicana Cookies needed a bit more trimming than her sister plant. Just a bit more, but still. Tropicana C didn't need as much trimming. Her leaves are full and beautiful. She just hasn't filled out quite as much yet. Well, now they are the same anyway, so we should see each of them grow back the same way. That's the goal anyway. I may not need a SCroG net afterall. Maybe it will be needed at 24" or maybe 30". Either way, I don't currently need it. If I had a bigger tent, it may benefit a tiny bit, but that's if I had a bigger tent.
The light needed to be lifted again today. Another inch. I may have to do 2" instead. The light is roughly 23.5", but the DLI is roughly at 45 mol/m²/d. So that should be good, but it is a bit high in the center at 52 mol/m²/d. Not a problem for now, but the plants are starting to fill in the center, so I need to be careful with the light intensity. It shouldn't be an issue. The plants get rotated almost daily to help fit in the tent better.
The environment is pretty good today with the temp at 76° and the humidity around 55% but can reach 58%. So it's a bit bouncy today. But the temp is pretty stable. The DLI is pretty good as well at 1.30 kPa.
Grow System Environment:
Temp: 74.2°
RH: 58.2%
VPD: 1.18 kPa
April 3, 2024
Watering day today. Both ladies got a full gallon top off. All nutrients are finally in the mix. It's looking good. The plants are super happy.
It looks like a gallon every 3 days is where we are for now.
They are both stretching pretty hard now. Already at 21" from yesterday's 19". I may have to install the SCroG net tomorrow. Nothing is really shooting up much, but the canopy is a bit off. It's about half and half. Some branches are tall with some still being a bit stubby and short. The short ones look just as good as the taller ones, with nice bud production, but still short. If it continues, I'll need the SCroG net.
I'd like to note that the internodal spacing is really nice. The bud sites are looking fantastic with plenty of space to grow some super fat nugs without clumping on top of each other. The leaf coverage is perfect now. I don't think I'll need to defoliate again for the rest of the grow. I may remove a leaf here and there, but that's it.
The light needed to be raised a couple inches. The DLI was over 50 mol/m²/d. Now it's back to normal. The light is just over 24" from the canopy. The DLI is back down to 45 mol/m²/d and the footprint is looking great!
The environment is a bit skewed today with rain outside. The humidity is up to 59% and the temp is a little lower at 75°. Even with the dehumidifier on. I may have to turn on the main dehumidifier in my room and see what happens. It should adjust itself this afternoon.
Grow System Environment:
Temp: 75.6°
RH: 56.2%
VPD: 1.29 kPa
April 4, 2024
Not much going on today. I got my side bars in so I installed those and the SCroG net to about an inch over the canopy. Some of the tops are starting to take off and need to be pulled back down.
I didn't bother checking the water today. It's definitely not ready and tomorrow is the start of a new week. I may not even be able to water for another day or so. It should be fine though.
The light was also left alone. No need to move it until the ladies catch up.
The environment is also looking pretty good today. The temp is at a nice 76° with the humidity at 55%. The VPD looks great at 1.33 kPa. Everything looking great. What a great end to a productive week.
Grow System Environment:
Temp: 75.5°
RH: 54.8%
VPD: 1.33 kPa
Likes
8
Share
@RunWithIt
Follow
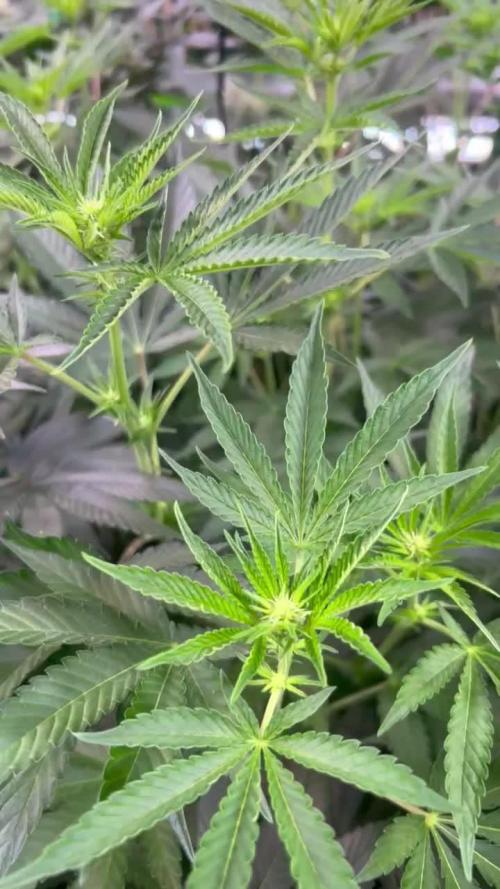
So the Cal-mag issue in AK was held back for a while, but now in week 4, its pretty clear that is the problem with her. Watered her with a full 5ml dose mixed in a 1 liter bottle, pHed to 6.8 on monday. Now im just watching the progression. Not sure i logged it, but i watered her with a quarter strength dose of the same stuff two weeks ago. No Urb this week, or Big Bloom. All other plants are doing just dandy. There's been a progression in fungus gnat appearances in both my closet space, and tent. Im planning on drying out the soil in all of my plants in both grow spaces, down to about 1 12 inch from topsoil, so i can apply some Diatomaceous Earth.
Other than all that, all of my candidate plants are doing awesome!
Ak began to produce a noticeable stench around saturday last weekend. Kind of reminds me of grape skittles.
Sour Ripper isnt producing much of a scent yet, but she's definitely in the bud-building mode. Buds are developing at an equal rate to AK48. I can tell she's going to burst in growth in about a week or so.
I've ceased ALL training as of last week on thursday. Did minor lollipopping and defoliation on all of my candidate plants needing it. The plants are pretty damn short. But thats fine as im planning to do a perpetual cycle soon - plus, ive got taller girls vegging out in my tent. Also got a Candy Cream (Seedsman) mother in there too. Stay tuned for that journal in the near future. ;) Heres to being halfway there everybody! Cheers


Likes
13
Share
@Robeeriegenetics
Follow
First week of flowering in the bag, trying out a new deep voice in my videos does it sound sexy? Let me know in the comments. seeing a little bit of stress on the leaves, but nothing major. The new developing growth is green so everything seems to be going well. I’m gonna give it another week and then I’ll defoliate. So far so good. having a little trouble reversing the wrath rock, candy icy cuts. but I’m not worried. I have backups of the mothers and I have backups of those backups so I’ll definitely still be able to take another shot after seeing the results from this grow ….
Likes
9
Share
@Mr_nugs_lover_David
Follow
She looks super healthy and gorgeous,she's just starting to flower,so let's see how she reacts to the lst and lollipoping I applied on her,can't wait to see this amazing strain in full flower 😍💚👀
Likes
5
Share
@CalGonJim
Follow
12/18 4am CANNAKAN!!!! Giving my FAST Flowers a try. A late spring early summer grow. CannaKan is my new best friend, I had a 100 per cent success rate last time!!! Ok I got it all done at 5:30 am, I set the Temp to 88 MPH or the Time Machine wont work, EVERYBODY KNOWS THAT! Marty will meet me in the parking lot at the mall, I have a great feeling about this. 11am Room temperature is 73. Heating Pad set to 88. Water temp 77.7 PERFECT!!
2:30pm blue dream is already starting to open. I think Tropicana cookies looks like she’s opening a little bit. They should all be open by tomorrow. It’s only been about nine hours.👍👍. 11:30pm They all opened. I drained the water put in new distilled water, made sure water level was right. Looks great!!!!
12/19 4am The temp looks good, all are opening nicely. I have to get the pots ready now, put on new stickers, they help identify the plants from different angles, especially in photos. Im doing a low power fast turn around grow in easy to move 1 gallon pots. They will all be topped above the 3rd node, then the bottom or 2nd to the bottom branches will be cut off to achieve a 4 cola grow. Very simple, easy to manage.
11am. 2:30pm, 5:30pm..so tired, finish in the morning.
12/20 12 am 1:30am Just finished TC & GS I had a little trouble seating GS, TC no problems, takes a while to learn. BD is still sprouting, not a long enough tail to bury yet.
9am I think im getting another CannaKan. 10am 👍👍👍
12/21 Put BD in the pot, not sure if she will go or not, I'm firing up the CannaKan and doing another, since its a photo I will keep it in Veg until my next grow cycle. I may do a full 3 gallon grow with this one and take clones, this is fun!!!! gardening, who knew? The new filter paper I got is a little thicker than what came with it takes longer to sink, more dramatic, I got medium in that blue box from amazon.
7am Tropicana Cookies is the Winner of fastest to sprout, she looks great! GS has the shell and skin, it could still fall naturally so I'll wait. BD is unchanged.
Micro-surgery on TC got the skin off and she popped right open!!
12:30pm SUCCESS!!! 4 hours later, she's PERFECT, worked GREAT!!! I NEVER thought I would be able to do seed surgery. That was my 3rd time doing that, success every single time! 4pm looks good.
12/22 9am. all look great, GS is taking off VERY strong overnight, TC has taken root her main stalk is already thick!! BD #2 is almost ready. I kept BD#1 underwater too long...then I accidentally ripped her head off this morning......so really not my fault......shhhhh.....
1 pm BD looks perfect 🤩 almost ready. 330pm Did the transplant...I really need to work on that....so nervous when I do it. Im not paid for this but CannaKan is one of the best products Ive ever used. I need lots of practice planting the radicles ...""In botany, the radicle is the first part of a seedling (a growing plant embryo) to emerge from the seed during the process of germination. The radicle is the embryonic root of the plant, and grows downward in the soil (the shoot emerges from the plumule)""..... I had to look radicle up... It makes a complete difference, I dont lose seeds now It just a million times easier using CannaKan.


Likes
3
Share
@Luke_Lee
Follow
—————————————————————
WEEK 1 / DAY 01-07
Mars Hydro FC-E3000
Floragard Professional GrowMix
11L Plant bag made of fleece
Light: 50 cm / 25%-75watt;
Schedule: 24/0;
20° C - 55 RH
150ml water per Plant
PH 6,5-7
0ml BioGrow; 0ml TopMax ; 0ml BioBloom
#1 Royal Critical Automatic
#2 Royal Critical Automatic
Fan, extractor and pump ON 24/0.
—————————————————————-
These are the two at the bottom left (green brackets)
-24.01.2025
Both seeds have sprouted successfully after 3-4 Days
-26.01.2025
Today is the last day of the first week. The little ones are doing well, the first few “real leaves” have appeared and the vegetation phase can begin
19.5° C - 78RH
Total Time: 193,39h
Total Energy: 25,04kWh
Likes
107
Share
@Tropicannibis_Todd
Follow
💩Holy Crap Growmies We Are Back💩
Code Name FBT2309
Well growmies we are at 21
days in and everything is going great 👌
👉 So the low stress training👈 has been going great she's gonna be a big girl, shes in the Pre-flower Stretch 👌
Lights being readjusted and chart updated .........👍rain water to be used entire growth👈
👉I used NutriNPK for nutrients for my grows and welcome anyone to give them a try .👈
👉 www.nutrinpk.com 👈
NutriNPK Cal MAG 14-0-14
NutriNPK Grow 28-14-14
NutriNPK Bloom 8-20-30
NutriNPK Bloom Booster 0-52-34
I GOT MULTIPLE DIARIES ON THE GO 😱 please check them out 😎
👉THANKS FOR TAKING THE TIME TO GO OVER MY DIARIES 👈
Likes
15
Share
@Korinthius
Follow
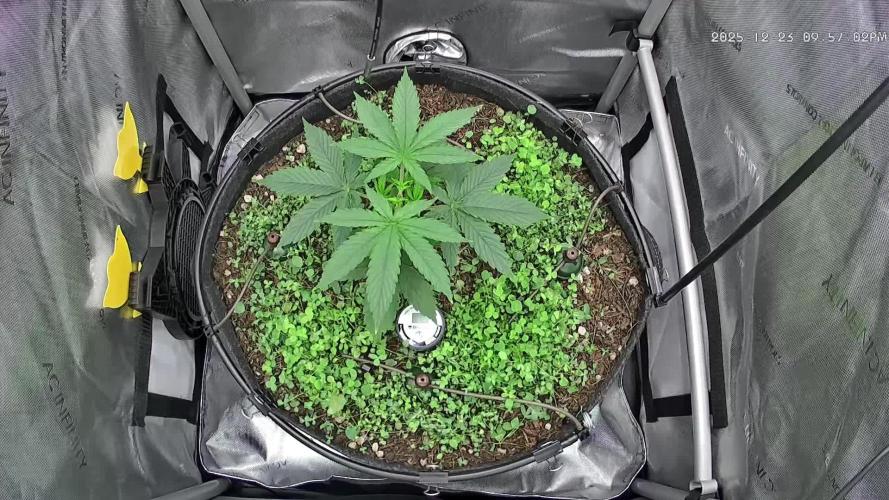
3/4/2021 3rd Node Appearing
3/7/2021 3rd Node Complete
3/10/2021 4th Node Spreading its leaves
3/13/2021 5th Node Spreading its leaves
Plant seems to be loving the Mars Hydro TS1000. I raised the light a few inches as this is a very stout plant and I wanted a little more stretch between nodes before topping. Otherwise, we should be topping this plant middle of next week.
Likes
7
Share
@Alvareas
Follow
Die Pflanze hat sich schön weiterentwickelt.
3 Tage nach dem toppen, waren die obersten Triebe soweit entwickelt, dass ich die obersten Sonnensegel entfernen konnte, da diese die untersten Triebe verdeckten.
4 Tage nach dem toppen, habe ich angefangen, mit LST-Clips, die Triebe nach außen und in die gewünschte Richtung, zu trainieren.
Am 6 Tag der Woche, habe ich begonnen, neue Triebe zu entfernen, jedoch die Sonnensegel der Triebe, lasse ich stehen.
Da ich die Triebe eh später entfernen würde, mache ich dies gleich am Anfang, somit muss die Pflanze keine Kraft auf diese Triebe verschwenden.
Am 7 Tag wurden die beiden obersten Triebe noch einmal getoppt.
Bis jetzt ist das Training aufgegangen.
Die Pflanze geht in die Breite und die Triebe liegen in etwa auf gleicher Höhe.
Erstaunlich finde ich, wie sehr die Pflanze, in Living Soil, auf zu viel Feuchtigkeit, reagiert.
Da ich ein Paar Trauermücken im Zelt und auf den Gelbtafeln gefunden habe, wollte ich mit Nematoden gegensteuern.
Deshalb habe ich 1 Liter, mit Nematoden, am Anfang der Woche gegossen.
Das Tensiometer hat 48 mbar angezeigt und ist im Verlauf der Woche, auf 91 mbar, langsam gestiegen.
Dies hat man im Verlauf der Woche, am neuen Wuchs, gesehen.
Es hat deutlich länger gedauert bis die Blätter von hell Grün auf dunkel Grün gewechselt sind.
Auch haben einige Blätter helle Spitzen und Ränder bekommen.
Die Luftfeuchtigkeit habe ich diese Woche noch einmal leicht gesenkt.
Die LED ist so weit entfernt, dass wir ca. 450 PPFD und einen DLI von ca. 25, hatten.
Die Parameter:
Controller Einstellung Tag: Advanced AI Luftfeuchtigkeit 57% - 67%
Controller Einstellung Nacht: Advanced AI Luftfeuchtigkeit 50% - 60%
Durchschnittliche Tagestemperatur: 26,2 Grad
Durchschnittliche Nachttemperatur: 23,1 Grad
Durchschnittliche Luftfeuchtigkeit Tag: 62,5%
Durchschnittliche Luftfeuchtigkeit Nacht: 57,3%
Durchschnittlicher VPD Tag: 1,1
Durchschnittlicher VPD Nacht: 1,0
LED Leistung: 20% = 95 Watt
Beleuchtungsdauer: 18 Stunden
Umluft: Stufe 1 oszillierend

Likes
Comments
Share

Likes
5
Share
@HoddZ
Follow
Absolutely stoked with my first grow.
On the scales wet is 92oz so i am thinking dry maybe 35 ish. No major dramas along the way now to dry and cure. 🤙🏻
Likes
74
Share
@Schnabeldino
Follow
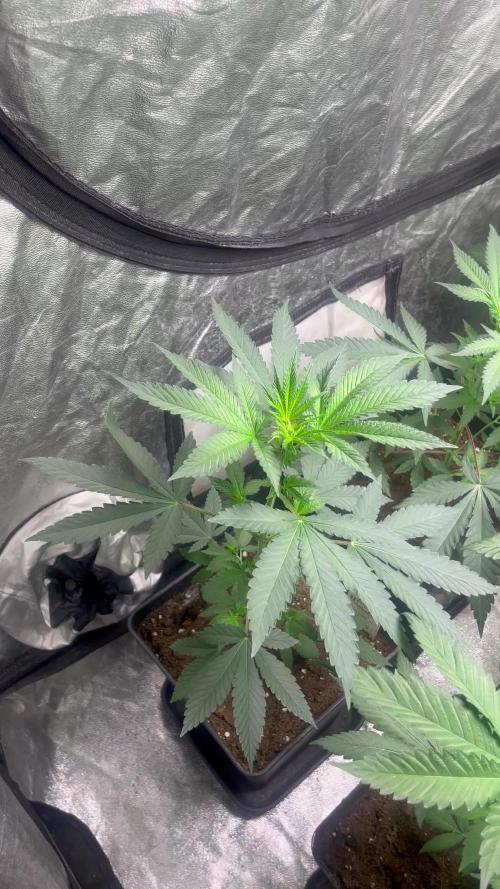
_____📅 Week 7 | 📅 🌼🌸🌺Pre-flower🌼🌸🌺 ______
🔸The red lady 💃 is doing great since I put her in the big tent below the sunlight lamps, but it looks like the light is still too strong. But as I have 5 other plants in there I won't change anything and see how she continues to do.
🔸This week I have watered it twice again, 2 x 2,5 l
______________________________________________________________________________________
current conditions
🌡️🔆= 24-25°
🌡️🌜= 18-19°
💨 Hum. = 67%
🔦 PPFD = 800 umol 12/12
🔦⌚DLI = ~ 34
_________________________________________________________________________________________
Equipment to use:
💡 Light: 2 x Sanlight Evo 4- 120 on 90%
🌬️ 3 osziling clips fans
⛺ tent:: 120 x120 x 180 Spider-Farmer
🍯 Pots: 15 liter pot
🌱 Soil: Bio-Bizz light mix
💊 Nutrients: Advanced Nutrients
💧 Water: Tap Water 0,5 EC

Processing
Likes
23
Share
@SativaSteve88
Follow
Another week down few more to go can't wait!! First ever attempt of growing my own so really impatient to see the final results now and get to the finish line, that said all has went well upto now other than the size they reached haha, really started putting on weight now it seems and they smell lovely, excited to see the buds fatten and progress over these last few weeks up until harvest now, started 5 liberty haze also they are just coming upto 3 weeks now so check that diary out to, any comments info tips for the final stages appreciated

Likes
11
Share
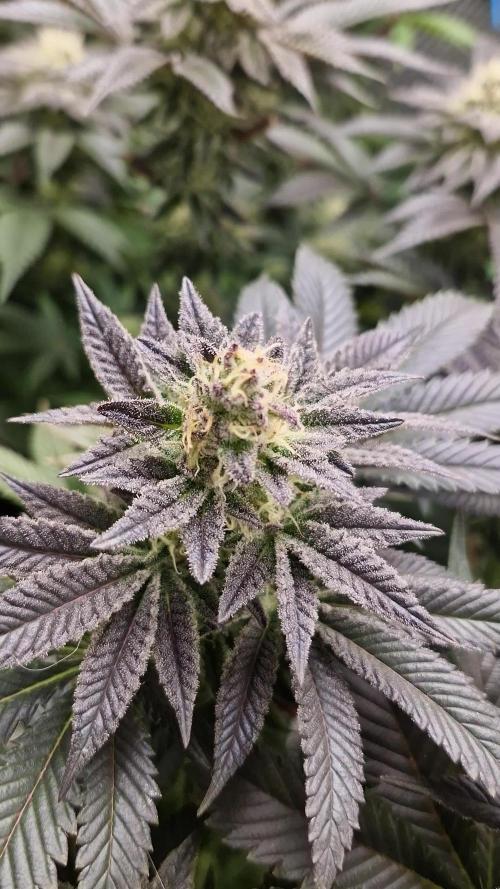
@SubliminalSociety
Follow
It's time. The trichomes have clouded over, a milky haze obscuring the clear heads. The smell is faint. Very herby of thyme and salvia. The buds are small and round.
