
Rainbow Sherbert #11 / Kannabia / Indoor


VEG
5x Osram LED Base Classic A 100 / 14W / 1521lm Light Emitting Diodes/70W
DIY E27
VEG
DIY samsung It-f562b 3500k Leuchtdioden / 120W Light Emitting Diodes/120W
samsung It-f562b 3500k Leuchtdioden / 120W
FLO
DIY samsung It-f562b 3500k Leuchtdioden / 120W Light Emitting Diodes/120W
samsung It-f562b 3500k Leuchtdioden / 120W


Fan
Cyclone 20W 20CM
Clipfan
Fan
Arctic
PC Fan


Drip
onepot


Perlite
Perlite
Indoor
Room Type
Topping
weeks 10
Defoliation
weeks 10-14, 16
ScrOG
weeks 11-14
LST
weeks 11-14
Transplantation
weeks 2, 7
9 l
Pot Size
Start at 17 Week
G
Germination4mo ago

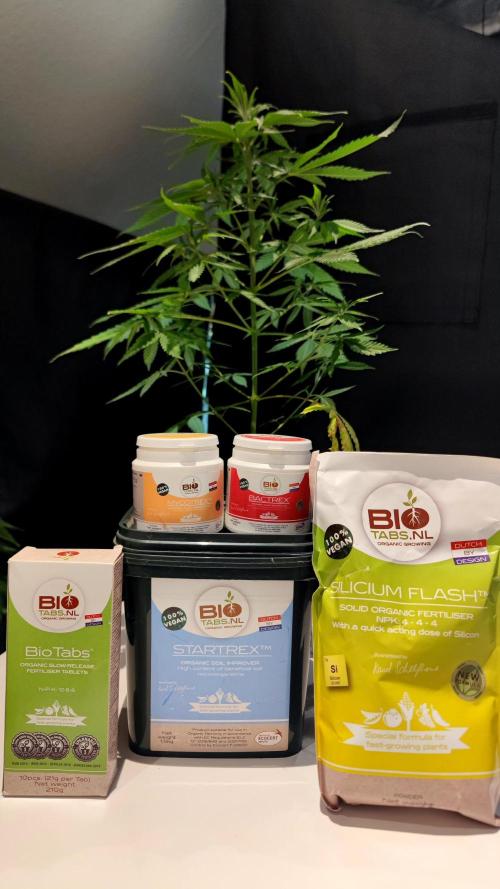
DivineBuds420 This grow is a sponsored run.
The seeds for this diary were kindly provided by Kannabia Seeds, and the nutrients are sponsored by BioTabs. Big thanks to both for the support – as always, everything shared here is based on my real experience and honest observations.
I’ve actually been running BioTabs long before this sponsorship. It’s simply the system that fits my organic, low-stress growing style best. Once the soil is prepared properly, things become very hands-off — prepare well, then let the plant do its thing 🌱
The goal of this grow is exactly that: keeping it simple, organic and stress-free, focusing on healthy development and letting the genetics speak instead of pushing extremes.
If you’re curious about the BioTabs system, you can use discount code GDBT420 for 15% off in the official BioTabs shop.
Let’s get started ✨
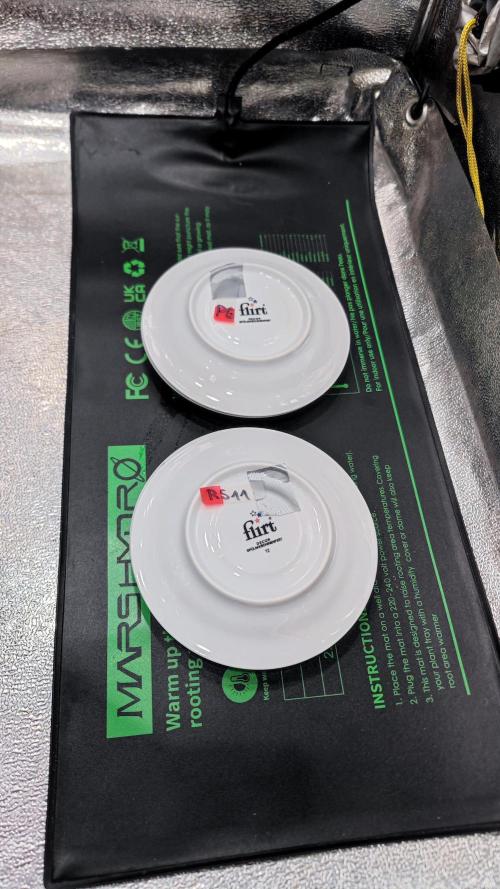
RS11 was germinated using the paper towel method.
The paper towel was moistened with osmosis water and placed between two plates to maintain a stable and humid environment.
The plates were positioned on a heating mat set to 25°C, providing consistent warmth throughout the germination phase.
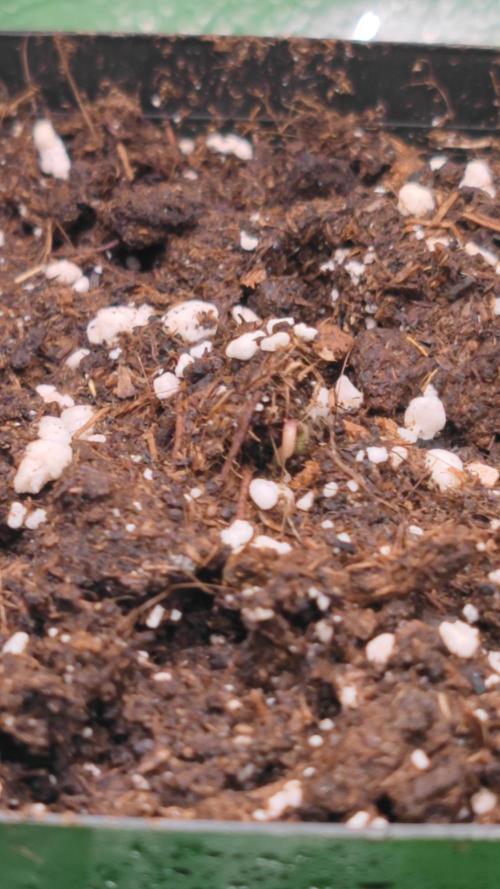
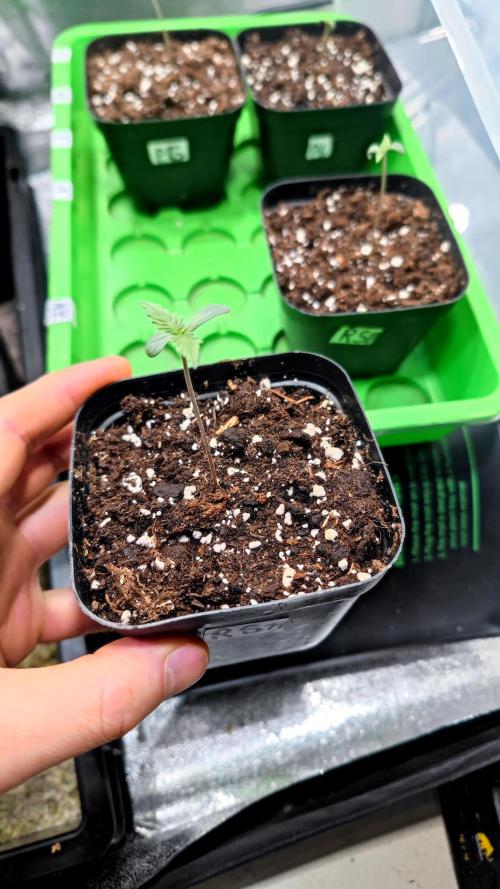
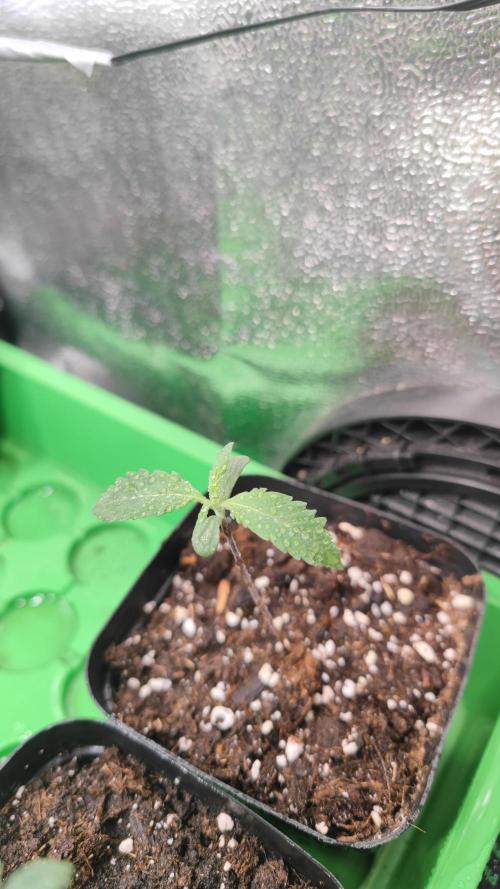
After successful germination, the seeds were planted into small ~0.5 L seedling pots filled with BioBizz Light Mix.
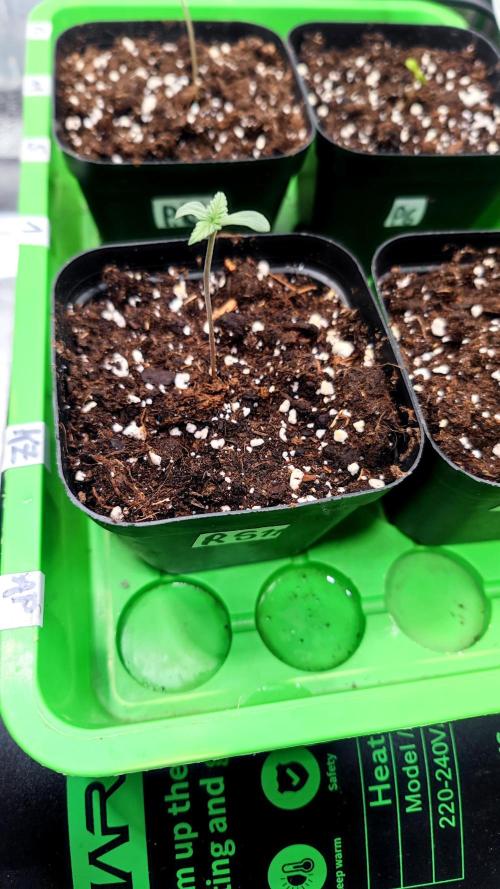
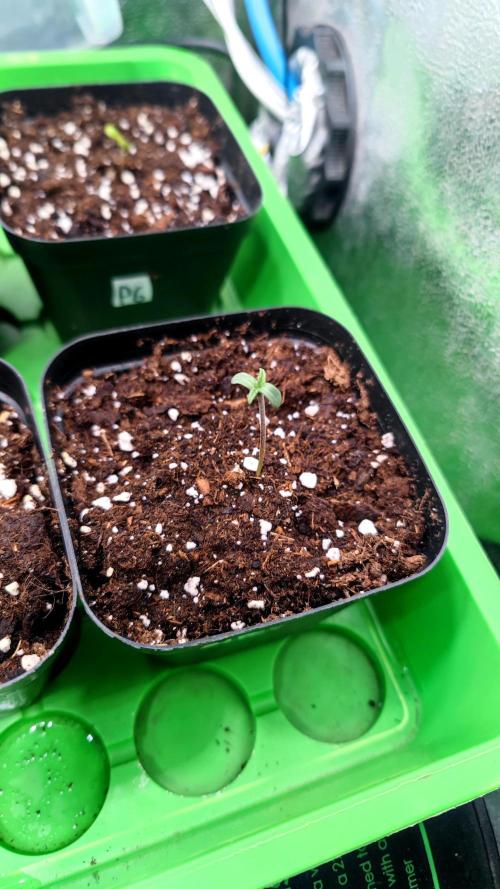
All seedlings broke through the surface without issues and are now growing happily towards the light.
Early development looks healthy and uniform.
The pots are currently placed inside a mini greenhouse acting as a humidity dome, which itself sits on the heating mat.
This setup ensures stable temperatures and increased humidity – ideal conditions for young plants.
A very smooth and stress-free start for RS11 🌱
6 likes
2 comments
Share
Used method
Paper Towel
Germination Method
1
Week 1. Vegetation4mo ago
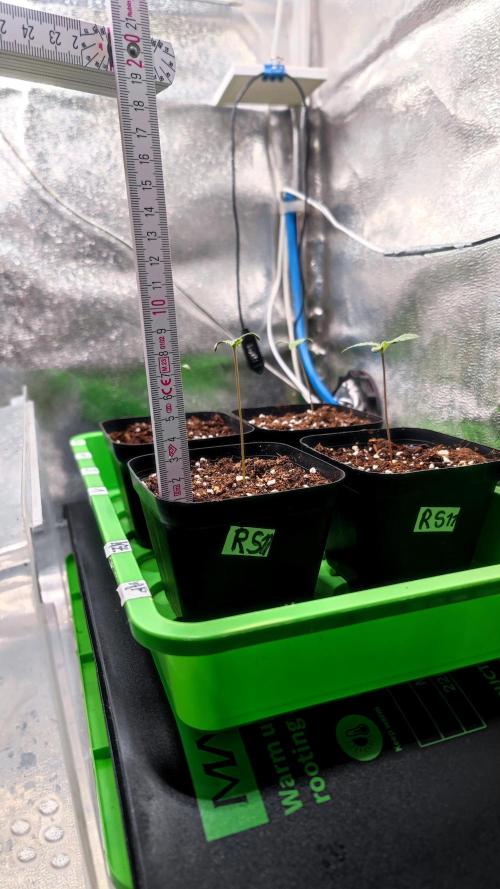
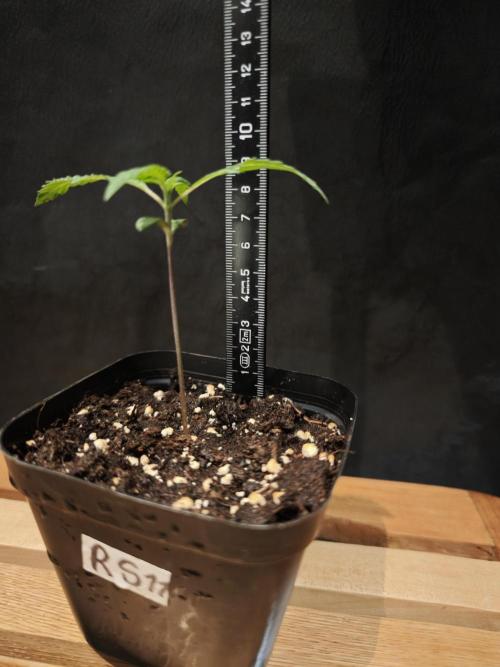
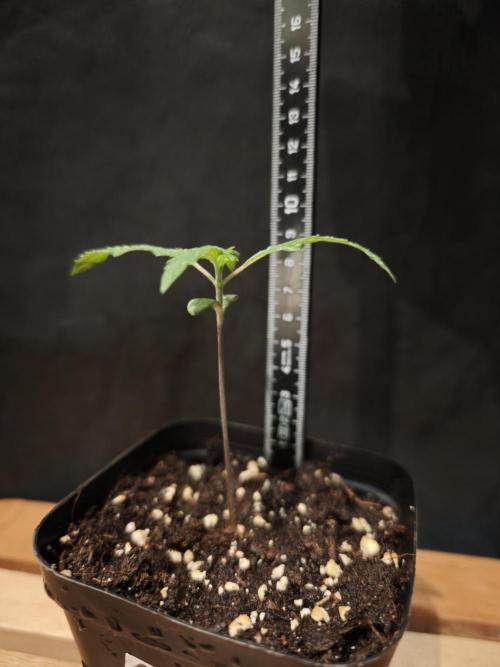
9 cm
Height
18 hrs
Light Schedule
22 °C
Day Air Temp
No Smell
Smell
70 %
Air Humidity
19 °C
Night Air Temp
0.5 l
Pot Size
40 cm
Lamp Distance
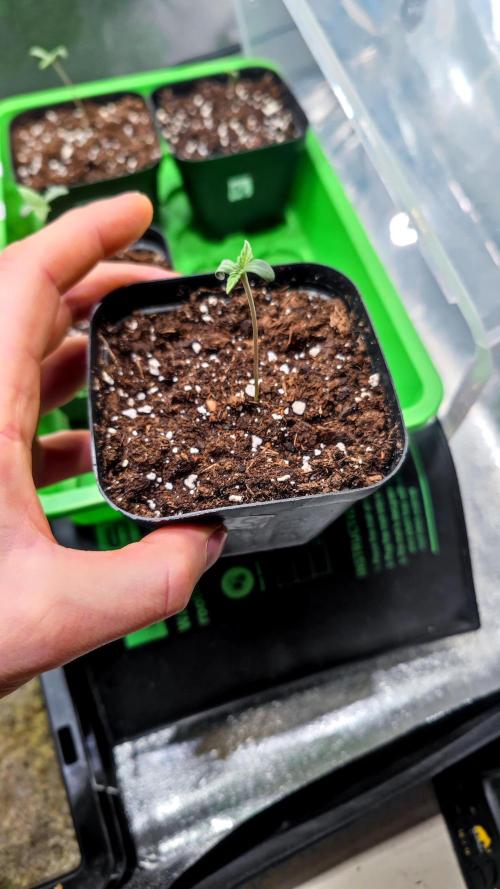
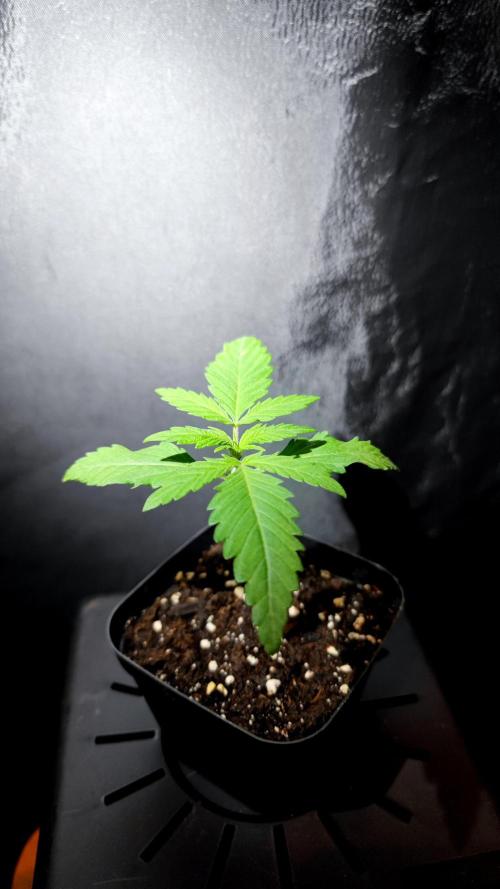
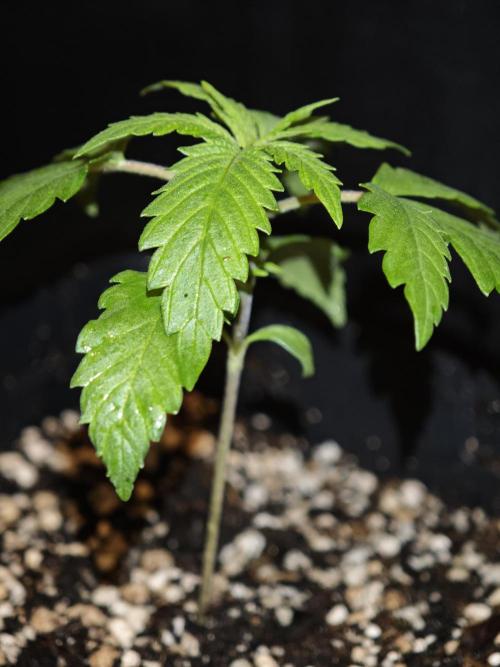
DivineBuds420 RS11 has transitioned smoothly into the vegetative phase.
Growth has been steady and stress-free throughout the week.
There was no need for any intervention – the plant simply did its thing.
Apart from occasional light misting with water, mainly to maintain moisture and slightly increase humidity, nothing else was required.
Leaf development looks healthy and balanced, and the plant appears comfortable in its environment.
Overall, a very calm and uncomplicated start to the vegetative stage.
5 likes
1 comment
Share
2
Week 2. Vegetation4mo ago
11 cm
Height
18 hrs
Light Schedule
21 °C
Day Air Temp
No Smell
Smell
60 %
Air Humidity
19 °C
Night Air Temp
3.5 l
Pot Size
40 cm
Lamp Distance
Nutrients 6

Startrex
5 mll

Silicium Flash
5 mll

Organic Fertiliser Tablets
1 mll
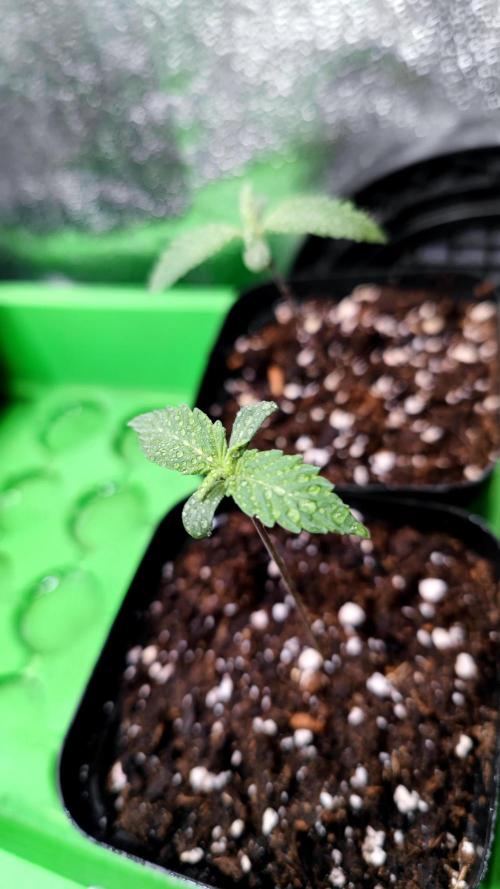
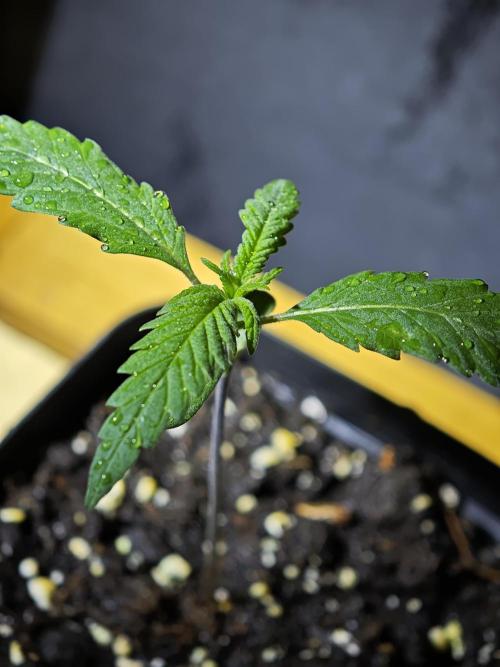
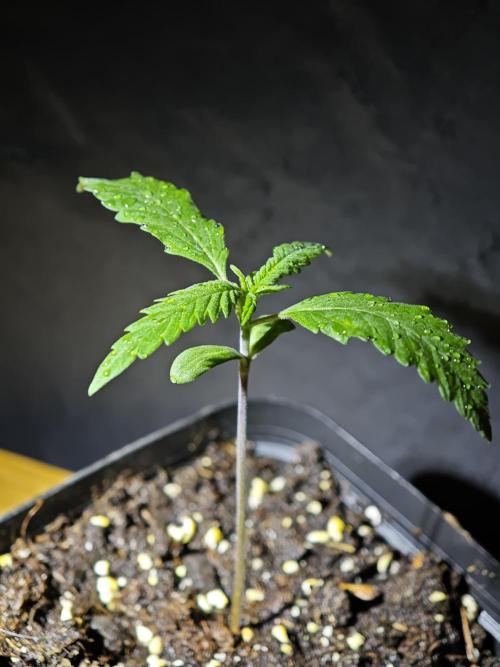
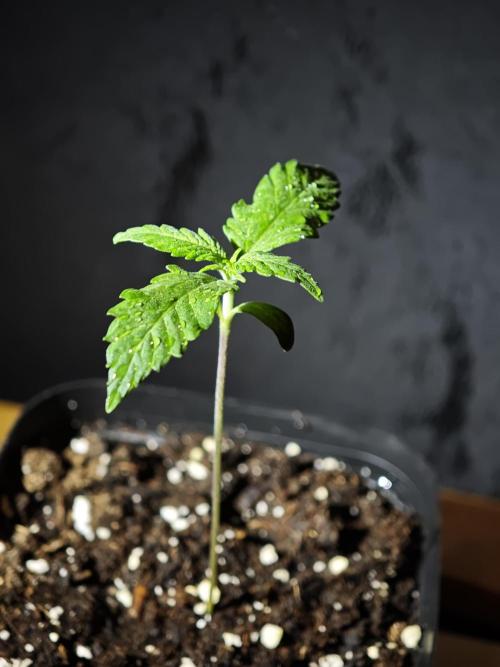
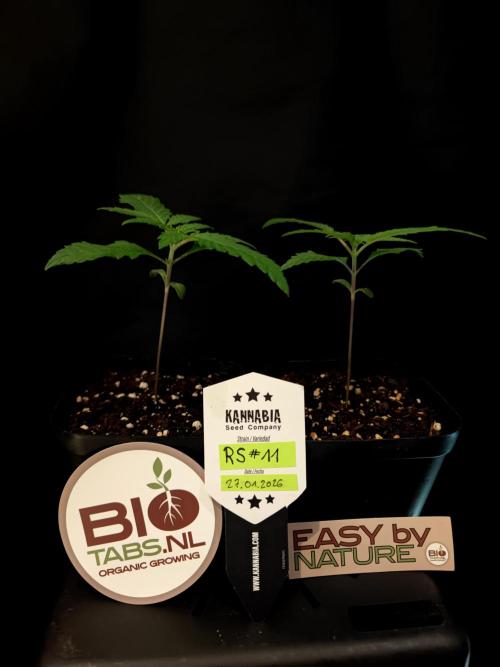
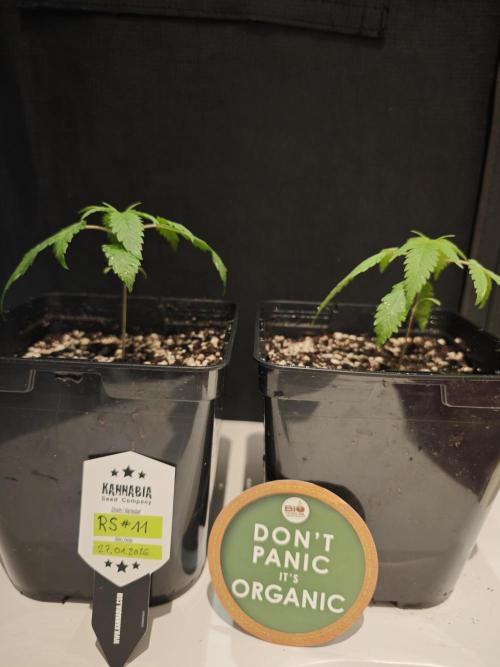
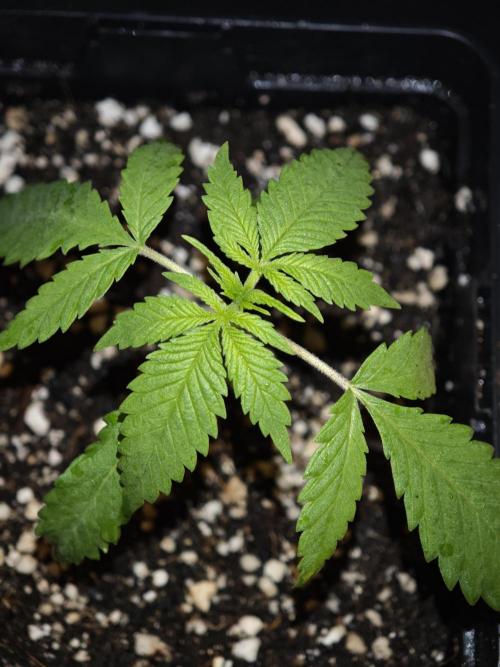
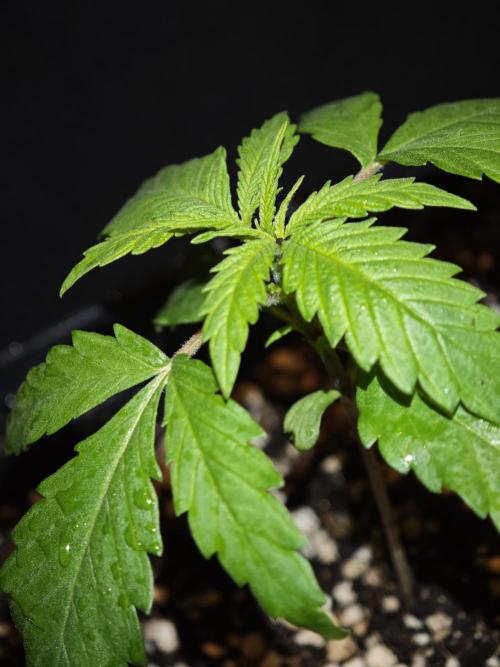
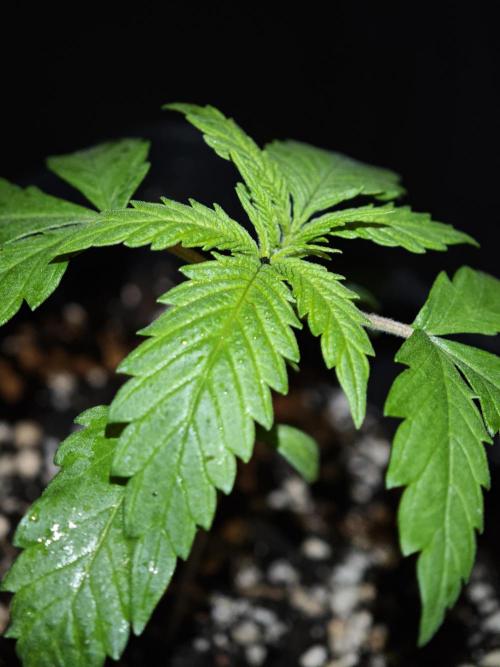
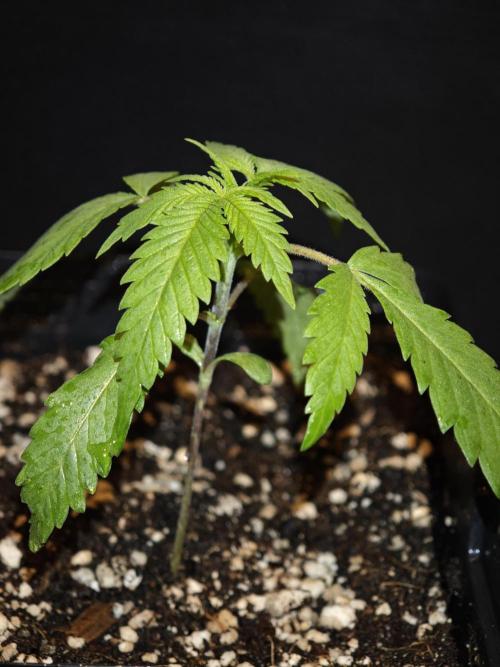
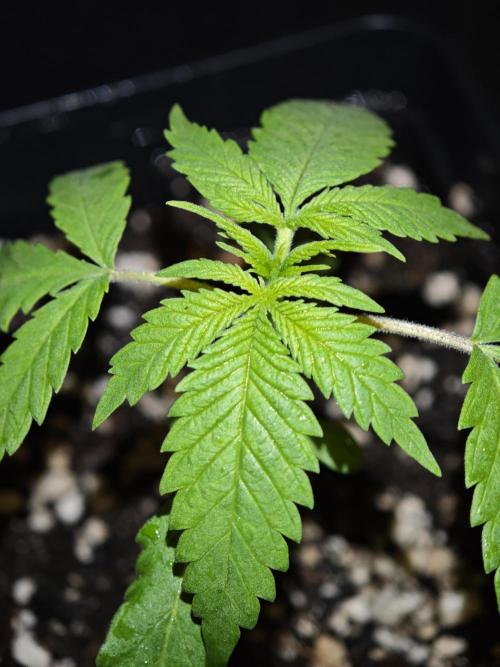
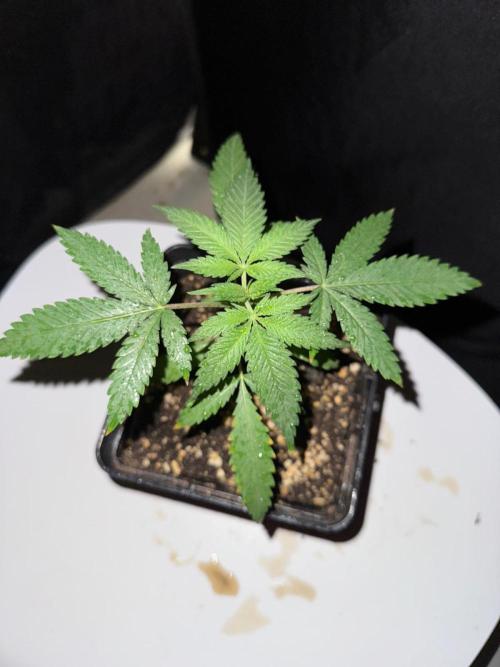
DivineBuds420 Both RS11 plants are growing steadily and looking healthy. In contrast to the Pink Gelato, her leaves are noticeably thinner, showing a different growth characteristic.
During the week, they’ll likely be transplanted into a slightly bigger pot and will get their full BioTabs treatment – nutrients, beneficial microorganisms, the whole organic setup. I’m excited to see her thrive.
I’ll be away on vacation for a few weeks after this update, so some diary entries may appear a little later. My cousin will be looking after the plants and watering them, and he’ll also take a few photos to keep track of their progress. Everything should continue smoothly while I’m away.
Both plants were successfully transplanted into 3.5 liter pots and received the full BioTabs treatment, including microorganisms and nutrients.
The substrate is based on reused and reconditioned soil with roughly 50% perlite mixed in. The base soil is BioBizz Light Mix.
Since watering is done exclusively with osmosis water, about 7 g of dolomite lime per liter of soil was added to provide proper calcium and magnesium buffering.
This run marks the first time following the BioTabs “just add water” strategy.
The substrate was prepared accordingly and amended with Startrex and Silicium Flash.
Before placing the plants into their new pots, Mycotrex was sprinkled directly into the planting hole and one BioTab was added to each pot.
After transplanting, the leaves were lightly sprayed with Boom Boom Spray.
The substrate was then watered with osmosis water mixed with Bactrex.
Everything went smoothly and the plants handled the transplant very well.
From here on, it’s all about letting the biology do the work.
8 likes
comments
Share
Used techniques
Transplantation
Technique
3
Week 3. Vegetation3mo ago
17 cm
Height
18 hrs
Light Schedule
20 °C
Day Air Temp
No Smell
Smell
50 %
Air Humidity
17 °C
Night Air Temp
3.5 l
Pot Size
40 cm
Lamp Distance
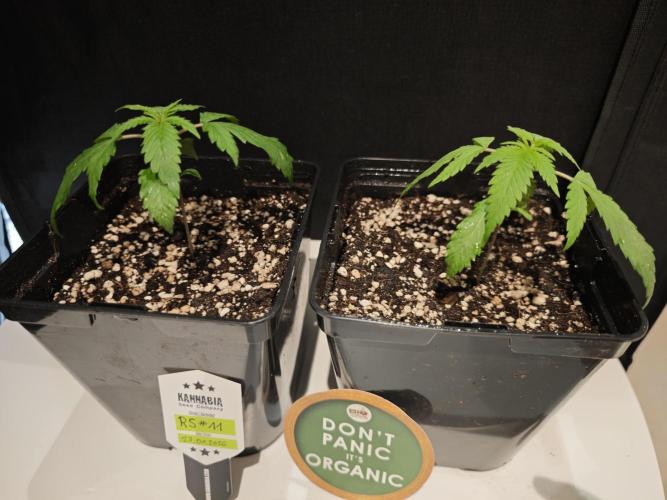
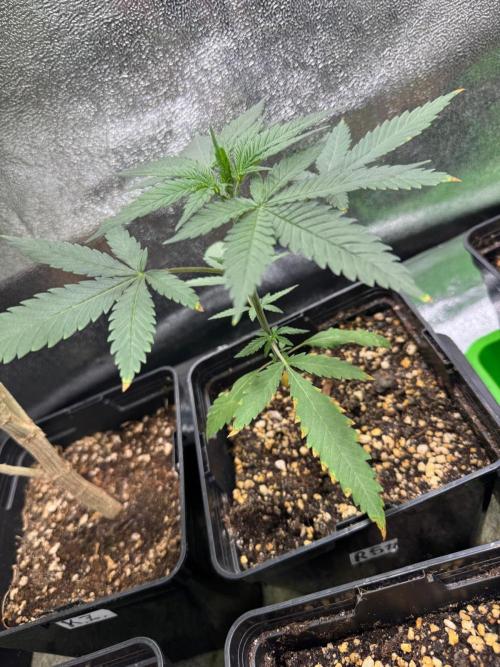
DivineBuds420 This update comes while I’m still away on vacation, so I’m relying on the information and photos from the person taking care of the plants.
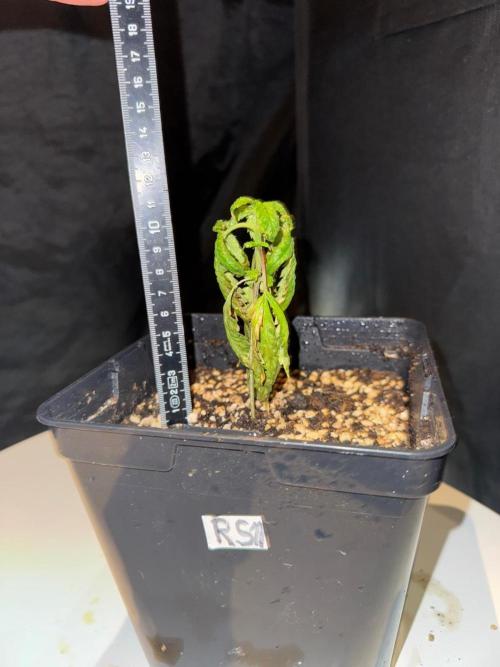
Unfortunately it seems the watering happened a bit too late and the plants went roughly five days without water. One of the RS11 plants was clearly hit much harder by this drought period and shows strong signs of stress.
At the same time there was also an issue with the heating in the room, which caused temperatures to drop more than expected. Inside the tent temperatures were between about 17 and 20°C, while outside the tent they fluctuated between 14 and 21°C. Humidity also dropped at times and occasionally went well below 50%.
All of this together likely created quite a bit of stress for the plants.
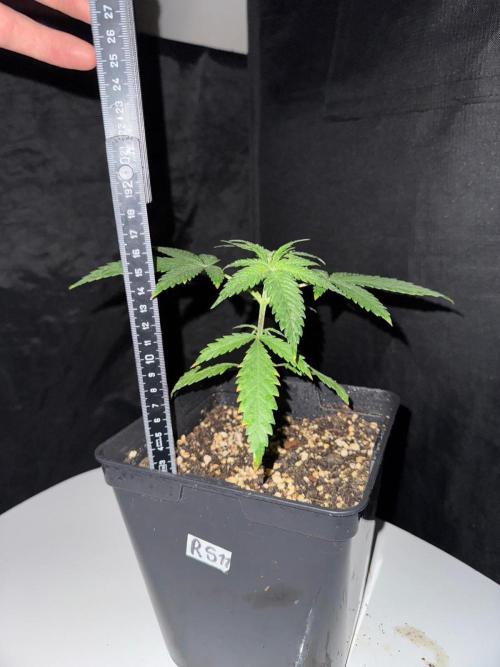
Her sister plant is still doing relatively well, although she shows some mild stress symptoms such as slightly burned leaf tips.
This could be related to the soil mix used during transplant. The substrate was recycled and reconditioned soil based on BioBizz Light Mix with a high amount of perlite. It is possible that the soil still contained more nutrients than expected.
Under normal circumstances I would probably not have added additional nutrients at this early stage, or only very lightly. However, since I was leaving for vacation, I wanted to make sure the plants would not run out of nutrients while I was gone.
In the end it was most likely a combination of drought stress during the watering gap, slightly stronger nutrient availability from the recycled soil, and less stable environmental conditions due to the heating issue.
For now the plan is simply to stabilize the environment and see how the plants respond over the coming days.
4 likes
comments
Share
4
Week 4. Vegetation3mo ago
30 cm
Height
18 hrs
Light Schedule
23 °C
Day Air Temp
No Smell
Smell
60 %
Air Humidity
20 °C
Night Air Temp
3.5 l
Pot Size
30 cm
Lamp Distance
DivineBuds420 I’m still away on vacation, but my plant sitter has been able to spend more time checking on the tent and keeping an eye on things.
Conditions have improved compared to the previous update. Temperatures and humidity have stabilized, and the watering schedule has also become much more consistent again.
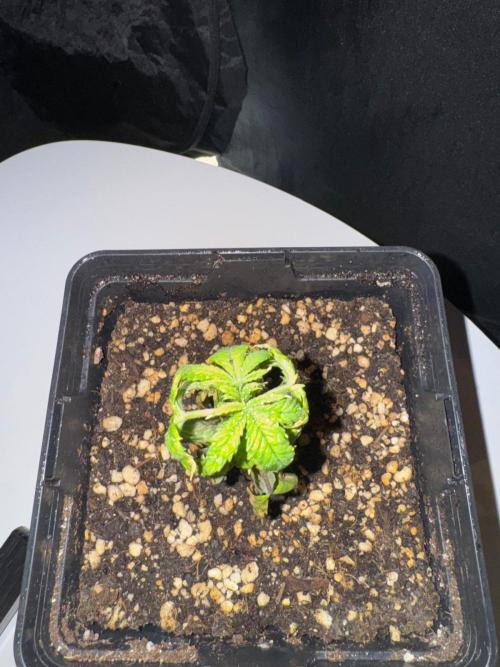
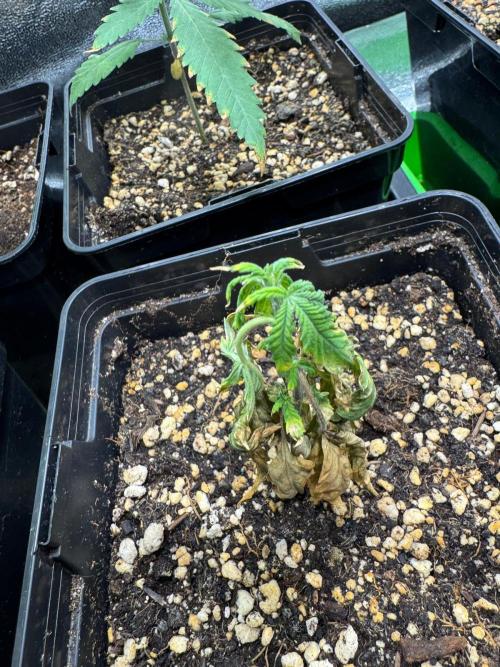
Unfortunately our problem child has not recovered from the earlier stress. Despite the improved conditions she continues to decline and is looking worse with each update. At this point the outlook for her does not look very promising - I'm pretty sure she won't make it.
Her sister on the other hand responded very well once the environment and watering improved. She has clearly recovered from the earlier stress and has put on noticeable growth over the past days.
For now the focus is simply on maintaining these stable conditions and seeing how things develop over the next few days.
3 likes
1 comment
Share
5
Week 5. Vegetation3mo ago

33 cm
Height
18 hrs
Light Schedule
22 °C
Day Air Temp
No Smell
Smell
65 %
Air Humidity
20 °C
Night Air Temp
3.5 l
Pot Size
30 cm
Lamp Distance
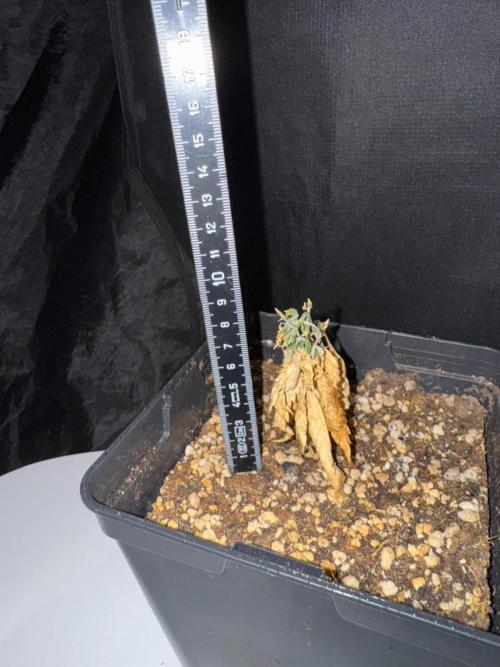
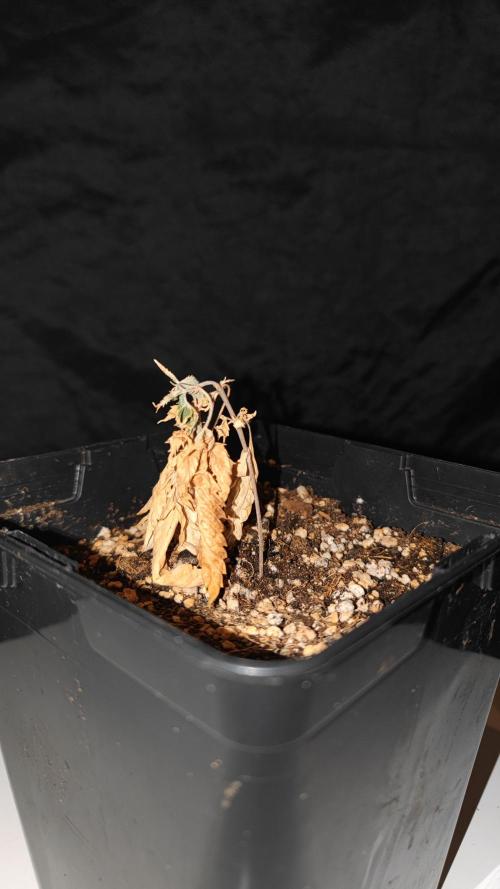
DivineBuds420 I’m finally back home and able to take care of the plants myself again.
Unfortunately, as expected from the previous update, one of the RS11 plants did not recover from the earlier stress and had to be removed. The combination of the drought period, unstable environmental conditions and the early stage of growth was simply too much for her to bounce back from.
Her sister plant, however, recovered well once watering and environmental conditions stabilized. Over the past days she has continued to grow and looks much healthier overall.
Now that everything is back under control again, the focus is on maintaining stable conditions, proper watering and letting the remaining plant continue her development.
Sometimes a grow throws a few challenges your way, but that’s part of the learning process and the journey.
In the end every grow teaches something, and sometimes losing a plant is simply part of the process.
7 likes
2 comments
Share
6
Week 6. Vegetation3mo ago

38 cm
Height
18 hrs
Light Schedule
21 °C
Day Air Temp
No Smell
Smell
70 %
Air Humidity
18 °C
Night Air Temp
3.5 l
Pot Size
30 cm
Lamp Distance
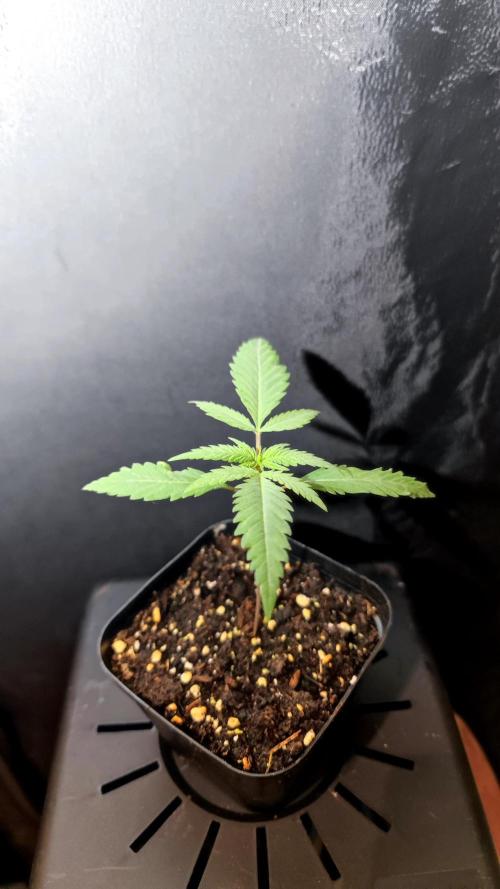
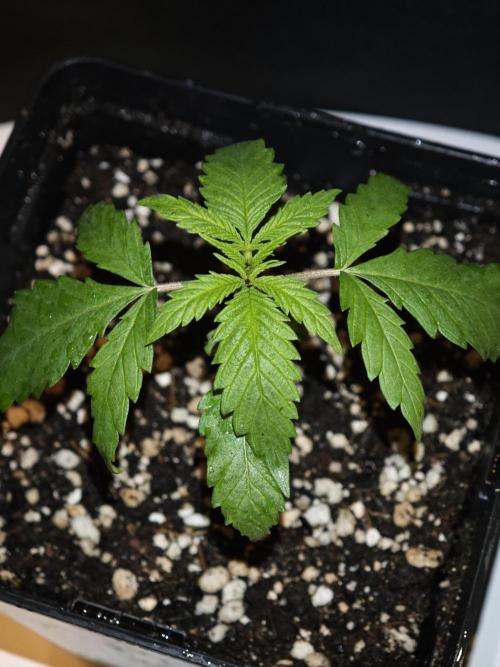
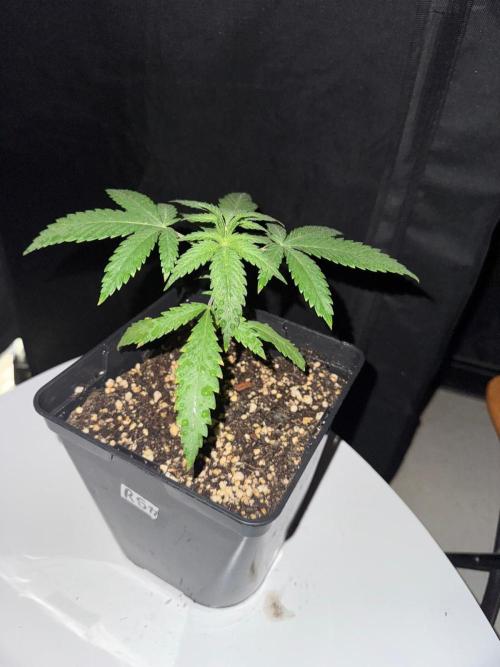
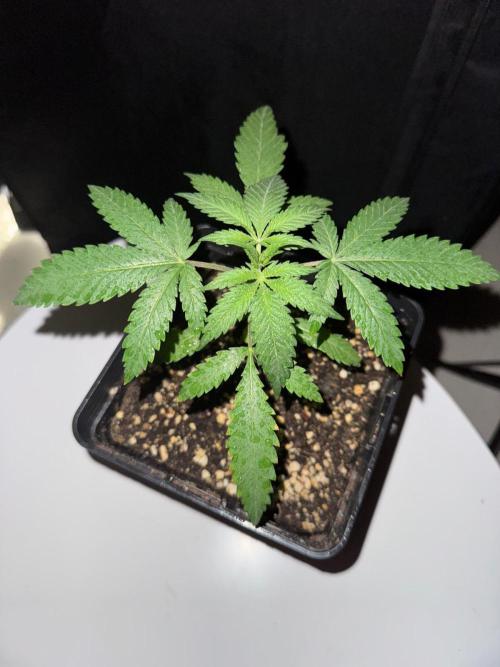
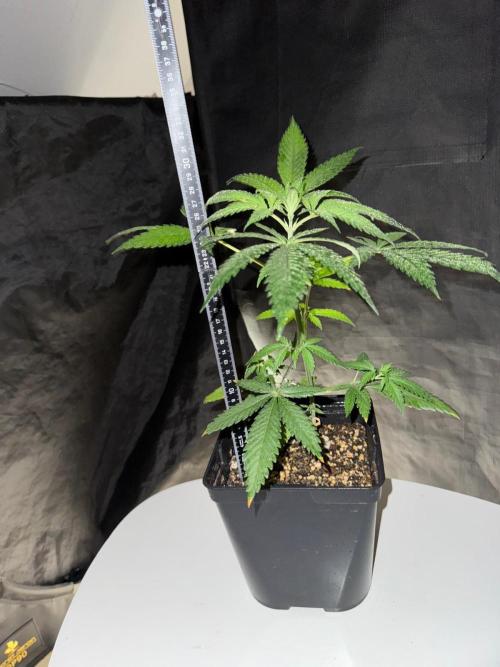
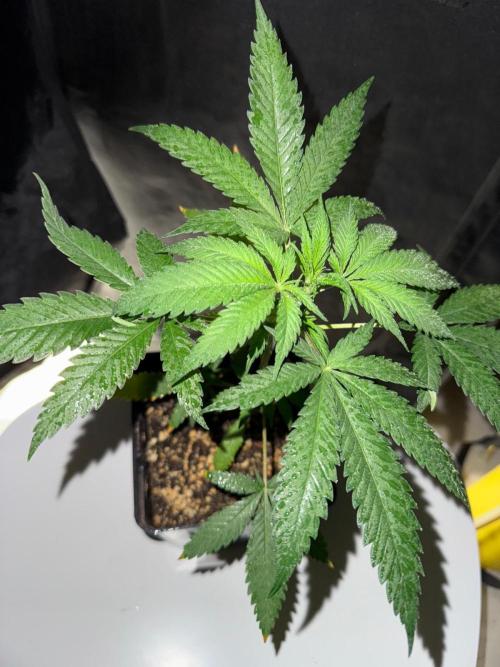
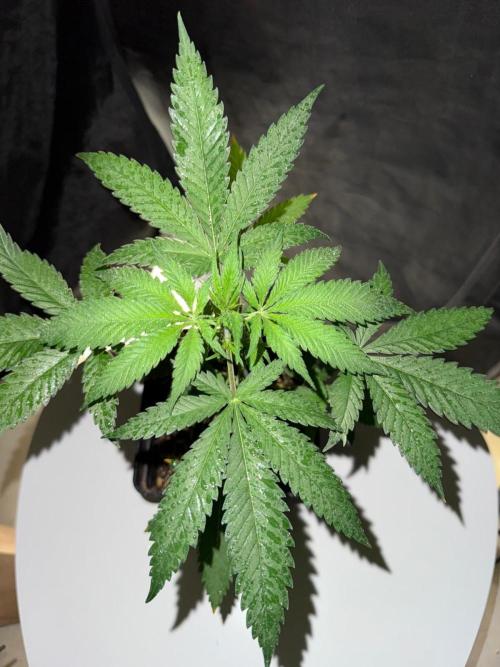
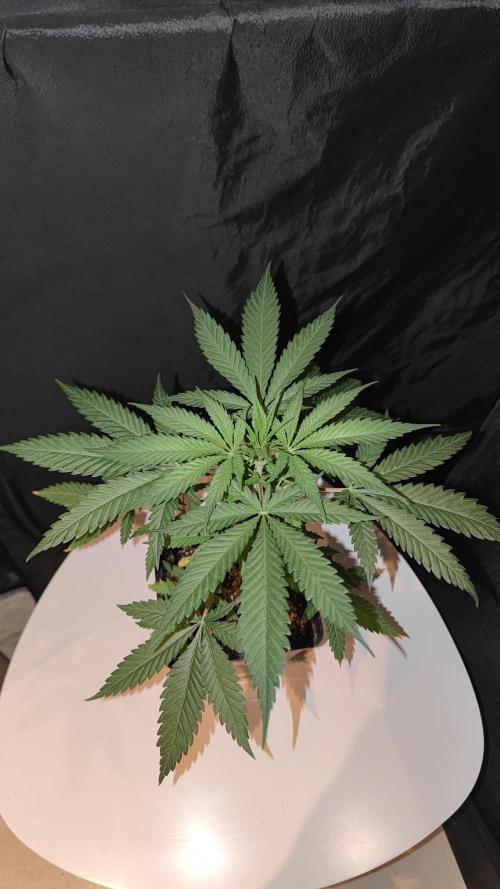
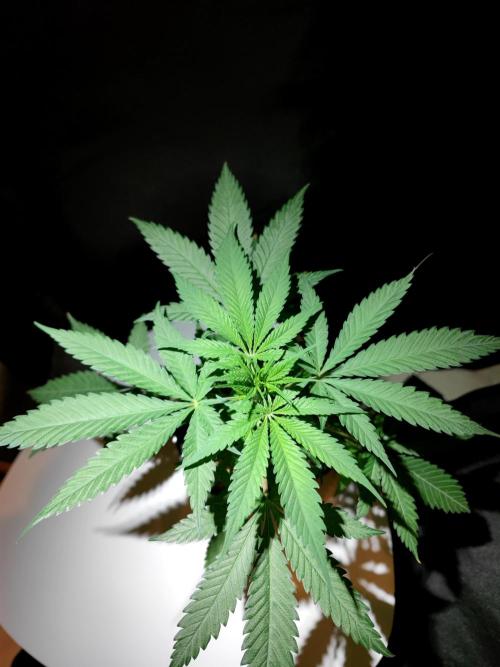
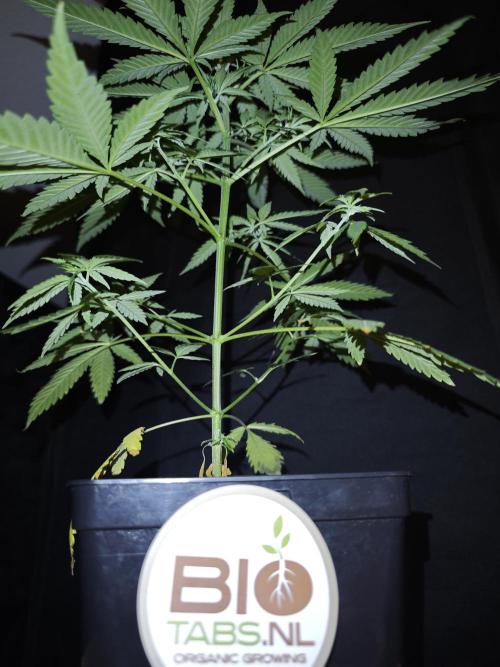
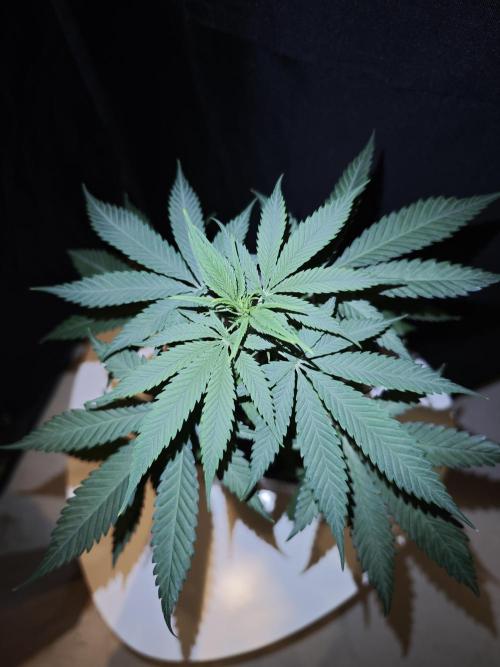
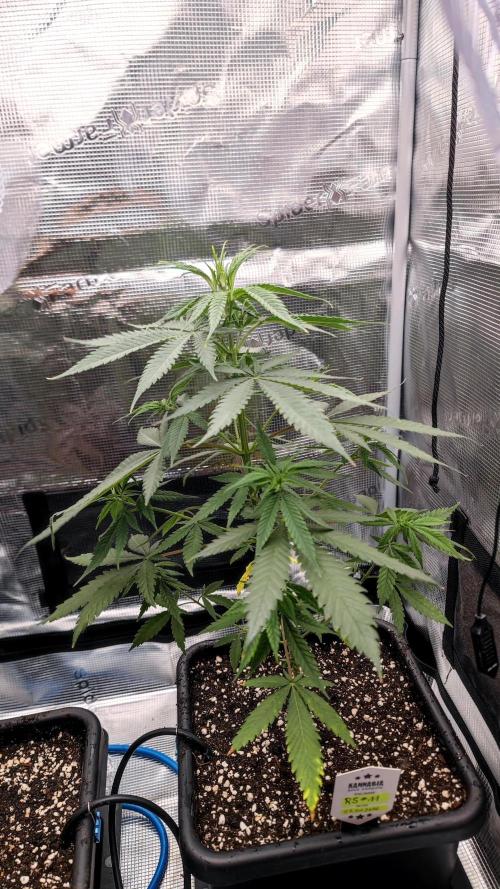
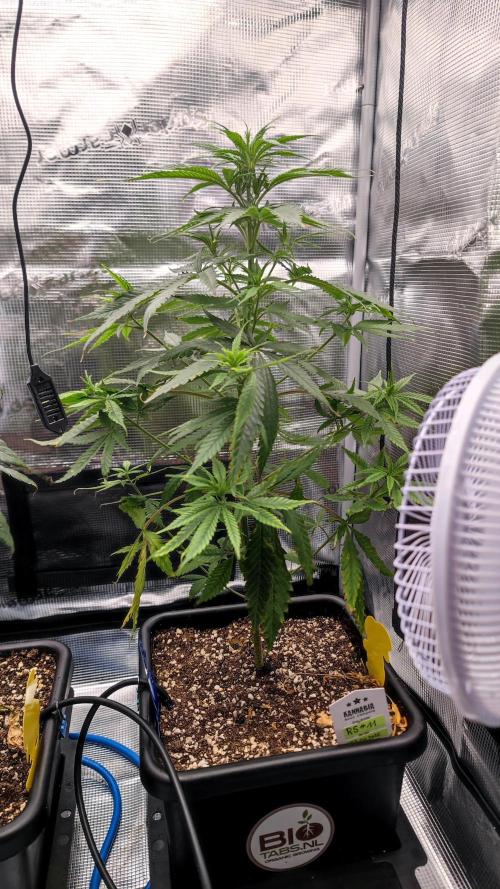
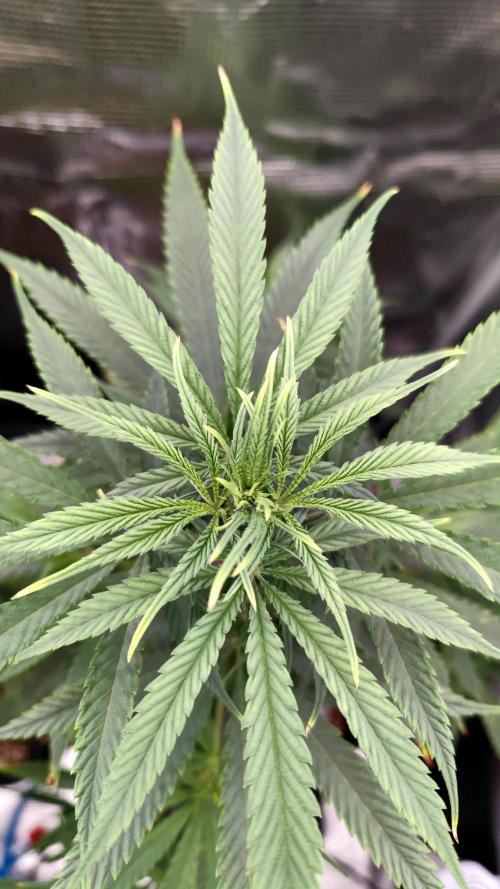
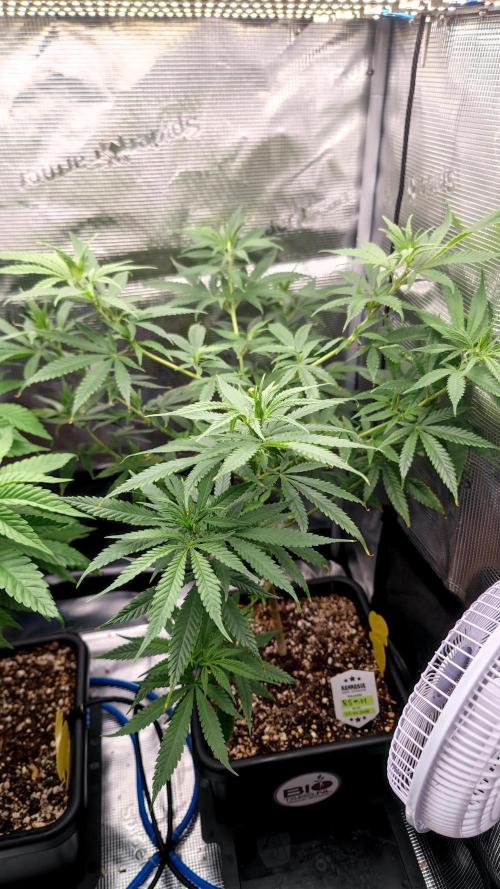
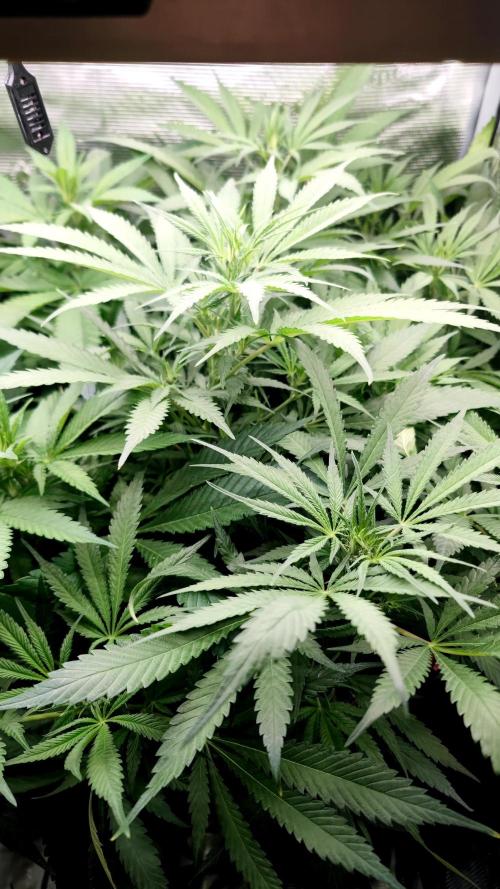
DivineBuds420 This week the RS11 continued to settle in nicely and showed steady vegetative growth.
She has grown noticeably in height and is starting to develop more side branches, slowly building the structure that will later carry the flowers. The leaves show a healthy deep green color and overall the plant looks strong and vigorous.
After the small stress signs from the previous week the plant seems to have stabilized again. Growth has clearly picked up and she appears to be focusing on expanding both above and below the soil.
Roots are beginning to reach the drainage holes at the bottom of the pot, which is usually a good sign that the next transplant will be needed soon.
For now the plan is simple: let her keep doing her thing, continue building a strong root system and prepare for the next stage of growth.
Sometimes the best thing you can do as a grower is simply step back and let the plant work.
Just like in life, we learn the most from our mistakes.
Every grow is another lesson.
Keep growing, keep learning
9 likes
3 comments
Share
7
Week 7. Vegetation3mo ago
47 cm
Height
18 hrs
Light Schedule
24 °C
Day Air Temp
No Smell
Smell
60 %
Air Humidity
18 °C
Night Air Temp
8.5 l
Pot Size
30 cm
Lamp Distance
Nutrients 5
Startrex
5 mll
Silicium Flash
5 mll
Organic Fertiliser Tablets
1 mll
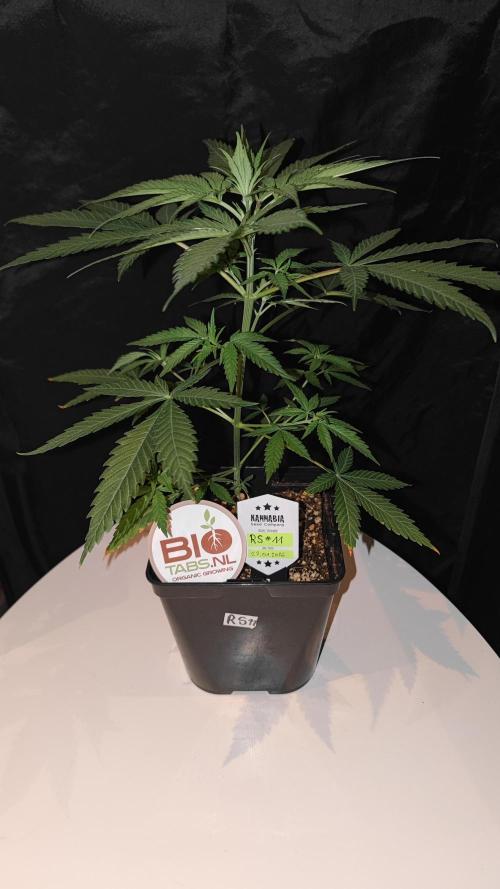
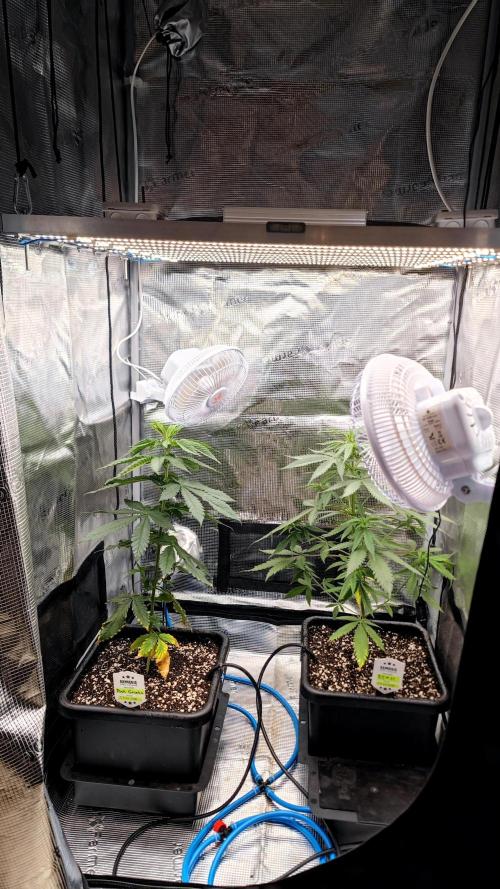
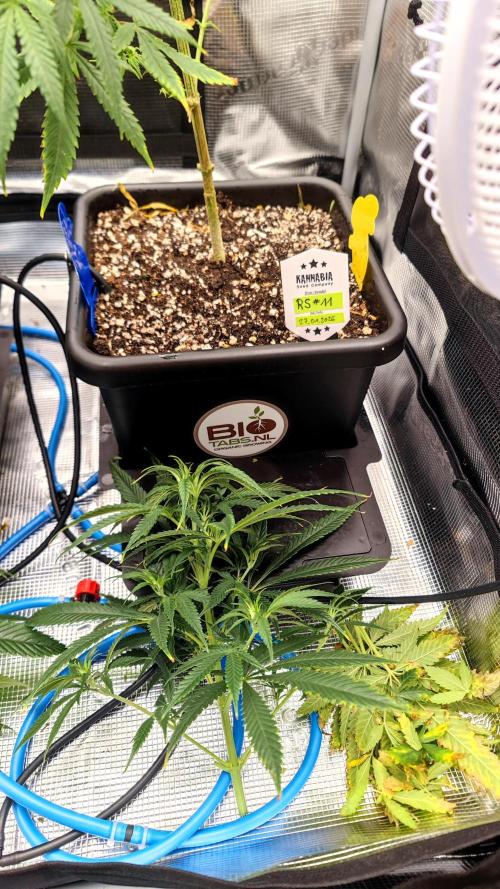
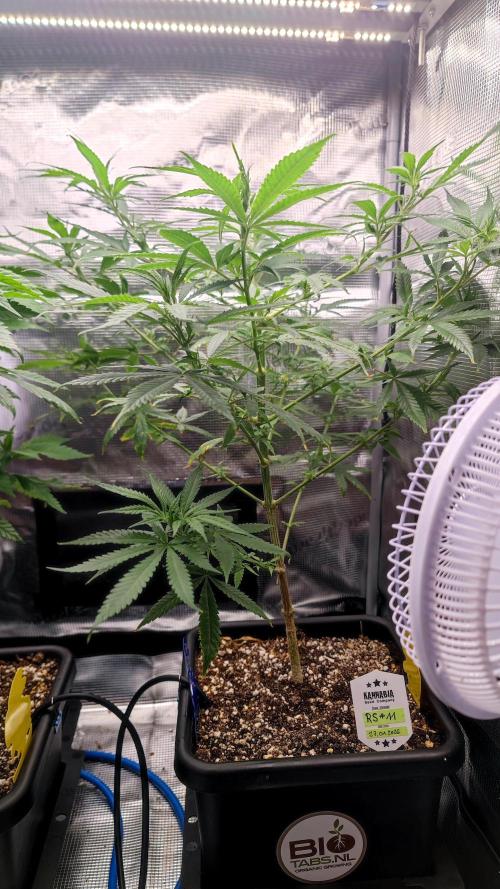
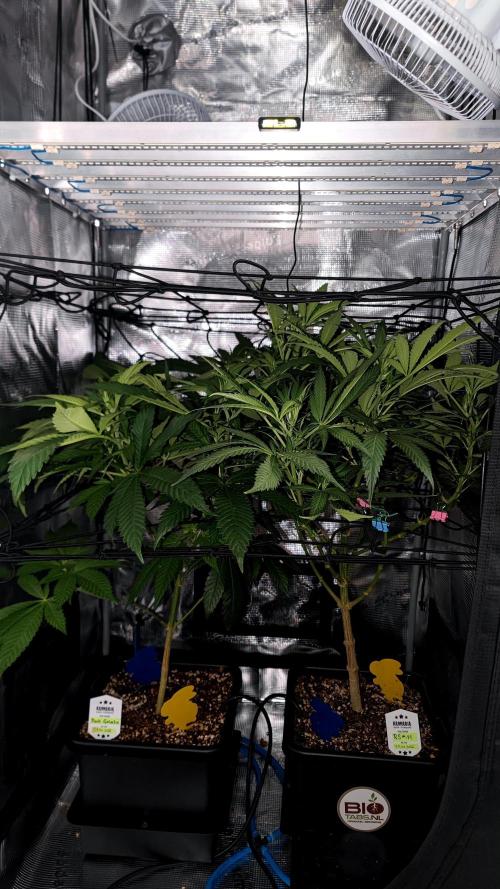
DivineBuds420 RS11 is still not fully recovered and still looks a bit stressed, but I decided to take the risk and move forward anyway.
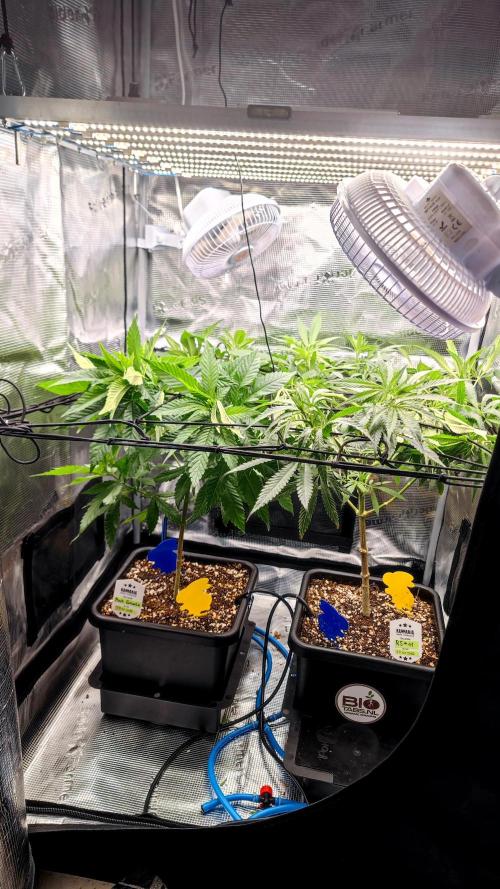
She was transplanted into her final 8.5L pot and moved into the 70x70 flowering tent.
The substrate was prepared the same way as before using the BioTabs “just add water” approach. Once everything is set up properly, the idea is to let the soil life take over and keep things simple with just water.
Per liter of soil (recycled BioBizz Light Mix with ~50% perlite):
7 g dolomite lime
5 g Startrex
5 g Silicium Flash
Into the planting hole:
5 g Mycotrex
1 BioTab
Watered in with:
1 g Bactrex dissolved in water
9 likes
2 comments
Share
Used techniques
Transplantation
Technique
8
Week 8. Vegetation2mo ago
53 cm
Height
18 hrs
Light Schedule
25 °C
Day Air Temp
Weak
Smell
55 %
Air Humidity
0 °C
Solution Temp
18 °C
Night Air Temp
8.5 l
Pot Size
25 cm
Lamp Distance
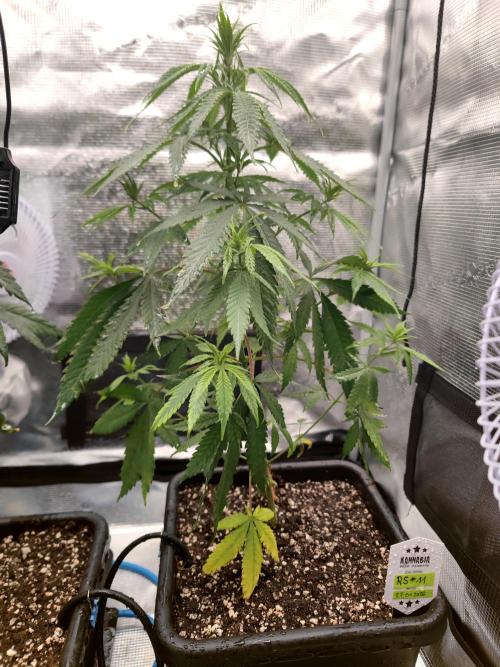
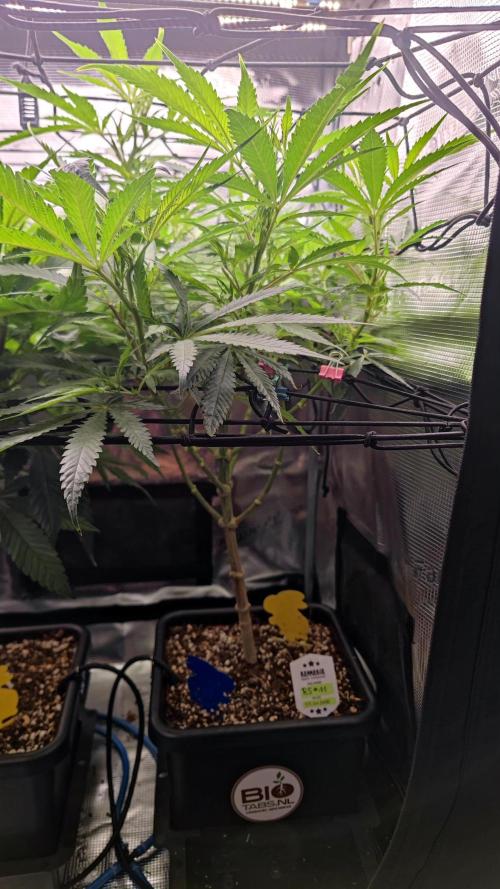
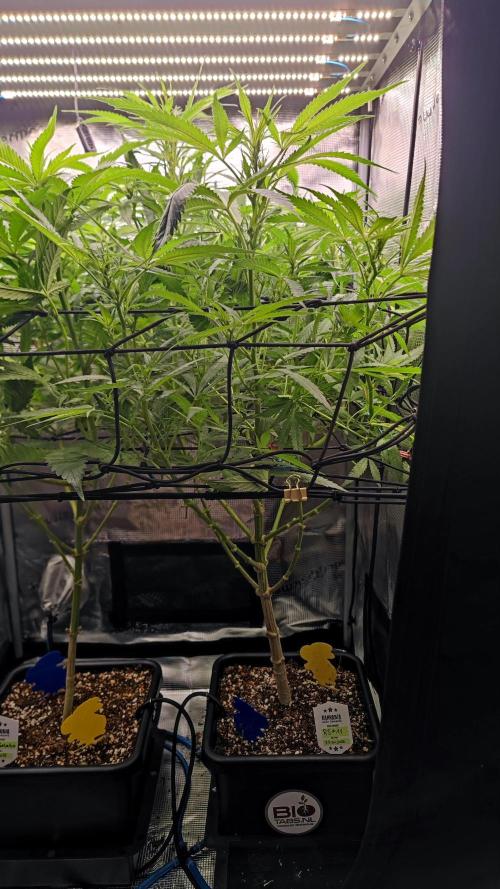
DivineBuds420 She’s still carrying some stress from the previous weeks, but she's lowly stabilizing.
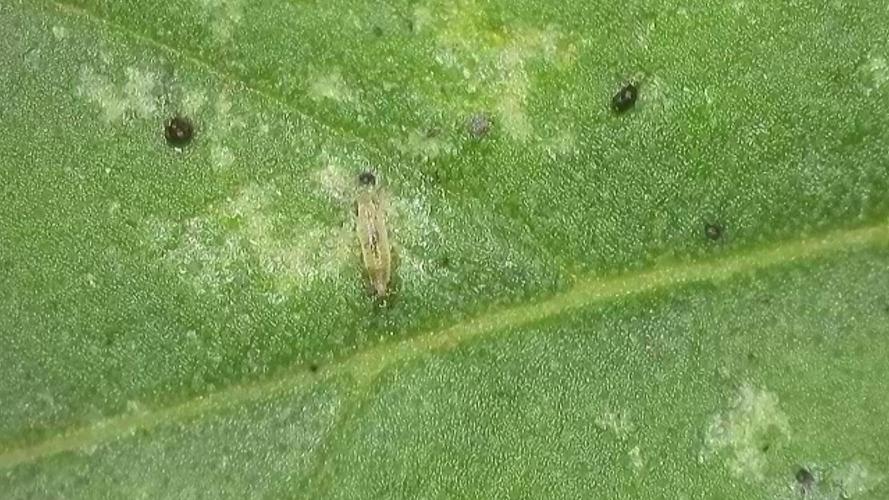
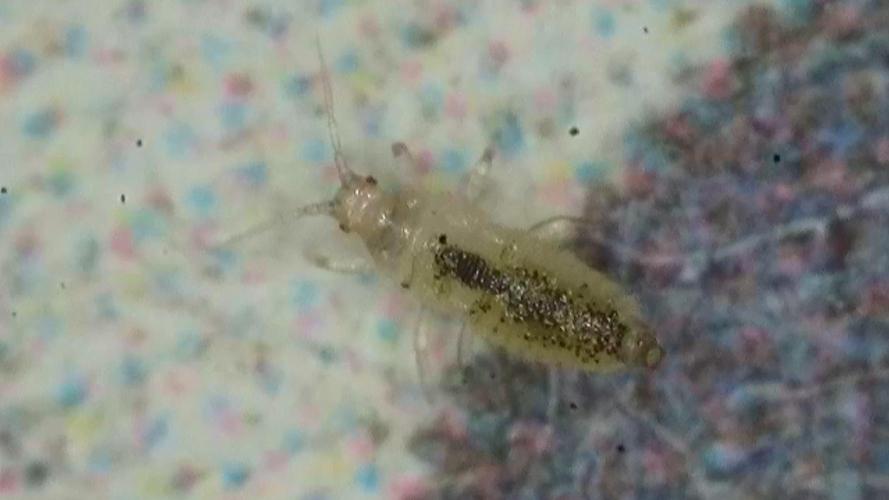
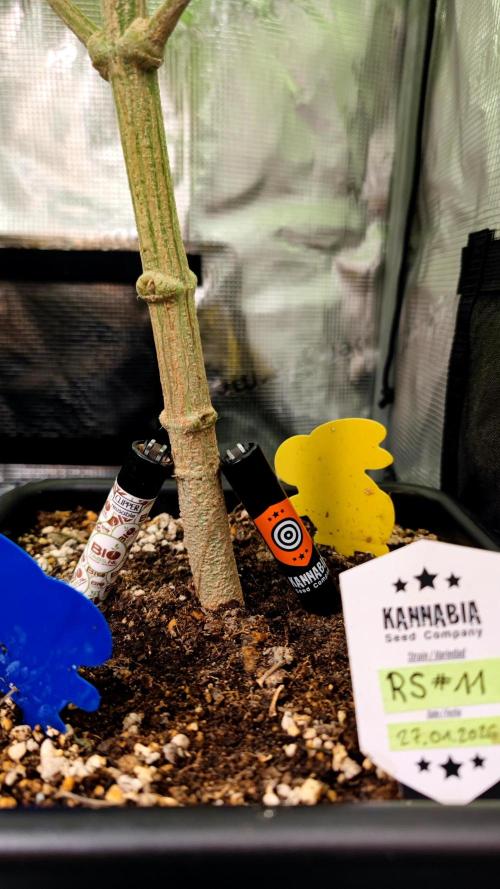
This week I noticed unwanted guests – looks like thrips larvae.
I reacted quickly and removed the most affected lower leaves and shoots. After that, the entire plant including the substrate was treated multiple times with a neem oil water mix, making sure to cover both sides of the leaves.
Additionally, I lightly coated the stem with oil to make it harder for any remaining larvae to move from the soil onto the plant.
I've set up yellow and blue sticky traps as well.
Let’s see how she handles it from here.
2 likes
comments
Share
9
Week 9. Vegetation2mo ago


59 cm
Height
18 hrs
Light Schedule
25 °C
Day Air Temp
Weak
Smell
60 %
Air Humidity
0 °C
Solution Temp
18 °C
Night Air Temp
8.5 l
Pot Size
25 cm
Lamp Distance
DivineBuds420 This week was pretty uneventful.
I kept a close eye on the plant and checked regularly for thrips, but couldn’t find any signs. Looks like the neem treatment did its job.
I’ll still run another round over the next weeks just to stay on the safe side. Thrips can be tricky since they reproduce quickly, so consistent treatment is key.
The grow still feels a bit behind after all the stress and setbacks, but no matter the setbacks, we always keep pushing and make it work – as usual.
6 likes
2 comments
Share
10
Week 10. Vegetation2mo ago

42 cm
Height
18 hrs
Light Schedule
25 °C
Day Air Temp
Weak
Smell
50 %
Air Humidity
0 °C
Solution Temp
18 °C
Night Air Temp
8.5 l
Pot Size
20 cm
Lamp Distance
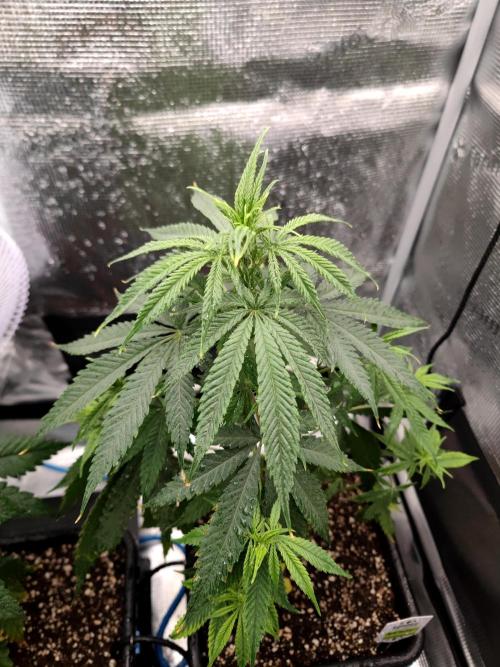
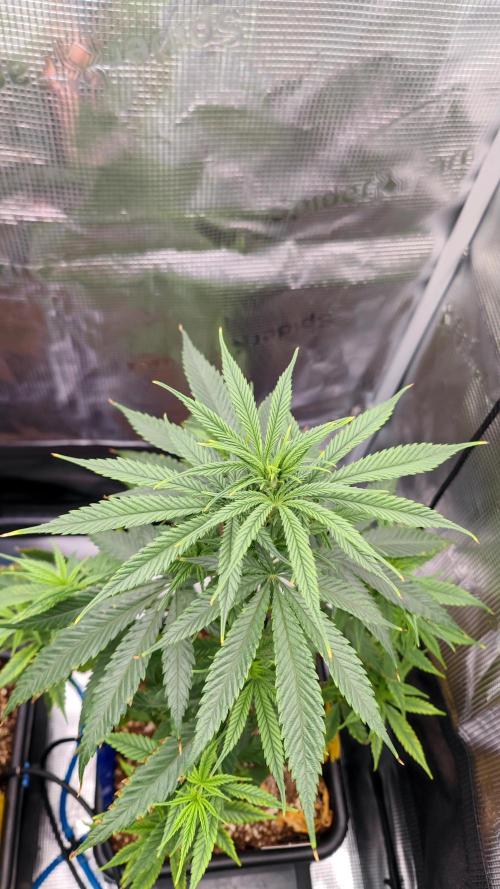
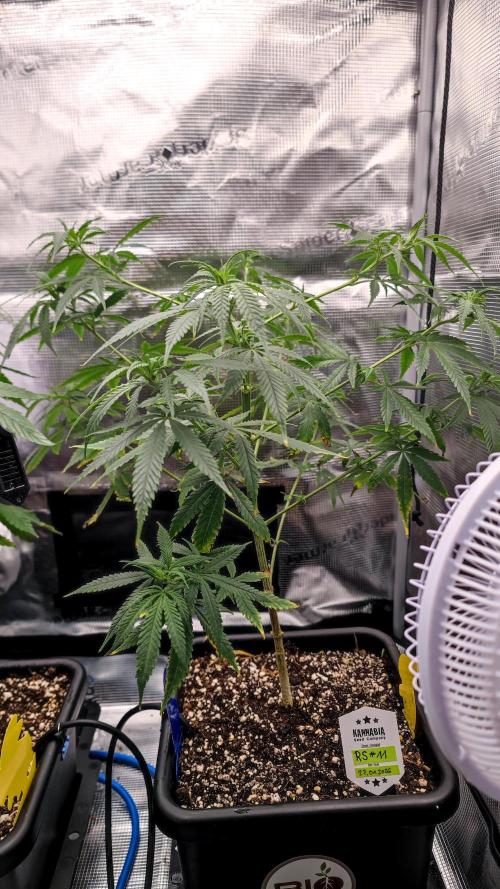
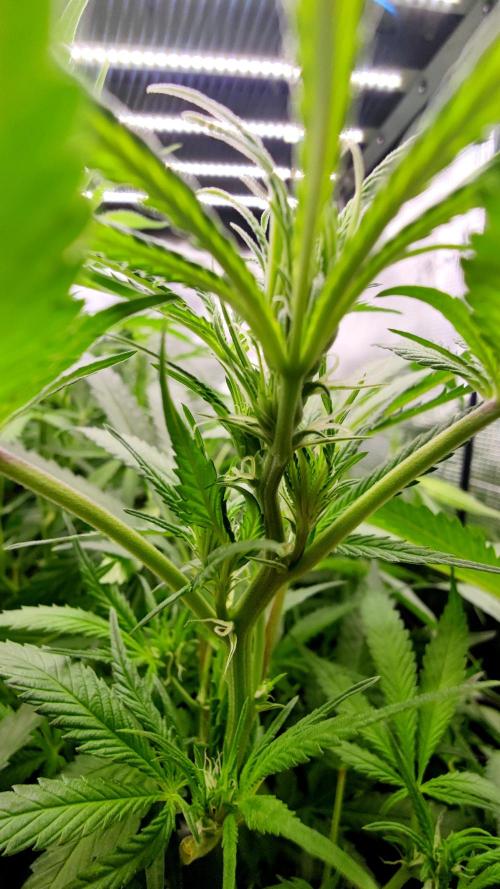
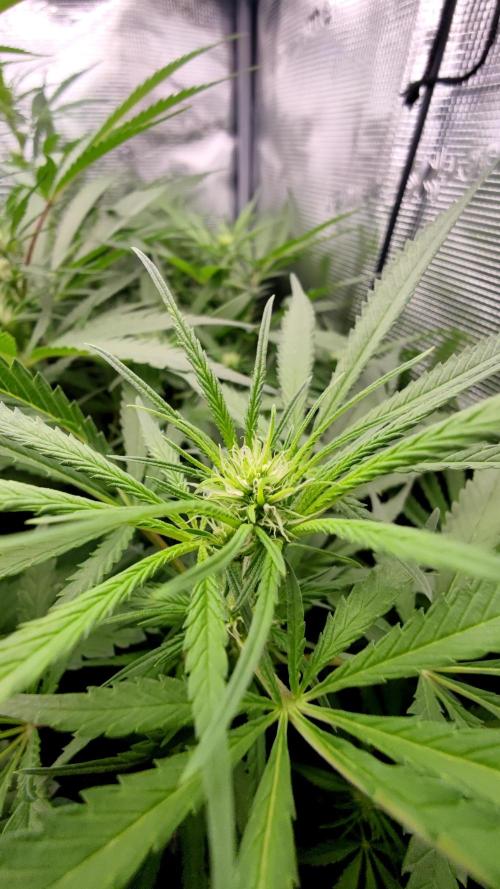
DivineBuds420 She’s slowly recovering, but still showing some stress.
This week she was treated again with neem oil just to stay on the safe side.
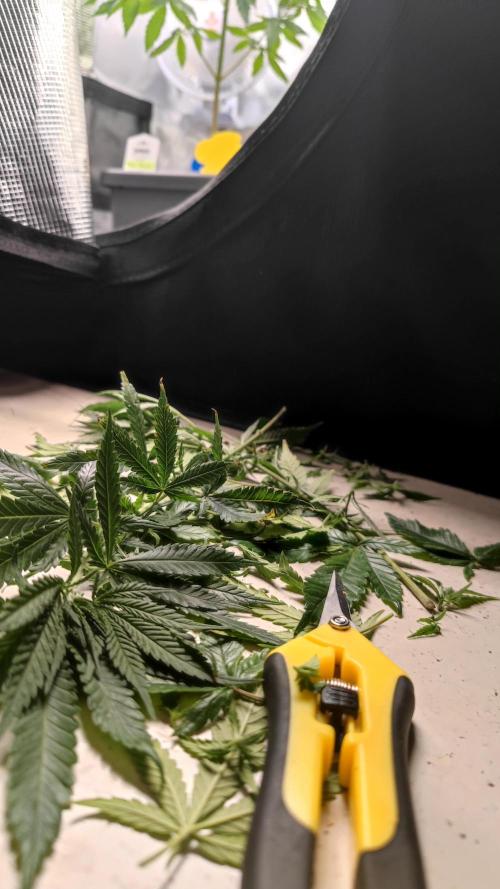
Even though she’s not fully recovered yet, I decided to take the next step and add a bit more stress. She was topped and defoliated to start shaping the structure and slowly fill the space.
5 likes
2 comments
Share
Used techniques
Topping
Technique
Defoliation
Technique
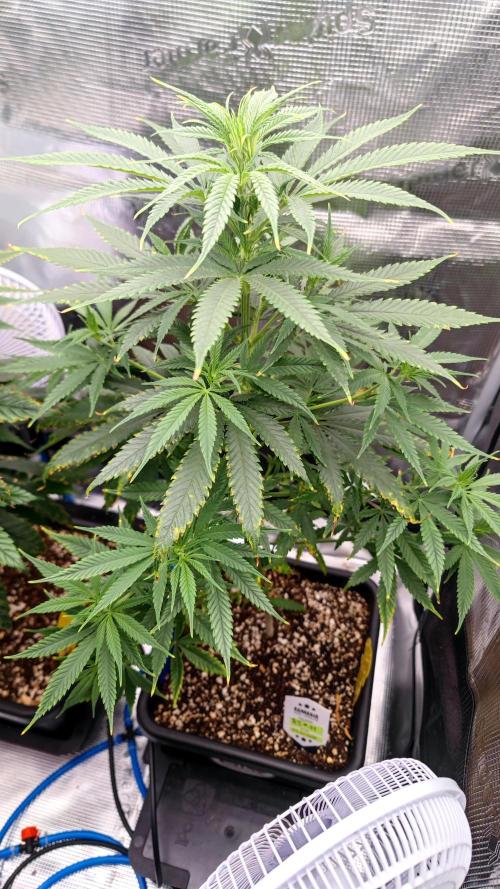
11
Week 11. Vegetation2mo ago

42 cm
Height
18 hrs
Light Schedule
26 °C
Day Air Temp
Weak
Smell
60 %
Air Humidity
0 °C
Solution Temp
18 °C
Night Air Temp
8.5 l
Pot Size
25 cm
Lamp Distance
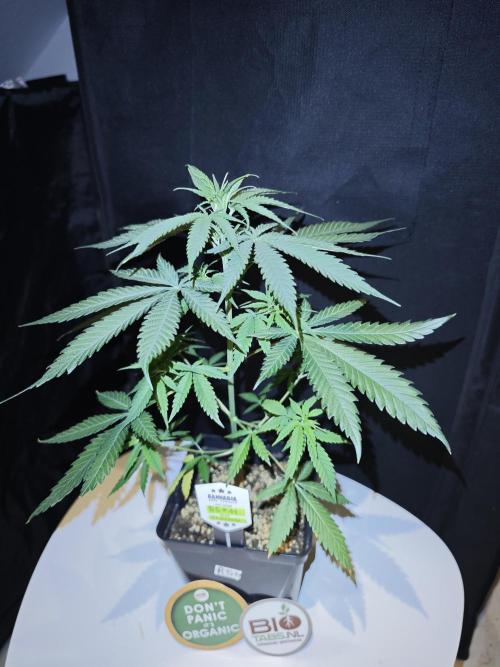
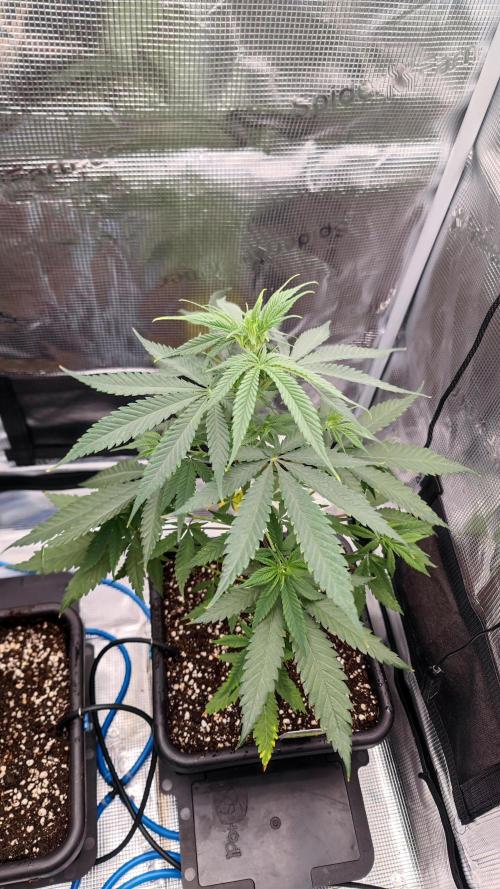
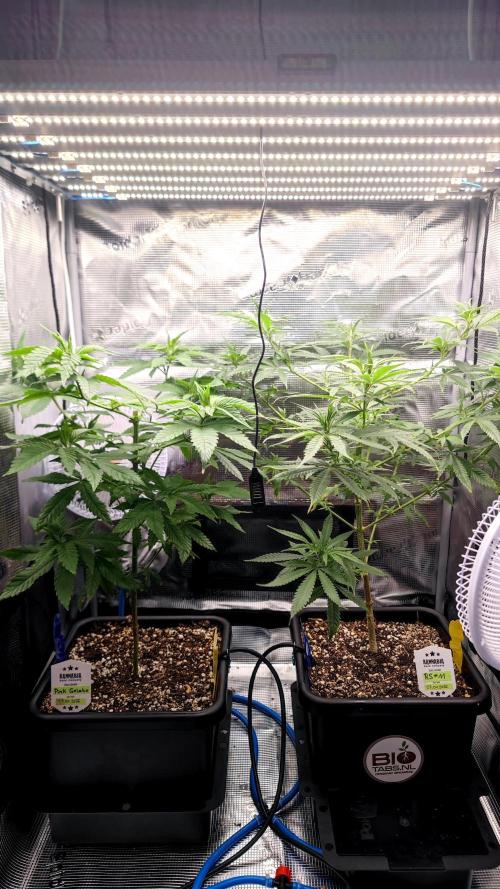
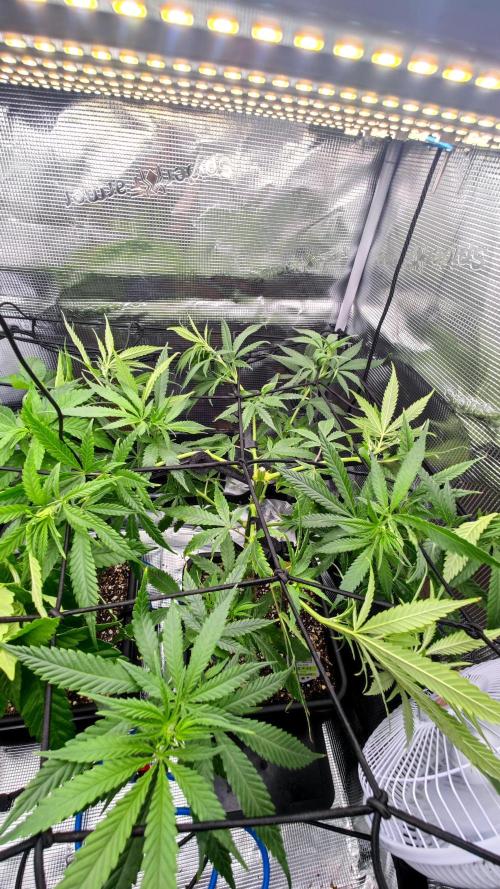
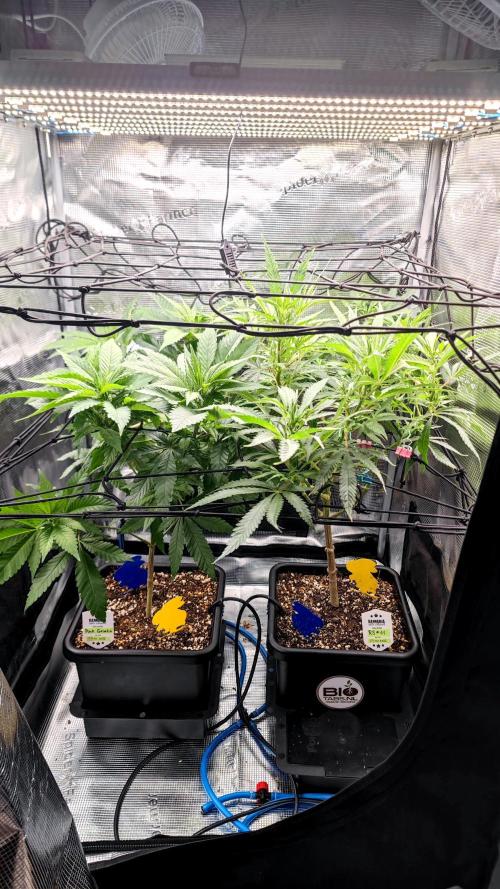
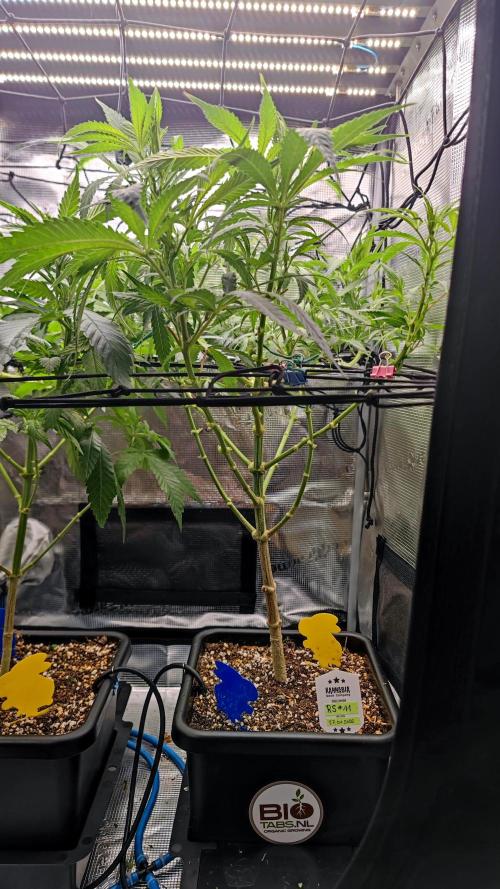
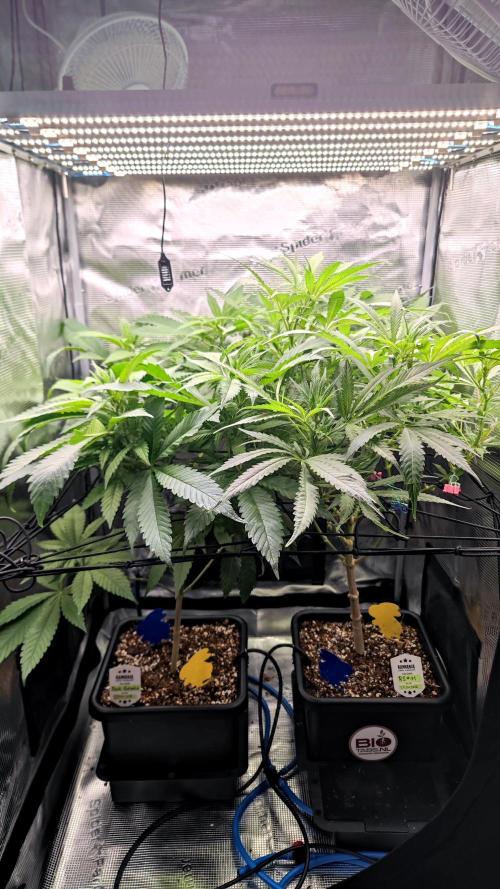
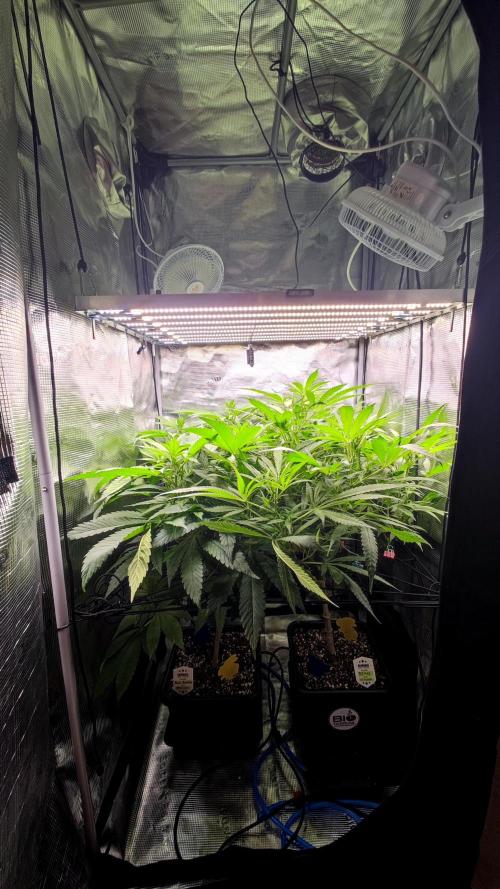
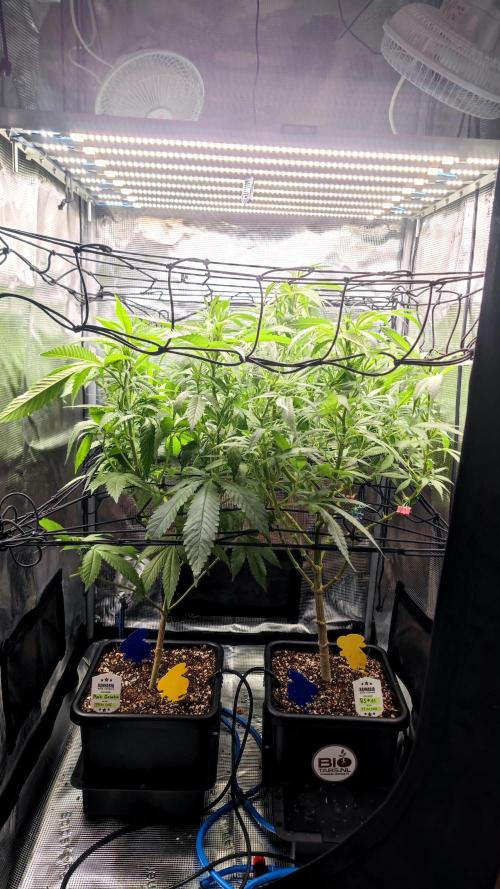
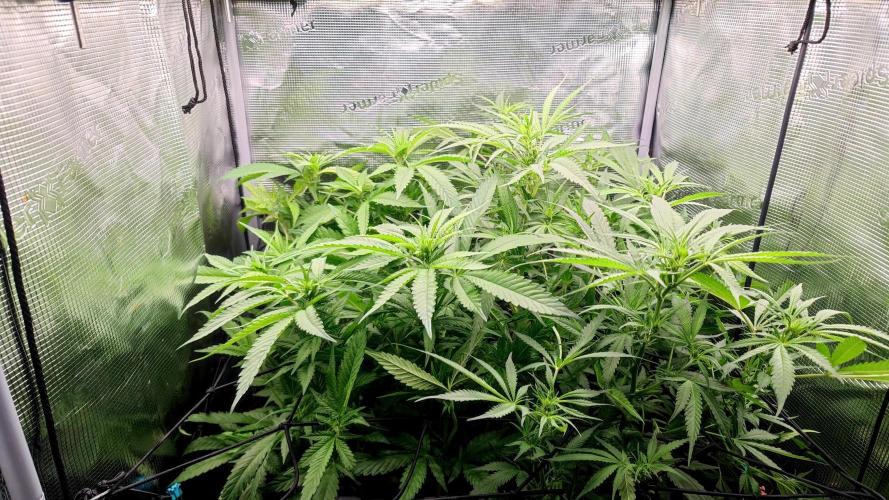
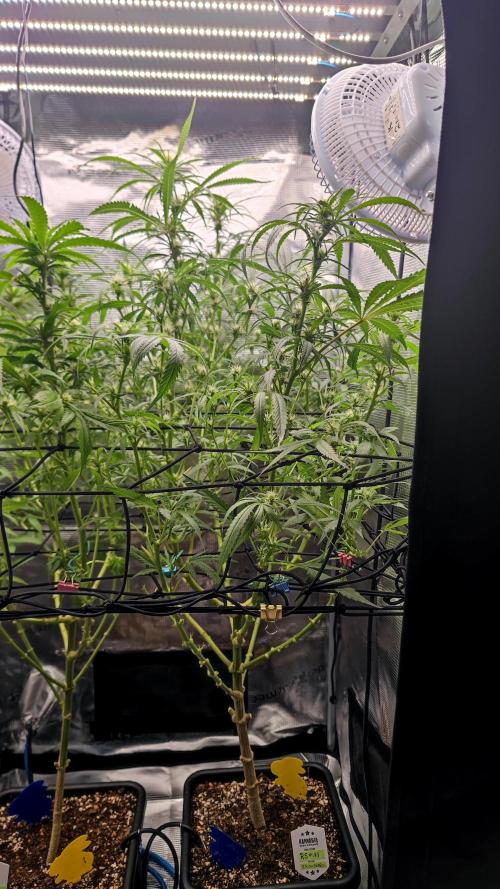
DivineBuds420 She’s slowly finding her rhythm again and looks more stable overall.
This week I turned on the AutoPot system, so watering should stay consistent from here on.
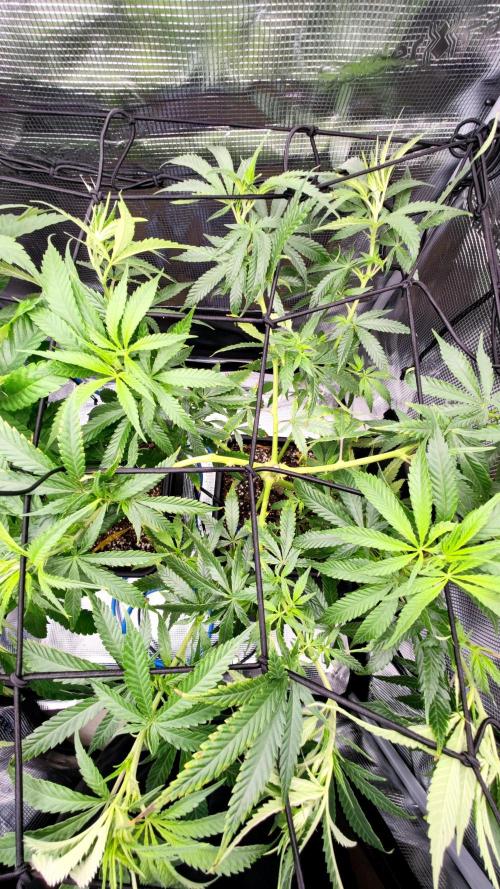
I also started some LST to spread her out and begin filling the space.
A light defoliation was done and the first net installed to help shape the canopy.
On top of that, I fixed an issue with the light. It was flickering, most likely due to a faulty potentiometer. After replacing it, everything is running smoothly again.
6 likes
comments
Share
Used techniques
LST
Technique
ScrOG
Technique
Defoliation
Technique
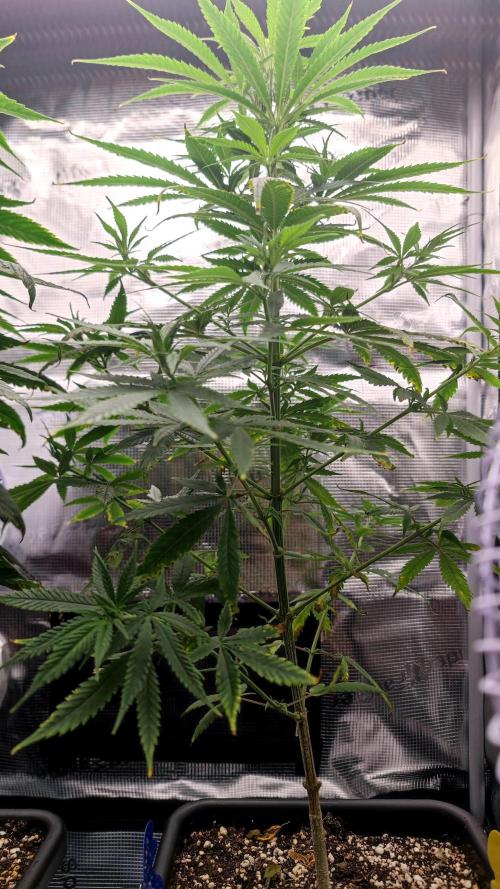
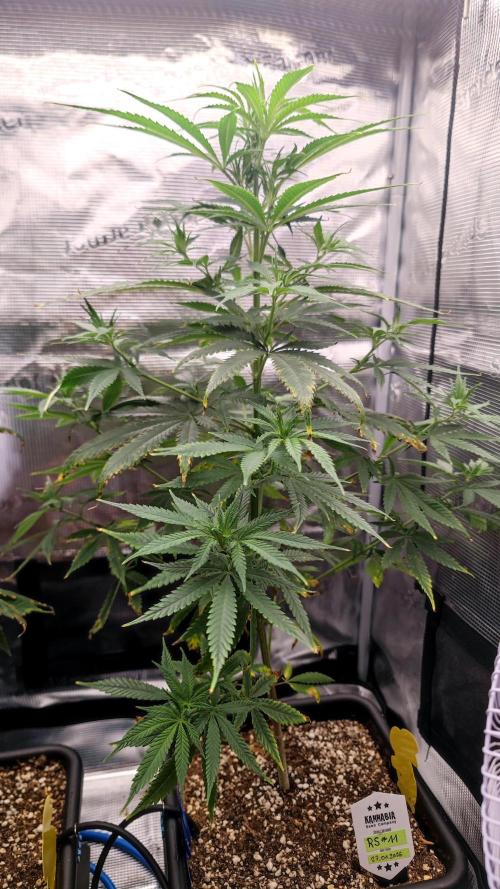
12
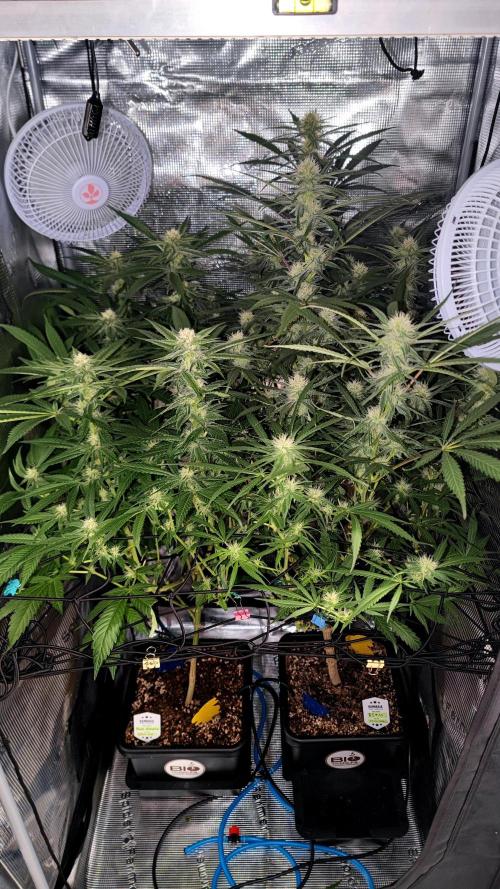
Week 12. Flowering1mo ago


70 cm
Height
12 hrs
Light Schedule
26 °C
Day Air Temp
Weak
Smell
60 %
Air Humidity
0 °C
Solution Temp
18 °C
Night Air Temp
8.5 l
Pot Size
25 cm
Lamp Distance
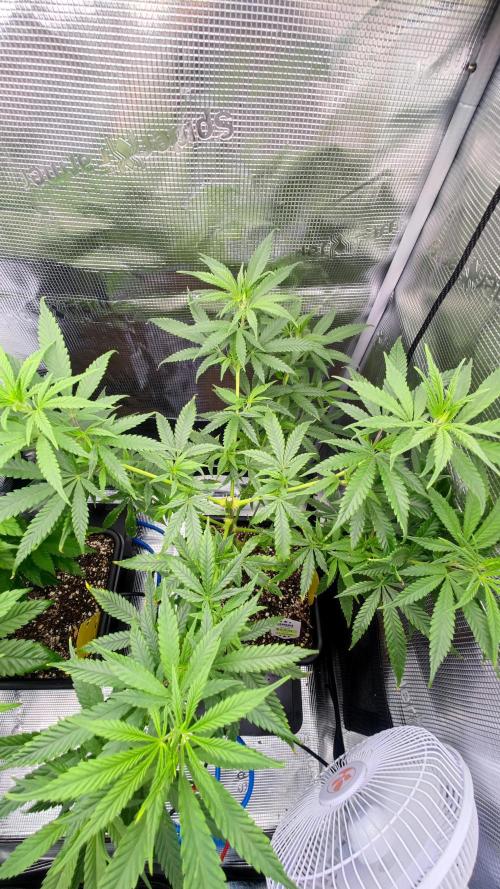
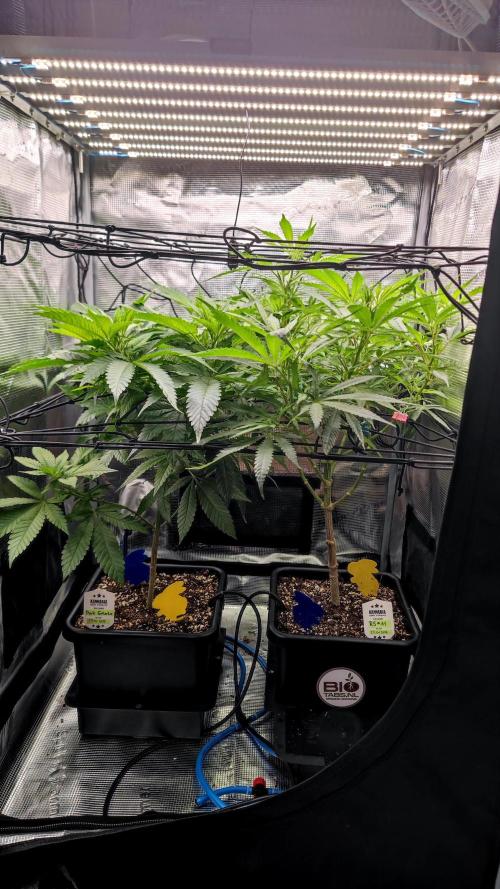
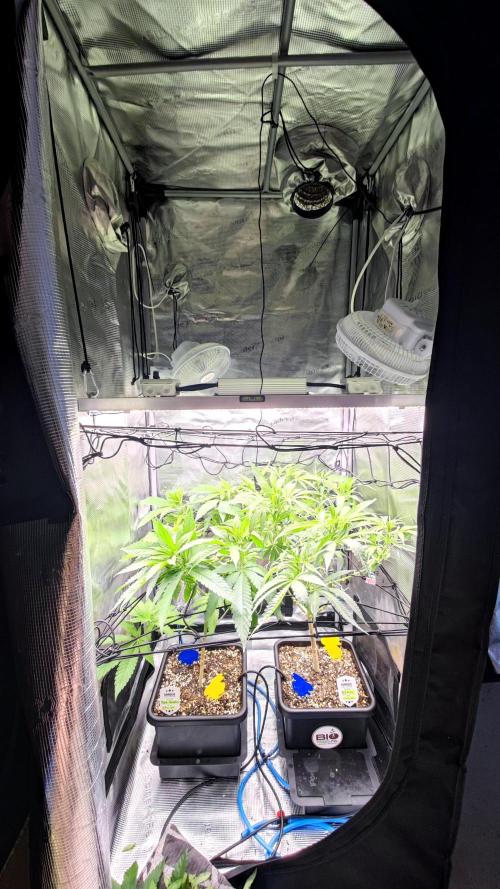
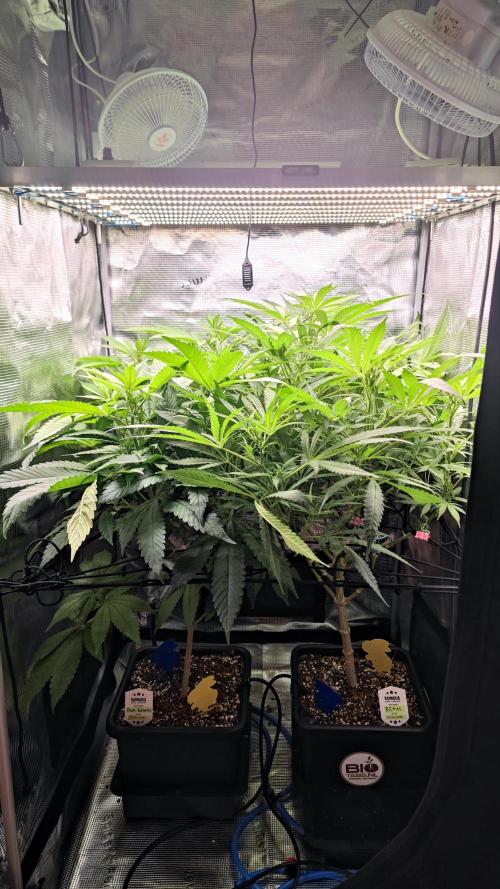
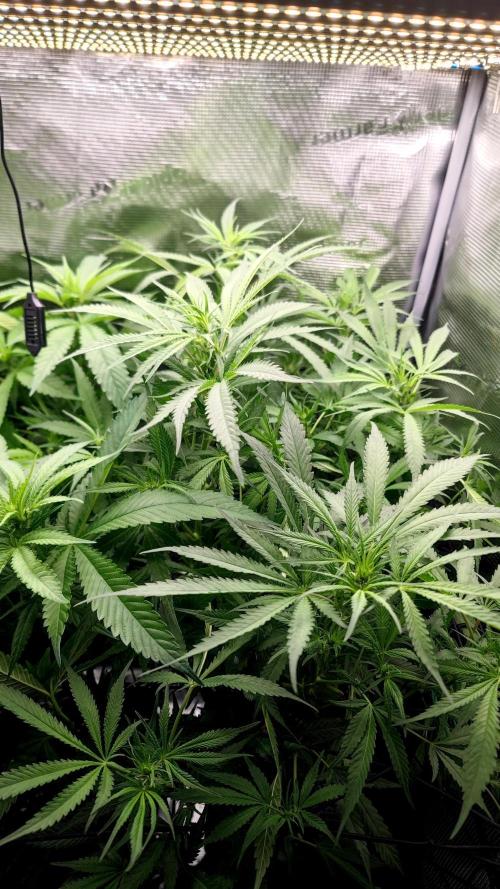
DivineBuds420 After the plant recovered and the lighting issue was sorted, growth picked up noticeably again.
I made the call to switch to 12/12 this week. With limited vertical space and some time already lost, it made sense to move into flower now.
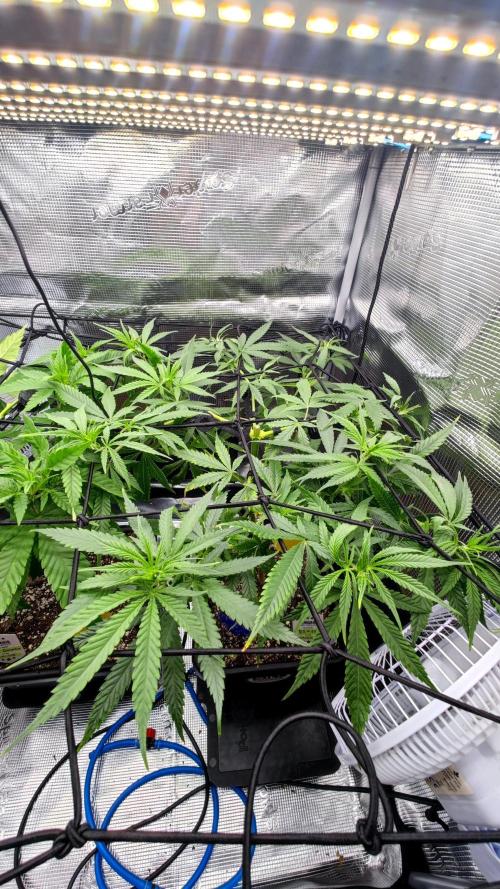
She’s responding well and beginning to fill the tent with a dense layer of foliage.
Really curious to see how the stretch will play out.
6 likes
1 comment
Share
Used techniques
LST
Technique
ScrOG
Technique
Defoliation
Technique
13
Week 13. Flowering1mo ago
85 cm
Height
12 hrs
Light Schedule
24 °C
Day Air Temp
7.0
pH
Normal
Smell
23 PPM
TDS
65 %
Air Humidity
19 °C
Solution Temp
19 °C
Night Air Temp
8.5 l
Pot Size
15 cm
Lamp Distance
Nutrients 1

Bactrex
1 mll
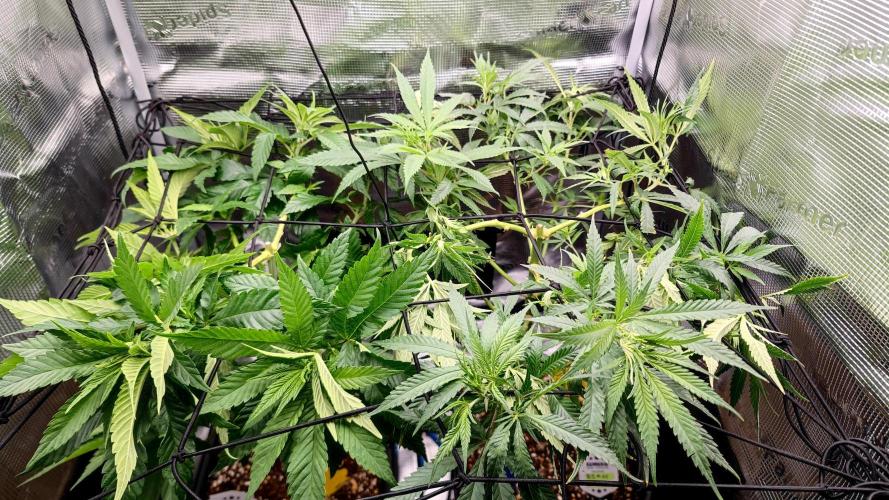
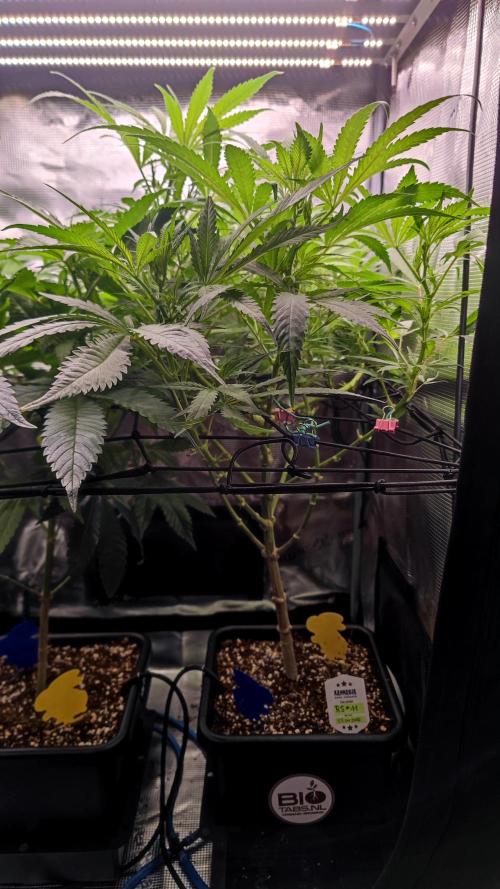
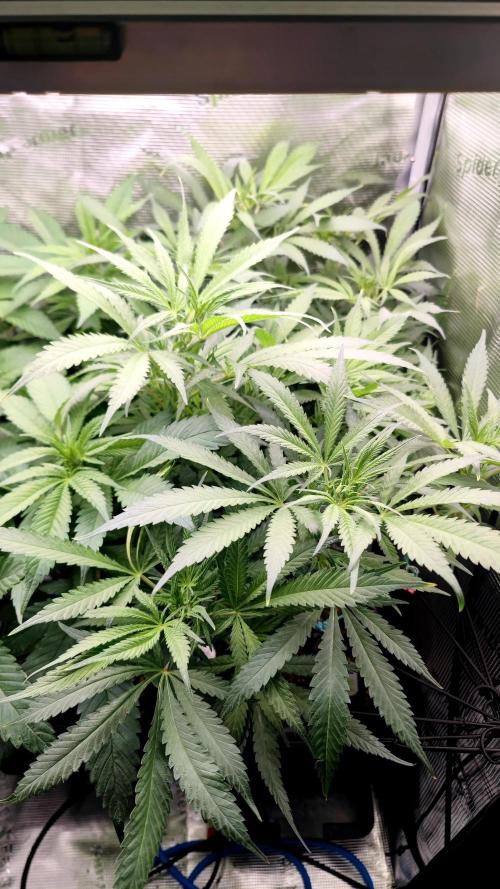
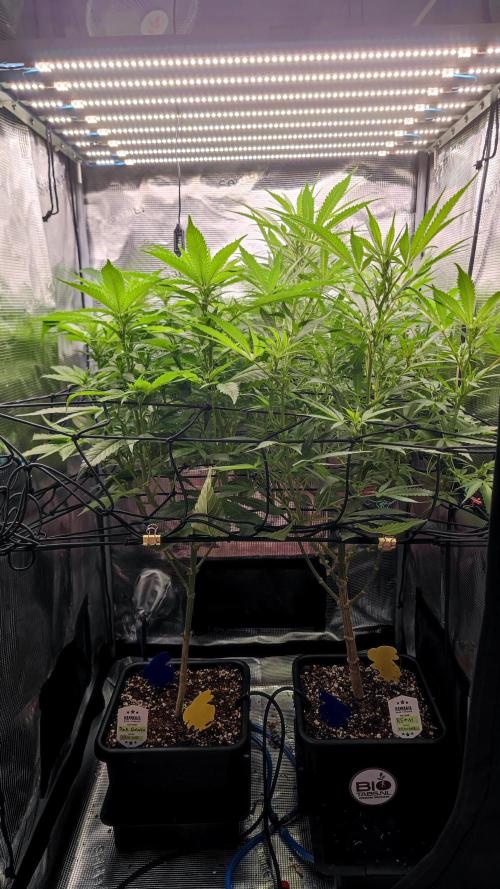
DivineBuds420 RS11 is growing vigorously and the canopy is getting dense fast. It’s starting to feel like a small rainforest in the tent again — pretty much business as usual.
The first signs of flowering are slowly starting to appear as well.
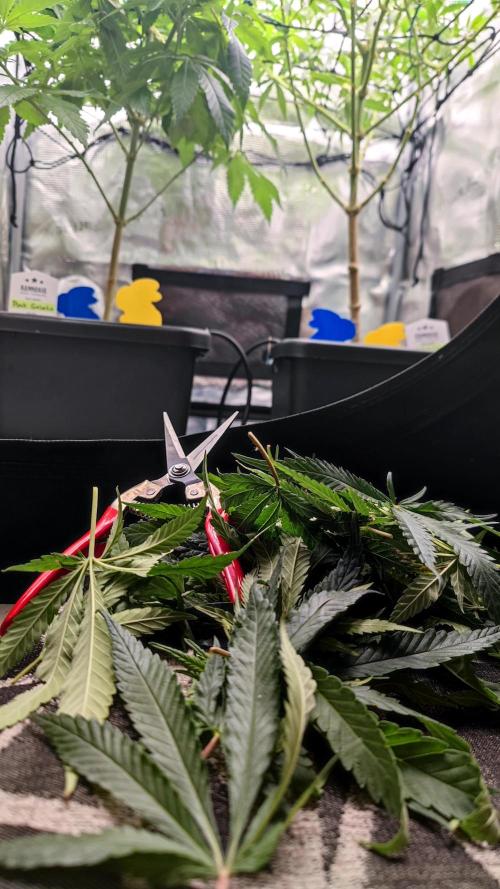
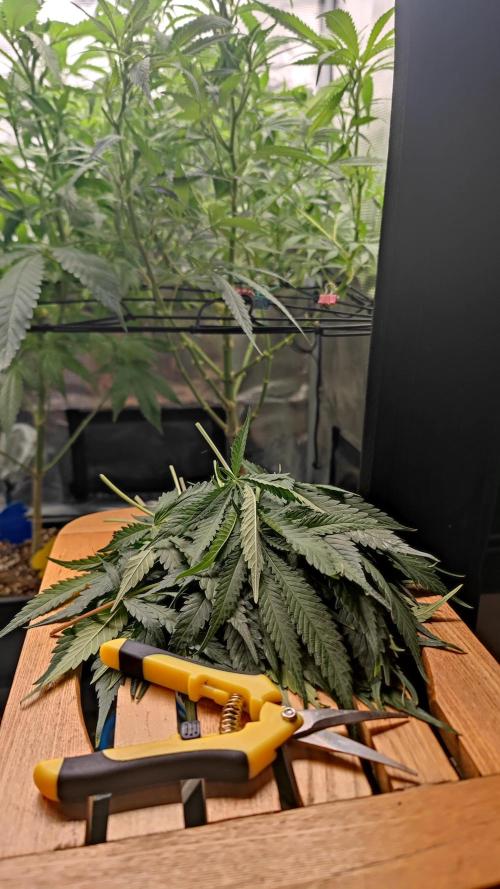
This week I removed some larger fan leaves and a few shoots to keep airflow under control and improve light penetration deeper into the canopy. At the same time, I’m trying not to overdo it and still leave enough foliage for proper photosynthesis and healthy growth.
A second net was installed to organize the canopy better and support the branches later in flower.
Towards the end of the week I watered with 1 g of Bactrex dissolved in RO water to refresh the soil biology.
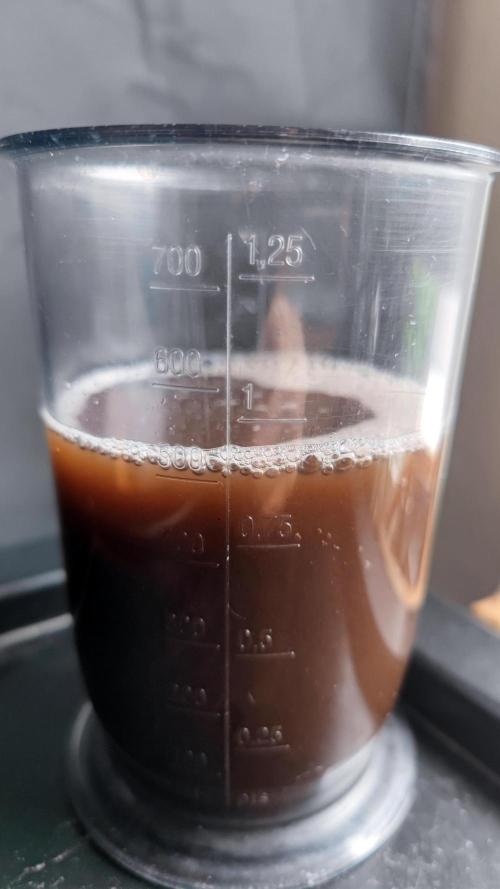
Next week I’m planning to brew a PK booster compost tea for the girls.
8 likes
1 comment
Share
Used techniques
Defoliation
Technique
ScrOG
Technique
LST
Technique
14
Week 14. Flowering24d ago
95 cm
Height
12 hrs
Light Schedule
22 °C
Day Air Temp
7.0
pH
Normal
Smell
23 PPM
TDS
65 %
Air Humidity
19 °C
Solution Temp
18 °C
Night Air Temp
8.5 l
Pot Size
15 cm
Lamp Distance
Nutrients 3

PK Booster Compost Tea
15 mll

Orgatrex
5 mll
Bactrex
1 mll
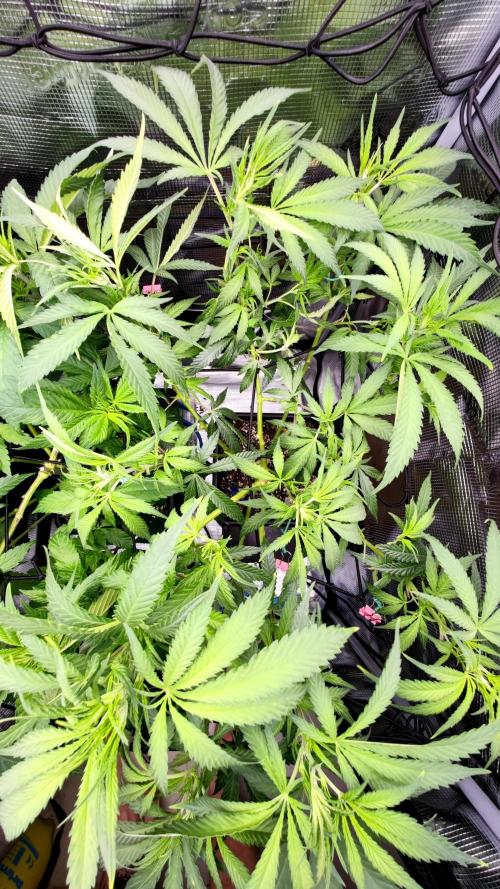
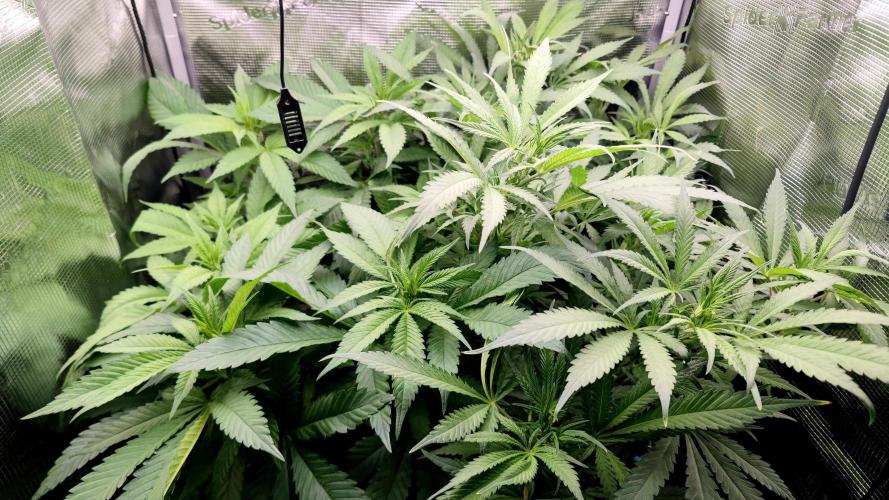
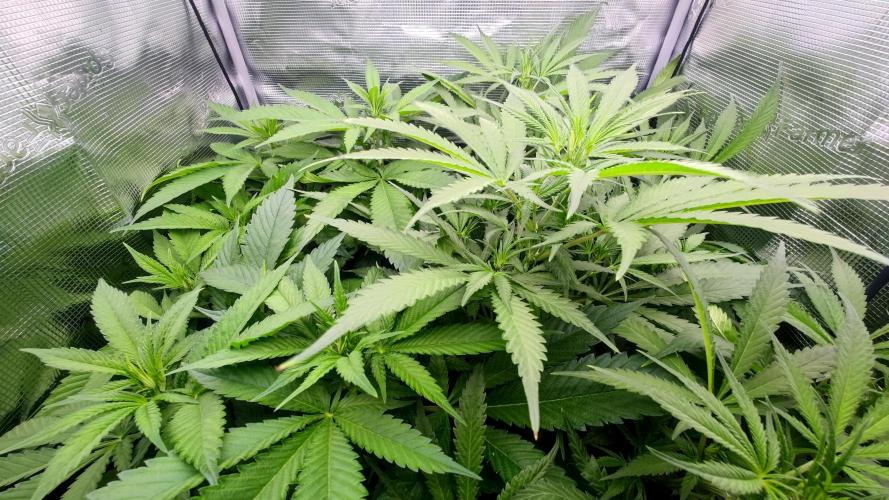
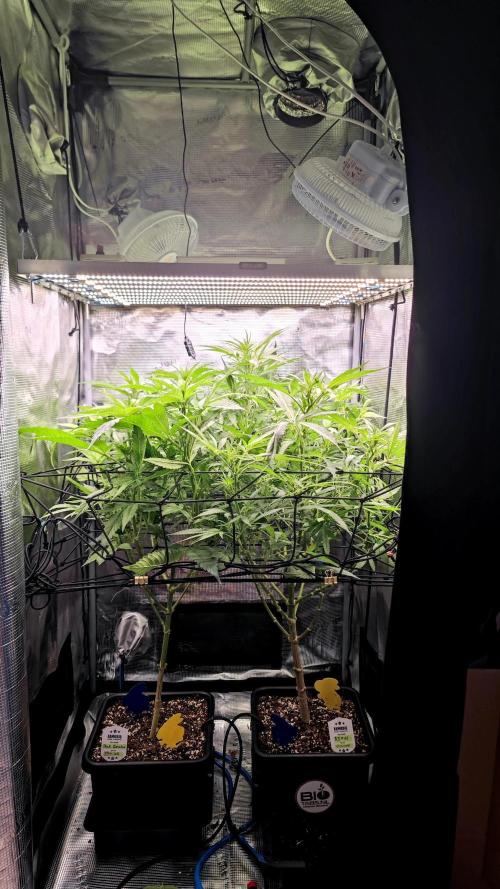
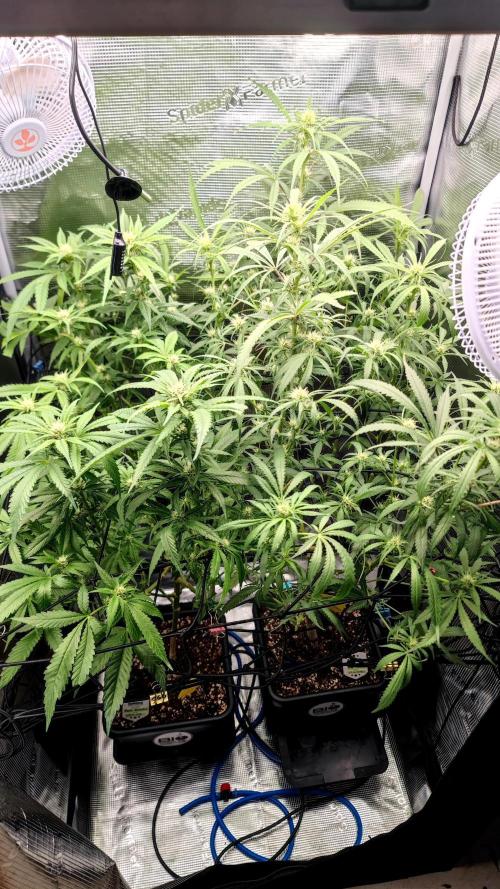
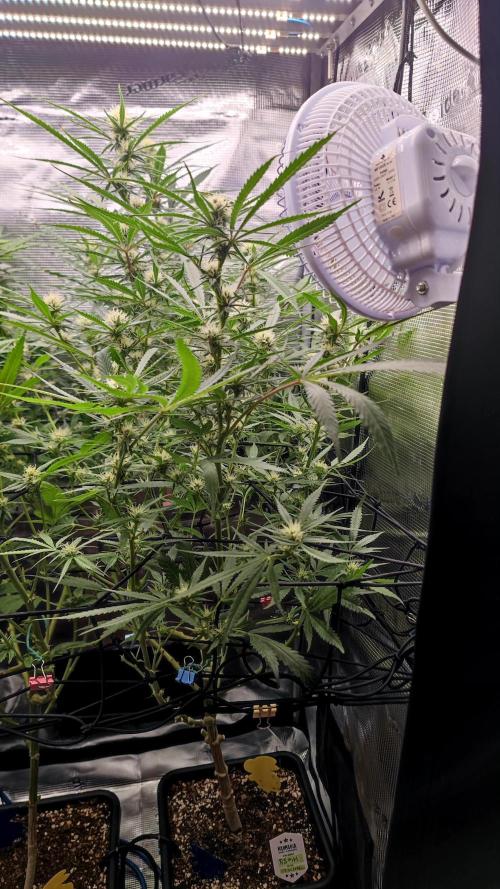
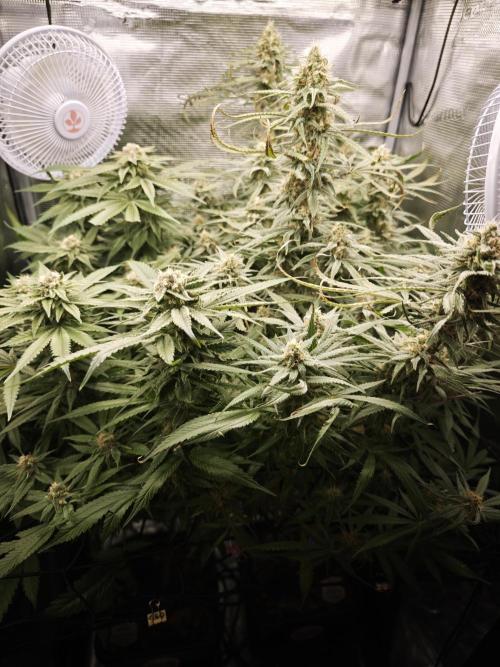
DivineBuds420 This week the RS11 really took off again and filled the tent properly.
The canopy became very dense, so I selectively removed more leaves and a few shoots while also repositioning some branches to improve airflow and light penetration. Keeping humidity under control is part of the goal as well, even though that is still influenced mostly by the environment outside.
I also brewed a compost tea and gave her around half a liter.
To give the roots some extra oxygen on top of the active aeration from the air stones inside the AutoPots, I occasionally turn the watering system off for a while.
The stretch now seems to be slowing down and the energy is clearly shifting towards flower production.
5 likes
comments
Share
Used techniques
LST
Technique
ScrOG
Technique
Defoliation
Technique
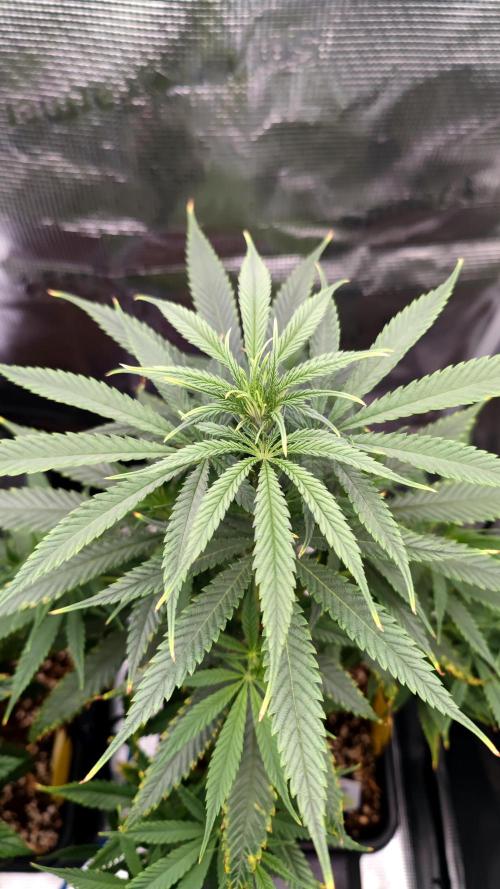
15
Week 15. Flowering15d ago

100 cm
Height
12 hrs
Light Schedule
27 °C
Day Air Temp
7.0
pH
Normal
Smell
23 PPM
TDS
60 %
Air Humidity
19 °C
Solution Temp
19 °C
Night Air Temp
8.5 l
Pot Size
10 cm
Lamp Distance
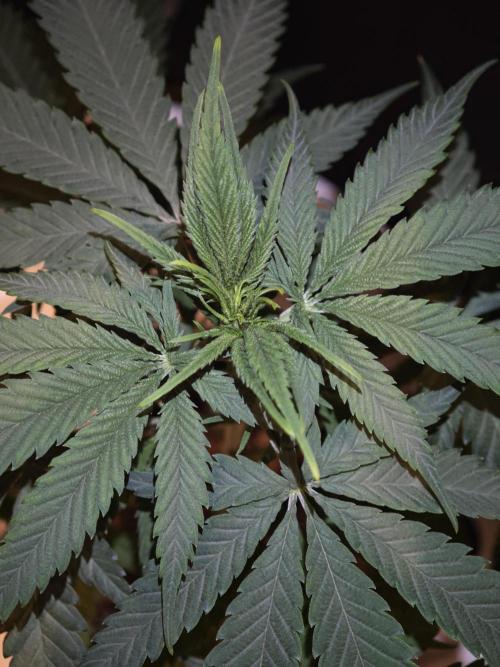
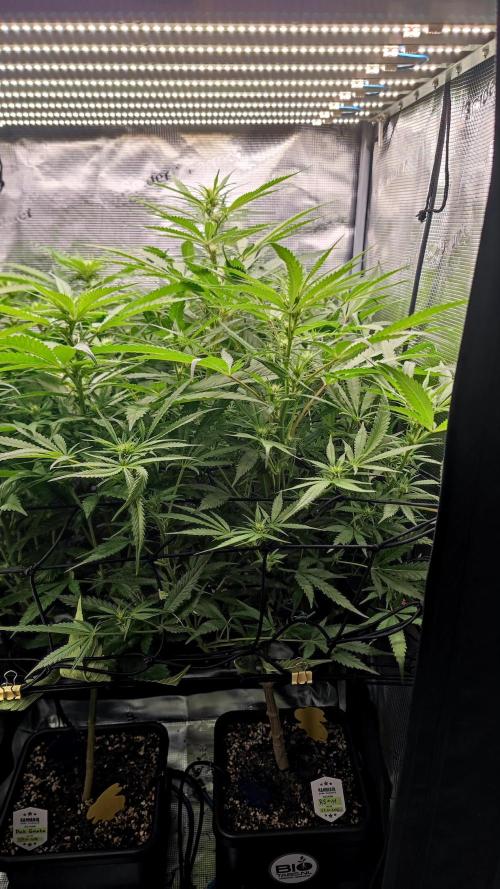
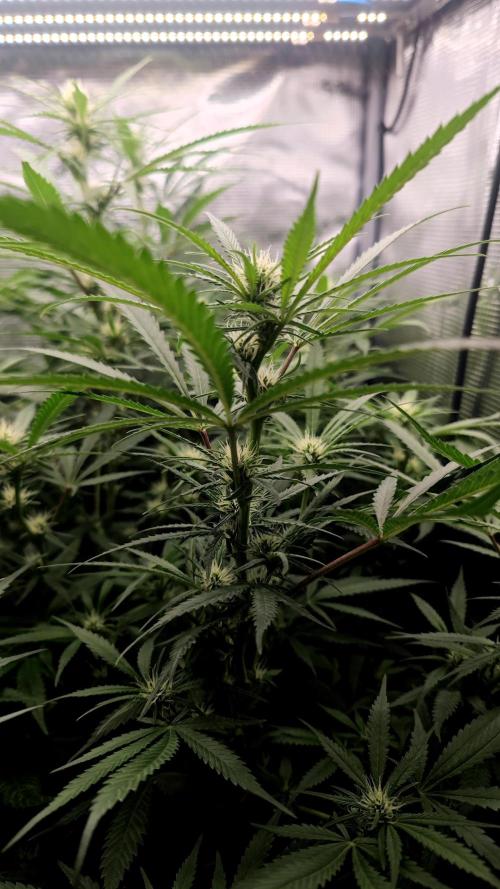
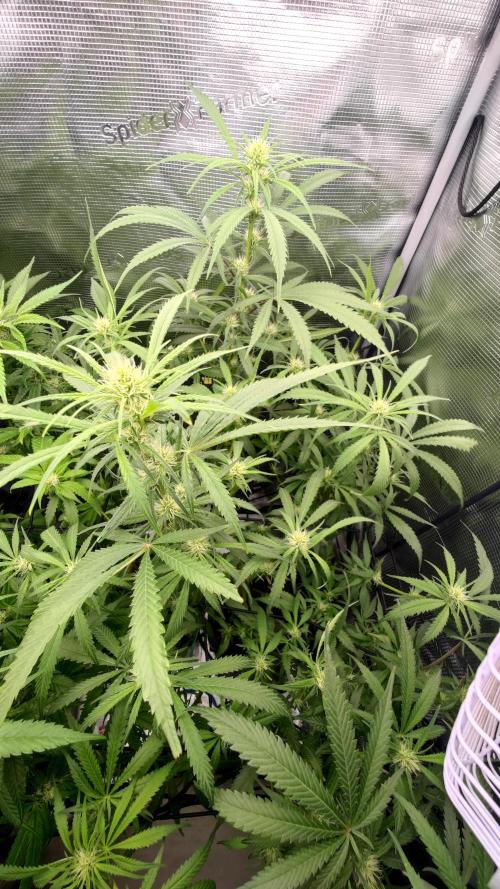
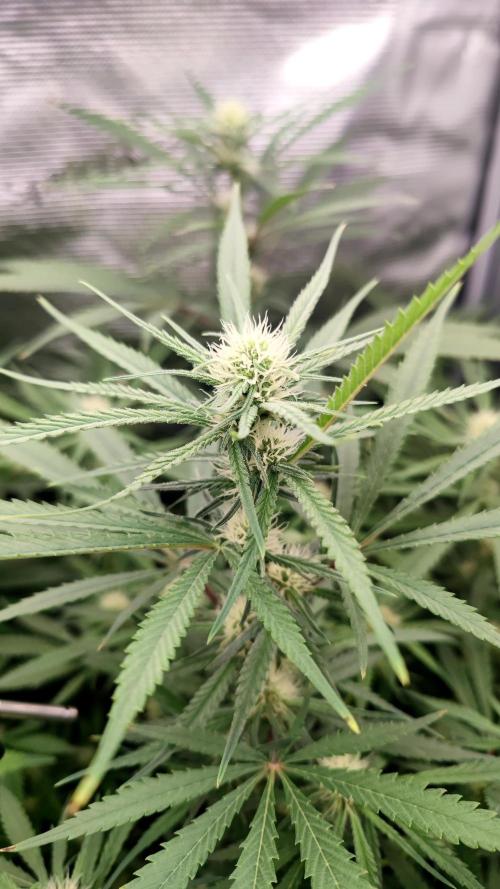
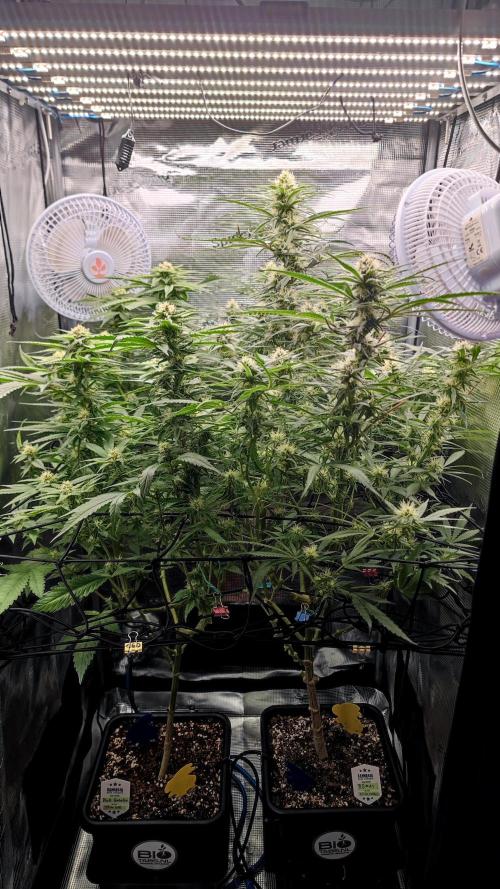
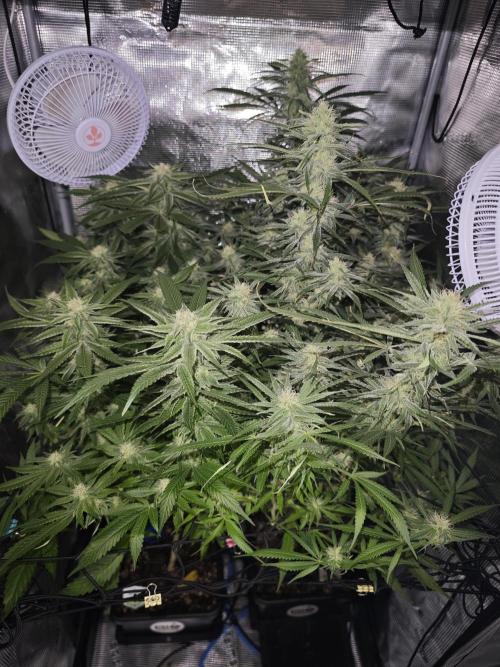
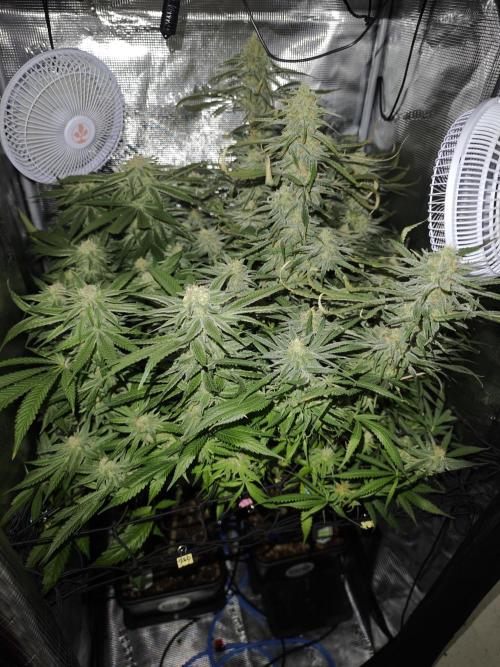
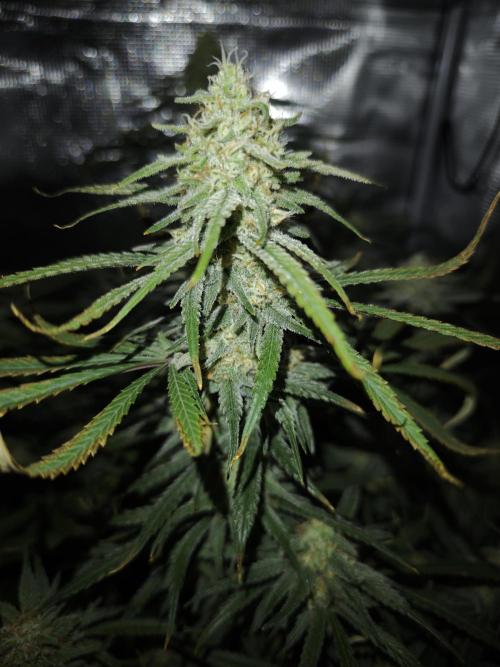
DivineBuds420 The stretch is now officially over and vertical growth has completely stopped.
The plant is now fully focused on flower development. Trichomes are slowly starting to spread across the buds and sugar leaves, and the smell is getting noticeably stronger with each passing day.
Despite regular defoliation, the canopy keeps filling back in quickly and staying extremely dense.
7 likes
2 comments
Share
16
Week 16. Flowering2d ago

100 cm
Height
12 hrs
Light Schedule
28 °C
Day Air Temp
7.0
pH
Normal
Smell
23 PPM
TDS
60 %
Air Humidity
19 °C
Solution Temp
19 °C
Night Air Temp
8.5 l
Pot Size
10 cm
Lamp Distance
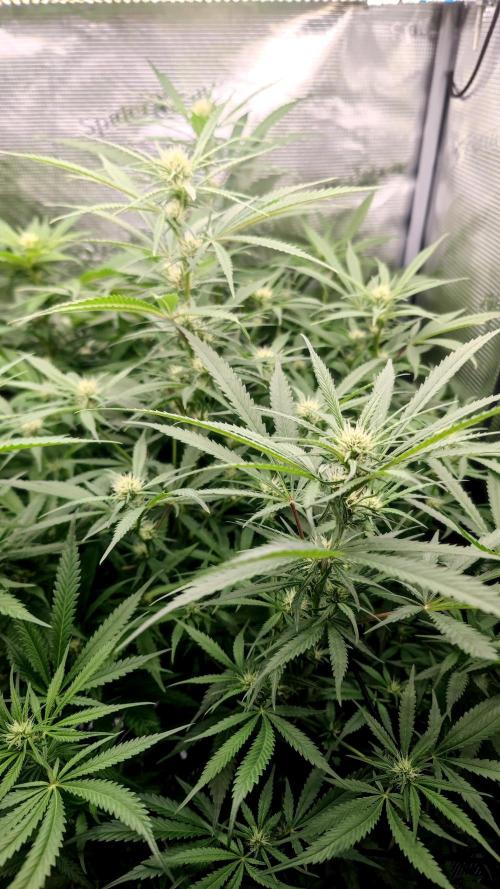
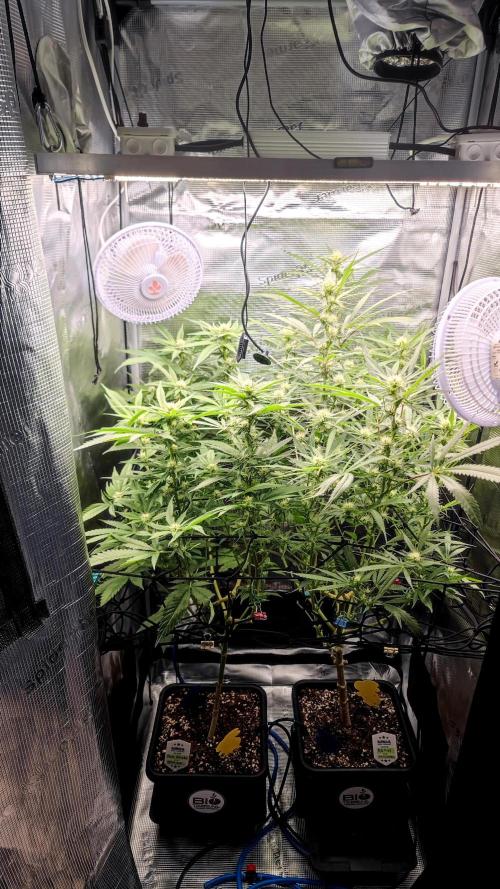
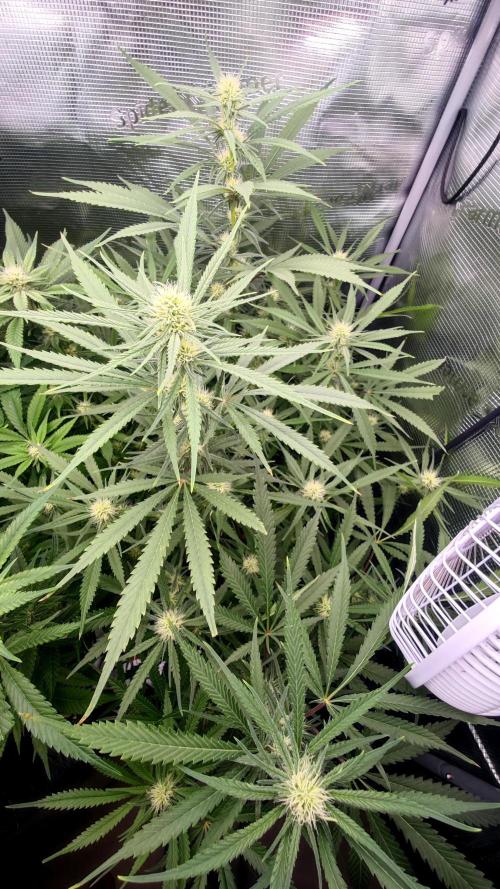
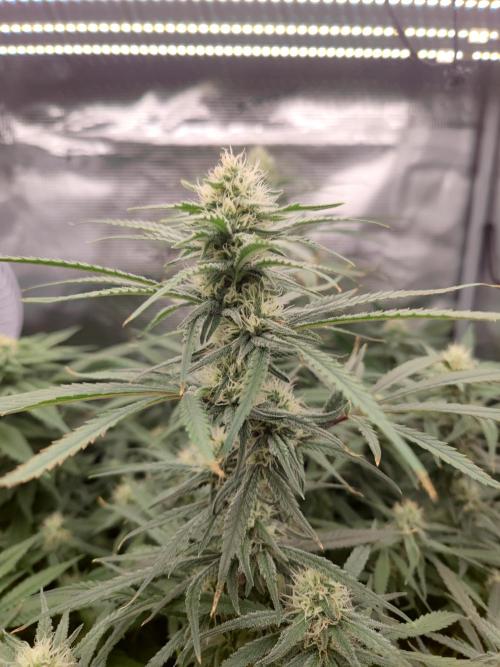
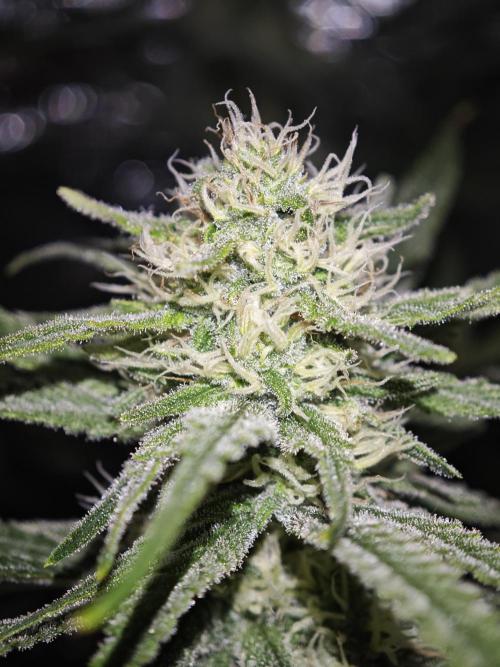
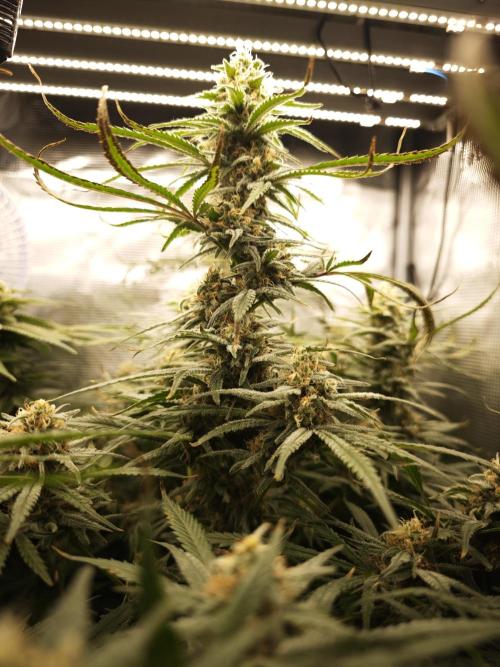
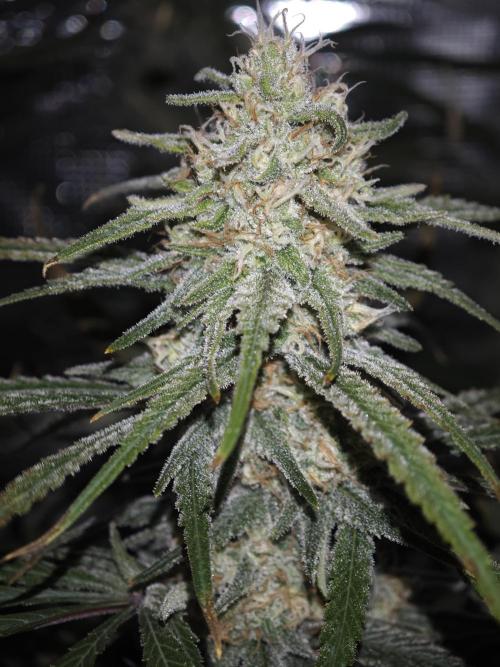
DivineBuds420 This week the plant received another light defoliation to keep airflow and light penetration in check.
The buds continue to develop nicely, everything is getting stickier and more covered in trichomes, while the aroma keeps getting stronger and more complex.
Overall things are looking good now, aside from some old battle scars in the form of burnt leaf tips from the earlier issues.
1 like
comments
Share
Used techniques
Defoliation
Technique
17
Week 17. Flowering2d ago
100 cm
Height
12 hrs
Light Schedule
30 °C
Day Air Temp
7.0
pH
Normal
Smell
23 PPM
TDS
60 %
Air Humidity
19 °C
Solution Temp
19 °C
Night Air Temp
8.5 l
Pot Size
10 cm
Lamp Distance
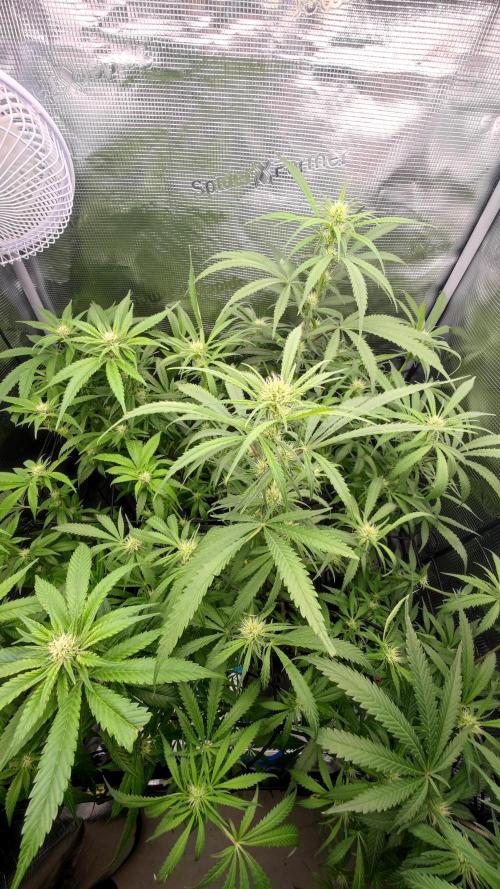
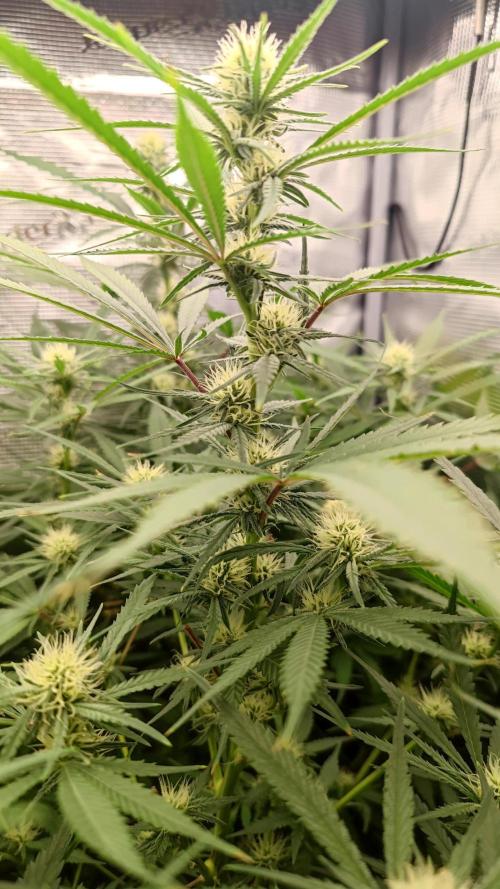
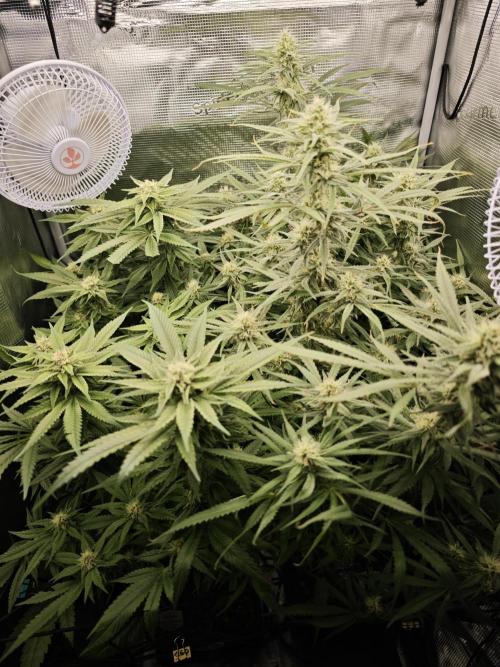
DivineBuds420 This week I spontaneously went abroad for around a week, but luckily I had a plant sitter checking in and looking after everything.
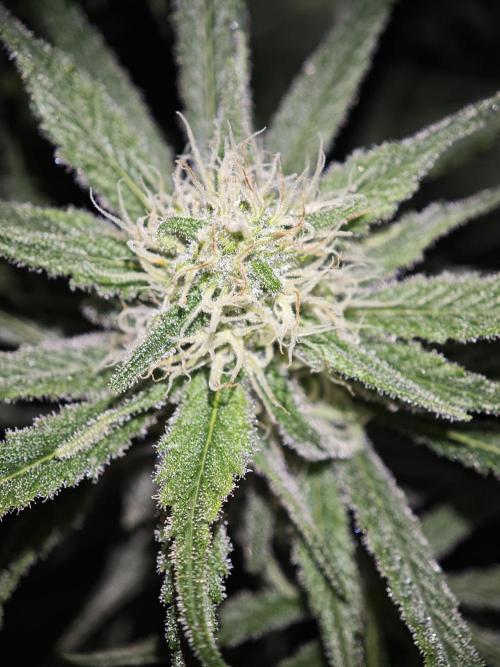
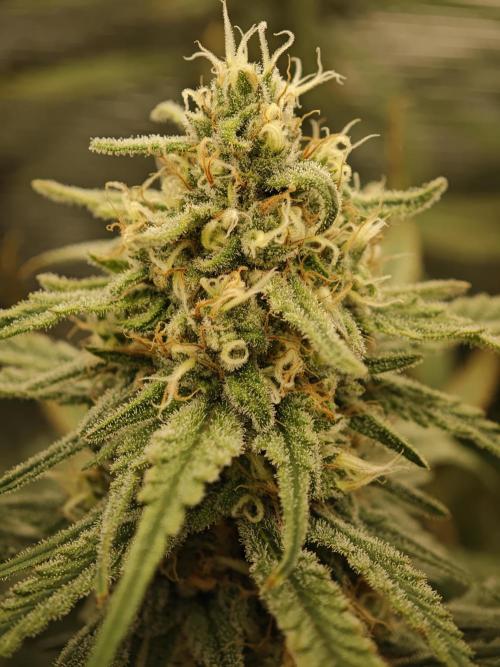
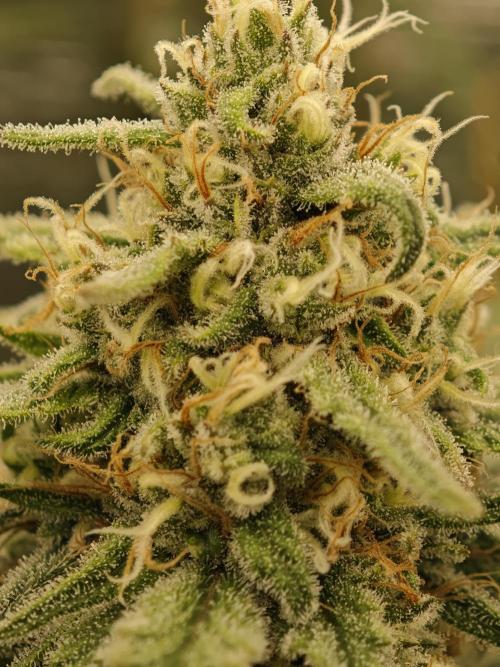
By the end of the week, when I got back, the flowers had noticeably gained size and trichome coverage continued to spread across the buds and leaves.
Some of the older fan leaves are getting crispy around the edges and tips while also forming claws. Most likely another reminder of the early stress and nutrient load, possibly combined with heat or being too close to the light, but overall she keeps pushing forward.
4 likes
comments
Share
Enjoying this diary? Follow for more updates!

Prefer the old Diary view?
Go back to the old Diary view