From Garden to Jar: Harvesting and Curing Outdoor Cannabis Plants

Growing cannabis outdoors is super rewarding. You don’t know how lucky you are if you’re growing plants outside!
While many growers don’t have the space, others are restricted legally.
In a perfect world, all of us could grow this wonderful plant outdoors if we could because the power of nature is unbeatable. No grow light can match the intensity of the sun, and the aroma and flavors of buds grown outdoors are quite something else!
Growing outdoors is a thrill in itself as the grower waits patiently for the plant to mature and harvest the buds. Compared to plants grown indoors, outdoor plants take a longer time to flower, but the rewards are worth it.
If you’re growing outdoors, you already know that the process of harvesting the buds is perhaps the most crucial factor in getting good buds. Therefore, we will discuss the art of harvesting outdoor buds, and also shed some light on techniques that enhance the quality and potency of the final product.
Read on to learn some important stuff about harvesting cannabis buds outdoors. We will also cover curing and drying.
Growing Cannabis Plants Outdoors

Growing cannabis outdoors, or any plants for that matter, has many advantages. The plants have the opportunity to grow healthy, thanks to sunlight. Sure, indoor cultivation also has pros as you can control the environment to suit your plants; however, outdoor plants get a more natural setup that allows them to grow strong and big.
From the moment the seeds sprout until the flowers bloom, cannabis plants outdoors are influenced by the seasons, temperature fluctuations, and daylight duration. This natural approach often results in plants with enhanced flavors, scents, and effects as they directly absorb nutrients from the soil and adapt to the environment’s nuances.
However, the most crucial point is when the plants progress towards the harvest. You should understand harvesting techniques as your wait is finally over and you get to reap the rewards of your hard work of growing the plant for months. And, your work doesn’t stop there; in fact, it has just begun as growing cannabis goes beyond just collecting mature buds. Instead, it involves preserving the plant's integrity to maximize cannabinoid and terpene levels and ensuring a seamless transition to curing.
Harvesting the buds at the correct time using appropriate tools and employing proper techniques significantly contributes to overall flower quality. As we progress through stages of harvesting — considering timing factors and meticulous trimming — we will discuss several factors that unlock your cannabis plant’s full potential.
Protecting Plants from Pests during the Last Weeks of Flowering

As cannabis plants reach the last stage of the marathon, i.e. the last few weeks of their life cycle, they become especially susceptible to pest infestations. You have waited a long time for this moment, so protecting the plants at this phase should be your top priority.
A few common pests that trouble cannabis include:
Spider Mites: These small arachnids love cannabis plants. They puncture plant cells and feed on the sap.
Aphids: Aphids tend to gather on the undersides of leaves, so spotting them shouldn’t be a problem. They feed on plant sap that causes distorted leaves.
Whiteflies: These tiny white insects extract plant sap and release honeydew that promotes mold growth. Whiteflies can cause yellowing and reduce plant vitality.
Caterpillars: Caterpillars not only chew away the leaves but the buds as well.
Out of all these pests, spider mites and caterpillars are the ones that can cause major damage. Spider mites in particular can be brutal to the plants during the last few weeks of flowering. They also love warm and humid conditions, but since you can't control the weather when you are growing outdoors, you'll have to implement other measures to eliminate them.
Like aphids, spider mites also hide on the underside of the cannabis leaves but they can be very difficult to spot as they are very small. However, you can look for other identifications that start with discolorations or tiny spots on the leaves. If you look closely you will see that these are tiny bite marks.
If the infestation progresses a little further you will also see webbing on the leaves at which point you should take immediate action. Otherwise, the web can render the buds useless and you won't be able to use them.
Rather than trying to eliminate the pests, it’s best to be cautious and protect the plants as soon as they start flowering. You should take the old adage “prevention is better than cure” very seriously, especially when there’s a threat of spider mites. If your previous plants have suffered from spider mites, you can expect them them to come back.
When the plants start flowering, inspect the undersides of the leaves regularly for spider mites and aphids. Try your best to keep the container and its surroundings clean by removing any dead leaves and decaying matter. Pests tend to thrive in debris so keeping things clean is an effective preventive measure.
You can also release predatory insects such as ladybugs or predatory mites to naturally control pest populations. Or, apply diluted neem oil mixed with insecticidal soap during the vegetative stage as it disrupts insect life cycles, but don’t touch the buds during the flowering stage as the smell can be nasty.
Some growers use companion plants like marigold and rosemary that ward off pests to a certain extent. You can also introduce beneficial nematodes into the soil to control larvae.
However, if the infestation has progressed well into the flowering stage, you need to use commercial formulations like spinosad that can control caterpillars and spider mites for a quick fix. As an organic broad-spectrum insecticide, it’s pretty safe to use.
At the same time, you should also be careful about the weather. For example, if it’s going to rain by the time you harvest, you need to consider that and plant the seeds accordingly. This is because rain, although great for plants, can make the buds wet and increase the chances of mold.
Several types of mold can affect your plants, and we have covered them extensively. Read about various types and get rid of them accordingly. So, coming back to rainfall, if you suspect that it’s going to rain, you can cover your plants temporarily. If you’re growing plants in containers, you can shift them to a safer location.
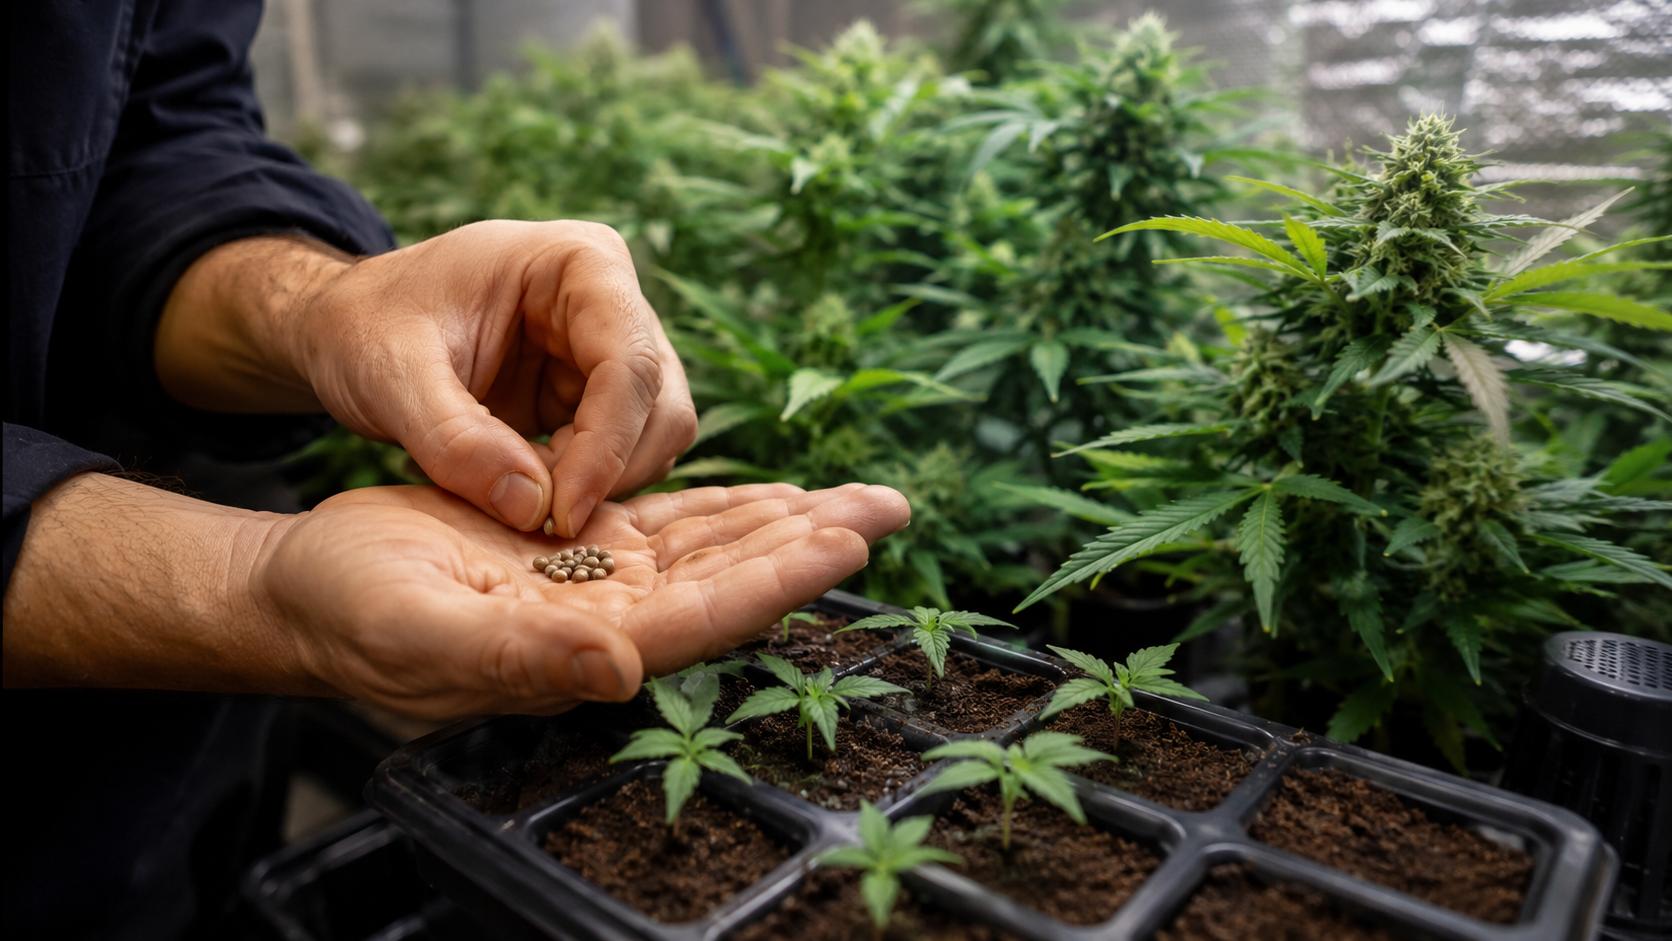
Harvesting Cannabis Buds Outdoors

Harvesting cannabis buds, whether you grow them indoors or outdoors, isn’t as simple as snipping off the buds when the buds mature. You need to know the right moment to harvest the buds.
When to Harvest the Buds?
First, to harvest buds at the right time, you have to understand the strain’s behavior in detail at first to recognize when it’s ready. This is because all strains are unique where one strain may take a long time to flower and another may be ready very quickly.
If not, you have to be familiar with the life cycle of the plant, at the very least. For instance, cannabis plants go through various stages like germination, vegetative growth, and flowering. During the flowering stage, their focus is on developing flowers or buds that contain cannabinoids and terpenes — the very last stage where you must closely observe changes in appearance as the plant transitions to late flowering.
The plant will undergo lots of changes just in the flowering phase. As the buds pack more weight, the color of the pistils will change as well. There will be changes in the trichomes, which serve as the primary indicator to harvest cannabis buds at the right time, regardless of whether you grow indoors or outdoors.
So, why is it important to harvest at the right time? Well, this is when the magic happens. If you snip away the buds at the correct time, you’ll get potent buds that are full of flavor and aroma. When the trichomes are at the peak of their development, the buds contain the highest concentration of cannabinoids like CBD and THC as well.
If you harvest too early when the trichomes are still clear, you’ll end up with less potent buds with reduced levels of cannabinoids. Conversely, don’t wait too long to harvest either! If the trichomes are overripe, the THC can start degrading and convert to other cannabinoids that may not produce the effects of THC.
Thus, you should be able to identify how the trichomes develop, change colors, and mature, you’ll be able to harvest your buds at the right time. Sure, there are other ways to identify when to harvest, but that’s a topic for another time.
Coming back to the trichomes, get a magnifying lens or a jewelry loupe and take a good look at them. Trichomes look like mushrooms, and you’ll be able to see them clearly with a good magnifier. Now, if the trichomes are clear it means that the plant is not yet ready for harvesting. However, if they appear cloudy or milky, you can get ready to harvest. Some growers may choose to wait until some of the trichomes turn amber.
In addition, paying attention to the color and shape of the pistils can help. As the plant matures, its pistils change from white to brown and amber. By considering all these factors, you’ll be able to harvest perfect buds.
Tools and Equipment Needed to Harvest Cannabis
Having the right tools and equipment is crucial for an outdoor cannabis harvest. Each tool serves a role in ensuring that the final product maintains its quality. In addition, you have to also maintain cleanliness and sanitize the tools to ensure that they don’t transfer diseases to your buds.
If you’re growing quite a few plants outdoors, you can expect more than 2 lbs of wet buds. Some monster strains produce that with just one plant. So, you’ll have a lot of buds, which means that you need to use the right tools while harvesting. After all, you want your buds to look beautiful, don’t you?
Most growers trim plants with their hands; however, it can be tedious if you’re doing it outdoors with so many buds. Unless you’re ready to work for hours that could even extend to days at times, you can consider machine trimming.
Here are a few differences between the two:
Hand Trimming vs. Machine Trimming
Hand Trimming
Precision and Control: Hand trimming allows you to maintain control over the process. This way, you can selectively remove leaves and meticulously trim buds with attention to detail if you have the time to do it.
Preservation of Trichomes: Hand trimming is often favored for its ability to preserve trichomes as they are your priced possessions containing cannabinoids and terpenes. This method minimizes any risk of loss compared to machine trimming.
Machine Trimming
Efficiency: Machine trimming is faster and more efficient than hand trimming. It makes more sense if you have too many plants. For commercial operations, it can reduce the cost of labor and expedite the harvesting process as well.
Consistency: Since it’s a machine, the results will be consistent. This means that your buds will look uniform and beautiful. Consider this if you’re looking to get into commercial operations as you don’t need to have perfect-looking buds if you’re a home grower.
Proper Use of Scissors and Shears
You may not be looking for perfect buds; still, you’d want decent buds even as a home grower. You can achieve good results even by manual trimming, but the key lies in precision. If you have the experience, your work will be easy, but if you’re a beginner, you should look into tools that can make your buds look as nice as possible.
First, get larger shears or pruning scissors to remove larger fan leaves and excess foliage. These tools are designed to handle volumes of material. Invest in a good pair as they need to work for a long time. The blades should be sturdy too.
Next, you’ll need small sharp scissors as they are perfect especially when manicuring delicate buds. To ensure an efficient process during prolonged trimming sessions, you should go for scissors that are easy on your hands.
Other tools you may need include:
- Gloves: This seems obvious but many growers try to wing it without using gloves. Wear disposable gloves to ensure that oils, dirt, or any other substances don’t get transferred from your hands to the buds. Moreover, the buds will be sticky so you can’t handle them without gloves.
- Magnifying Microscope: Growers rely on magnifying glasses or microscopes to closely examine trichomes. This allows you to carefully monitor color changes so you can harvest your buds at the right time when the plant has peak levels of cannabinoids and terpenes.
- Cleaning Supplies: Brooms and brushes help you keep the area clean and also prepare the space for the next growing project.
- Airtight containers: Always use airtight containers to store your buds to protect against moisture and maintain freshness throughout the curing process. Glass airtight containers work best.
- Drying Rack: After harvesting, a drying rack helps with air ventilation to prevent issues like mold.
Preparing for Harvest

In the days leading up to the harvest, a bit of preparation will not hurt. It will also help enhance the quality and potency, so it’s a win-win. Here are a few things you should keep in mind:
Flushing Out Nutrients Before Harvest
If you’re growing in containers, then you can consider flushing, but if the plants are in the ground, it’s pointless to flush. Flushing is a controversial topic where some growers feel that it’s best to flush the plants to remove any excessive nutrients. They also believe that it can improve the flavor and harshness as well. Flushing helps the buds smoke smoothly without giving you the typical hit, they say.
Other growers believe that it’s completely pointless to flush. First, no studies or evidence prove that the quality or flavor of the buds increases when you flush the plants. Second, a study on flushing was also conducted to see whether there was any truth to flushing. The buds were flushed for several days but there was no notable difference at the end of it, including the terpenes, potency, or yield. Therefore, many growers have stopped flushing their plants.
In addition, it could be detrimental at times to flush the plants. You’re trying to remove the excess nutrients collected over time, but it could have an opposing effect. For example, if you don't know how to flush, you could end up overwatering the plants. If the plants take longer to dry up although they are outside due to the weather, they will be vulnerable to mold and other issues during the last few weeks of flowering.
Most importantly, the pH goes haywire if you’re not using pH-balanced water. Some growers have noticed that the ppm numbers are all over the place when they begin flushing the plant.
On the other hand, some growers swear by the fact that flushing helps remove the harshness. In addition, there are some things you just won’t change. Why fix it when it’s not broken? So, if you’ve experimented with plants by comparing the results between flushed and non-flushed buds and concluded that flushed buds are remarkably better, you are welcome to continue doing it. If you’re a newbie and don’t want to risk it, you can just skip this process.
However, there are times when flushing can be of great help. For example, if you notice that your plants are overfed and struggling during any stage of their growth, flushing can come in handy. It’s great to “reset” the system in a way and then continue with the right pH to prevent issues.
Typically, those that flush their plants wait until the plants are mature with just a couple of weeks remaining for harvest. Flushing involves watering the plants with lots of pH-balanced water to remove any nutrient build-up. To avoid overwatering issues, you can water the plants as you normally would, sans the nutrients. However, you will have to watch the plants like a hawk for any signs of deficiencies. Sure, the leaves turn yellow regardless of what you do when there are just a few weeks left for harvesting, but you should take notice when all the leaves turn yellow. Sometimes, even the sugar leaves can start yellowing, but this should be avoided. Not that it will affect the quality, but the buds just won’t look good.
Environmental Conditions
Since you’re growing outdoors, there’s nothing you can do about the weather. Thus, you have to plan before planting the seeds to ensure that the climatic conditions are going to be favorable to harvest the buds. Here are a few things to keep in mind:
Temperature: Cannabis plants love consistent temps around 65 to 80°F or 18 to 26°C throughout their growing phase, meaning sudden fluctuations in the temperature can be bad for them. However, if you have planned it in such a way that they experience lower temperatures at the end of their flowering, you’ll help to enhance the production of terpenes contributing to the aroma and flavor of the buds.
Humidity Regulation: Managing humidity levels is vital, but you don’t have a lot of options as the plants are growing outdoors. Cannabis plants like humidity levels between 40 to 70% in the vegetative stage and less than 40 to 50% during flowering, but achieving those levels will be very challenging outdoors. Therefore, you can only increase the ventilation by planting in spaces where there’s a lot of breeze. If you’re growing in containers, it becomes easier to move them around.
Apart from the environmental conditions mentioned above, there are other things you could do to ensure that you harvest the buds smoothly without issues. You could do this by timing the harvest.
For example, some growers prefer harvesting in the morning because they believe it provides the best conditions for preserving terpenes as they are sensitive to heat and light. Others like harvesting in the late afternoon when the plant is very active at that point of the light cycle. Harvesting at night can be a little difficult especially since you have to clip the buds without damaging them.
Post-Harvest Phase of Growing Cannabis Plants Outdoors

The post-harvest phase involves two stages: drying and curing.
And this is where the buds transform. If you put in the work, your buds will look and taste incredible. If not, they will lose a lot in terms of flavor, potency, and overall appeal.
Here’s a detailed overview of drying and curing buds grown outdoors:
The Important Stage of Drying
Controlling Temperature and Humidity: After you harvest and trim the buds, you need to hang the branches on a clothesline or a rope in a carefully regulated environment with specific temperature and humidity levels. This initial drying phase, which lasts about 7 to 10 days helps eliminate moisture from the buds. While the humidity needs to be between 50 to 60% or even 55%, the temperature should be around 15 to 21°C or 60 to 70°F for good results. Placing a fan in the room might help with air ventilation but do not point the fans on the buds. Sure, the fans will expedite the process but also make them too dry.
Trimming and Bucking: Some growers prefer trimming the leaves after they are dry. If you have any excess leaves left, now is the time to trim them and prepare the buds for the next process. Bucking involves removing branches from the stem to ensure a more uniform drying process.
Darkness and Ventilation: Throughout the drying process it is crucial to shield the buds from light to preserve their cannabinoids and terpenes. Adequate ventilation is also essential to prevent mold or mildew formation. This step is critical — you don’t want mold at the last step!
The buds are ready to be cured if they have dried properly. There are multiple ways to check this and figure it out as you don’t want to cure the buds when they are still wet. One method is to cut off a small bud and place it in a mason jar. Wait for a couple of hours and check if there’s any moisture. If there’s some moisture, the buds need some more time to dry. If not, they are ready.
Another way to check is to test the stems. If they snap easily rather than bending, they are dry enough and you can proceed to curing. If the stems are too dry and break immediately, the buds could be very dry as well. On the other hand, if they don’t break easily and just bend, they need more time to dry.
Significance of Curing for Flavor and Potency
After so many months of waiting for the buds, it can be tempting to skip the curing process and smoke them. After all, the buds are dry and ready to be used, right? Wrong.
Curing brings out the flavors and aromas of your buds. Everything you have done till now will be for naught if you skip this important process. It’s this phase that determines whether you have lackluster buds or potent ones. Typically, growers cure their buds for about 6 to 10 weeks but you can do it longer if you like.
Terpenes: Curing the buds slowly allows the terpenes to develop properly. And, since terpenes are responsible for the taste and aroma, you can bet that a good curing process will bring out the flavors like none other.
Preserving Potency: Curing also enhances and preserves cannabinoids like THC and CBD, which are important whether you’re a medicinal or recreational user. Additionally, curing allows for the breakdown of chlorophyll resulting in a more flavorful smoking or vaping session. If there’s a lot of chlorophyll left out in the buds, they will be harsh to smoke.
Improving Texture and Bud Structure: Curing ensures that moisture is evenly distributed throughout the buds. This prevents them from becoming overly dry or brittle, so you’ll have perfect buds if you allow the buds to cure for some time.
Jar Curing: To cure the buds properly, use airtight glass jars to provide the perfect environment for the buds. Airtight jars prevent extra moisture from getting in. You should also periodically open the jars and release any built-up moisture, known as “burping”. It also ensures that any gases in the jar are released and fresh air is introduced into the jars.
In the first and second weeks of curing, burp the jars every 10-12 hours. Burp them at least once a day until the 4th week. Once it’s obvious that there’s no extra moisture and the buds are sticky, you can stop burping.
Now, how do you maintain the humidity inside the jars? You can use Boveda packs that ensure a specific humidity level in the curing jars. Cannabis buds prefer humidity levels around 50 to 60% and you can achieve this with the humidity packs. Look out for any moisture closely as it can invite mold. You cannot smoke moldy buds, so make sure you follow this process properly to safeguard the buds.
To ensure the safety and quality of the harvest, it's important to take measures during the drying process. Here are some steps you can follow:
- Make sure there is ample airflow in the drying area to avoid humidity buildup and prevent mold or mildew.
- Monitor and control humidity levels throughout the drying process. Make sure the temperatures are in the desired range as they can affect the drying process and make the buds too dry.
- Ensure the drying area is clean without any debris lying around. This is to prevent any contaminants that could contribute to mold issues.
- To store the buds for a longer time, place them in ziplock bags. You can also vacuum seal them to make sure they are not exposed to oxygen and light that can degrade them.
Summary: From Garden to Jar: Harvesting and Curing Outdoor Cannabis Plants
There are major differences between growing cannabis outdoors and indoors. Indoors, you can control the environment and provide perfect conditions for the plants to thrive. However, you can’t do the same outdoors. Therefore, you have to plan everything since timing plays a huge role.
Cannabis prefers different levels of humidity and temperature during every stage of growth, but you can’t control them outdoors. So, plan and plant the seeds when the light is optimal and there’s no risk of rain. You can protect the plants from rain to a certain extent by covering them. Also, plant the plants in containers rather than the ground so you can move them around; however, plants in the ground fare better if you have good soil, so the choice is yours.
Once you find the perfect time to harvest, make sure you take the time to properly dry and cure the buds. These two stages are incredibly important and you must do everything to protect the buds from mold. Otherwise, all your hard work will go to waste.
The most important stage of all this is curing. If you skip this part, you will end up with less potent buds that are harsh to smoke. Curing breaks down the chlorophyll, so the buds will taste fantastic.
Once you cure the buds in glass jars, continue storing them in airtight containers so they remain fresh for a long time. We hope you enjoy your buds and share them with your buddies as well! Happy growing!
Read more