


Likes
Comments
Share


@Tropicannibis_Todd
Follow
ALRIGHTY THEN GROWMIES 😎
👉SHES PRETTY MUCH READY JUST WAITING ON THE AFGHAN TO DRY TO MAKE ROOM ON THE HANGERS 👈
👉Although we have just hit week 15 shes done , love the colors and the hint of berry mixed with kush 👈
Was a blast to grow thanks for hanging in there and following me on my journey👊
I GOT MULTIPLE DIARIES ON THE GO 😱 please check them out 😎
👉THANKS FOR TAKING THE TIME TO GO OVER MY DIARIES 👈
👉NutriNPK NUTRIENTS USED FOR FEEDING 👈
👉www.nutrinpk.com right now get 10% off using SPRING2022 as the coupon code👈

Likes
9
Share


@Herbz_Unkraut
Follow
another resin monster from seedstockers, with a very special scent, full of flavors! grinded it smelled like peppermint, and vaped it has a great sweet creamy taste!

Likes
55
Share


@MadeInGermany
Follow
Info:
Unfortunately, I had to find out that my account is used for fake pages in social media.
I am only active here on growdiaries.
I am not on facebook instagram twitter etc All accounts except this one are fake.
Hi everyone :-)
This week it has developed really well again :-).
I didn't train her this week, I'll do it again next week :-).
It was poured twice this week with 1.2 l each time (see nutrient table above for adding nutrients).
I sprayed them all with GreenBuzzLiquida Fast Plant spray.
I also cleaned the entire tent and checked everyone's health.
Fresh osmosis water was prepared and filled into canisters.
Yellow boards against flies have been put up and blue tags to prevent trips.
Unfortunately I still struggle with them but they have become significantly less pushed.
I think in a few weeks the last story should be :-).
Otherwise, like every day, they were looked at and petted for a while ;-).
I wish you lots of fun and stay healthy 🙏🏻
You can buy this Nutrients at :
https://greenbuzzliquids.com/en/shop/
With the discount code: Made_in_Germany you get a discount of 15% on all products from an order value of 100 euros.
You can buy This Strain at :
www.Zamnesia.com
☝️🏼☝️🏼☝️🏼☝️🏼☝️🏼☝️🏼
Strain
Gelato clone from mother (Zamnesia )
☝️
Genetics: Wedding Cake x Gelato x Gelato 33
Vega lamp:
2 x Todogrow Led
Quantum Board 100 W
💡
Bloom Lamp :
2 x Todogrow Led
Cxb 3590 COB 3500 K 205W
💡💡☝️🏼
Soil :
Canna Coco Professional +
☝️🏼
Nutrients :
Green Buzz Liquids :
Organic Grow Liquid
Organic Bloom Liquid
Organic more PK
More Roots
Fast Buds
Humic Acid Plus
Growzyme Big Fruits
Clean Fruits
Cal / Mag
Organic Ph - Pulver
☝️🏼🌱
Water: Osmosis water mixed with normal water (24 hours stale that the chlorine evaporates) to 0.2 EC. Add Cal / Mag to 0.4 Ec Ph with Organic Ph - to 5.8

Likes
Comments
Share

@DogDoctorOfficial
Follow
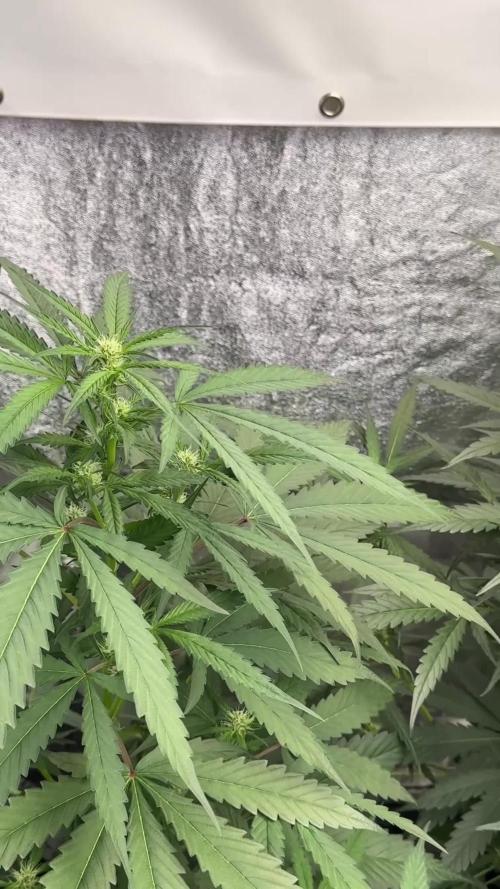
💜 Week 6 – Purple CousKush Auto (Pheno B)
Growing Without a Hurry
One of my favourite lessons from this entire 8×8 Adventure has been learning not to measure success with a ruler.
Some plants race toward the finish line, stretching with incredible determination. Others quietly settle into themselves, carefully building strength before revealing what they have planned.
This Purple CousKush belongs to the second group.
She's never tried to compete with her sisters. She simply grows at her own pace, never rushed, never stressed, never trying to be anything other than herself.
And honestly...
I wouldn't change a thing.
🌱 Plant Development
Week 6 finds this beautiful lady standing at approximately 66 cm, making her one of the more compact Purple CousKush phenotypes in the room.
While some of the other ladies have focused on vertical growth, she has invested her energy into creating a wonderfully balanced frame with sturdy branches and beautifully healthy foliage.
The flowers are now beginning to establish themselves across every branch. Fresh white pistils continue appearing at every node, and although the buds remain small for now, their formation is wonderfully even throughout the canopy.
One feature that keeps drawing my attention is her foliage.
The leaves carry a rich, deep emerald-green colour that immediately speaks of excellent health. Even more interesting are the gentle curves at the tips of several leaves, almost as if they're curling a finger and inviting you to come a little closer.
Every plant has its own little signature.
Those playful leaves have become hers.
🌿 Environment & Growing Conditions
This week brought another period of stable environmental conditions, allowing the plant to continue developing without interruption.
• 12/12 light schedule from seed
• Future of Grow Black Series LED delivering approximately 850 PPFD
• Mammoth Pro grow tent
• Day temperature around 29°C
• Night temperature around 25°C
• Relative humidity averaging 60%
• CO₂ approximately 639 ppm
• pH 6.0
• EC 1.78 mS/cm
Despite the warm summer conditions, she continues showing exceptional health. Leaf colour remains vibrant, stems continue strengthening and there isn't a single indication that she's under any environmental stress.
Sometimes quiet progress is still outstanding progress.
💧 Feeding Program
Growing in a 15 L Plagron Lightmix container and hand-watered with approximately 1.1 litres per irrigation, she continues responding beautifully to the current bloom feeding schedule.
This week's nutrient solution consisted of:
• Terra Bloom – 1.9 ml/L
• Pure Zym – 1 ml/L
• Sugar Royal – 1 ml/L
• Power Buds – 1 ml/L
• Green Sensation – 1 ml/L
The balance between nutrition and growth continues to be exactly where I want it. The rich green foliage, healthy new growth and consistent flower development all suggest she's receiving everything she needs without asking for anything more.
No corrections.
No chasing numbers.
Just letting the plant do what she does best.
🌸 Phenotype Notes
This phenotype reminds me that every seed carries its own personality.
She's certainly not the biggest plant in the room, but she's far from the smallest story.
Everything about her feels deliberate. Her internodes remain nicely spaced, the branching is symmetrical, and her compact stature gives the impression of a plant that's quietly preparing for the weeks ahead rather than trying to impress anyone today.
Looking closely at the flowering sites, it's clear she's beginning to shift more energy toward bud production. Every branch carries clusters of fresh pistils, hinting at the shape she's slowly becoming.
She's teaching patience.
And patience has always been one of a grower's greatest tools.
🔍 Looking Ahead
Over the coming week I expect the flowering sites to begin stacking more noticeably as the stretch gradually slows.
The framework is already there.
Now it's simply a matter of allowing time to do its work.
With her healthy root system, vibrant foliage and naturally balanced structure, I'm excited to watch these small flower clusters slowly transform into properly formed colas over the next few weeks.
She may never become the tallest plant in the room.
But she may very well become one of the prettiest.
💭 Final Thoughts
Plants like this remind me why comparisons rarely tell the full story.
It's easy to admire the tallest plant or the fastest flowering phenotype.
But there's something incredibly rewarding about watching a quieter plant confidently follow her own rhythm without ever looking unhealthy or unhappy.
This Purple CousKush doesn't seem interested in racing.
She's simply enjoying the journey.
Healthy.
Balanced.
Elegant.
Confident in her own timing.
Sometimes the most beautiful gardens are built by plants that never felt the need to hurry.
🙏 Thank You
A huge thank you to everyone following this 8×8 Adventure. Every comment, every question and every shared experience makes this journey even more enjoyable.
A special thank you to the amazing companies helping bring this grow to life:
💜 Zamnesia for the incredible Purple CousKush genetics.
💜 Plagron for providing the nutrition that keeps these ladies thriving.
💜 Future of Grow for the outstanding Black Series lighting.
💜 TrolMaster for helping maintain a stable environment from start to finish.
And finally, thank you to the entire GrowDiaries community. Whether you're here to learn, share your own journey or simply enjoy watching these phenotypes develop, I truly appreciate every visit and every conversation.
Until next week...
Growers Love and happy growing! 🌱💚
Likes
9
Share


@Wicked_Stix
Follow
The voodoo juice x platinum hermed this week so moved it to it's own tent. We have 6 plants remaining in the room. I cut out the maxigro this week. They are getting .5 tsp per gallon of maxibloom now. Seems to be keeping everyone happy. Not much to report other than that. Buds seem to be progressing pretty nice.
Likes
18
Share


@TheItalianGrower
Follow
Hi guys, the first week has come to end. Girls grow up well. I dropped the light about 10cm to avoid stretching.
I have used few nutrients but from next week I increase the dosage.
Stay tuned 😜😎





Likes
27
Share


@MiyaguiOkPolilla
Follow
Hola cultivadores!
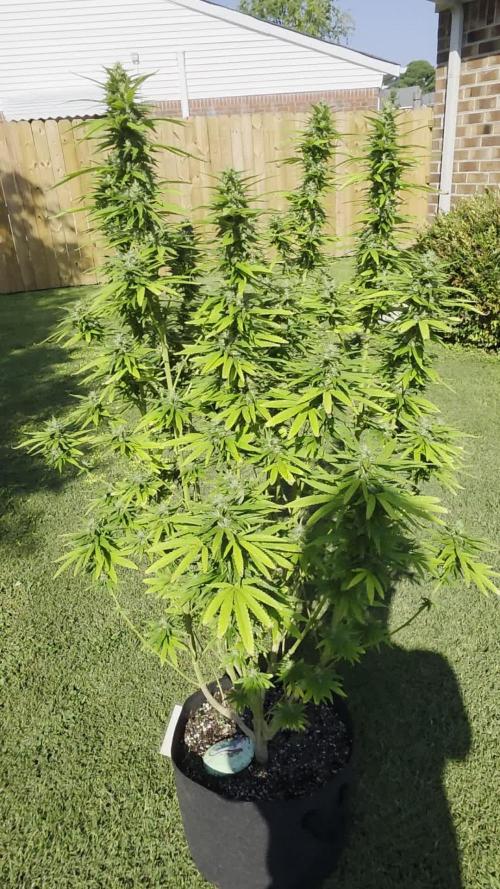
Esta chica está seduciendo mi mente cada día, no dejo de verla y darle cuidados, algunas hojas viejas cuentan la historia de una vida de excesos y mucha luz de cerca, pero hoy es una planta fuerte y segura. Se alimenta con ansias ya que el agua de riego desaparece de su maceta en cuestión de horas (además que hay mucha exposición del sustrato). Su etapa de Bloom ya es más que visible y he decidido no hacer defoliación hasta dentro de 2 semanas si fuera necesario.
Sus ramas son muy fuertes y creo que no necesita nada más de lo que le doy.
Si alguien tiene un sabio consejo se lo agradezco 💐🚵♂️🏄♂️🌹💚
Saludos a todos y gracias por visitar el diario 😌
Irie!


Likes
49
Share


@masterofsmeagol
Follow
IVE MADE MORE VIDEOS BUT THEY JUST DON'T SEEM TO UPLOAD AND IT'S FAR TO SLOW TO DO IT FROM HOME
6/27 Made last week a five day week to get back on track. It's still overcast and rainy. It's not raining a lot bit it's consistent. Despite the weather the plants are doing phenomenal. I'll update later. It's 1pm. It's been raining consistently since 11. Just a sprinkle but it's steady. I'm going to begun uploading the weeks weather on my diary. I may start a new diary for the plants I light depped as they are flowering pretty good. Rain stopped and it's just overcast for now. I looked at some videos and did a comparison of videos one week ago and videos today and HOLY SHIT! WHAT A DIFFERENCE. Especially the light depped 10th planet. Well everything but that was the most significant difference. I'm astonished at the health and growth despite the crummy weather. Continued to rain. Just got harder. Plants are taking it but it's flooding underneath the pallets a little but it will be fine. The light dep however has me concerned. The 10th planet is looking spectacular. The bigger purple punch I'd looking good too. The smaller one though looks to have a pollen sack coming off one of the branches. Considering its not on the otherside I assume it's not just a swollen calyx. I don't mind chucking it especially if that means I don't hurt my other girls so I want to make sure. I sent videos to a few other growers and I'll add a question on here. Those three plants have been isolated from the rest for a few days due to rain. I have the suspect isolated alone until I can confirm. It sucks cause the light Depp was going good and the6ve all got little flowers.
6/28 Well that fucking sucks. ALL THREE plants I tried to light depp hermed on me. I could see male flowers. Luckily I had been keeping a really good eye on them and it was preflowers mostly. At least I caught it. One or two stamines on each plant. Would've been really easy to miss. Only one had STARTED to elongate into a stem so I think I caught it early enough. Plus since all this rain they've been kept in a different location then my big girls. Glad I did that now. Boy the roots looked good on those plants. I just grabbed the stalk and lifted and it came right out of the pot. I held it there admiring it for a minute. This sucks. At least the real plants are doing good. As far as I know. No male preflowers that's for sure. I've got some feedback from other growers and the videos are a little blurry but I had found a light leak and I'm certain these plants hermed. I know I could've tried to save them but I didn't want to risk it. I compared what I was seeing with Google photos and other websites. Aside from the larger ball with its stem, there were also several little bumps besides developed calyxes that were weaving into little buds. Trust me that I wouldn't cut down my plants if I wasn't 110% sure. I might've been able to "save them" but to me it's just not worth the risk.
6/29 I was second guessing myself pretty hard last night due to some responses I got on my light dep and messages I got from other growets. Made my anxiety horrible but I looked on several video's I'd taken again and I know what I saw. I felt better after that. This was after I researched and waited THREE days until I saw the ball on the stem and the groupings of small nubs under a fresh yellow flower. These plants were flowering good and it sucks to lose them. One MAY have been ok but one was a runt and had all the characteristics of a true hermaphrodite. They were only in 3's and I couldn't risk my harvest for an experiment. Still sucks. Oh well. Sun is starting to come out. Plants seem to be doing fantastic. I have one spot on a leaf that looks like a pillar munched on a leaf so I'll probably get the bt out soon as I have a dry day that I can apply it. I'll have to check the weather. I need to start a nute regiment but the plants aren't telling me they need anything yet.
6/30 I fucked up dates or dodnt do it yesterday or it didnt save right so I'm leaving this blank today is the 1st.
7/1 I have still only watered s couple times and I haven't had to feed. This week I'm going to start nutes. I had some external ersonal situations that have kept me from my plants. I'm hoping to get back on track. I noticed some pillar damage so I'll need to dig out the BT. This morning I saw this giant ground hog by my cage. Hated too but had to get rid of him. Of course some of the blowback landed on the leaves of one of my plants. I tried to clean it as best I could. Better than that fat bastard eating everything in one night. I broke a branch either falling around it or bulling through when I was pissed or I LST it the wrong way and the wind broke it against the tomato cage. Nice big branch too on top. I tried to fix it with duct tape but we'll see. The plants need me to spend sometime with them. I need to clean them up. Apply bt and give them their first feeding. I'll update as I go. They don't seem nutrient deficient by any means but I don't think it would hurt to start the nutes.
7/2 Bags were lighter today and if it wasn't going to rain tonight and tomorrow I'd he watering. Plants look great so soil isn't depleted yet I guess. They're growing rather rapidly. The branch I broke didnt make it. Had an idea it wouldn't but I had to try. I waited on the BT on account of the rain. I may go back over and change my mind and water with silica or a mild nute solution or maybe apply the BT. Depends what time I get back. I have some work I need to do over there. There's a few that I need to clean up the bottoms on. Pest damage is minor and limited to one or two plants and a leaf or two only.
7/3 More rain. It was supposed to rain this morning too but it didn't. We got .33in yesterday and through last night so I thought that was ok. Looking back on my previous diaries I'm doing things significantly different than before. I had used a lot more nutes earlier on. This morning I mixed two gallons of 2tsp of big bloom and fed it to the 9 plants in smart pots leaving the container plants as they have much more water in them. Looking back at other diaries I previously had, WPM and septoria by this time not to mention a shit ton of other pests I was fighting by this time. Since I poisoned where the cagexwas multiple times and sprayed the cage before it was moved I luckily don't have that problem yet knock on wood. I'm planning to apply BT tonight to deal with the moth larvae if there are any. I'm looking at plants around this area and im seeimg SOME septoria and pm on raspberry bushes and burdock so it is around. I made sure my cage is not by any other vegetation this year and is sitting on asphalt with the bags on raised pallets. Good thing I did or I guarantee they'd be flooded by now. I've been seeing multiple complaints from maine growers online (AND THEY HAVE HEALTHY PLANTS!) saying this is the worst year ever. Maybe they need a dose of fusarium oxysporum to keep them humble. This is maine. If you don't like the weather just wait five minutes. Meanwhile I'll be doing my sun dance hoping for sun. "Hard to grow cannabis with no sunlight" said another grower on my forum.


Likes
85
Share


@Teamdirtbag2
Follow
She is growing good. Defoleated A lot. She is starting to get frosty. No burn upped the newts to 680 ppm.
Hung the second light. So things should get interesting.


Likes
5
Share

@ProfessorWeed
Follow
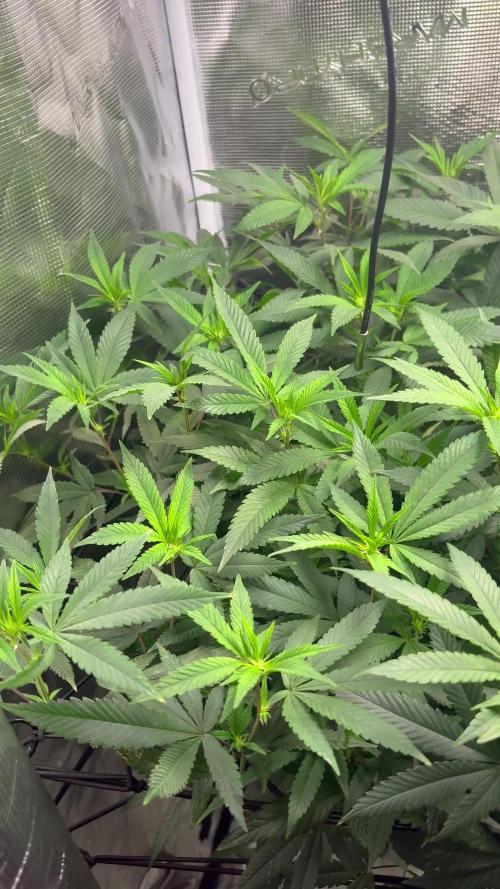
Der Steckling aus dem Garten Eden hat in der ersten Blüte Woche ein Wachstumsschub von fast 30 cm hingelegt.
Ich habe einen Blüte Dünger auf in Salz Form benutzt. Ich hoffe ich habe mir meine Boden nicht kaputt gemacht.
Durch den Einsatz von Klimaanlage und Entfeuchter hab ich sehr stabile Werte die sich konstant halten.
Ich möchte mich in diesem Durchgang auf maximale Hartz Produktion und Erhalt fokussieren.
Welche Tipps habt ihr für mich die ihr schon getestet habt?
Likes
45
Share


@BodyByVio
Follow
Beautiful flower full of trichomes. Smell and test fantastic. Very fast flowering. She was done on day 49 but I cut her down few days later.
I love the strain, the only thing that I will like this strain to have is a better yield. Beast quality buds I ever grew.
Processing
Likes
2
Share


@MephodMan
Follow
Tap root issues - too long in jiffy block
Still working on dialling in VPD
Likes
34
Share


@Canna96
Follow
Hey now, this week went very well. I transplanted her on day 17 and she looked a little grumpy for about 24 hours but her leaves are now pointing upwards and she is responding very well to the larger airpot. I still have the Spectrum X in V1 at 30% which is doing an excellent job of keeping her low to the ground with nice tight nodes. She is only six inches tall and working her on her 6th node by day 21 so I am very happy with this light fixture so far. I transplanted her into a mixture of Coco Coir and Perlite and set up an auto watering system that is currently feeding her 4 times per day, Once at lights on, and then every 5 hours thereafter until the 4th feeding, then it repeats at lights on. I will top her just above the 6th node as soon as I have room between 6 and 7, which will be in the next several days. I know some people don't think it's beneficial to top autos, and I would certainly agree it is not the best way to go in all setups. However, when utilizing high frequency fertigation in coco coir it is absolutely necessary. The issue is vertical growing space if you are growing in an indoor tent. I use a combination of LST, topping, mainlining, manifolding, and super cropping to try to keep my plants from growing into the lights, but it can be difficult with certain strains. As soon as I top her just above the 6th node, I will begin LST and start bending the mains down and tying them off to the side of the airpot via rubber coated wire. I will gradually increase her feed and just continue with LST and occasional defoliation the rest of the way. I am also super happy with this new MedicGrow light and how tight she is keeping the nodes on ALL the plants in the tent currently including my tomatoe plants that have just exploded since going under this light last week. I will post a few pics of them as well. They will go outside in about a week and will get fed the runoff from the Cannabis plants which will be mixed with my basement dehumidifier water to lower the EC, then I PH it to between 6 and 7 and the tomatoes absolutely EXPLODE....I hope everyone is have a great week, be safe and Blaze On!
Website: https://medicgrow.com/
https://growdiaries.com/grower/medicgrowled
Likes
9
Share


@Scoota710
Follow
It’s growing pretty good. I’ve been debating on topping it or doing some LST on it 🤔
Likes
4
Share


@shwable
Follow
Hello and welcome to week 5, everything looks fine so far...
I almost topped the CP1 a second time by accident. When I tried to bend the stem a little more it just snapped clean and I applied tape and stabilized the branch. I hope it recovers and it's looking quite good ;)
