
Likes
Comments
Share


@el_cultivito
Follow
Se preparo una solucion de Mills Start R:
- PPM : 100
-pH : 5.8
Se submergio cubos de roca de lana dentro de la soulcion.
Cada semilla que se germinara se paso a un cubo de roca de lana y se mantuvo sin luz.
Cuando las plantulas salian del cubo, se pasaron a otra bandeja de germinacion con domo de humedad bajo una luz T5.

Likes
4
Share

@Minuteman_Organics
Follow
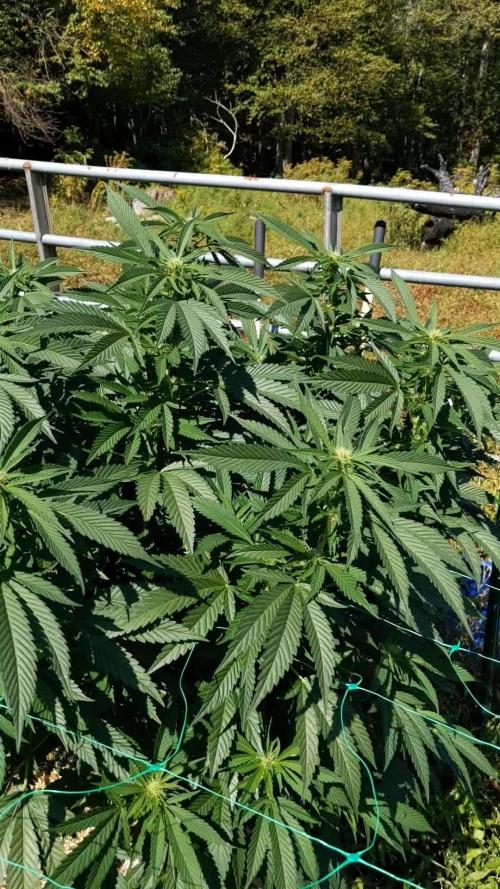
Another week. Just been giving water and spraying BT roughly once a week as weather allows. Haven't seen any sign of caterpillars but I have seen months landing on the leaves and that's enough reason to get ahead of it.

Likes
9
Share


@Johan2
Follow
Pulled day 59 of flower could waited a week more.Reasonably happy with the outcome.
Very incense kind of smell but chocolate taste.
Made some bag shake hash , about
2gms - lots of cloudy trycs in the hash. It’s worth checking the quality of the shack hash with a microscope. have made 400gms of canna-butter for edibles.
Not a bad yield . I was expecting a bigger yield.
Looks good in the jar .

Likes
18
Share


@NMGDOC
Follow
I was flushing all the plants since August 9.
You can see in the videos with de microscope ( I really try my best, but it was pretty difficult) the trichomes looks cloudy and some of them looks amber. Maybe in the videos you can't see it because my hand was really shaky.
August 17: all the plants were in dark.
August 18: i cleaned all the plants, buds, leafs, everything..., spraying water to remove the rests of potasic soap.
Today august 18, during the nigth, i'm going to harvest all the ladies.
In the past 3 days i didn't watering the plants and the smell was stronger.
August 19:
Before dry
-Critical Kush: 150g
-Red dwarf: 60g
-Syrup (2 plants): 270g
-Lemon (4 plants): 570g


Likes
35
Share

@Fatnastyz
Follow
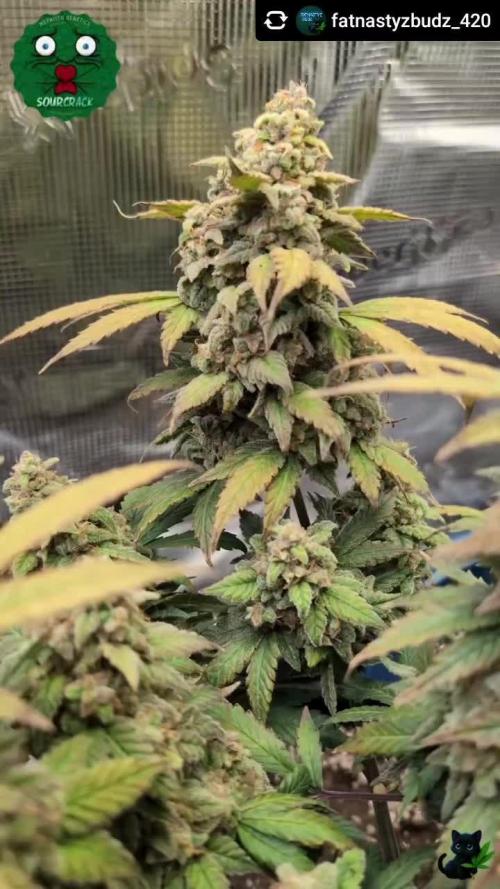
Super glad I got to finally run her again! Wanted to for a while, but then ol' Personalsmok3s had to call me out! 😂😂Which just ensured it was next! 🙏
Love this thing and I could grow a tent full at once!
😻😁🤘

Likes
11
Share


@PanGrower
Follow
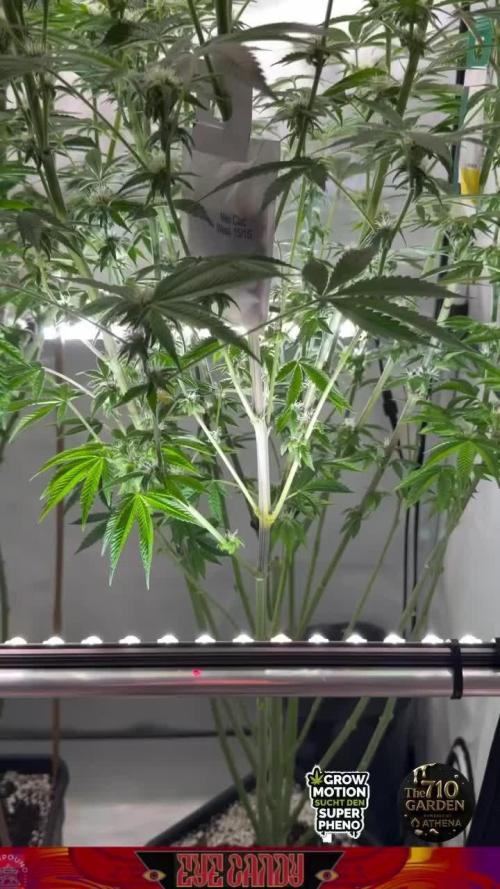
Do not pay attention to the temperature on the thermometer in the middle, it lies by a couple of degrees. I have a good thermometer on top of the box that shows the temperature.
Day 29: After a terrible fracture, we see that the plant is beginning to recover. I'm honestly disappointed because it makes it very difficult for me to train mainlining and it will also increase the amount of time it takes to grow.
Day 30: It looks much better already, I could superprune the right branch, but I don't want to stress it. I will try to bend the right branch harder, I will bend the left one a little in the morning the next day, maybe early.
Day 31: This morning I cut the lower leaves, photo in the evening and continued the LST training after the injury. Photo in the evening.
Day 32: I am completely sure that the plant has moved away from the stress, but we can see on the left circle, the right bud (and side) slowed growth.
Day 34: I saw traces of salt on the tips of the new leaves, so now I pour water with regular 15 PPM.
Processing
Likes
7
Share


@Silverback_Guerilla
Follow
SUNDAY 4/28:
I plucked off some dead leaves and did some leaf-tucking. The two remaining colas on the good one in the big tent (the one I had to chop off 5 big potential colas) is really starting to bud up now. She'll make a pair of 10" colas. The bigger one in the small tent still has the big curl going on with her leaves..doubt they straighten up. The new growth looks more normal, but still I'm sure the problem was that the soil was just too compacted for her roots to flourish. I'll continue prodding and poking with a skewer to loosen the soil and get oxygen to the roots. The smaller, daintier one that I had to remove a couple branches from is stretching her remaining branches now and starting to put on the pistils.
Daytime temps are still hovering around 87-90f, but I've got them sitting in 70-72f temps for 6 hours of darkness now.😁
I did a little video today and I'll take a few "glamour shots" tomorrow.
MONDAY:
I think I phuktup the PH again because they are getting fed everything they need and still showing signs of various deficiencies. I douched everybody with 1/3 gallon including some boomerang, calimag, bembe, bud candy, and terpinator. No time for glamour shots...
TUESDAY:
I was busy again today, so no glamour shots..
WEDNESDAY:
I did a little training today and finally got around to taking some good photos.😎
A couple of plants in the tent, adjacent to one another, suddenly got crispy leaves..(contagion?)
THURSDAY:
The 'contagion' seems to be spreading through the garden...
I'm thinking maybe I completely PHuktup the ph when I added silica last time and didn't correct it?? Not sure...but it's sad..they're all gonna be less than photogenic for the finish...
FRIDAY:
I plucked some dead leaves and misted everybody with perfectly PH adjusted spring water and increased airflow in the tent. Also decreased the dehumidifier to 45% RH. I moved a lesser plant into the small tent and a better Candesia into the big tent.
Likes
7
Share


Likes
55
Share


@BodyByVio
Follow
Just got done with trimming the 4x4 @greenhouseseedco Super Silver Haze / @blimburnseeds Silver Surfer Haze tent.
The final yield is exactly 1000g plus some (kind of a lot)that I smoke in the last 2 weeks 😃
Also got 6, gallon size ziploc bags filled with good quality trim for concentrate.
To be honest I was expecting a little more but keeping in mind that this grow I did not supplemented with bottled CO2 I think I’m good with the results.
Definitely I enjoyed a lot this grow and I’ve learned even more.

Likes
24
Share


@PEAKYPLANTERS
Follow
Respect for all of you, brother farmers! masters and beginners! thank you again for gathering on the pages of my diaries🤗
Have you seen this beautiful 4-headed girl? something tells me some nice rocks will come out of there!
👻👻

Likes
10
Share


@Archieballs
Follow
All looking good. Banana #1 is starting to put on more weight. #2 and Haze nodes are coming closer together. The smell is intense. All 3 got ph water as needed about 4.5 liters until runoff.

Likes
3
Share


@GrowwUp
Follow
Nothing new this week. She's still growing steadily and the nutes seem to be doing a good job so far. I'm using the Dual Fuel with a bit of Growth Solution to raise the EC to follow the Green Plant Nutes program and it feels like it's right so I'm keeping like that. The light is set to 100% as the plants are healthy and the weather is getting a bit too cold. I upgraded my second inlet fan from a generic 150mm ball bearing fan to a 125mm Phresh Hyper Fan V2 w/ speed control. Now my tent is so much quiet with both Hyper Fans V2 working on blowing fresh air in and out. Maybe I get a Phresh Hyperfan V2 Climate Controller to manage them automatically next upgrade.
Likes
Comments
Share


@PrinceOfHerbs
Follow
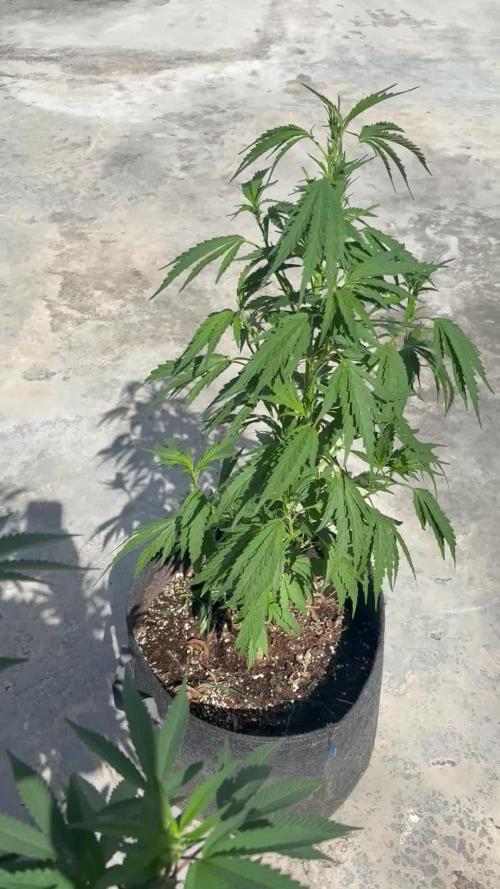
The plant looks quite healthy.
It is stretching a lot, so a net will be stretched over it next week.
Day of flowering: 5


Likes
8
Share


@Oldnumber7
Follow
after the 5 days all are sprouted through. Update: first full week out of the soil with just minor water added with a pH of 6.3 from the sink. The Do-Si-Dos didn't sprout with normal leaves but is starting to come along so we shall see how she does. The others are coming along fine so far (fingers crossed)

Processing
Likes
39
Share


@Belverde
Follow
Hi guys..
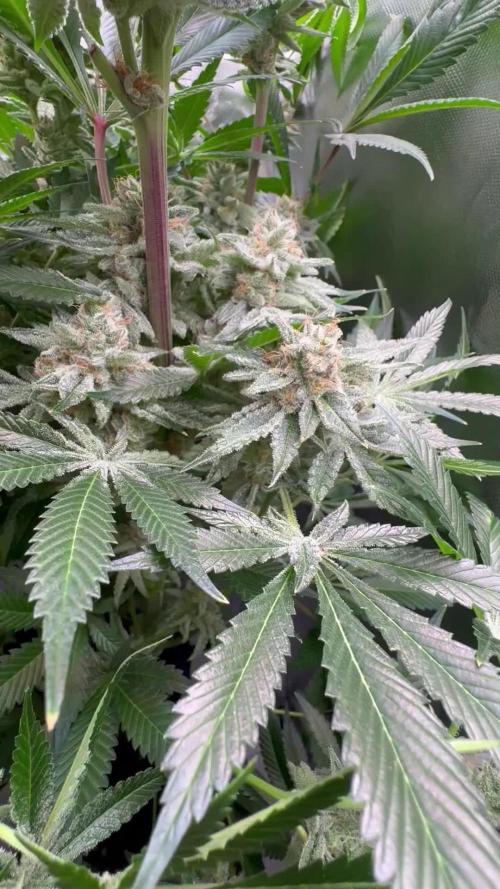
Here we are again with our two beloved Peyote Critical ...
I will not dwell much today ... it is just now missing to reach an optimal flowering ... I believe that at most, in ten days, they are ready ...
If one if you wish you could easily cut it now ... all milk-colored trichomes .
Usually I always prefer to start the second phase (drying and treatment) when there they are 15% of amber trichomes ... The timing of the harvest sometimes varies based on various factors and / or above all on personal pleasures ...you know..
The plants are really beautiful and super resinous ... The perfume it is much more on the Kush side, quite even sweet with other "notes" that I do not recognize but tending to the "honey" side ..... Of the critical it has more than anything the structure and also the shape of the peaks .... however it is ... at the end of the week last time I gave them once again a bit of banana macerate, more or less always a 0.5 in a 1.5l bottle of water ... a few days later a little bit of Topmax .. now just water, like I practically did it throughout the cycle, since the nutrients were already present in the soil ... we hope for good ...
let me know if you liked it ...
Criticism, advice and comments are welcome😉 ...
Thanks to have read 🙏..
Good cultivation ...
See you in seven days ....
Bye ✌️
Likes
20
Share


@Steno
Follow
The strain is really strong to various stress, it's felt a difference between the two phenotipes, their are both delicious but one more berry flavoured and the other more exotic one. At the moment the best strain I've ever grow! 💐🍧


Processing
Likes
10
Share


@Murojuanna
Follow
Lowered feed to half of what I was feeding previously, will begin a 14 day(approx) flush next week.


