
Likes
Comments
Share


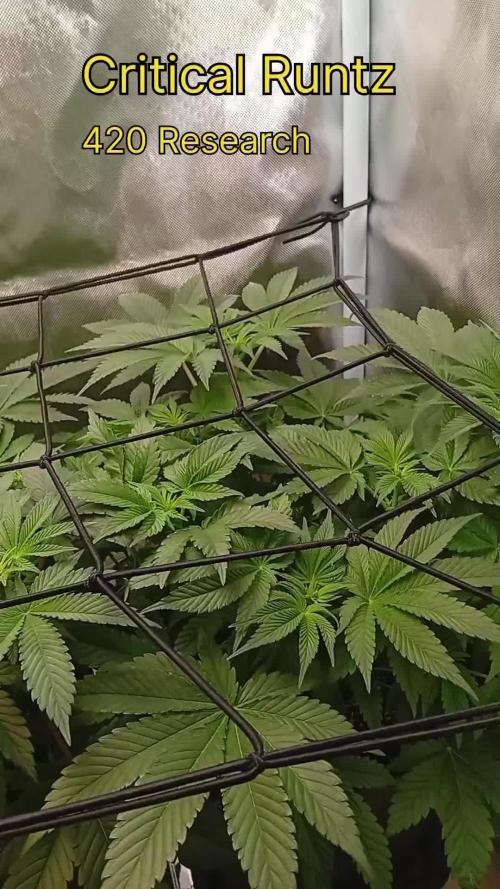
@SzkolaZiola
Follow
First week of florwering is over. They all already show pistills so induction was successful.
I did a little defoliation to uncover bud sites and LST-d Strawberry Cough since it was much higher than the rest of the ladies. Now I do have even-ish canopy.
CA$H and Mimozz are going superb. Cough is okay, not great, not bad. Grandpa's Cookies is a runt but I'll try to have at least some weed from this one also 💪


Likes
6
Share


@KivzBudz
Follow
Die Woche startet mit dem dritten Blütetag, ich hab das Licht am letzten Samstag umgestellt auf 12-12. Heute (03.06) kamen die ersten kleinen Härrchen und sie beginnt sich zu strecken. Ich update Bilder im Laufe der Woche :)

Likes
41
Share


@JeyJo
Follow
Day 79
Heut wurde gegossen mit Dünger und Neemöl
Neemöl wurde auch gespritzt
Day 82
Heute wurde gegossen mit Calmag
Day 84
Heute habe ich bei allen 3 Ladys unten rum leicht entlaubt und einige Triebe entfernt
Anfangs der Woche war es ziemlich kalt und die Ladys haben die Blätter hängen lassen (6grad)
Ende der Woche ist es endlich Warm geworden und sie stehen wieder prächtig da, vereinzelt hab ich Löcher von kleinen Heuschrecken aber noch nicht all zuschlimm.
Ich habe auch die Calmag Menge erhöht da leichte Mangelerscheinungen zusehen waren.
Die Ladys wachsen und gedeihen sehrgut
#1 100cm
#2 120cm
#3 158cm

Processing
Likes
11
Share


@DesDeGrower
Follow
It’s the time....Luke is now ready to finish his training.
He changed location to much bigger and taller tent for his flowering period.
Everything under MarsHydro TS3000 light 💡
Before switching to 12/12 got quick defoliation and transplanted to final 30l pot 🤘
Tomorrow getting his trellis net #
Keep it locked and stay tuned!
😎🤘
Couldn’t resist and managed to put trellis in place before sleep 😎
🚨 —-> second plant (one on left side) is LemonWalker OG as well from DNA Genetics started in same time as Skywalker. There was some issues with it on early veg stages and to be honest I was almost sure she will not make it.....surprise, surprise as you can see recovered to the point where I decided to switch her to flower and see what she will bring 😉
Day6 update
Girls going both strong 💪 We can see first flowers starting to shape.
Second and probably last defoliation today to push all the power into forming tops 🤘
Stay tuned!


Likes
92
Share


@Hou_Stone
Follow
I changed my tent this week, the lamp and the Mars Hydro extractor convinced me that it was good gear so I took the tent in + 😀
Pulling all the branches with ropes is way too much work... I think I'll just pull the 2 main branches down and add a scrog net next week
-----------------------------------------------------------------------------
-Water: tap water (280ppm). I add 0.7g/L of Grow mineral powder and 0.2g/L of Calcium to reach 820ppm and I adjust the ph to 5.8
-Daytime temperature: 29°C
-Night temperature: 25°C
-Humidity: 45-65%
-Lamp: Mars Hydro FC3000. intensity 60% at 40cm from the top leaves
-Room: Mars Hydro 100x100x180cm
-Extractor: Mars hydro 402 CFM Max. power 2/10
-Substrate : 70% coco, 25% perlite, 5% vermiculite.

Likes
25
Share


@pifflestikkz
Follow
Day 15
18/07/24 Thursday
De-chlorinated tap water pH 6 with calmag 5ml -5L.
I have scratched back surface soil, and topped up with canna terra pro and DyNoMyCo ✌️💚
Day 16
19/07/24 Friday
Lite Feed today, 250ml each pot small run off.
Seeing excellent start to these babies. Let's get it 👌💚
Day 18
21/07/24 Sunday
De-chlorinated tap water pH 6 with calmag 5ml to 5L.
Watering in 1L each day from now.
Updated video
Day 19
22/07/24 Monday
Nothing new to report. Starting to see them beautiful fans appear that's all 😁✌️
Day 20
23/07/24 Tuesday
Feed today, giving them straight all nutes Inc flowering nutes.
I will update the dose as they grow and develop a bigger hunger.
Video updates 👌💚
Day 21
25/07/24 Wednesday
END OF WEEK
Still no water or feed since Tuesday, it has been overcast last two days though so not a lot of energy been used.
Still happy and healthy 💪💚


Likes
5
Share


@MotherNaturesSon
Follow
Everything you’d want and expect from
this classic strain. Hybrid lovers need not hesitate getting hold of this strain, or one of the many crosses baring her genetics. Cheers

Likes
12
Share


@AllieO
Follow
2/2: Some of the huge fan leaves had to go. Not even the strongest of tucking would control them. Flowering is officially starting! Trying to rotate to get as much light to bud sites as possible. Excited to see where things go with this one.
2/5: determined that there was a bit of a light burn situation. Decided to pull her from the tens for a good flushing and then rearranged the tent a bit to keep her off to the side a bit.
2/7: she's a big girl. I have her flying solo in the tent for now..

Likes
20
Share

@Brotanical
Follow
Nach ein paar Schwierigkeiten am Haus die nun beseitigt sind geht es nun nahtlos weiter 👍
Diesmal in Blütewoche 3 zum Start gleich mit dem Infrarotmatten Upgrade von Calorique 100x50cm (110w) in Verbindung mit Thermostat das nach Feintuning nun gut eingestellt ist was man auch direkt am Durst der Damen merkt 😁🤚
Es geht mit Blühkomplex von hesi weiter und teilweise auch mit Alfa Boost bei Bedarf natürlich pH angepasst
Und der kleinen Reihe an Plagron zusätzen wie zum Beispiel CalMag
Es wird bald radikal entlaubt(für meine Verhältnisse 😄)und auch kleine Triebe werden weichen müssen da ich es versuchen werde flach zu halten und das Scrognetz als Stütze nutzen werde/möchte 🌝 die Mutti wurde aussortiert aber ihr geht's gut in ihrem eigenen "space"
Die infrarotmatte steht mit einem von mir angefertigtem Lattenrost🤫😄 in dem 120er Zelt naturbelassen Fichte unkompliziert aber für die Wärmeverteilung und erhalt super 👍 ( der Geruch erinnert etwas an die alte NDL Zeit/Hitze im guten Sinne haha. Die LEDs laufen mit etwa 500ppfd gleichmäßig auf beiden Seiten und werden die nächsten Wochen langsam nach oben geschraubt 💫.
Es geht entspannt weiter bis dahin 🌱👍?
Liebe Grüße 🌿

Likes
57
Share


@Coopmc
Follow
Testing 9 seeds I expeckt 2 winners 2 losers and 5 ok let’s see how she rolls!
The plant the seeds and pollen cam from a seedling I grew from a seed found in a Bag of SFV that J was given 3 of I back crosses the best with itself !!
3 up already!!
6 playing peekaboo
7 of 9 up 2-3 look hands down better plants !!
8 out of 9 up!
9 up 3 losers and 6 to chose a few winners from!!
9 seams to be good number to ensure I find one exception copy usually 2-3
First cut down to the too3 all 9 did germinate!!
The three look strong
Likes
78
Share


@Roberts
Follow
Pure Ice cream is doing great under the Spider Farmer G5000/UVR40 lights, in the Athena blended line nutrition. She got a solution change a few days ago to blooming nutes. Nothing special to report. Thank you Spider Farmer, Athena, and Pure Instinto Seeds. 🤜🏻🤛🏻🌱🌱🌱
Thank you grow diaries community for the 👇likes👇, follows, comments, and subscriptions on my YouTube channel👇. ❄️🌱🍻
Happy Growing 🌱🌱🌱
https://youtube.com/channel/UCAhN7yRzWLpcaRHhMIQ7X4g
Spider Farmer Official Website Links:
US&Worldwide: https://www.spider-farmer.com
CA: https://spiderfarmer.ca
UK: https://spiderfarmer.co.uk
EU: https://spiderfarmer.eu
AU: https://spiderfarmer.com.au
G5000 Light Amazon Link:
amzn.to/4643esa
UVR 40:
https://www.amazon.com/dp/B0BR7SGTHS
Discount code: saveurcash (Stackable)

Likes
7
Share


@Boomer911
Follow
Zkittles by Fast Buds Diary
Care Routine:
Watering: Every 2 days with SST (Sprouted Seed Tea) and a mild root stimulant. 💧
Nutrients: Adding Jungle Juice Grow (1ml) to the waterings. 🌱
Environment: Full day in 5-liter pots, 24 hours outside, receiving around 12 hours of indirect/direct sunlight. ☀️
Observations:
Growth: First serrated leaves have emerged, showing healthy growth. 🍃
Strength: Plants are showing decent strength for their size, instilling confidence. 🌿
Health: Plants are healthy and robust, showing promising growth for this stage. 🌿
Outdoor Transition: These plants are now fully outdoor, ready to be warriors of the unknown. 🏞️ Sorry ladies .
Description: Zkittles by Fast Buds is an autoflowering strain known for its delicious fruity flavor and potent effects. It offers a well-balanced high, combining relaxation with uplifting euphoria. 🌈🍬
Likes
4
Share


@Angelgrows
Follow
She is smelling so strong and stacking nicely, the buds are dense and super shiny and covered in tricombs. So far there’s more cloudy than clear but no Amber yet will keep y’all updated :)


Likes
10
Share


@Cr4zyElite
Follow
Ninth Week / 04.07.24 - 10.07.24
Week 9 was smooth with no major issues—everything’s going great! 🌿 Whenever the sun was shining, I took the opportunity to put the plants out on the balcony for some direct sunlight. ☀️
Kept up with the 18-hour light schedule indoors and continued watering every three days. 🌱💧
The plants are looking healthy and vibrant, making steady progress in their growth and development. Loving this journey! 🚀🌼

Likes
14
Share


@BLAZED
Follow
Week 11 (26-9 to 2-10)
26-9
Temperature: 26.5 degrees (lights on) 19.8 degrees (lights off)
Humidity: 70% (highest) 50% (lowest)
Watering: None.
27-9
Temperature: 26.4 degrees (lights on) 20.2 degrees (lights off)
Humidity: 82% (highest) 56% (lowest)
Watering: 1500 ml. PH 6.4 EC: 1.7 (with Hybrids & PK+)
28-9
Temperature: 26.2 degrees (lights on) 21.2 degrees (lights off)
Humidity: 74% (highest) 57% (lowest)
Watering: 1100 ml. PH 6.5 EC: 0.6 (without Hybrids & PK+)
29-9
Temperature: 26.8 degrees (lights on) 21.2 degrees (lights off)
Humidity: 92% (highest) 59% (lowest)
Watering: 800 ml with Hybrids & PK+ and 1000 ml without Hybrids & PK+
PH 6.4 EC: 0.6/1.7
30-9
Temperature: 28.6 degrees (lights on) 21.1 degrees (lights off)
Humidity: 81% (highest) 56% (lowest)
Watering: None.
I set the light to 85% strength, with a distance of 30 cm (highest tops) LUX: 20.400 / 26.200
1-10
Temperature: 28.4 degrees (lights on) 19.9 degrees (lights off)
Humidity: 77% (highest) 55% (lowest)
Watering: 1000 ml. PH 6.5 EC: 0.6 (without Hybrids & PK+)
2-10
Temperature: 28.7 degrees (lights on) 20.5 degrees (lights off)
Humidity: 88% (highest) 60% (lowest)
Watering: 1000 ml. PH 6.5 EC: 0.6 (without Hybrids & PK+)
Likes
8
Share


@Skinnytalls420
Follow
Day 26-21/05/22 everything looking good most of them going into flower now!!!
Day 29-24/05/22 all looking good!!! Gonna start giving bloom nutrients this week.
Day 32-27/05/22 all looking good started to give bloom nutrients. I feel like they should be bigger maybe not?


Likes
10
Share


@StoneyMelony
Follow
Week 11 day 78, you can see buds are really fattening up, some good trichome production as well, The smell is really awesome , sort of a sweet flowerish cannabis smell. All my other plants has grown big as well so there is not many room left. i did some defoliation but you hardly notice.😁 i gave a PK boost again this week also