


Likes
Comments
Share


Likes
Comments
Share

@Texasfarmer210
Follow
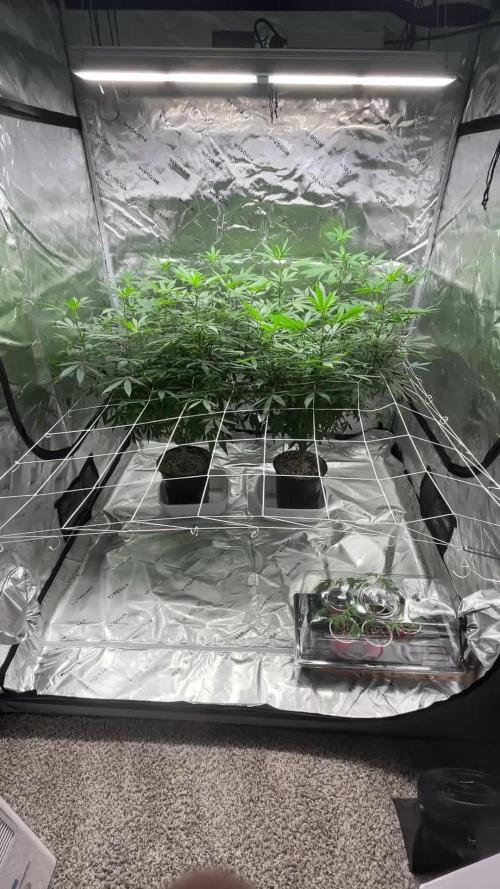
Day 11 of flower🔥🙏🏼 Thank all yall for following it means alot. I’m Curious how these girls are going to bang out!
I’m looking for that sweet Jealousy terp with some gas on the back end!🌊🥇🥇
Likes
42
Share


@JBoBz
Follow
Growing the Original Glue from GG Strain was an honor for me!
I loved this growth, from the first two little leafs to the hervest I was looking at them all the time because of the different structures compared with my previous and present experiences!
I'm glad to share this diary with all of you stoners!
Happy growing to everyone! 💚🦍💚


Likes
2
Share


@Mr_nugs_lover_David
Follow
Her 2nd week was pretty good,she could be a little bigger with a few hours more of sun that's why I moved my plants almost everyday.she looks very healthy let's see how she performs

Likes
21
Share


@BlackDragon22
Follow
Omg. Ha delle tonalità pazzesche. Anche questa bimba ha prodotto delle gemme di prima qualità. Gelide, puzzolenti, compatte e Cremose. La sto appena fumando e anche se deve stagionale, il suo sapore ed odore è pazzesco. Non vedo l'ora che diventi qualcosa di ancora più buono 🙏🏽💣 aspettando con impazienza la stagionatura.. Grazie per essere passati amici, fratelli.
Likes
148
Share


@BioBuds
Follow
Greetings my dear Jungletamers,
So a major surprise came when @MarsHydroLED contacted us and asked if would like to try out their new SP 3000 light. Being a fan of Mars Hydro for years, we of course accepted their offer. We are totally in love with this light. I was when I saw it in another grower's setup and was in awe of its output and results.
So with much pride and thankfulness for the presents the Universe bestowed on us, in the form of MarsHydroLEDS offer and the bountiful harvest of the last grow, (which I am thoroughly enjoying btw, such a great weed to have grown ourselves) we start out on a new adventure that we can't wait to share with you.
With many lessons learned from the previous grow, a mighty producing strain in the form of Expert Seeds Gorilla Glue #4, a.k.a Expert Gorilla's and a tweaked super soil mixture, we are setting out to hopefully get over a gram per watt, preferably 1.5.
The Setup
A 4.5 (140 cm) x 2(70) x 6.2 (200) grow tent, giving me a .98 m2 workspace. This space is customized to my needs.
A standing fan will provide airflow through the whole grow, a top fan will help guide cooler air past my lights onto the grow.
3 56 ltr pots will be the home for the plants when they are 2 weeks old, up to then in smaller jars.
The Light
The leading role and star of the show will be played by the Mars Hydro SP-3000, so kindly provided by MarsHydroLED, which we will test and review here and I might say, endorse.
I'm very careful with who I endorse and support these days, but a company with that many wins in design, I'm talking ever since their first range came out in 2009 these guys have been raising the bar for the whole industry, I did not hesitate to support this leading brand.
If you want to compete with these guys, you better bring some quality AND affordable pricing. Why do I endorse the SP-3000 without ANY hesitation?
It is seriously THE BEST light on the market in this price range and size group. It has an enormously effective output in U/Mol and with 30% less energy waste comparing to older LED lights.
Prove me wrong!
And with a company holding a considerable market share selling thousands of units every month, competing on price and quality, one would think that customer service would suffer. Of course, also Mars Hydro is not perfect, but check the sheer amount of people that not only praise the light but also the service received, should the light somehow not perform up to par. It is this dedication to their customer base that made this company have a fanbase... Yes, a fanbase with a website and a wiki.
So if you are looking to buy new lights, check out the END OF SUMMER OFFER at the Mars-Hydro Global Store on Aliexpress:
https://marshydroled.aliexpress.com/ 👈 Check their offers but also their score, they ship from a warehouse near you so you don't have the extra import fees!! Cut out the middleman and have a deal on these lights!!
At the moment I write this in August 2021, the lights are 408,20 euro when sent from Germany to the rest of Europe, that's 40 euro cheaper than the other Mars outlets, BUT EVEN 60 euros cheaper than ordering at a grow store!!
The Strain:
Experts Seeds - Expert Gorilla feminized regular.
Don’t let the name fool you because Expert Gorilla is suitable for growers of any skill level. However, you do need to be an experienced smoker because Expert Gorilla is one of the most potent strains on the market.
Lineage: Chem Sis x Chocolate Diesel x Sour Dubb
Popularity: Extremely Popular
Flavor/Aroma Profile: Chocolate, Earthy, Fuel
Yield: 400 g/m2
Stress Tolerance: High resistance to disease
Potency: 24% THC
Flowering time: 58 - 63 days
The Soil:
Those who saw my Monstercropped Gelato #33 grow (you should see it if you didn't, I'm so proud of that grow), know about my super soil and organic nutrients/ permaculture tea combo that starred in my previous diary.
Because of the great results, we are going to use the same recipe, adjusted some more with some new ingredients that will complete the mix and give an even more sustained super soil buffer.
20% Atami Bi-grow (very similar to ocean forest)
20% Atami worm castings
20% Atami Coco Coir
10% Hydrocorn
10% Peat powder
1 cup Fossil seaweed chalk
1 cup bonemeal
1 cup bloodmeal
1 cup Microlife
3-4 teaspoons of epsom salt
3 cups of activated biochar (activated with our own permaculture tea)
I just made layers, starting with hydro corn on the bottom to aid airflow/run-off. On this I started layering the coco coir, Bi-grow, peat, castings, and amendments in a way that the more mature the plants get, the more phosphorous and less nitrogen they will find. Every time I made three layers, I would mix them by hand. This way we simulate natural soil, which consists of humic layers, composting plant waste, fungal and microbial life, and nutrients from fossilized sources.
The Nutrients
I will start with just adding 6.4 PH water, although this soil should buffer ph itself and regulate, after 4 weeks, I'll slowly be adding:
- Biobizz Grow
- Plagron Alga Grow
- Biobizz CalMag
- Biobizz Flower
- Plagron Alga Flower
- Biobizz Topmax
- Melasses
The Tea
Some of you might remember the permaculture tea from my previous grow, I have a short video in my harvest page showing how we make it), it will star again in this grow.
- (Rain)water
- Comfrey (whole plants)
- Dandelion leaves
- Roots and leaves from the earlier grow
- Minor periwinkle (Finca minor) is a plant we have in our garden, it contains an alkaloid that is associated with increased brain function but also is a light toxin for wee beasties and other unwanted guests like gnats (who hate it).
- When flowering I add some wood ash to this mix
Thank you for checking in on one of my grows again! Thanks for all the love on my previous grow, check it out if you haven't seen it!!
Hug
Bud

Likes
220
Share


@CRiSPrGrow
Follow
These had a pretty good life. I actually only fed NPK the one time . Germinated them in a Zambeza propagator, i really recommend getting one of those propagators, they're reusable and really take the heat off those first days when you're sweating. Pooped them into their plugs they sprouted out strong, germinated 5 kept 3. transplanted them no problem. Veged these for 4 weeks, then they shot up. during veg they stretched out a bit early on i should have been giving some specialised micro i had on had but for some reason on the other i didnt. They needed extra support for their first three weeks, so i decided to LST them around week 2. Two camping hooks one anchor for the main stem and one to keep the plant down. Once i dialed in my lamp to plant distance they benefitted by slowing down on the stretch a bit. they all took to LST extremely well, bushing out and creating an nice even canopy. They pushedout these thick indica leaves, one of my plants was a lighter colored leaf pheno, the vertafort one. The Six Shooter genetic really stretches, if just off the top of my head it seems that the plants quadrupled in size over an 8 week period, completely eclipsing their neighbours and creating a thick dense canopy throwing shade down below. Each turned into a bush with three or more mains sticking out the top by week 6. IThe results start to look real pro around week 8. Before that though I hadn't been defoliating. This and simple lack of light means that I had loads of undevellopped colas. If I'm honest I should have tried to harvest in stages but by colas. Anyway these kind of grew like a gorilla glue but with much different and much better flower structure. The plants started pushing out flowers and pistils and preflowers etc early, but then took a while to gear up towards towards getting fat. The flower branch out in a spiral pattern up and down the main and secondary colas evenly, creating this misssile shaped colas, but they branch out once sometimes twice, which means less branch to nug ratio than a gorrilla glue by a full multiple. They started smelling like lemons around the time they were fattening up. Then they started getting buff, really little by little, what did rippen rippened evenly. Some colas was basically waste especially the colas stuck on the sides of the tent and some of the colas where for some reason or another there was no light there due to the dense canopy. Truly a BEAST OF A PLANT, HIGH POTENTIAL, great BRANCHING, if you look carefully each plant has more than a dozen colas,
Timed it so the harvest was on a day the plants were chock full for plain water after ten day's worth of additive aided flushing. hung to dry slowly in the tent, got it around 55RH inside the buds over 12 days then trimmed and jarred in miron glass with boveda 62. The trim was a great experience, took a while but not that long because the flowers were so nice in the way they are. you do have to trim every sugar leaf one by one though if you're doing it by hand, broke these sizzors that @Mrs_Larimar sent me because of the resin lol. so I pull these plants out my tent and I just kinda look at them and they're basically dark green because of all the sugar leafs, i'm thinking to myself "shit i messed up this isnt even that frosty". well, what i found out is every time i clipped one of those trademark long sugar leafs off it revealed absolutely resious white frost. That's what can keep someone motivated. ! Once jared, if there's boveda in your jar, you dont really need to burp it daily, or even weekly i just let it sit there, obviously i've been smoking it and following the cure, let me tell you this one needs longer to cure than you're used to maybe, at least two more weeks of cure after a slow dry. Four weeks after the chop , it's a strong weed !
Didn't smell all that loud, but I have a 1300M3/H exhaust so... i'm not surprised. I will say though that my neihbour said she could smell weed even when I wasnt home and she could smell weed in the corridor, from the times I was trimming and basically every time I open my jar. Gonna need a new carbon filter for the next grow. I retired my lightbulb too. Hard to put my finger on the taste because the smoke is so smooth, and when i saw GD had a tag for Woody, i knew right away this was that taste i felt. I will say this though, cure this correctly, dont rush, dry it real slow, then cure it, citrussy tastes, usually those will evaporate, leaving this distinguished terpene heavy hitter much better tasting. So what can i tell you, this weed is white weed, so frosty. Bag appeal is great too, this strain pushes out pistills like no other, maybe even more than the gorilla glue. that means this is a chill weed right? One of the phenos I grew had more pistils than the other two. Mr. B's did, but i dont know if you can really tell from the close ups, i'll try to put some more pictures up. I got two maybe three phenotypes in terms of taste. Mr. B’s is much pine-ier than the others, and when the joint goes out and you light it again, it’s even more piney … I’m actually really happy about that reminds me of white rhino from the east coast back in the day but way piney-ier than that even. When you smoke the other phenos the smell is incense and the taste is really really smooth & woody. Sometimes I find different after tastes on the exhale like coffee, pepper, and maybe sweet/fruity sometimes too depends on the pheno I'm toking on. It is LOUD THOUGH, always have a spare filter on hand IT’S NOT WORTH IT get it !
Well at the end of my first grow, i'd like to quickly review all of Bulbi's own :
Bulbi"s Own Early VegMicro: Fine green powder with calcium and all the rare metals in it. I didnt use it ! Damn, next time I'll amend my soil with it like i did this time on the FBT1
Bulbi's Own Cal Mag : Organic fine white powder with calcium and magnesium, i used it in the feed and sometimes as a spray. I didnt know how much to put in because these things dont come with instructions so i ended up putting 1/4 doses most of time. The correct amount should have been 2.5G/L.
Bulbi's Own Flower Micro : Organic fine beige powder that I used mixed in with the sulfur. I think this one's a keeper, really helped my plants make it through the stress of bottom feeding and all that heat.
Bulbi's Own Mag Sulfur : Organic fine red powder that I used mixed in with the Flower Micro I used this one in my spray too , to great effect, in my opinion
Bulbi's Own Beneficials Trio : This was the base beneficials mix I had, you need to put 7.5 to 15g/l , watch out for clumps, use at the night fall, or when still dark.
Bulbi's Own Anti Afid : I threw it in there i think just in time to protect my plants when I intentionally overwatered when I went on my trip. There were some white flies that emerged, because... well that's what they do isnt it. but there were just a few of them and they ended up flying around wierdly, and within four days, no more white flies, didnt even use yellow sticky tape ! You mix this one with the trio for even more effect. I used these in a spray I think , also.
Bulbi's own Anti-Worm : This one is more directed against larvae, and can be combined with the base trio. I was weary of using it, but I'm glad i did to give my soil matrix that full spectrum of biological protection.
Bulbi's own Humic Acid : This one i loved, looking back I'm regretful not having used it more. the dry humic acid is a great experience, the quality of it was impressive, clumps would seperated into more clumps ad infitum the feed slowly turning completely ink black. definituely using this once a week from now on
Bulbi's own Amino Acids : this one is just amino acids, maybe next time I'll use it at the same time as the humic acid, but I'm not 100% on that. What i did do was spray the top layer of the soil with amino acids when I accidently ran into some issues from spraying kelp all over the place. So in that sense it's an absolute life saver and a must to have on hand.
Bulbi's Own Kelp Extract Concentrate. Loved this one too haha, so thick, and green, check out the video of when i pour it lol. Worked great, raises the pH some so be careful, i used this one as a sprat aswell to get those plant growth hormones pumping during the seeding and veg stage.
Bulbi's Own CO2 : well part of what I set out to do was to test the CO2 theory. Like roots do absorb CO2 but at a lower efficiency than leaves say 15% vs. 85% the theory being enriching your water or feed with CO2 would ultimately benefit the plant. So i enriched water with these ceramic based co2 tablets, because CO2 is a soluble gas, it stays in water. Then i fed the plants in this manner in the feed and also as a spray. The idea behind that was that co2 enriched water would come in direct contact with the plant allowing for absorption of some quantity of CO2 through the leafs. Someone explained to me that these are actually old school techniques. Well I know i started late and didnt follow a regular schedule like i wished for but the plants didn t die, or show any immediate negative upon innoculation, so what can I say? I'm doing this again, perhaps. Only problem is that these things are really a pain to pH correctly
General Hydroponics Dry pH Down : GREAT PRODUCT, hard to find but amazing – not registed on GD for some reason
I still have to make my bubble hash so any advice welcome ! 🚀
Likes
13
Share


@blazinjungle
Follow
5 goirilla glue #4 seeds from Expert seeds. All beans popped , in height order on the pic . currently Under 2 t5s , will transfer to 4" inch rockwoo cubes as roots appear . Just phd water at the moment
Processing
Likes
7
Share


@Cannibalgardens
Follow
Honestly the genetics are always good here from @fastbuds .. not much is changing just getting thicker colas cannot water till the end gets here ready to hard l
Likes
25
Share

@German_GrowLab
Follow
Einen wunderschönen guten Tag, liebe Grow-Community, und herzlich willkommen zur 14. Woche meines kleinen Outdoorprojekts!
Diese letzte Woche ging es den Damen an den Kragen …
Da die Kleinen in letzter Zeit doch ordentlich an Pflanzenmasse zugelegt hatten und das Wetter in Kombination mit zu dichtem Blattwerk ein erhöhtes Pilzrisiko birgt, habe ich mir die Schere geschnappt und die Pflänzchen ordentlich ausgedünnt. Ich bin hierbei relativ radikal vorgegangen (nach dem Prinzip „Viel hilft viel“). Das hat mehrere Gründe: Einerseits bin ich kein Fan von diesen ganzen Popcornnug-Geschichten (sowohl qualitativ als auch vom Trimaufwand her). Ich stelle die Qualität immer über die Quantität und so gewährleiste ich, dass die Haupttriebe die gesamte Energie erhalten und optimal performen können. Des Weiteren gewährte ich so eine deutlich bessere Luftzirkulation und vermeide ein unnötiges Überlappen der Blätter, welche wiederum Kondenswasser einfangen und somit ein optimales Klima für Pathogene bilden. Und last but not least darf ich ja eh nur meine 50 g/Person ernten.😇
Beim sogenannten „Lollipopping“ verwende ich eine frisch sterilisierte Schere, welche ich nach jeder Pflanze neu reinige, um eine mögliche Kreuzkontaminierung zu vermeiden.
Vor diesem Eingriff habe ich den Pflanzen noch eine Stärkung verabreicht, um sie auf den kommenden abiotischen Stress (nicht durch Lebewesen erzeugter Stress) vorzubereiten. Hier kam wieder mein noch nicht so altbewährter Biostimulator ins Spiel. Dieses Mal allerdings in Kombination mit einem Komposttee. Dieser hat den Vorteil, dass er den Gasaustausch der Pflanze fördert (,,ein lebenswichtiger Prozess, bei dem Sauerstoff (O₂), Kohlenstoffdioxid (CO₂) und Wasserdampf mit der Umgebung ausgetauscht werden“), indem sich die Mikroorganismen um die Spaltöffnung (Stomata) ansiedeln und diese sich schneller öffnet und schließt.
Wichtig ist hierbei noch zu erwähnen, dass sich die meisten Stomata auf der Blattunterseite befinden, diese also ebenfalls besprüht werden sollte. Und da wir Bakterien ausbringen, ist es von Bedeutung, mit großen Tropfen und wenig Druck zu arbeiten und die Pflanze möglichst nass zu machen.
Jetzt hoffe ich nur noch, dass das Wetter wieder mitspielt und wir gesund und vital in die Blüte übergehen können.
Und zum Schluss noch das altgewohnte Gequengel: Grow Diaries hat mir aus irgendwelchen Gründen meine Views gedrittelt (vielleicht wegen der Kritik im letzten Bericht)😁. Bisschen ärgerlich, aber ich mache es ja nicht für den Fame.😂
Das war’s für diese Woche. Euch noch einen schönen Restsonntag.
Peace


Likes
16
Share


@Mospeada
Follow
Beginning of week 7 in flower, only two more weeks left if they ripen like they did last time. Plants are beginning to smell, develop triches and fattening up. They're not going to get any taller but compared to my first grow they're double in size. It's getting really intense. I'm in there every day checking humidity (on the no defol side) and I'm starting to struggle keeping up with the feed. During lights off I've found the plants eat the most food. I topped up the res, added 25% more PK. I try to keep the plants at 700 ppm and in the space of four hours it dropped to 600 ppm (towards the end of lights off). I stopped directly loading with Calcium Nitrate and instead used a regular calmag. I'm about to go overboard with Calcium Nitrate again and bump the ppm up to 1k. Will see how far the ppm drops the next day.
17/02/20 Update: The plants are beginning to smell a lot more, it has that kind of fermenting pungent smell from a red paw paw but applied to a mango. Very sweet, it literally smells like I'm growing some kind of tropical fruit. Still struggling with the feed, I added close to 40g of calcium nitrate and the plants still dropped the ppm lower than when I boosted it. I find it really frustrating that Dual Fuel only sell as a pair. Part 2 is amazing for late flower. Potassium sulphate and Magnesium sulphate, it's the perfect PK boost and I don't know anyone other nutrient like it. The other PK boosters always have too much P.
18/02/20 Update: Still battling my plants and the efforts to keep up with them is still frustrating me. Ran out of potassium Sulphate and bought Bio Diesel Rhino K 0-0-15 as a substitute, talk about expensive but I was desperate.
19/02/20 Update: Uploaded how I pump calcium into my plants this late into flower. They eat more than what I showed daily. That's 100+ ppm of Ca everyday! I don't know how much pectin this plant has now but the Brix would have to be through the roof compared to my first grow.
20/02/20 Update: finally got the feed right for a twelve hour period. I'm using two times the amount of K any bloom booster recommends and I'm probably using ten times the amount of calcium easily. I'm also going to feed as minimal N from now on, I'd cut it out completely if I could but I rely on Micros for the macro nutrients. Spent $65 on that bottle of potash and I used a third of a bottle for one nutrient change, think I'll stick to using powered water soluble potassium sulfate. My main concern is that I won't be providing enough iron with the little Micro I'm giving it. Going to throw a couple of rustry nails into the res. I'm about to do a top up...dropping the Micro super low, putting minimal part 2 in. Along with all the fulvics, humics, kelp and other acids my ppm only sits at 244. Which gives me plenty of room to load up on calcium. Top up the mag cause what was in the part 2 wasn't enough then load K.
21/02/20 Update: The plants finally stalled and took a breather yesterday. Didn't upload any photos cause it looked the same as the day before. By the end of the evening it looked like the explosive growth started back up again and the photos from today will show it. The ppm was creeping up not down this time...finally over feeding them. Dropped the extra loading of calcium and potassium to regular bloom phase levels and bumped the chelators up instead.
Update 22/02/20: plants aren't eating what they were. Ppm is remaining stable at 800. I won't dilute the res just yet. Still holding off to see if it goes up again. If it goes down I'll refeed the same formula as last time that has reduced calcium and potassium.
Likes
14
Share


@Smile_gan
Follow
All, Still just watering only.All looking slow growing. Pineapple express quite a small and short.


Likes
3
Share


@Earthsower
Follow
She suffered with under watering practices and heat stress no doubt but seems to be stabilising with no further deterioration. Double Kush Cake Feminized is come to the end of her growth spurt reaching 60cm her gaps aren’t filled and won’t likely be filled with due to the stress she was under! From now until the end the lady will be fed sparingly every five days with 1500ml of nutrients and npk

Likes
18
Share


@Sabac
Follow
Plantitas sanitas.
2 semana de flora y van creciendo muy bien.
Hoy les Hice defoliacion..


Likes
17
Share


@HowtoBubatz
Follow
The plants are thriving in their 4th week of flowering, and I couldn’t be happier with their progress! 🌟
Adjusting the nutrient mix for the coco substrate has really paid off, and both plants are responding beautifully.
The trichome production is impressive on both, but interestingly, the plant without LST is slightly ahead in development compared to the LST variant. 🌿💨
The buds are forming nicely, and there’s already a noticeable aroma in the grow space. It’s predominantly sweet, with hints of something deeper starting to come through. 🍭✨
So far, everything is looking on track, and I can’t wait to see how they progress in the coming weeks!💚💚💚
Likes
6
Share


@Krautbauern
Follow
she is doing good but more leafs than my fastbuds plants… we‘re excited for the last weeks
Likes
2
Share


@Kali_DC
Follow
Run off testing
Peach Sherbert OG - ph 7.1 / ppm 2800
Peach Sherbert OG #2 - ph 7.1 / ppm 2100
Mimosa x Orange Punch - ph 6.9 / ppm 3250
Mimosa x Orange Punch #2 - ph 7.1 / ppm 3700
Permanent Marker Auto - ph 6.8 / ppm 3750
Permanent Marker Auto #2 - ph 6.7 / ppm 4300
Glookies Auto - ph 6.7 / ppm 2000
Glookies Auto #2 - ph 7.0 / ppm 2500


Likes
26
Share


@Sickone
Follow
Die 1. Pflanze wurde am Tag 68. geerntet da viele Blätter aufgrund des zu nahen lampenabstand gelitten haben und ich mir unsicher war ob es klug ist sie noch länger zu ziehen.
Gesagt getan die Pflanze wurde geerntet und kopfüber in den Schrank gehangen. Gute 7 Tage später habe ich sie weiter verarbeitet ( Getrimmt ) und die fertigen Blüten ab in die Gläser zum Aushärten gegeben.
Smoke Bericht folgt sobald alles fertig ist.

Likes
44
Share


@TragicTerps
Follow
I mean freaking 23 weeks... never again for shits and giggles.
For a reveg it's a success. From potential 2g dried to maybe 14g is a good change.
We will see the end result either way we got a few weeks left let's finish flushing her and getting ready for harvest!
