
Likes
Comments
Share


@Skunkiest_bender39
Follow
Umzug hat geholfen, gehen endlich gut weiter voran mit denBlütenständen.

Likes
145
Share


@Salokin
Follow
Hey Growmies,
All three of the ladies are developing as they should. Introduced sugar Royal to the mix, so far don’t see a difference, but the plants appear overall very healthy. Increased the ppfd to 269-300 as they grow larger.
Here is the code that’ll give you 20% in Zamnesia‘s online store, just input ZAMMIGD2023 at checkout.
Thanks for stepping by and until next week!

Processing
Likes
100
Share


@TheFairyBudMother
Follow
Gradually ramped light down from 18 hours to 12 after power outages due to the fire, and it was about good time to flip anyway.
It is so much easier to control temperature during the winter in my space. The lights keep the space at a pretty steady 74 F.
I only popped two seeds but these are very consistent plants. One was transplanted to a bigger pot a week later and was slightly smaller. Lots of buds forming! They aren’t super fussy about nutrients—still,I haven’t pushed PPM and am keeping Ph in the 6-6.8 range.
I’m using peony rings as support and to spread a little but I am not training for a perfectly flat canopy as I had excellent popcorn nugs in my last grow even with the lights over 2x further than optimal.
Defoliated the lower branches but I am not defoliating aggressively, but will continue to remove any withering leaves.
Sorry for the slow updates. The fire has been pretty traumatic for my city and myself, and I’m just getting back to normal life. My home, family and pets are safe, and the fire is mostly contained.
Thank you for checking out my diary. Happy holidays and I hope Santa Ja brings you a giant tree!

Likes
78
Share


@Hou_Stone
Follow
🍌Germination went very well, here I am with 5 seedlings of Banana Krumble , I will continue the adventure with 4 of them. 🌴 I can't wait to see what they have to offer me. Big tasty buds I hope🍌😁
After a short week of growth I place my seedlings in their final 7Liters pot with a mixture that I made. I use unfertilized soil as a base.🌱
And I add organic nutrients from GreenHouseFeeding that I mix at the top of the pot (35Grams BioGrow 14Grams Biobloom).
Then I water each pot with 1L of water.💧
I use tap water. I lower the pH and sometimes add a little BioEnhancer😘
My Instagram 🌱❤️️ :
https://www.instagram.com/hou_stone420/
------------------------------------------
Equipment used :
Light FC3000 Mars hydro. power 25% at 30cm
Extractor 6 inch Mars Hydro. power 1/10. ON 24/24h
No other fan this week
Heating mat Romberg 95x95cm. ON half an hour every hour
👌
☄️🌠🌠🌠🌟
Have a nice day buddies, thanks for your visit 🙏👋

Likes
4
Share


@Leonardo_DaGrower
Follow
First feeding of the week was a light 300ppm and the rest RO.
Death week two is going well. She is eating up what is left over in the leaves giving me confidence of a good flush. Last grow she was bright green on harvest and incredibly hard to smoke without a long cure.
I can’t be fooled by amber trichomes, because of last weeks heat problem. The leaves are full of amber but I’m still seeing some clear. Last week countdown right on cue.
Lights reduced to 90% on the last day.

Likes
41
Share


@TheBulldozerSicily
Follow
Nel frattempo che i semi Germinavano, ho pulito e disinfettato la box, ci é voluto più di un giorno, tra lavare l'argilla e lasciarla in ammollo con acqua e cloro, a pulire tutti gli accessori singolarmente e le pareti della box.
Bene, adesso siamo pronti per un altro ciclo!!!
Likes
17
Share


@AmokNewb
Follow
So where to begin I got 108.83 ounces wet from two plants in a 2.3x2.3 on my first attempt not including larf. I can’t complain about that. Took me 14 hours to trim the last plant and boy that was a marathon.
I will update this once I get some dry weights and everything goes into curing.

Likes
4
Share


@Autower
Follow
Another day another week and coming along nicely only difference this week is I have started pumping some overdrive through them now seems as it’s week 6 flower. 2 weeks on that then hopefully ready for a flush with pure water and a few days dark then harvest time. I’ve got a feeling the papaya is going to be ready before the cookies waiting for.my microscope for my phone to come then will update with some pictures of the trichomes.


Likes
12
Share

@Chubbs
Follow
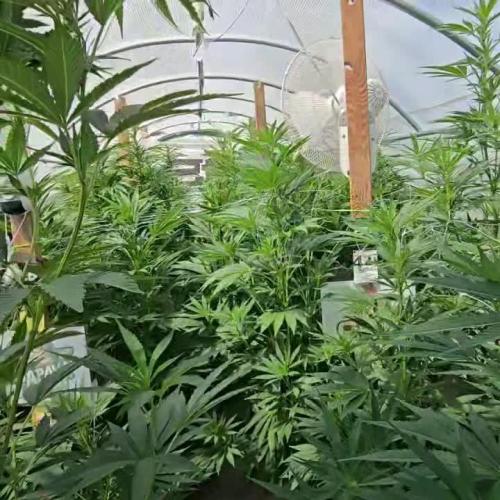
Wow, another week done. It's become an absolute jungle in my greenhouse. A few of the GG4/Sherbets tops had to be mainlined since they're hitting the top of the greenhouse at 7ft8in tall. The smell is definitely getting stronger every day and it goes from super pungent, to sweet, to almost tropical. They're all still looking nice and healthy. The Athena Blended Line works wonders with my well water as the plants couldn't be happier.
All in all Happy Growing.
Likes
26
Share


@420DeepGrow
Follow
Gracias al equipo de Seedsman y XpertNutrients sin ellos esto no sería posible.
💐🍁 Bubba Cheescake:
Bubba Cheesecake es un cruce de Bubba Kush anterior al 98 con Cheese Cake (Wedding Cake x Exodus Cheese). Se trata de un híbrido 70% índica con muy buenos rendimientos, alto en THC y bajo en CBD. Bubba Cheesecake prospera en interiores y exteriores. En interior se aconseja un corto periodo de crecimiento vegetativo debido a la cantidad de estiramiento que presentan las plantas. Las plantas pueden crecer hasta una altura de 250 a 350 cm. cuando se deja crecer naturalmente al aire libre. En interior, la floración dura entre 60 y 65 días, con rendimientos entre buenos y altos, de 400 a 550 gr/m2. Las plantas de exterior son capaces de producir entre 700 - 800 gr. peso seco. En las latitudes norteñas, en exterior, los productores pueden esperar cosechar a principios de octubre. Los cogollos son grandes y duros como piedras. Las plantas maduras muestran atractivos colores púrpuras y azules y brillan con una resina pegajosa que cubrirá las manos del cultivador si no tiene cuidado. El componente Wedding Cake agrega dulzura al sabor del regaliz y el aroma es terroso y musgoso. La producción de THC es muy alta con un nivel bajo de CBD. El efecto es intensamente narcótico, fuerte y duradero.
🌻🚀 Consigue aqui tus semillas:
🍣🍦🌴 Xpert Nutrients es una empresa especializada en la producción y comercialización de fertilizantes líquidos y tierras, que garantizan excelentes cosechas y un crecimiento activo para sus plantas durante todas las fases de cultivo.
Consigue aqui tus Nutrientes:
https://xpertnutrients.com/es/shop/
📆 Semana 9:
No ha sido una gran semana respecto al tiempo pero el incremento de nutrientes le ha venido muy bien
Continuo con la dosis recomendada por el fabricante.

Processing
Likes
7
Share


@gablmo
Follow
Finally flower. They are 4 feet now. What am I going to do? I don't want them to burn into the light.

Likes
56
Share


@nonick123
Follow
Día 22 (11/11) Las plantas muestran pequeños puntos / zonas marrones pero... Don't panic! It's Organic!
Dejaré que el proceso del Super Soil de BioTabs siga su camino tal y como indica el manual de BioTabs!
Ajusto LST a CBD Auto 20:1 #2 aplicando una nueva atadura a la punta, que ya se estiraba hacia arriba 24 horas después! 💥😍
La idea es NO aplicar más LST y dejarla que crezca de forma natural a partir de ahora
Tal vez solo ir recolocando las ramas laterales para que no crezcan demasiado juntas, porque no quiero estresarla y que ralentice su crecimiento...
Día 23 (12/11) Subo a DLI 40
Pequeños ajustes de LST en las ramas laterales a CBD Auto 20:1 #2 para crear una estructura homogenea
No voy a volver a aplicar LST a la punta, voy a dejar que crezca de forma "natural" a partir de ahora
El resto de plantas están creciendo muy bien!
Riego con 750 ml H2O RO a CBD Auto 20:1 #2. El resto no necesitan riego
Día 24 (13/11) Riego todas las plantas con 750 ml H2O RO
CBD Auto 20:1 #2 se muestra sedienta y vuelve a necesitar 750 ml de H20 RO tras solo 24 horas desde el último riego!
Día 25 (14/11) Pequeños ajustes de LST en CBD Auto 20:1 #2
Parece que los puntos / zonas marrones se aceleran en todas las plantas excepto en CBD Auto 20:1 #1...
Día 26 (15/11) LSD-25 Auto & OG Kush Auto empiezan a mostrar muchas zonas marrones y las hojas inferiores se empiezan a retorcer...
Día 27 (16/11) Riego con 1 litro de H2O RO
El area técnica de BioTabs me confirma que lo que muestra las plantas es una quema de nutrientes... 😢
Su recomendación es regar SÓLO con agua la siguiente semana (hasta el día 35 por lo menos)
Día 28 (17/11) LSD-25 Auto & OG Kush Auto se muestran muy afectadas por la quema de nutrientes... Una pena porque estaban creciendo muy bien hasta ahora...
Después de hablar con BioTabs, parece que el error ha sido aplicar el Boom Boom Spray demasiado temprano (en día 21) cuando las plantas tenían suficiente nutrientes y acababa de añadir la 2ª (y ultima) Tab al sustrato...
Tengo que seguir aprendiendo que con el SuperSoil: MENOS ES MÁS, MENOS ES MÁS!
A seguir regando SOLO con agua los próximos días...
CBD Auto 20:1 #2 todavia no muestra el sexo (pre-flores)... es algo extraño...
💦Nutrients by Bio Tabs - www.biotabs.nl/en/
🌱Substrate PRO-MIX HP BACILLUS + MYCORRHIZAE - www.pthorticulture.com/en-us/products/pro-mix-hp-biofungicide-plus-mycorrhizae
"GDBT420" 15% DISCOUNT code for the BIOTABS Webshop https://biotabs.nl/en/shop/
Likes
12
Share


@ThatoneAKguy
Follow
Today marks almost 5 weeks since germination and I thought that the damaged plant had recovered enough to make the journey the rest of the way home. I’m looking at other people’s phenos of this strain they can have quite a bit of stretch and given that I have another project up and going it was time to turn them to flower. I’d like to see the 36”+ stretch that I’ve seen out of others that would make these quite the specimens

Likes
9
Share


@pzwags420
Follow
At the end of week 6 the buds are bulking up and the trichomes are going milky with red hairs pulling in will wait for more amber trichs before harvest which I anticipate around week 8-10.


Likes
14
Share


@Naujas
Follow
Well, I was forced to change the light schedule to 12/12. And the girl doesn't really like it, there are 2 ladies growing in the tent, one of them is a photo (I always thought it was an autoflower), but it turned out to be a photo, and I have to change the time, which the mimosa doesn't like, instead of 18 hours of light, it will only get 12 :( but strange spots appeared on the leaves, but not on all of them and it doesn't expand, the flowering is ending, the flowers are filling up every day :) good luck to everyone :).

Likes
18
Share


Likes
10
Share


@brunoazazel
Follow
Dia 49 desde cotiledon, realizamos primera poda apical.
aplicamos tambien una vez por semana NPK, un riego con fertilizantes y otro sin.
la semana que viene ya aplicaremos melaza tambien en el riego. y por otra mezcla los preventivos de insecticida y fungicida.
También aplicamos tierra de diatomeas tanto arriba del sustrato como en las hojas! espolvoreamos y despues rociamos con agua, quedarán las hojas blancas 😝


