


Likes
Comments
Share


@Hempface86
Follow
All right here we are day 100 39 of flower and as expected the buds are not going to be huge I'm thinking thumb size as I stated a few weeks ago it's still got some grown to do so I'm hoping she bulks up.. she smells great and I'm happy with how the canopy came out however I think from now on I'm going to keep the topping to a minimal once maybe twice tops.. thank you Weedseedsexpress for the opportunity to grow your genetics I'm getting excited as strawberry cough has been a long time coming for me.. this plant is one of two that I planted in the same soil and the other one didn't make it because it was used soil with salt based nutrients I say that to say this little girl has really pulled through some tough times and I didn't help any with what I did to her so overall the genetics I would say are extremely stable strong as she had quite the will to live.. I hope everybody is doing well and so are there ladies God bless and happy growing everyone ✌️😎

Likes
73
Share


@Herbz_Unkraut
Follow
1 plant was very ripe, 1 plant was almost perfect to harvest and the 3rd could take another 1-2 weeks...but it was end of 10th week of flower and i had to go on vacation, so i perhaps choped 1 plant abit too early....still awesome result!


Likes
14
Share


@Momgrowsthechronic
Follow
Welcome to Week 1 of the Sweet Seeds Gorilla Girl XL Autoflowering grow courtesy of the fine folks at Sweet Seeds! This is the second of three consecutive grows/diaries that I am doing to showcase the tried and tested genetics from this reputable seed breeder. My last grow was a smashing success so I have high hopes for this grow as well. Nothing much to report for Week #1 although I will mention that the first watering was only 0.7 of a litre per plant (0.18 of a litre per plant per day) and the second was 1.4 litres per plant (0.35 of a litre per plant per day). I am watering on my usual schedule of every fourth day as this seems to be the sweet spot throughout past grows. I am using the usual- air bubbled tap water that is PH’d to around 6.0 and if need be (over the winter months in Canada) warmed to 68-70 degrees prior to hand watering with a small watering can. The seedling that lost one of it’s cotyledon leaves is fine but still a little smaller than her sisters. So now on to Mom’s tip of the week…
Mom’s Tip for Week #1 is- YOU GET WHAT YOU PAY FOR- QUALITY IS KEY!… When considering growing Cannabis, even on a small scale, quality is an important factor in all aspects from the seeds to set up to the supplies used throughout the grow. Starting with seeds from a established breeder will raise the odds considerably in your favour for a successful outcome. Many seed companies are more than willing to ship out freebies while building up their brands which seems attractive to new growers- but use at your own risk! There’s nothing worse than being halfway through a grow and discovering male flowers tucked in amongst the lowest branches or realizing that your beautiful buds have been mysteriously pollinated just weeks before harvest. I know that seeds from a reputable seed breeder are usually more expensive and can be hard to access in certain parts of the world. But purchasing quality seeds from a reputable seed company is the first step towards homegrown Cannabis success. An area that new growers often overlook due to the high price is the quality of crucial components in their set up- including tent, lights, and intake/exhaust fans. Anyone can get away with cheaper pots, oscillating corner fans, water pumps for dechlorination, etc but it’s worth every penny investing into the workhorses of your entire operation. An initial investment of around two thousand dollars will provide serious growers with the longevity and hassle free basics needed. If done right, quality components will pay for themselves within the first 6-12 months of use and continue to serve your needs for 3-5 years to come. Supplies used throughout the grow are the final area where quality is important but somewhat subjective too. Although I’ve already stated that I don’t feel the need to spend big dollars on all the extras (pots, oscillating fans, water pumps for dechlorination, PH/moisture meters, etc- I do believe in doing my homework to make sure that I’m getting the best bang for my buck. I thoroughly research every item purchased and used in my grows by reading customer reviews, speaking with other growers and sometimes even trial and error at my own expense. Making quality an important factor in all aspects of Cannabis cultivation will benefit you, your grows and the planet we live on. 🌳🌎🌳


Likes
38
Share


@Cariboo_OG
Follow
Utopia Haze is a rare heavily sativa dominant hybrid (90% sativa/10% indica) strain created through back crossing Brazilian Sativa strains. This tasty little bud took home 1st Place for Best Sativa in the 2008 High Times’ Cannabis Cup and for good reason – with its potent 18-22% average THC level and long lasting cerebral effects, Utopia Haze is one powerhouse smoke. The Utopia Haze high comes on soon after you finish your first toke, hitting you with a strong cerebral lift that infuses you with a sense of hazy relaxation.
Type: Feminised/Photoperiod
Cultivation: Indoor/Outdoor
Flowering Time (days): 70-75
Indoor Yield (g): Up to 650
Feminised Outdoor Harvest Month: October
Feminised Outdoor Harvest Month Week: 3rd-4th week
Aroma: Citrus, Woody, Pungent, Mint
Effect: Cerebral Lift, Hazy Relaxation, Sleepy
Welcome Everyone to the Final Entry of my Utopia Haze Grow !
There is so much to discuss ! I have been extremely busy as of late trying to get this Harvest together, but i am happy to have it here for you now !
I Seriously under estimated the amount of time, help from others, and my own necessary skills to pull this off.. and i still kind of screwed it up lol !
But its worth noting i have never actually done this before and trying to document it during....was extremely hard.
It is next to impossible to work an iPhone with rubber gloves on !
First I want to discuss everything step by step so before you jump straight into the comments on how the end product is so small in "quantity"
Rest assured i am happy with its"quality"...and thats all that matters to me because Life is a journey not a destination! and i have learned so much from this grow that I couldn't be any happy even if i messed some things up :)
But at the very least I hope you read through this entry in its entirety with an open mind and focus more on the process, rather than just the outcome!
I ran out of Ice & i was only able to wash three times..(normally I've heard you should go sometimes 5-6 washes)
Preparation is Key & things will be much better next round :)
Photos 1-22
These are pretty self explanatory but for those of you just tuning in now.. this is what happens to a very happy plant when you don't have the necessary tools to monitor key components of growing cannabis.. Ph, as well as EC levels play a very key role in the outcome of your grow lol that being said I was just able to save this plant by purchasing both tools but that doesn't mean the plant didn't suffer because of the prior events.. This was a Huge reason behind me choosing to turn this harvest into what i would consider
"Solventless Hash Rosin" from "Ice water extracted Bubble hash".
Pictures 23
The idea here is the process of using "fresh Frozen Cannabis" this has been discussed many a time online on such sites as instagram and here on grow diaries as well.. I personally have Never tried the process so i decided to try it out and make a judgement for myself..
Video 24
The Cannabis has now been in the freezer for 72 hours making it very well frozen.. as you can tell i struggled getting it all into the 25u Screen Wash Bag. One thing of note i would do differently is i will de-stem my next batch as i also believe this played a part in the amount of plant matter that escaped through the sieves.
Photo/Video's 25-28
The idea here is "ice water Seiving" & especially with the bags that I am using here that are only have screen material on the bottom portion of the bag it is very important to have spaces in-between the screens to allow the water to pass directly through the screens into the bottom bucket with the least amount of resistance.. because the hash is so extremely temperature dependant if it gets warm on the side of the bag.. it will stick there and not make it to the bottom to become use able product..
29
You do not need to use as much Ice as i used here lol... the idea is to keep everything very cold..i certainly achieved that but at the sacrifice of using so much that i ended up grinding product and producing "contaminants" but in the end they are just plant matter that i would be smoking when i rolled up my joint either way so.. I'm not super disappointed..
But it should be noted that what you want to achieve here is a Layering effect where you have the wash bag between two small layers of ice while the "water current" washes the Trichomes away allowing them to be separated by the screens setup below :)
Before Starting the machine you should allow some time (i.e.;10-12minutes pre soak to allow the product to become saturated) before the first cycle.
By video 32 I have just ran out of ice lol..
Video 33-34
Here I have a tip for you.. to separate the screens that you sieve through.. cut 5 gallon buckets to stretch them across nice and tight.. it'll make scooping your Bubble that much easier ! i learned this from the many "Frenchy" videos I have watched :)
Picture 35
Here in lays the problem for most people.. drying your hash without loosing vast amounts of "Terpenes" whilst also stay ever vigilant against mold !
Thanks to all those videos I've watched on youtube.. id like to think this was one of my most successful parts of this process..
Things to Note; Terpenes start to seriously evaporate at temperatures 68F or 20C
you need to stay as cold as possible whilst bringing the Relative Humidity in the space down into the 40-30% to stay away from that nasty mold !
I used my cold storage room in the basement.. with a dehumidifier running to keep the space at 45% RH & staying at a constant 15c.
All while spreading the hash as thin as possible across parchment paper, on top of the white screens with a fan moving air across both sides of the paper.
Pictures 36-38
These are some macros i took in the middle of my drying session I fell in love with the colour.
Yes i know the black spots are plant material but they will get caught when i bag the hash & squish the oil out.
Thing to Note; at this stage it is important to ensure you 'micro plane" the hash down as fine as you can whilst staying weary of the temperature... any "chunks" will hold pockets of moisture.. that lead to potential problems..ie; mold ...
Picture/Video 39-41
Successfully planed bubble hash ready to be bagged and Squished !
Picture 42
Ive decided to follow Pedro.. from Pedros Grow Room and double bag to be on the safe side so i don't have any blow outs.
So thats One 25u bag inside one 160u bag ! :)
Pictures 43
This is almost 3 grams of the bubble hash from above, already melting in the bag.. this is where i ran into trouble again lol things started getting to warm in the house and i was only able to get one of the three squish's i did on video :( things started getting sticky.
Picture 44
This is basically just a photo of the equipment I'm using; 3x5 LowTemp Cage in the frame I built myself, with a 20Ton bottle jack.
Something to note here is this is an older Lowtemp model with only a single heating zone which is which i have it closed here heating Both sides of the press :)
As well as the importance of having adequate pressure on your plates.. my rig is very overkill for the size of hash bags..lol
Video 45
Here is the lovely press video.. its didn't quite work the way i wanted either lol my directional folding wasn't quite tight enough for a big "drip" :)
&the Press was set to 65°c
Photo's 46-50 are pretty self explanatory :) I had a blow out.. but still managed to pull an 80% return from the hash once squished...& yes it tasted amazing :)
Was it worth it in the end... that could be debated.. for some..i understand..its not your thing, but for those of us that are interested in making our own concentrates.. free from Solvents...
I wouldn't make it any other way :)
If even ONE of you reading this diary finds it helpful to reference for ANYTHING.....even if its "what not to do" ill consider it a success !
Thanks again for tagging along on this garden adventure.. its been one heck of a journey !
Much Love from B.C. Canada,
Until Next time,
Cariboo

Likes
12
Share


@RoyColt
Follow
Day128 07/04 Defoliation.
Day129 08/04 Defoliation.
Day130 09/04
4lt ro water -20ml Finalpart Terra,
Total 740 ppm , ph 6,4
Drain 500 ml 1150 ppm.
Day131 10/04 Defoliation.
Day132 11/04 Rinseout Day
5 lt ro water -5ml sensi cal mag extra,
Total 200 ppm, ph 6,5
Drain 1300 ml, 750 ppm.👌
Day133 12/04 Defoliation.
Day134 13/04 Rinseout Day
5lt ro water -5ml sensi cal mag extra,
Total 200 ppm, ph 6,5
Drain 1500ml, 550 ppm.
Likes
3
Share


@CanarianGrow92
Follow
Another week of veg for our Fast Version B from super sativa seeds club.
At the beginning of the week we gave some bactrex and orgatrex from biotabs.
The plant is evolving good! Nice and green
Likes
21
Share


@Chubbs
Follow
420 Fastbuds Week 4
Amnesia Zkittlez Auto
How's everyone's grows? Hopefully all is good. This weeks update the girls have transitioned into flower showing preflower sites all over. One has decided to stay super short with the other reaching about 14in tall or so. No big sings of issues besides a few little rust spots showing up. I added 1tsp/gal of some GH Calimagic to help stop that and so far seemed to do the trick. All in all Happy Growing.

Likes
2
Share


@drozdzis
Follow
Plants look strong and healthy.
Average temperature and humidity, no major fluctuations.
Additives: A small dose of Voodoo Juice, 1/4 dose of Cal-Mag.
Likes
37
Share


@Mr_Motalovah
Follow
Hello Growers and Tokers! 👋 👩🌾 🧑🌾.🔥💨
Pretty good week. She's grown a full 10cm this week, new growth is coming up.
She's mainly still filling in space but still stretching.
I'm impressed how fat her stalk is getting and her stems are quite strong, no need for support yet. 💪
I noticed that she is drinking really fast and was a bit limp some days.
So I increased the amount of water a lot this week total of 600ml.
So far I'm constantly adding a little bit more every feed.
Currently feeding 1,5L each, every other day. Will be increasing as they ask for more.
How do they ask for more?
When feeding if the soil is drier than normal I give a 150-200ml increment of water.
I do that until they stop feeding so much then i just maintain that amount.
I start reducing if it takes longer to dry.
That works good for me. The old finger in the dirt trick. 👍
Nothing like knowing exactly what your ladies need first hand.
No particular smell yet. Buds are just starting to form.
Stay tuned for next week's update.
Take care and stay safe!
One love!
Likes
9
Share


@DeepRootsGrowTrees
Follow
TRIPLE G by ROYAL QUEEN SEEDS
Week #16 overall
Week #15 Veg
This week looking good still in veg and dealing with the elements she's a nice dark green color she should start to flower in the next few weeks here. Stay Growing!!!
Royal Queen Seeds TRIPLE G

Likes
65
Share


@Mrs_Larimar
Follow
March, 11th.
The Nicole Kush Seedlings are growing vigor and nicely
I forgot to make Pics of all... But they arte to see in the Video
Tomorrow iam going to do that... Iam setting up another " Babytent" with a new Light
Stay courious
You can have a Sneak -Peak on the new Viparspectra XS-1000,
wich is going to be released on March 15th
March 13th.
Iam done with setting up
Now i have another Babytent. and Inside the New Viparspectra XS-1000
and the other Stuff to run the Envoirement
I already ca see a difference between both Tents. If you stand outside and just look with Eyesight
the Viparspectra seems to be brighter// has another color of Light.
I made a Unboxing Video for more informations.
Amazon: http://url-9.cn/0y9i
Amazon US: https://amzn.to/3e0P2bk
Amazon CA: https://amzn.to/3bTnEJC
Amazon discount Code:
it10mlarimar XS1000 10%
it15mlarimar XS1500 5%
it20mlarimar XS2000 5%
it40mlarimar XS4000 5%


Likes
14
Share

@420DeepGrow
Follow
📆 Semana 10
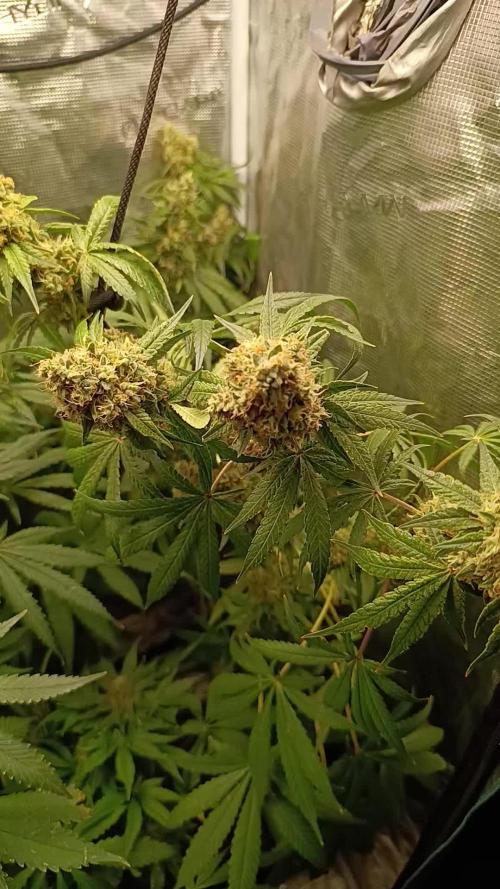
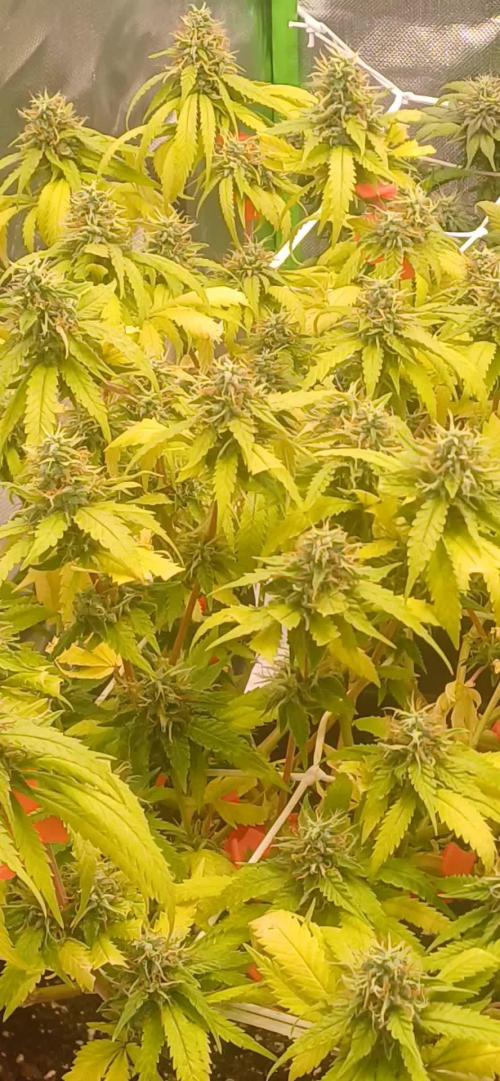
Los cogollos continúan avanzando en su etapa final de maduración, mostrando un engorde notable y una estructura cada vez más compacta, dura y pesada. La producción de resina sigue siendo muy elevada, cubriendo las flores y aumentando progresivamente su aspecto maduro. Los pistilos continúan oscureciéndose y retrayéndose, mientras la planta se acerca poco a poco al momento óptimo de cosecha.
El aroma se ha intensificado todavía más, destacando un perfil cítrico y fresco acompañado de notas marcadas de combustible y matices profundos, mostrando cada vez con mayor claridad la personalidad terpénica de esta genética.
⚡ EC: 1.6–1.7
💧 pH: 6.2–6.4
🌡️ Agua: 19–21°C
🌫️ Humedad: 40–45%
💡 Luz: PPFD 900–1000 | Fotoperiodo 12/12
🔥 Nota: Continúo manteniendo unas condiciones estables, acompañando la fase final de engorde y maduración para que las flores terminen de expresar todo su potencial antes de la cosecha.
Seguimos creciendo fuerte! 💪


Likes
5
Share

@SkunkyDog420
Follow
Hallo zusammen 🤙.
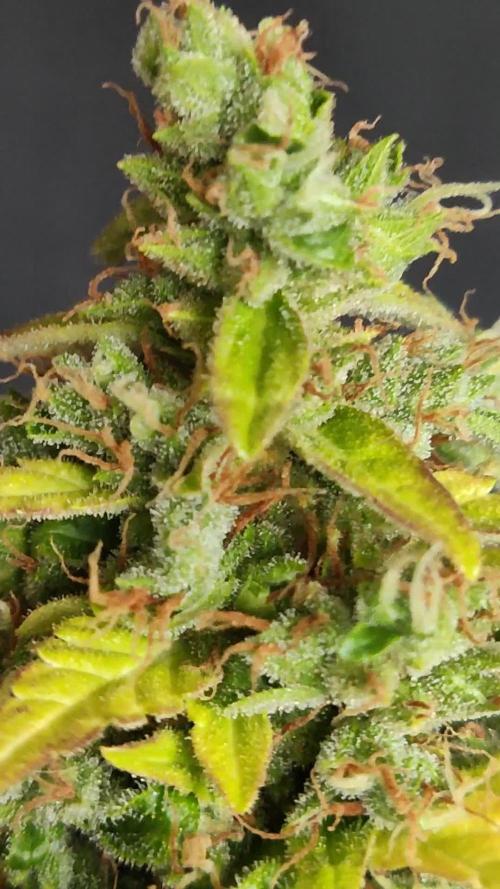
Habe sie heute geerntet.
Wir hören uns in 3 Wochen mit dem Erntebericht.

Likes
4
Share


@jamaljackson
Follow
It's been 78 days since sprout, the plants are all still coming along nicely, getting heavier by the day even though it doesn't always seem like it. I always have difficulty realizing how much growth happens in a week. I felt like they hadn't bulked up much but then I looked back at my last update and clearly was wrong.
I am trying to figure out how much time before harvest, but I am still leaning toward closer to 100 days. The plants are still being fed crop salt at the ratios posted a few weeks ago, currently I plan to do one more res change with full strength nutes and then after that two weeks of their Cake finishing nutrients (https://cropsalt.com/products/cake) which would put me a few days past 100 days with a harvest date of July 18th or 19th. This past week I also set up a Home Assistant dashboard to monitor the tent and added a camera as well. Kind of a bit late for this grow but it will be awesome for the next time around. Aside from the sensor in the tent, I have also purchased a wireless battery-powered temp and humidity sensor that will be going in the 5-gallon bucket I am going to use to cure. Here is a guide I made if anyone is interested in setting something similar up. https://gist.github.com/Jamal-J-Jackson/f47baa9e5a9f9534affa543583022abf#file-home-assistant-guide-md

Likes
2
Share


@CannaIGrow
Follow
I did not top this girl, yet. Her top lowers started catching up to the top so I didn’t want to stop her yet lol. But all in all she’s looking healthy.
Likes
19
Share


@GoldenWeedGrower
Follow
Legend
Timestamp: 📅
Measures: 🛠️
Water: 🌊
Actions: 💼
Thoughts: 🧠
Events: 🚀
________________________________
📅 D36/V34 - 28/09/23
🛠️
🌊
💼 New LST - Made Timelapse of the grow
🧠
🚀
________________________________
📅 D37/V35 - 29/09/23 -
🛠️
🌊
💼 LST on the younger lady.
🧠
🚀 Marlene Senior is pre-flowering
________________________________
📅 D38/V36 - 30/09/23
🛠️ EC raised to 1.2 pH is stable to 6
🌊 Added 5L and nutes
💼
🧠
🚀
________________________________
📅 D39/V37 - 01/10/23
🛠️
🌊
💼 LST again on the younger and HST on her main bud
🧠 The bigger one is ok for now, I'm going to let her grow normally a little bit
🚀
________________________________
📅 D40/F01 - 02/10/23
🛠️
🌊 Added 2L water and nutes
💼 LST on Marlene Junior and a little bit on the older as well
🧠
🚀
________________________________
📅 D41/F02 - 03/10/23
🛠️ EC and pH are both stable
🌊 Added water 2L
💼 Made timelapse of the last nights
🧠 She's drinking a lot, I need to understand how to manage the flowering stage
🚀
________________________________
📅 D42/F03 - 04/10/23 -
🛠️
🌊
💼 Big Defolation and strong LST
🧠 Maybe the last training before full flowering stage
🚀
Likes
17
Share


@Papastroumf
Follow
Day 66 : Continue the juices on NL because her trichomes are 50-50 milky cloudy. She is flowering very well and is like breeders photo. Each bud is like sprouting. She creates seed pockets and these pockets explode with pistils. Its amazing. Breeder suggests to leave her flower for 45-50 days. Until now she flower for 38 days , so yeh 12 remains for sure. I added Calcium because she needs it.
Edit Day 70 : I watered her with juices because she stills produces new trichomes. She also started to purple her buds. Her colas are so beautiful. We don't see buds like this every day.

Likes
7
Share


@CrowMaster
Follow
End off week 7 everything looking bomb gonna start flush in the next week….I’m a professional grower has to come out A+ If it don’t I don’t eat…