


Likes
Comments
Share


@Kevs_Best
Follow
Woche 5 - Vorletzte Woche der Vegetation und beeindruckende Entwicklung
Die fünfte Woche markierte die vorletzte Vegetationswoche, und die Pflanzen zeigten weiterhin bemerkenswertes Wachstum und Gesundheit. Die Nährstoffe und das Gießschema blieben unverändert, wobei der EC- und pH-Wert sowohl im Drain als auch in der Nährlösung stabil auf optimalem Niveau waren. Die Luftfeuchtigkeit wurde leicht auf 60 % gesenkt, während die Temperatur weiterhin im Bereich von etwa 22 bis 26 Grad blieb.
Die Pflanzen setzten ihr Wachstum in beeindruckendem Tempo fort und entwickelten enorme Seitentriebe. SPOILER !!!: Ohne jegliches zusätzliches Training bildeten sich am Ende der Woche 16 bis 18 Hauptnebenbuds sowie jeweils ein zentraler, kräftiger Headbud. Die Genetik dieser Pflanzen erwies sich als absolut außergewöhnlich.
ENGLISH
Week 5 - Final Week of Vegetation and Remarkable Development
The fifth week marked the penultimate week of vegetation, and the plants continued to show remarkable growth and health. The nutrient and watering schedules remained unchanged, with EC and pH levels stable at optimal values, both in the nutrient solution and the drain. Humidity was slightly reduced to 60%, while temperatures stayed in the range of 22 to 26 degrees Celsius.
The plants kept growing at an impressive rate and developed enormous side branches. Without any additional training, by the end of the week, they formed 16 to 18 main side buds along with a strong central head bud. The genetics of these plants proved to be absolutely outstanding.

Likes
18
Share


@gottagrowsometime
Follow
What a nice harvest. Fingers were like id been playing with super glue. And stunk of lemon orange + fuel. Sex on stems. Really nice harvest. I stripped thus one down a lot more than what I normally do ad it had a lot of weird shapes. And the HST points would of made for an uneven dry in parts.
Took over 14 days to dry at 19.5c 50-55rh.
2 months curing. Yet, not much was left to show. I don't think it was THE BEST pheno. So I will do a hunt on this and grow 3 while prepping clones and will find that perfect one and grow the oranges off it.
Fuck lemon is GOOOODDDDDDD
LEMON & ORANGES SOOOOO FUUUCCCCKKKIIINNNGGGG

Likes
33
Share


@Ema26
Follow
Day 50: Finally reached the third week of flower and she’s looking great. She continues to creep upwards while developing lots of sites and pistils. I’m hoping to see some bud development sometime soon. I’m also considering 18/6 light schedule if anyone has any opinions on it. I continue to feed her as before and I’m having no problems yet. Very excited to see what this week brings! Any comments are welcome! Happy growing!
Day 51: I’m seeing no major differences since yesterday but she’s looking great! I’ve decided against changing the light schedule as I don’t want to stress her at all. She’s still not dried out since watering a few days ago so possibly too much water has slowed growth. Not concerned at the moment as she’s still progressing and looking great.
Day 52: she seems slightly fatter. Maybe my eyes are being impatient😅 it’s still surprising me how quickly the medium can go from being nice and moist to bone dry. I’ve watered her today with slightly less grow and slightly more bloom and top max, hopefully she shows a positive reaction. I’m running out of head room rapidly so hopefully she doesn’t stretch excessively anymore. She’s also smelling a lot stronger today, not that I’m complaining😎
Day 53: definitely looking and smeller a lot better today. She must’ve liked the feed I gave her.
Day 54: she’s smelling great and growing great. I’ll water her again tomorrow morning increasing bloom and top max dosage and lowering the grow. Hopefully she carries on like this.
Day 55: watered today with a bigger dosage as above and she seems great. Smelling nice although I can’t see any major differences she’s definitely taking her sweet time.
Day 56: she’s definitely shining more today and smeller stronger. Still no major differences, I’m looking forward to seeing what next weeks brings.

Likes
22
Share


@Slobasian
Follow
You walk into the back yard and it’s a straight face punch of smells. Looking like some indoor rn moved all plants to safer place in case storm hits so now I atleast have a wind break


Likes
41
Share


@TheBulldozerSicily
Follow
Nel frattempo che i semi Germinavano, ho pulito e disinfettato la box, ci é voluto più di un giorno, tra lavare l'argilla e lasciarla in ammollo con acqua e cloro, a pulire tutti gli accessori singolarmente e le pareti della box.
Bene, adesso siamo pronti per un altro ciclo!!!

Likes
1
Share

@TTerpz
Follow
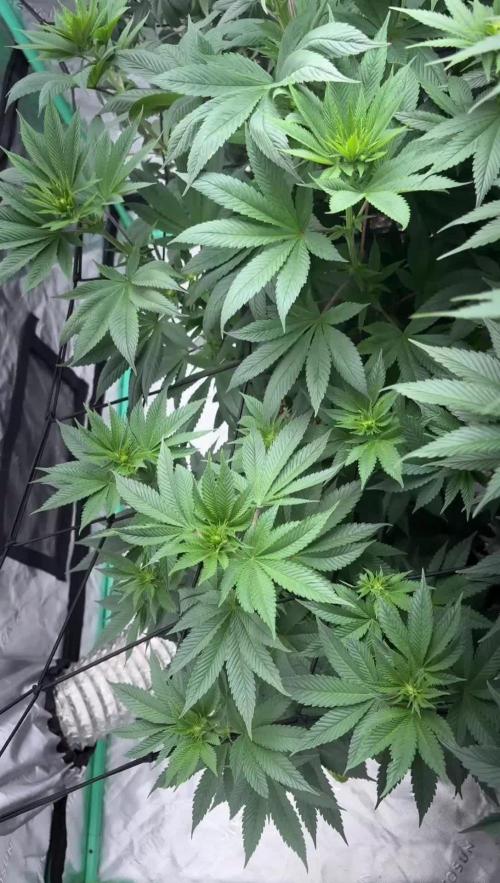
Two out of three were fed with nutrients today on 8/10
2/3 were fed with plain ph water on 8/12. Back plastic pot still drying from plain water feed on 8/10
8/15/25: 7 more days until lollipop & slight defoliation. Need to feed all 3 with nutrients.
Likes
27
Share


@eldruida_lamota
Follow
Vamos familia, hora de cosechar estas Biscotti de RoyalQueenSeeds.
No veáis que pinta que tienen las flores están bien formadas y repletas de tricomas.
Después de 70 días de floración obtengo estas flores tan increíbles que huelen pfff.
Es una variedad un poco complicada de cultivar pero, que al final si da sus frutos.
Bastante contento con este primer cultivo de la temporada de indoor.
Dar las gracias a james por las genéticas dé RoyalQueenSeeds, y a todo el equipo de Agrobeta, que sin vosotros parte de estos proyectos no son posibles 🙏
Agrobeta:
https://www.agrobeta.com/agrobetatiendaonline/36-abonos-canamo
Mars hydro:
Code discount: EL420
https://www.mars-hydro.com/
Hasta aquí es todo , espero que lo disfrutéis, buenos humos 💨💨.

Likes
19
Share


@buddhi_coop
Follow
Day 7 of flowering & so far we’re off to a good start. They’ve grown 5” since last week so that’s almost an 1” a day. So far I’m still watering every other day with 1/2 gallon of water each-6.3 ph & that seems to be fine. I might have to start watering everyday here pretty soon though or I’ll have to increase the amount of water I give them each time I water. I’m having fun, I hope they are too.
Processing
Likes
47
Share


@rhodes68
Follow
11/17 Week 8
Man I will be glad when this grow is over, if making mistakes promotes learning well... Im a fricking PHD ...
Ok progress on Maggie the yellow is limited to the very top as buds are building in particular those a couple inches from the top.
Thinking another root drench is in order, cant hurt and letting her dry a bit as a prep.
Looks like tomorrow
Layla doing ok she exhibits far fewer problems but the same issue are present she is just a hell of plant along with the Runtz which she shares the tent.
Thinking about the feeding tomorrow will decide what to do then.
They have plenty of time to finish up, had some issues on germination on the grow following so looks like it may be delayed a week from the scheduled 2 weeks.
Maggie may need it.
11/19
Have stumbled onto to something it seems. The further I move the lights out, they are now at twice the "ideal" placement of 14" at 28" and the yellowing is disappearing to a great extent.
Problem with this of course is not enough light at bud sites not on the canopy which lets face it is most of your bud.
It is absolutely something that makes the plants insanely susceptible to light burn. New one for me but maybe some of yall know so making a question of it. Pics at lights out only and I missed today so new pics later if I get back in time.
Update :
Defoliated and tightened training on all three to spread things out from the center and open up the light and air paths. Raising the lights is working just wish I knew why as lights are higher than crap with little room for more than a few more inches. Would drop the watts to 450 but need the heat to keep the grow room level as our temps here swing 40 degrees all the time. Something I learned with the help of a carbon filter. If things normalize will begin dropping lights to see what happens.
11/20
Setting the lights at 24" as I am not risking yield any further than that on Layla and the Runtz, Have the canopy as level as it can be with Brandy getting the least light being on a coco coir block (heh) for height, which she is responding well to since I opened up the plant and no longer worried over mold issues in that main bud.
Have Layla on a milk crate to bring her into decent light as well as the Runtz. She is just a lovely thing building those white crystalline buds.
Maggie has turned into a beast at least I know her root ball is huge from the growth above. Seriously defoliated her removing several small lower branches and leaves blocking light and air paths. Next feed will be continuing what seems to be working, Epsom salt and bloom nuets (no calmag with epsom salt) with a foliar feed after lights out which may well be with calmag.
Foliar feeding today at lights out, one quart sprayer with 1ml CaliMagic and 0.5ml wetting agent un-PH warmed to 75 F before spraying (our tap water comes out at @50F so...), just trying to hit hard and effective
* New Pics after foliar
Update
Folks its taken 8 weeks and a final piece of the puzzle provided by Grey_wolf resulted in a near full strength cal-mag foliar feeding and the last def bites the dust.
See what happens from here but its the first time I have felt good about this grow since the bad time germing at week one. *big sigh of relief*
Have a whole list of things I will never do again in soil more about that at harvest.
Right now I need to work on why calcium is blocked at the roots but thats another day right now I just wanna look at em. 😁
11/22 Another foliar feed same as before just diluted 30% and all three got it today JIC
Cannot find a pale leaf or top and hairs are standing up on the top buds for once and buds building nice on the lower ares the defs were cleared up first.
Going to stop the foliars for a few days see what happens but will resume at first sign of need.
Maggie has potential even after all this and we going to help her be all she can :D
11/22 Feeding day -
Bio-Bloom 7ml - calmag 4ml - Recharge .5tsp / gal at 6.5PH to all three. No foliar today
11/23
The thickness of the hair growth on Layla is amazing! Will try and get pics at lights out of it if my crappy camera will catch it.
Never seen anything like it, once again THIS this is what we intended by growing Stardawg :)
Update:
Pics and vid hope it comes through well enough as for the green in that tent and the dense hairs on Layla


Likes
24
Share


@nonick123
Follow
Día 37 (08/07) Ajustes de LST en todas las plantas! 🚀
Día 38 (09/07) Ajustes de LST en todas las plantas. Las ramas inferiores están creciendo como un cohete! 🚀😍
Riego con 250 ml H2O pH 6,5
Día 39 (10/07) Las plantas se muestran sedientas! Creo que el cepellón está lleno de raíces y piden el trasplante!
El crecimiento no se ha visto afectado de momento
Riego con 500 ml H20 pH 6,5
Día 40 (11/07) Paso a regar con 500 ml / día, ya que hace mucho calor (30 ºC) y efectivamente las plantas ya han copado la maceta de raíces
OnionOG y KS1: Las ramas de nodo inferior se han quedado enanas tras el entrenamiento, de modo que las elimino y aplico canela en polvo en los cortes
Riego con 500 ml H20 pH 6,5
Día 41 (12/07) Riego con 500 ml H20 pH 6,5
Clones! Mi experimento vuelve a demostrar que NO necesitas complejos productos de clonación ni sistemas para obtener clones!
Hace 15 días puse 2 clones con el tallo sumergido en miel durante 5 minutos en una maceta de 400 ml con PRO-MIX HP BACILLUS + MYCORRHIZAE
He mantenido la humedad alta con una cúpula de humedad casera hecha con una botella de agua PET de 5 litros cortada por la mitad y pulverizando a diario.
Han estado los 15 días en mi terraza con luz indirecta, y temperaturas que rondan los 30 - 32ºC durante las horas centrales del día
Hoy los he trasplantado a una maceta de 1 litro porque ya habían formado raíces y empezaban a formar nuevas hojas!
🐥🐥🚀🐥🐥
Día 42 (13/07) Riego con 500 ml H20 pH 6,5
Día 43 (14/07) Trasplante a maceta definitiva de 21 litros de ROOTPLUS Pot de GSKOREA GLOBAL!
Estas macetas son una maravilla!
Proceso de trasplante:
Se prepara con 17,85 Litros (85%) de sustrato PRO-MIX HP BACILLUS+MYCORRHIZAE + 1,05 Litros de Humus de Lombriz (5%) + 2,01 Litros de Insect Frass (10%) + 210 gramos de Earth Vibes Super Soil (10 g/L substrato)
Se llena la maceta de sustrato con las manos (limpias) y rompiendo los trozos más gruesos, para que el sustrato esté aireado y esponjoso, sin presionar
Se coloca una maceta vacía de 6,5L para que quede la forma perfecta de la maceta donde están actualmente
Se espolvorea la parte proporcional de la probeta de microorganismos sobre el agujero de trasplante
Se saca la planta de su maceta actual (bonitas raíces 😍) y se coloca en la maceta final
Se riega muy lentamente hasta percolación profunda con H2O EC 0,5 pH 6,5
Una vez asentada, complemento con un riego de 500 ml con 25 ml/L de Humus de Lombriz Liquido
Se coloca mulch (acolchado) de paja para evitar traspiración excesiva y cuidar a los microorganismos del suelo
A ver como reacciona al trasplante!
Aplicación foliar Kelp hidrolizado de Lurpe Solutions a 0.25 ml/l
Realizo ajustes de LST aprovechando el trasplante a la nueva maceta. De momento tienen una canopia muy bien formada!
💦Nutrients by Lurpe Solutions - www.lurpenaturalsolutions.com
🌱Substrate PRO-MIX HP BACILLUS + MYCORRHIZAE - www.pthorticulture.com/en/products/pro-mix-hp-biostimulant-plus-mycorrhizae

Likes
16
Share


@Andres
Follow
I would believe this variety again ... I think it could be better ... and do not make some mistakes in it ... I recommend it to all growers ...

Likes
3
Share


@Outdoorman
Follow
This one was born way after the other, she was about to die but miraculously it gave me a lil bit of heaven
Very strong plant
I’ll now grow em again in the best condition


Likes
2
Share

@Antarctic
Follow
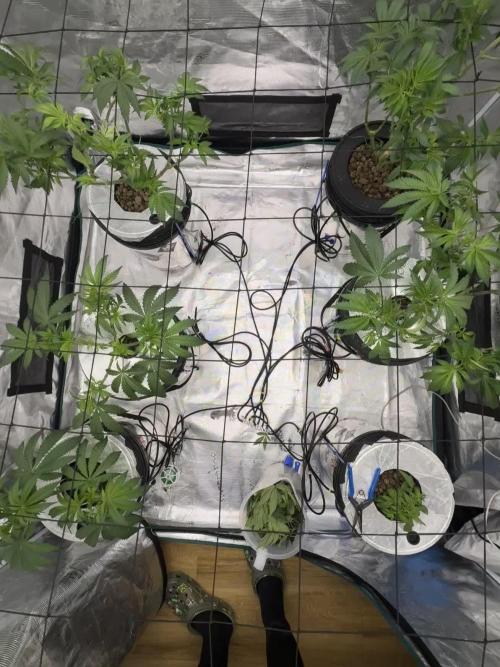
This grow started on October 20, and today is December 26, which puts the plants into Week 9 of the overall cycle.
The last defoliation and pruning was done around December 16.
After that, I made a conscious decision to stop cutting and stressing the plants.
Earlier in veg I definitely over-stressed them — too much training, too many interventions.
In hindsight, that slowed things down instead of helping.
From this point on, the goal was to let the plants recover, grow freely, and build momentum in order to reach the flowering stage as smoothly and quickly as possible.
Lesson learned for future grows:
less stress
fewer unnecessary cuts
more patience
Sometimes the hardest part is not touching the plants at all, especially when your hands are itching to train and optimize everything.
Week 9 is about recovery, structure, and preparation for flower.
Next week marks the start of flowering.
Likes
7
Share


@420Germany
Follow
Start of ML + LST
The Green Poison Auto XL goes strong.
I feel like its the stronger one but we might see maybe the other one will over take.
Likes
12
Share


@BB_UK
Follow
Can’t wait to see how this girl turns out she’s still in pre stretch like her sister #mimosacake and #forbiddenruntz they were the last 3 fastbuds to come into flower! 😊 going to be a great yield can already see it. Fastbuds WW always above and beyond with your genetics
Likes
6
Share


@Lordviper28
Follow
Overall this was a little bit of roller coaster with this strain none but two of the plants turned out the same I did accidentally herm one out but still was good I had one turn out more looking like the white widow and very frost but I would grow this again just to perfect it I know I could of gotten more out of this strain

Likes
35
Share


@ISCA_Abi_In_Da_HOoD
Follow
Im Come back .
Je suis de retour comme Gandalf .
Fillere selam .
Sweet Seed
Mandarine Zikittlez Fast
Strawbery Cola Sherbet Fast
Non game no pain
Likes
5
Share


@killerjoint
Follow
10-8-2024 TOP DRESSING AND WORM TEA.....
NOTHING MORE
10-9-2024 22ND DAYS INTO FLOWERING
SMELLS CRAZY ON THESE STRAIN
GETTING SOME SNOW ON TOP
LET'S GO
10-11-2024 DO NOT HAVE ANY PEST BUT JUST IN CASE
NATURESGOODGUYS HOOK ME UP WITH LADYBUGS
JUST GOT HANGING PATCH ABOUT /WITH SHIPPING
10-14-24 NOTHING TO DO...JUST WATER (PH6.6)AND WATCHING THE PLANTS.......
COPY CAT GENETIX STRAINS ARE CRAZY!!!!!!!!


Likes
29
Share


@Sidbank
Follow
2.06 I switched them on! They started to grow :).
7.05 after switching to flowering they started up. I saw a little deficiency of calmag. I added 1ml of CalMag Agent and 3 days after it disappeared. The tops become slightly lighter (which is a common deficiency and not dangerous), which means a lack of manganese. Today it's watering time, I'll add some trace elements from Canna, to fill up the manganese, Soil Attack for the flies and water them with 0.7L. I will also stabilize water pH for 6.0
8.05 To combat manganese deficiency, I add Trace Mix by Canna and i see a few flies so i added Soil Attack, and stablize pH 6.0.
