


Processing
Likes
Comments
Share


@Greengirl420
Follow
🤦♀️🏼 😩 Day 40 from sprouting from soil. I think I messed up. I got bloom boost last week that I added in my water and fed them like two days in a row, about 3/4gal total. I started a new seed and added more lights & I also removed about 4 leaves from lower plant that seemed to be causing a lot of shade. Now my baby looks like this. Yesterday the leaves were curled up and some of the hairs are turning brown. I gave it a half gallon of plain water yesterday & today. I was hoping it would grow more buds. I also have had a Fungus knat problem pretty bad. I was trying to use that organic spray didn’t work, I heard Dawn dish soap- that didn’t work (not for long) so yesterday I added those white things on top. Basically it’s a mess. I started this not wanting to put a lot of money into it, but it’s fun & interesting! I just wanna get better now lol! I’ll definitely be changing it up next round

Likes
5
Share


@hi_bengal
Follow
Mephisto Creme de la chem Earthbox grow using buildasoil medium and amendments.
Soaked seeds in water for 18hrs and planted into earthbox. Light hanging at 24" 300 par reading. Keeping humidity between 60/80% Temps running between 75°84°

Processing
Likes
18
Share


@JO_GROW
Follow
Ok so another frustrating week!
So this week I re potted her and moved her into "the big house" under new lights (GN Telos 0010) set at 70cm from canopy and perfect environment controlled by temp and humidity equipment.
Now because of the cal mag deficiency I buffered the coco 2 times in an 8 hour soak in 150% calmag solution ph'd to 6.1 prior to transfer.
Then after draining and getting to the correct temp I moved her to the new pot and topped with a light A+B feed.
A day later I fed with the nutrients listed which includes 1ml/L of calmag and again the same the following day.
Run off ph is spot on at 6.2-6.4ph, although it was 6.6 when I checked today and growth is great but this damn limegreen cal mag deficiency seems to be continuing. At this point I am hoping it's damage already done that didn't show when the leaves were young. The bottom leaves dont seem to be getting worse and some of the reddening on the stems has gone so fingers crossed this next week will see a change in green because I'm out of ideas, apart from making a foliar mix and trying that I'm stumped!
The only thing I can think of is a flush incase of a nutrient lock out but I cant see that being the case as her nutes have been light. Even now with all the nutes she is getting the EC is only at 1.4.
Thanks for reading, any comments/tips welcome as always.
Happy growing!

Likes
46
Share


@DogDoctorOfficial
Follow
Week 4 Veg & First Flowering Report: Runtz Battle 🌿✨
Hey, green warriors and cannabis aficionados! 🌱🔥 We’re rolling into week 4, and it’s time for the exciting transition into flowering. Our Runtz plants have been thriving, and we’re gearing up for a spectacular bloom phase. Let’s dive into the progress and celebrate the journey!
Week 4 Veg Progress 🌟
As we wrap up week 4 of the vegetative stage, here’s a snapshot of how our Runtz plants are doing:
• Healthy Transition 🌿:
• All plants are looking robust and healthy, with vibrant foliage and strong growth. The transition into flowering is approaching smoothly, thanks to the solid foundation laid during the veg stage.
• F1 Compactness 🌟:
• The F1 strain is showing impressive compactness, with a well-structured and dense canopy. This trait is ideal for maximizing yield and ensuring even light distribution during the flowering phase.
Flowering Phase Begins 🌸🚀
We’re officially entering the flowering phase, and the excitement is palpable. Here’s what’s happening:
• Flowering Transition 🌿:
• Our plants are beginning their journey into bloom, and the change is evident. The initial signs of flowering are emerging, setting the stage for a productive and beautiful flower cycle.
• Autopots Activated 💧:
• The Autopots are now fully operational, allowing gravity to manage our watering system efficiently. This setup ensures consistent hydration, freeing up time while maintaining optimal moisture levels for our plants.
• Environmental Conditions 🌡️:
• Water Levels: We’re maintaining consistent water levels with TDS at 400 and pH at 6.2, ensuring optimal nutrient absorption and plant health.
• Temperature: The room temperature is set at a cool 18°C, providing a stable environment conducive to healthy growth.
• Room Conditions: With a room temperature of 30.3°C and a relative humidity (RH) of 51%, we’re keeping the environment balanced to support robust flowering.
Nutrient and Care Strategy 🌱💧
As we move into flowering, our nutrient and care approach is key:
• Watering and Nutrients 🌿:
• We’re continuing with the Regulator and CaMg Boost in the reservoir, as the soil is rich in biolife and nutrients. The goal is to see if these organic inputs, combined with the soil’s inherent nutrition, can sustain the plants through the flowering phase.
• Environmental Control 🌡️:
• Maintaining precise environmental conditions is crucial for a successful flowering phase. The combination of stable temperature, balanced humidity, and the Autopots system ensures our plants have everything they need to thrive and produce high-quality buds.
Looking Ahead 🌟🌿
As we step into the flowering phase, the anticipation is high. Our Runtz plants are set to showcase their full potential, and we’re excited to see the results. Each week brings new developments, and we’re committed to nurturing these beautiful plants to their fullest.
Stay tuned for more updates as we continue this journey. Here’s to a fantastic flowering phase filled with growth, discovery, and green magic. 🌟💚
#RuntzBattle #Week4Veg #FirstFloweringReport #Autopots #CannabisCommunity #FloweringPhase #PlantHealth #GreenMagic #NutrientStrategy #GrowStrong #StayPositive
Germination method 🌱 @thecannakan
Genetics Runtz F1 @zam.nesia Runtz auto @kannabiaglobal
Nutrition
@aptusholland 🌿
@aptus_world 🌎
@aptus_es 🌍
@aptusbrasil 🌱
@aptus_thailand 🌿
@aptus_portugal 🌳
@aptususa_official 🍀
@aptusplanttechnz 🌺
@aptusplanttechaus 🍃
Ambient controls🎮
@trolmaster.eu @trolmaster.eu.support @trolmaster.support @trolmaster.agro
Soil @promix_growers_eur @promix_cannabis
LED - @lumatekeu
Watering- @autopot_usa @autopot_global
Love and attention- @dogdoctorofficial
#aptus #aptusplanttech #aptusgang #aptusfamily #aptustrueplantscience #inbalancewithnature #trolmaster #trolmastereurope #trolmastersecrets #Autopots #RuntzBattle #KannabiaVsZamnesia #GreenJoy
As always thank you all for stopping by, for the love and for it all , this journey of mine wold just not be the same without you guys, the love and support is very much appreciated and i fell honored and so joyful with you all in my life 🙏
With true love comes happiness 💚🙏 Always believe in your self and always do things expecting nothing and with an open heart , be a giver and the universe will give back to you in ways you could not even imagine so 💚
More info and complete updates from all my adventures can be found ⬆️ link in the profile description ⬆️
Friendly reminder all you see here is pure research and for educational purposes only
💚Growers Love To you All 💚


Likes
23
Share
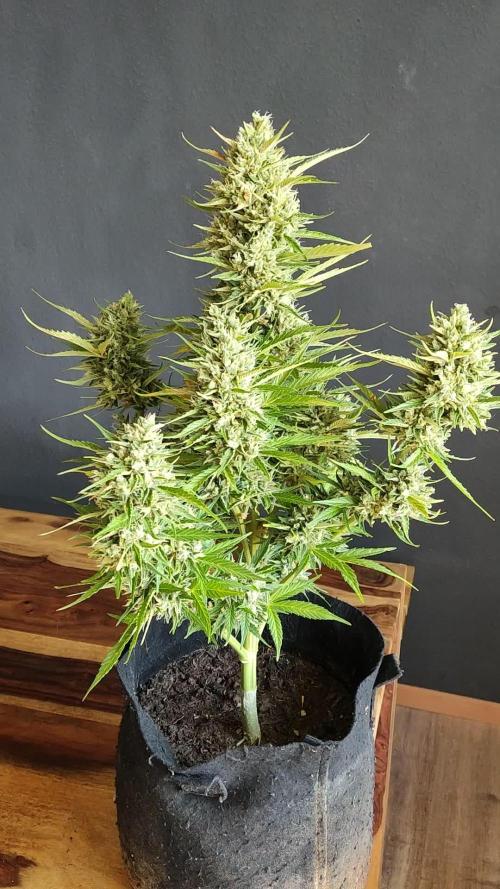

@SkunkyDog420
Follow
Hallo zusammen 🤙.
Habe sie heute geerntet . Wir sehen uns in 3 Wochen mit dem Erntebericht.

Likes
91
Share


@Greenwolvesfarmer
Follow
Hicimos transplantes , y la verdad me retrasé en subir el seguimiento . Se ven preciosas , esperemos que el stress dels transplante y luces , sea favorable para que exploten de felicidad !
Ahora innovando y agradecidos con los kings de las luces ! mKleds apostando por un : 480w Samsung 3500k + epistar UV 660 IR ...
#greenwolvesfarmer #seguimientoMkled #loboXcultivo

Processing
Likes
6
Share


@Mr_nugs_lover_David
Follow
She's looking gorgeous,I lsted the talles branches to get a more even canopy. Let's see how she turns out,I'm loving to grow this strains her performs well with lst and all types of training,she's being fed only using 100% organic and bio amendments by florians living organics and guanokalong and also my lactobacillus serum home made,it is being a pleasure to grow her.
Likes
13
Share


@Oyziphar
Follow
This was the last week for the Cookies Gelato. They've turned purple. Weather is not that great anymore, and I want to avoid more budrot, so I had to chop them down 😛


Likes
7
Share


@Baboon_Grows
Follow
Well one thing I learned , if you tie down using anything check it everyday
Likes
2
Share


@LoganatorDude
Follow
I absolutely love to watch them grow! Especially that moment they hit their first growth spurt.
I started with RO water that is remineralized for drinking purposes. The ppm is only 18! My tap is 156! So considering they don’t need much water, I’ve been stealing some of our drinking water. The RO water starts at pH of 7. After I add the nutrients, ppm of 249 @ pH of 5.8 while soil is still sweet @ pH of 7
I think my days are off as a new week begins on the last day of the previous week. I am going to leave that for consistency.
04/21 - Noticing some possible nutrient issues with the Fruity Pebbles for several days now. Going to see what she needs. Up front I’m thinking maybe just a super small amount of Amino Acids with a little Epsom Salt. Maybe she is struggling to access the nitrates from the neem cake. IF it’s a issues with nitrogen. We will see. Maybe she would benefit from some extra calcium?… Any ideas are greatly appreciated.
Day 22 and I am noticing how these girls have been burning up a lot of potassium lately, dealing with the wind and sun 💨 ☀️, getting pushed around all day.
I plant to top dress with some Kelp Meal pretty soon.
Day 24 -> 4/22/22- a quote from the weather on today’s red flag warning and dust storm warning.
“ HAZARD...Less than a quarter mile visibility with damaging wind in excess of 60 mph. SOURCE...Satellite imagery. IMPACT...Dangerous life-threatening travel.”
I’m keeping the girls inside today.
Day 26, I was planning to check the runoff on some of these girls, especially the fruity pebbles, however I messed that up as I also top dressed WAY too much of the seaweed bliss. So I flushed with plain RO water at pH of 7 until there was only slight coloration in the runoff. I didn’t check the runoff as a lot has changed with all that flushing. So next watering/feeding I will make sure I check the runoff on multiple plants.
So the seaweed bliss with its 17 on potassium, seems to be the most likely culprit for why there is a bronze-ish color on the inside of the new growth. Hopefully a foliar feed of Epsom salts can correct the problem. Inside tent, lights on LOW. Noticing similar pattern in all of them to a degree, most noticeable in the fruity pebbles.


Likes
13
Share



Processing
Likes
21
Share


@The_420
Follow
J-33 Red Mandarine F1 de chez Sweeds seeds
Bonjour, la communauté de GD ! Apres avoir fait la découverte de ce site incroyable, nous nous lançons ! Nous sommes 2 grands passionnés près à partager, apprendre et recevoir tout ce qui est possible a propos de ce sujet !
J-11 de floraison ( 12h / 12h )
Très vigoureuse, feuilles de belles couleurs , belles branches qui se forment : on voit une excellente génétique.
Elle commence à montré des signes de floraison, on reconnait bien qu'elles sont féminisés.
Un futur sapins, au niveau de la forme, elles ont doublées de tailles en une semaine.
Température la nuit ne descends pas en dessous de 20°C
Température en journée 25-26°C
Humidité 30% - 60% après arrosage
Arrosage 1 jour sur 2 / 1.5 L ( HESI super vite 1 goutte = 0.05 ml)
Si vous avez des conseils, recommandations, doutes, questions etc... Nous serons heureux de partager un agréable moment de discussion avec d'autres passionnés.
J+35
Les belle Red Mandarine F1 poussent bien, elles demandent de plus en plus d'eau ! Les bourgeons commencent a se développer 😍
Je fait un quart de tour de pots tout les deux jours et j'adapte les produits HESI avec le tableau de culture.
Je n'ai pas encore de correcteur de PH et de EC pensez vous que c'est grave ?
Merci pour tout vos renseignement, a tres vite 😊

Likes
5
Share


@Willy_Balls
Follow
1st week of 12/12 light going beautifully. They are doing really well. Although I still experienced root issues. I think this spot is cursed :P


Likes
11
Share


@Skinnytalls420
Follow
Just as difficult to grow as the first time I done Afghan kush but still managed to get some nice purple bud out of it!!!


Likes
26
Share


@KingSalomonsWeed
Follow
Nice lovely buds with an great smell of... Gelato(sry better taste than any weed I smoked before) energy relaxing potent yielding anything good till great. A. Real keeper. Fast!
AND, the smell, is from roses.. karamel cookis., i never had this before sweet, but not overall. Another terpenes.. Nelks?? for Real! Like an GELATERIA if you open the door and you step inside.
Just Great...
Ahmm by the way... 😛 💪 Women can't resist this smell!!!
Damn 10 points i should gave. For real.
Its not normal. Good, good, 👋
Hallo, wenn ihr mich fragt ziehe ich die Gelato 41 fast der Gelato 41 vor. Schmeckte mir besser, sah schöner aus. Die fast Version.


Likes
22
Share


@Weedbadk
Follow
Día 1 y todas germinaron súper rápido 3 días
Día 5 desde puesta en sustrato
Ya todas están arriba
Estoy solo pulverizando el sustrato
Temperatura 23c humedad 75%


Likes
25
Share


@DrGanj
Follow
Spread this girl out a bit using some string and mild LST. She's responded super well and all the bud sites seem to be getting a nice dose from the TS1000 :)
Bit late uploading this week but the pictures were taken back on Tuesday meaning this is still an accurately dated upload.