Likes
Comments
Share
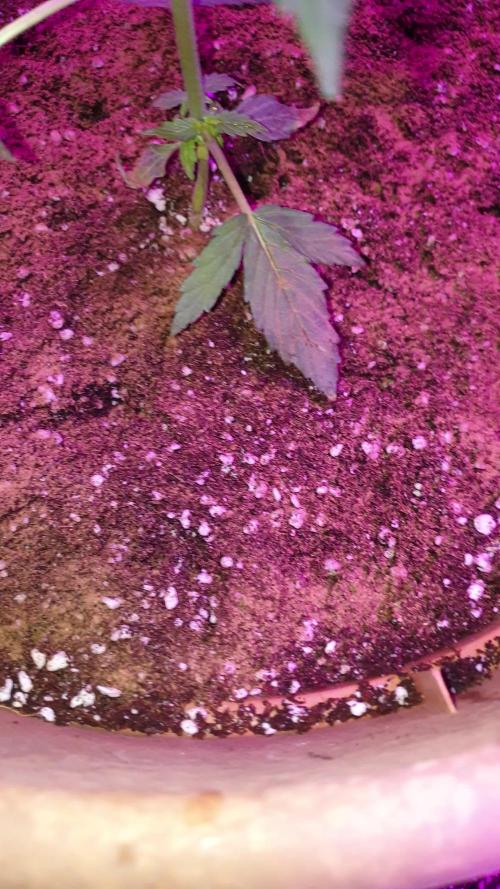
Good week for this tent, everything looks good, seeing decent growth on these two girls. Look at those beautiful pistils! also notice they are almost as big as GB1 Im pushing this tent into Bloom in 9 days, nervous but excited. I fed them today, and I used tap water so let's see how this goes. my tap water tested at 8.0 PH after adding nutes it went down to 6.9/7 Which for me is high but i'm just going to trust my gut. I have been buying RO and distilled and i'm tired of having to pick up some jugs every few days. I'm pretty happy about this tent and excited to see how they transition. 👽 FEB6- switched timer on lights to 16/8 to ease the transition of 12/12. FEB10 UPDATE- girls look good, happy, switching to flower once I know if GB1 is female or not, hopefully everyone will enjoy the next life stage!!! check video for update!
Likes
14
Share
Likes
4
Share
Stretch has stopped and starting to stack
Likes
15
Share
@Lontra
Follow
Tag 29: 🌱: Beginn Woche 5. Da ich denke, dass wir mittlerweile in der Vorblüte sind, trage ich diese als erste Blütewoche ein. Es gab ganz leichte Anpassungen am LST, ich werde die Lady jedoch vermutlich von nun an in die Höhe wachsen lassen. Desweiteren wurden einige der untersten Fächerblätter, die bereits vollständig verschattet waren, entfernt. Auch 1-2 kleinere Blätter, die nach innen wuchsen und den Blüten die Sonne nahmen, wurden entfernt. Leider ist mir auch eines der größeren Fächerblätter abgebrochen, das ich noch behalten wollte, aber ich denke sie wird es verkraften. 💧: Die Erde ist immernoch feucht. 💡: Die Beleuchtung ist unverändert (DLI ~40, Abstand zur Pflanze ca. 35cm) Tag 31: 🌱: Bisher lasse ich sie einfach erst mal wachsen, ich denke jedoch darüber nach die nach innen wachsenden Fächerblätter morgen doch noch mal zu entfernen. 💧: Die Erde ist immernoch feucht. 💡: Die Beleuchtung ist unverändert (DLI ~40, Abstand zur Pflanze ca. 35cm) Tag 32: 🌱: Heute wurde erneut die Schere angesetzt und ein paar der nach innen wachsenden Blätter sowie ein paar kleinere Triebe im Inneren entfernt. Das LST wurde nur minimal angepasst, um eine einheitlichere Höhe zu erreichen. 💧: Die Lady wird so langsam etwas durstiger und so gab es heute wieder ca. 3 Liter Nährstofflösung. Diese wurde jetzt etwas erweitert und entspricht nun ca. 50% Bio Bizz Düngerschema. Zusätzlich dazu gab es dieses mal auch CalMag+Bittersalz. 💡: Die Lampe wurde ein paar klicks nach oben gehangen um die Werte in etwa konstant zu halten (DLI ~40, Abstand zur Pflanze ca. 35cm) Tag 34: 🌱: Heute wurden nur die Blätte etwas sortiert, um den Blüten mehr Licht zu geben. Mittlerweile haben die höchsten Triebe etwa 20cm (vom Boden aus) erreicht. 💧: Die Erde ist noch feucht. 💡: Die Lampe wurde noch ein Stück weiter nach oben gehangen, um die Beleuchtung in etwa konstant zu halten (DLI ~40, Abstand zur Pflanze ca. 35cm) Tag 35: 🌱: Ein paar der untersten, im Schatten liegenden, Blätter wurde entfernt, sowie 2-3 kleine Nachzügler Triebe aus dem Inneren. Das LST wurde ein wenig angepasst. Ich denke darüber nach noch ein paar mehr kleine Nebentriebe (vor allem aus der Mitte) zu entfernen, damit der vorhandene Platz besser für die größeren Triebe genutzt werden kann. Über Gedanken/Meinungen/Ideen dazu würde ich mich freuen 😉 💧: Zu Tagesbeginn ließ sie ihre Blätter ganz schön hängen und die Erde war ziemlich trocken, also gab es auch heute wieder etwa 3 Liter Nährstofflösung. 💡: Die Beleuchtung ist unverändert.
Likes
15
Share
So another relatively quiet week for Cotton Candy Kush this week. Some minor LST adjustments as she grew, but she has recovered extremely well from her topping and is growing nicely. I love watching the time lapse seeing her leaves constantly changing position depending on the light cycle. I am not 100% sure why the one root grew sideways. I wonder if during one of my photo shoots if something got caught when I was putting her back in the pot. Its been this way for a while, and causing no issue so not overly worries. Once she gets into the Bloom tent, it will be even less of a concern. Not much change in height as I have been LSTing her, but I am good with that. Upcoming Plans - I expect with her growth to be topping her very soon again.
Processing
Likes
12
Share
Welcome to week 1 of my CBD Medi Kush Diary! I have 2 - CBD Medi Kush by Spliff Seeds going in the same tent with 14 other plants (full details on all of the other plants can be found on my "Dude's New Diary to Rule Them All" diary, check it out). But with the CBD Medi Kush I'm also growing 3 - DinaMed CBD+ by DinaFem, 1 - Critical+ by DinaFem, 3 - Cream & Cheese CBD by Seedsman and 7 - Cherry Blossom CBD Hemp by Elevator Supply Co. The 2 CBD Medi Kush plants and 2 of the DinaMed CBD+'s were all started from seed at the same time (all other plants are clones). Once all surviving clones/seedlings were healthy enough I transplanted from dixie cups to small pots (I guess around 1 litre). They were transplanted into soil I had been composting and turning for 3-4 weeks. They really responded well to the transplanting and the new soil. Noticeable growth in 48 hours. The pictures in week 1 were taken right after transplanting (check week 2 and you will see a very noticeable change all around). My plan this grow is to go organic (or as organic as possible). While the soil was composting I added old fan leaves to the mix as well as Recharge, Mr B's Green Trees 'Growth', and Jobe's Organic granular fertilizer. I know, I know, everyone says don't use time release nutes with cannabis. BUT, The Rev said it was fine in his "True Living Organics" book. He actually recommends putting spikes in the flowering pots prior to transplant (I'm planning on trying that too). Recharge and Mr B's Green Trees don't claim to be organic specifically for whatever reason, but the ingredients include pretty much everything The Rev recommends adding to composting soil. Plus I love Recharge, that stuff is great! Organic or not I'll be using Recharge along the way. Here's the setup... First of all, I'll let you know my grow area is in my attic. The previous owners finished the attic with walls lights and even carpeting, but for some reason kept the folding attic stairs. Its pretty a pretty good space, we divide the attic in half. One side for my plants, they other for attic type storage. I have 2 2x4 tents and a larger flowering area (10x12'ish). One of the tents I use for drying only, the other is where I have these babies growing. The babies are currently under a single Viparspectra V300 300W LED. I'm having really good results with Viparspectra LED's. Bang for the buck, Viparspectra is hard to beat. I have a 2nd 300W Viparspectra which is a R300 (more reds) which is better for flowering. I may stick the R300 in the tent as well at some point, but for now the single V300 is doing a great job. In the flowering area I'm running 1000W HPS. The HPS has been kicking ass with the plants in flower now and I'm expecting more of the same with these girls when they are ready for the big time. Side note: I'm running a separate diary for all of these girls. In this diary I'm just going to focus on the CBD Medi Kush specifically. But I did start the CBD Medi Kush and DinaMed CBD+ seeds at exactly the same time. So, in the other diary I will do some comparisons and contrasts between the 2 strains as they grow. So far the DinaMed is taller, but the CBD Medi Kush has beautifully stacked node structure. This looks like its going to be a win-win. Please follow and comment away!!! Any tips/tricks regarding organic gardening would be appreciated! 👍
Likes
8
Share
@Cowboy
Follow
I over water this past week but got back on track ,it took about 2 day for her to come back around,, but a great week
Likes
3
Share
@Satica_G
Follow
Der Samen kam aus der Erde, und damit er sich nicht streched hab ich das licht etwas herunter gelassen. Die Luftfeuchtigkeit war bei 35%, dass habe ich aber wieder im griff da ich eine Sprühflasche habe und eine Kuppel über den Setzling hatte. Bewässern brauch ich kaum da die Pflanzen wenig Wasser brauchen. Da die TS600 bei 60% Leistung nicht allzu heiß wird es ist aber auch Winter. Montag habe ich meine Spuckpalme dazu gestellt da die vielleicht etwas die Luftfeuchtigkeit reguliert ich hab keine Ahnung ob das stimmt ich wills auch nicht googlen wird schon funktionieren und wenn nicht sprühe ich sowieso regelmäßig mit einer Sprühflasche. Die Spuckpalme sah mir sowieso zu traurig am Fenster aus. Die Temperaturen waren am Wochenende im Zelt sehr hoch Sonntag Nacht hatte ich 5 Stunden lang circa 30°C-32°C. Trotzdem haben beide Pflanzen es super bestanden. Ich habe zum Umtopfen nächste woche einen 8L Topf, Mykorhiza und Wurmhumus gekauft. Dazu noch den Biobizz Indoor Dünger.
Likes
47
Share
@Mz876
Follow
She was supposed to take about 8-9 weeks to harvest but I went 1 day short of 10 weeks of flower before harvesting. All the trichome were milky , no amber trichome that I kept looking for . Overall I’m very happy with her . I can’t wait to see her dry weight and I’ll be back with that and more pics 😊
Likes
16
Share
July 20: smoke arrived this morning to go with our heat wave. Awesome. Extra watering, misting air, and wetting the sides of the grow bags with hose water to keep things cooler and hydrated. So far so good in the heat. Did foliar spray of Extreme Blend and potassium silicate. Also note that for all my grows I use apple cider vinegar for pH adjustment and a Dr Bronners liquid soap as a wetting agent (surfactant). Euphoria is doing great, but to ensure that it finishes early enough for this latitude (53N) where the UV light gets very weak after mid-August, I’m starting the force flowering tonight. Already starting to flower but I want a strong flower set and as much flower growth under strong sunlight as possible. Force flowering schedule is 2-3 weeks of in dark garage at 9 pm followed by 730 nm far red light and then back out at 7 am. The light initiates dark mode 2 h faster so it’s like having a 26 h day. Good trick use as a bloom booster, also moves up the finish 2-4 weeks. So, 10+2 is 12 h dark and 14 h daylight. Might sound bogus but it works. July 21: first night of force flowering caused a big stretch. Notably stretched after darkness in hot garage overnight. Hot outside overnight too but was much hotter inside garage and recorded here as 24 C. Seems okay and high overnight temperature might be ideal at this early flowering stage. Warm overnight temperatures continue for a few more days. July 22: record hot overnight low forecast for tonight of 24 C and feels like 27 C with humidity. Wow, that is really incredible for here and 13 C above historic average. July 26: six days into flowering and she is doing fine. 👍👍
Likes
78
Share
@deFharo
Follow
Bienvenidos cultivadores de marihuana clandestinos, y también, a los que tienen la fortuna de no serlo!🖐️👨‍🌾... todo por la causa! Otra mañana nublada, otra mañana de porros y música en compañía de esta gitana digna descendiente de La Faraona. Tímidamente, la planta ha comenzado la pre flora, ayer hice una gran defoliación a todas las plantas, no me agrada esta técnica, pero me obliga la necesidad de espacio y quiero la mayor entrada de luz por el dosel ya que esta temporada apenas voy a añadir luz lateral, la planta pierde esplendor pero lo recuperará en unos días y además los brotes florales quedan más expuestos a la luz... a jugar! Esta semana la planta ha aumentado mucho el consumo de agua, han sido días calurosos que ayudan a aumentar el metabolismo de los cultivos, principalmente en esta etapa de crecimiento. Además, dos riegos profundos con Bio estimulantes con una concentración EC de 1.25, de momento, espero a una definición mayor de las flores para aumentar la cantidad y tipo de nutrientes. Hasta la próxima... SALUDOS A TODOS!! ================================= Info de la cepa GYPSY KUSH: https://en.seedfinder.eu/strain-info/Gypsy_Kush/Kannabia_Seeds/ "una variedad única con un duende flamenco que no se puede aguantar y que solo puede venir del sur..." Kannabia Seeds - Genética: Black Domina x Afghan x Ginger Ale - Hibrido: Sativa 50% Indica 50% - Tiempo de Floración: 58-62 días - Rendimiento: 500 gr/m - THC - Hasta 16% ==============
Likes
11
Share
its day 35 since sproud and the plant looks good so far. I removed some leaves and started training her with that bending clips to make the branches stronger. I collected leave mold from the surrounding woods. a lot of white fungy hopefully usefull mycoriza.
Likes
8
Share
Bin echt sehr zufrieden und erstaunt, wie gut sich die Mädels gemacht haben. Und erstaunlich, wie die nach 22 Tagen schon riechen… bin echt gespannt, wie lange es noch bis zur Blüte dauert
Likes
2
Share
@Mastr
Follow
Sorry for missing week 10 I was in summer holiday This week bud still getting bigger and fatten up I feed with 4ml bloom 4ml top max 1m per L bloom bastick 1ml bloom booster Will chop them down at day 90 so not long to go honestly I can't wait she smell super strong even 4inch fan for only 2 plant cant really handle a smell lol when I open door and feed water smell get alot strong also she is very frosty and sticky
Processing
Likes
6
Share
Progredindo e engordando aos.poucos !o fedo de gamba ta grande!mais resolvido com.um.filtro de ar da ghp de 125mm !essa proxima semana vou dar 2 ml de remo magnifical em 1 litro e meio de agua para elas, parece que estaocom falta de um pouco de calcio e mg, ja que faz uns 20 dias que nao a rego com sal de epsom!vou testar esse suprimento da remo que ja da uma ajudada com outros nutrientes como o cálcio que nao tenho no organicos da bio bizz que estou usando!estou dando 2 colheres de sobrimesa de spirulina (alga em pó)diluida em 1 litro e meio de agua com ppm de 300 no maximo vi um resutado!
Likes
12
Share
Hello dear ones 😌 I hope you had a few nice warm days here in Germany, the plant really enjoyed it. Since it's been warm during the day she's been getting 16/8 again and she loves it. This also enabled me to take photos that reveal their true beauty. At the beginning of the cup I really thought to myself: Oh God, how is this going to work? But at that point, I didn't even know what was still in store for me... There were many events, both positive and negative, and the plant noticed this. She had to endure a lot because of these circumstances; I couldn't give her the warmth she needed and I had to completely change her light cycle. I haven't even changed the water in the dwc since the first week of flowering because it's not financially possible at the moment. But Zamnesia seems to have done a good job with the breeding, because the genetics are strong and do not hermaphrodite despite high stress: LST Fimming light stress.The Auto Runtz smells grazy fruity and I'm just thrilled THANK YOU ZAMNESIA ❤️ I also have to commend Advanced Nutrients for the starter kit with the PH Perfect Sensi Grow and Bloom. Since I switched to economical, I'll definitely be able to complete the run.And I don't have any problems even though I don't change the water. The plant is actually my 2nd run and I have to say in the DWC game changer🙏🏻😌❤️ Let's come to Green Sensation by Plagron: Since I know a run without it, and now this one, I just ask myself:What kind of green magic juice is this?Through Green Sensation I have to say, this has become by far my thickest plant at this stage Than I ever harvested. Plagron, you have made a magic potion that enables me to produce large, thick flowers despite poor conditions. 🔥🙏🏻❤️ A big thank you goes out again to Zamnesia and Plagron for creating this great cup and giving me the opportunity to take part.I'm looking forward to the end, and I'm happy for everyone.I hope you have learned a lot so far and that, regardless of whether you win or not, you are still proud of yourselves.🙏🏻 Added some pictures On Friday, May 9th 🔥😉❄️❄️ In 2 days the next flowering week begins, and it's starting to explode 😂❤️❄️❄️
Likes
2
Share
Langsam bilden sich die Blüten aus :3 Riecht schon langsam sehr lecker