


Likes
Comments
Share


@CanadianFillmore
Follow
08/25 dry weight came in at 157 grams. Very happy with the second round grow of GG4, she produced a lot more bud with the extra veg time. While I enjoyed this strain, I am moving on from her, to other strains.
Thanks for checking out my grow! 👽🌳🔥💚

Processing
Likes
15
Share


@Deli_Weed
Follow
Va muy bien hasta el momento, engordando cada día, eh tenido que amarrar algunas ramas al tronco principal porque empezaban a caer con el peso, eso es buena señal 💪🏻🌲

Likes
41
Share


@JacareGrows
Follow
Hey guys.
For this week i upload some videos 1 video per plant.
I am not giving any more the bio nova autoflower supermix, i m thinking on let them going only with water until the end, but lets see.
Plant 5 is close to harvest i think on the end of this week.
Plant 1 and 4 are doing good on flowering.
Plant 2 is slowly flowering
Plant 3 is still in middle of the transition to flowering, is going very slow. I think she probably is blocked because of the size of the pot and light .
When i harvest plant 5 the others will have more space, and i can bend some branches to increase the bud quality.
The big question is, when harvest? its the first time im doing this and i am afraid of doing that wrong.
Hope the videos can help someone to help me :D
I have also made a video of plant 5 on a more close look, not to much quality but for now its what i can get , sorry
28/05 day 69
small trichome update of plant 3,4 and 5. Plant 1 and 2 still on pre flowering
analysing the trichomes, i would say,
Plant 3 and 4 need almost 2 more weeks
Plant 5 - probably only 1 week more, so up to almost week 12
plant 1 and 2 - will take much time as fotoperiodic LOL

Likes
5
Share

@Ninjabuds
Follow
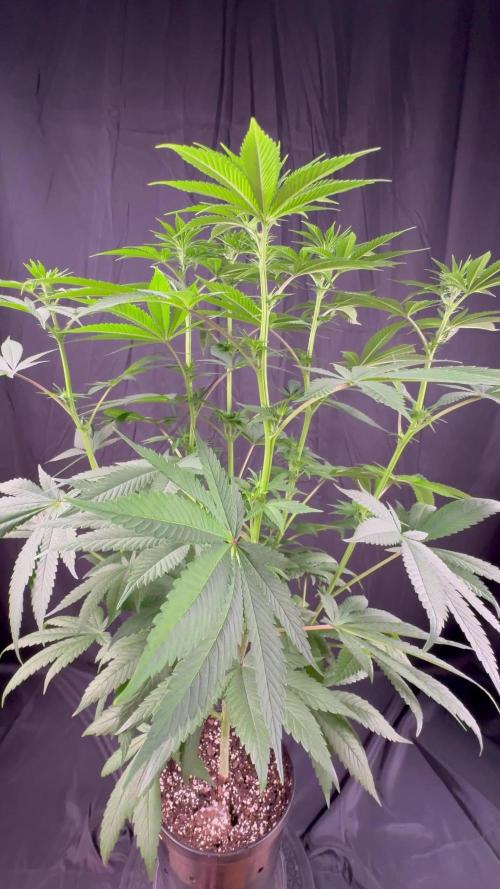
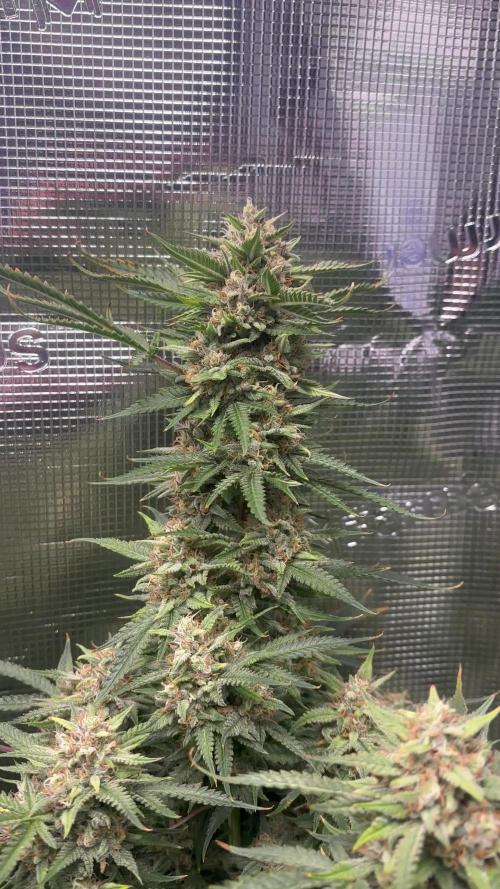
El dorado og has some old school genetics to is and they are starting to shine. It’s really starting to stack up the stems real nicely. The plant reaks like skunk. I bet it turns out really nice
All of the plants have really taken off. Usually I have a couple plants that are much smaller but all of these plants are getting huge. Seeing I got a new eluefah uap1500 the other day and I have my 2 fastbuds plants under that now I have my spider farmer light free. So I popped up another 2x2 and moved 3 of the 10 plants into the 2x2 and left the 7 other in the 2x4.




Processing
Likes
30
Share


Processing
Likes
6
Share


@ganjaman24
Follow
***Update*** have switched 2 of 3 to 5 gals will do the other one as soon as I get more coco..looking to veg maybe another 2 weeks then going to flip. Recently acquired LED light for my veg room so have 250w hps n 300w LED..ladies seem to be loving it.


Processing
Likes
12
Share


@GrowGuy97
Follow
Day 14 - 3 out of 5 are growing a little slow/weird, all 5 seem to be growing kinda slow compared to my first run of autos but hopefully everything does good🤞🏼 Happy growing friends🌱✌️🏼
Day 17 - Still have 2 extremely weird looking ones, really hoping they bounce back🙏🏼🤞🏼
Day 18 - 3 out of 5 still going strong, the other 2 havnt changed much!

Likes
45
Share


@masterofsmeagol
Follow
8/27 I think I mightve been overwatering. It's so hard to tell when the conditions change week to week. That's Maine for ya. Bags were still heavy and plants were soaked. I tried to shake the more advanced flowering plants without sending water everywhere. That's how septoria spreads. The event horizon I treated with plant doctor looks the best it ever has. It's tile for another application on the toasted toffy. I'm seeing a few spots again. I didn't have time to take pictures or do a video. This video is from last night. I'll treat that toasted toffy again today and I'll record it here. After I see it working u may treat the others. I see some residue of k bicarb but it has pretty much eradicated the pm. I know it will always be there but these treatments seem to be working. I'll be adding beastie bloom to my line up soon. EVERYDAY I go over the buds are bigger more compact and dense. Event horizon, toasted toffy and the red runtz (I think) in the 50 are flowering to beat hell! The get bigger everytime I see them. I can smell them as soon as I round the corner. This is going to be a good year. These strainsxare high in thc. Maybe I gave up some mold resistance and a harder to grow strain but if I can make it to the end it will be fire.
WENT BACK OVER AROUND 5. OBVIOUSLY IN THIS SCORCHING 80°+ day the seedling in the 10 was dry as a popcorn fart. Some other plants seemed dry when I stuck my arm down the bag but I could feel some moisture when I pushed my finger through the medium. They WILL need water but I'm not giving it to them tonight. Took a shit ton if pictures and a video this morning. I'll uploadcthat shit tomorrow. I'm trying to do a couple right now. Anyway I continued to defoliate what needs it. Flowers are swelling. I GAVE THE TOASTED TOFFY ITS 2ND TREATING OF PLANT DOCTOR. I USED A QTR GALLON OF A 4 TSP PER GALLON MIXTURE. I MADE SURE TO GET AS MUCH OF THE FOLIAGE AS POSSIBLE AND THEN I USED THE RESTCON THE MEDIUM. I SHOULDVE PROBABLY WATERED THAT ONE BUT ITS GOING TO RAIN TONIGHT. AT LEAST I HOPE IT IS. Looks like some of the pics are uploading! Yay! The plants looked the best I've ever seen them tonight so I held off watering. My wife is I'll and may need to go to the hospital. So instead of watering prematurely I can monitor the situation and make a decision in the morning. I made enough phed water for my father to go around and water everything. He is aware of the situation. Hopfully that will not be necessary. However, I don't want to over water and I feel like they didn't want it. Just going with my intuition. It's done me pretty good so far.
8/28 Luckily no hospital. It's sprinkling out. Plants are covered in water so we got SOME rain. It says we will get 0.00 but that can't be right. I watered the 10 yesterday and everything else this morning with a gallon each except the middle gmo in the 30 which got 1.5 gallons. Did not water the one in the 50 gal pot. It looks a little overwatered. Also looks like it has a slight calcium/magnesium deficiency. I'll up the calmag and i'll make sure when I do water I'll water thoroughly. Like usual toasted toffy is looking better after the treatment. The all star has been the k bicarb. I haven't seen shit for pm. Just a little residue from the k-bicarb. Took a video and some pictures. This is the fun time. I like watching the buds develop. Some of these plants were monster cropped so they are STACKED. I'll keep what I do updated.
8/29 Made an awesome video today bit it won't upload. Probably because its a little over 2 minutes. I'll do another one if it won't upload. Nope it won't even attempt to upload it now. Oh well. They flowers just looked so pretty this morning. I noticed some WPM on the event horizon in the middle. I noticed SOME on the bottom and interior of the GMO that I had already identified. I'll do another k-bicarb treatment and see how that goes. Plant Doctor seems to he doing a pretty good job on the septoria on toastedctoffy and my favorite event horizon. That plantvis THICK. it's going to be stacked and have some huge colas. I need to LST it and suppirt those giant colas and separate them a bit more. There is never any shortage of work to be done I can tell you that. I have defoliation to do on the sherb pie and the middle event horizon. It seems like crisis after crisis. Bu my plants are STRONG.
8/30 It was in the 40s at 6am. Shook off the plants. Bags are still heavy. I see some septoria climbing a bottom branch of the toasted toffy. It's foggy as hell out. Can't see a foot in front of me. Saw a LITTLE PM on the gmo I've been treating. It's just time to apply the ki bicarb. Plant Doctor is working wonders on even horizon in the back. I see some pm on the one in the middle. I think I'll treat that with plant doctor as well. I'm not sure. I messed up the video. I've got work to do. I'm waiting until I water and I'll feed again. I'm going to add beastie bloom to the lineup this time I think. Only one plant seems like it m9ght be too early for it. We'll see. I need to look back. I'll document what I do. Video won't upload. I'll try later but it's sideways
WENT OVER AROUND 3PM AND EVERYTHING LOOKED FABULOUS. WELL....THE PLANT I DIDNT WATERCLAST TIME IN THE 50 WAS DROOPING SO I GAVE IT A GALLON AND A HALF. THE TEN WAS LIGHT SO I GAVE IT A GALLON. IT WASNT DROOPY BUT ITS A HUGE PLANT IN A 10GAL AND USES A LOT OF WATER. I WAS PLANNING TO GO CHECK THEM TONIGHT AND SEE IF THEY NEEDED WATER BUT EVERYTHING IS PRAYING TO THE SUN! I DONT WANT TO OVERWATER AND I BELIEVE THESE WOULD BE BEST SUITED TO BE WATERED IN TGE MORNING. ILL FEED THIS TIME AS WELL. IM CONSIDERING ANOTHER APP OF K BICARB. TOOK A FEW PICTURES AND VIDEOS BUT ILL NEED TO UPLOAD
8/31 FED AND WATERED EVERYTHING. TOASTED TOFFY DIDNT GET FED DUE TO SEPTORIA AND THE 10 ISNT FAR ENOUGH ALONG.. THE 50 WAS WATERED YESTERDAY BUT GOT THE FEED WITH A LITTLE MORE WATER THIS MORNING. I ADDED ABOUT 1/16 TSP BEASTUE BLOOM TO THE REGULAR LINEUP TO SEE HOW IT GOES. MY BUDDY TOLD ME LOTS OF PEOPLE HAVING PROBLEMS WITH PM. I WENT BACK OVER TO DEFOLIATE AND LOOK FOR PM AND I FOUND IT. ON THE GMO INTETIOR AND SOME BOTTOM BRANCHES. I DEFOLIATED WHAT WAS BAD AND THEN I SPRAYED 3 GMO'S, EVENT HORIZON IN THE MIDDLE AND SHERB PIE WITH K-BICARB. HOPFULLY THAT WILL KEEP THINGS OUT OF CONTROL. I WILL BE WATCHING AND KEEPING UP WITH FUNGACIDES. IF I FIND ONE NOT WORKING ILL SWITCH IT UP. I HAVE A FEW OPTIONS. BUDS ARE EXPLODING IN GROWTH! WINDY OUT. I SAW A SECONDARY BRANCH LIMP AND MY GEART SUNK. I LOOKED DOWN THOUGH AND SAW THAT IT JUST WAS BLOWN HATD AGAINST THE TOMATO CAGE AND SNAPPED. I REMOVED IT WITB A SIGH OF RELIEF. MY BUDDY SAYS THE SEPTORIA DOESNT LOOK TO BAD AND ITS PRETTY FAR IN FLOWER SO HE THINKS ILL BE ALRIGHT. NEVER GROWING CLONES AGAIN. ILL STICK TO SEEDS AND STEAINS MADE FOR MAINES
9/1 Forgot to write an entry. IT RAINED FOR A BIT BUT TURNED TO BRIGHT 80'S
9/2 WATERED EVERYTHING. I THINK ITS TIME FOR ANOTHER TREATMENT OF PLANT DOCTOR TODAY. The septoria is getting a little worse. The buds are swelling everyday though. I think this plant only has a month left. I just need to outrun it. So far so good. I think my watering habits are better now. It's different depending on weather. Potassium bicarb has been wonderful treating the pm on that gmo. I treated the middle event horizon with it as well. It seems to work awesome. I'm losing tons of leaves. I hope that's normal senescence. I think it is seeing as how I see SOME foliage in the woods. Its matching other diaries. The plant must shed some leaves to make these flowers that seem to double in size every time I see them! Trying to upload a couple videos but they are long so we'll see what happens.
WENT BACK OVER AT NIGHT ANDCAPPLIED A LITTLE BIT OF K BICARB AND DEFOLIATED WHAT I SAW ON THAT GMO. IVE BEEN DEFOLIATING WHAT SEEMS LIKE A LOT BUT BUDS ARE SWELLING AND ITS CONGRUENT WITH THE MAJORITY OF MY DIARIES. I WISH I HAD PERFECT CONDITIONS BUT I DONT. I TREATED THE EVENTHORIZON WITH PLANT DOCTOR AGAIN. I USED APPROX A QTR GALLON OF 2 TSP/GALLON AND TRIED TO AVOID BUDS WHILE STILL GETTING THE LEAVES. I KINDA USED THE REST AS A SQUALCH SINCE I HAD WATERED THIS MORNING. THE WIND WAS STRONG. I ADDED A GARDEN STAKE AND ROPE SUPPORT TO THE TOASTED TOFFY AND ATTACHED IT RIGHT TO THE FRAME OF THE CAGE. LOOKS GOOD FOR NOW. ILL KEEP THINGS UPDATED.


Likes
7
Share


@Ieiogrow94
Follow
Eccoci qui...
Siamo quasi alla fine del cultivo, odore, resina e colore ci sono. Attendiamo solo la maturazione delle cime che richiederà 1/2 settimane....
NON VEDO L'ORAAAA...
Seguiranno aggiornamenti, grazie a tutti per il supporto🔥🌲❤️

Likes
53
Share


@DogDoctorOfficial
Follow
Harvest Report: The Swift Journey of Blackberry Auto
Greetings, fellow cultivators! The moment we've all been eagerly awaiting has arrived – the harvest of my Blackberry Auto. This beauty has moved through her life cycle with astonishing speed and grace. Let's take a moment to reflect on her incredible journey from seed to harvest and celebrate the fruits of our labor.
Seed to Sprout: It feels like just yesterday when I planted the tiny seed of Blackberry Auto. Nestled in a Root Riot cube, she sprouted with vigor, her first delicate leaves reaching for the light. The conditions were perfect, with temperatures at a steady 28°C and relative humidity at 95%, creating an ideal environment for her early growth.
Transplanting and Early Growth: As she transitioned to a small pot filled with rich soil and Mycor Mix, Blackberry Auto continued to thrive. The Mycor Mix, with its blend of various mycorrhizae species, worked wonders in enlarging her root system and facilitating nutrient uptake. Her early growth was nothing short of spectacular, setting the stage for the robust plant she would become.
Rapid Vegetative Phase: Blackberry Auto quickly outgrew her initial pot and was soon transplanted into her final home – a 16L AutoPot. This setup allowed her to drink as she pleased, supported by the precise hydration of the AutoPot Aquavalve. With a foundation of Aptus All-in-One Pellets and Mycor Mix Soil, she had everything she needed for explosive growth. Her leaves grew enormous and lush, and her branches spread wide with gentle low-stress training.
Swift Flowering and Stunning Development: Entering the flowering phase, Blackberry Auto didn't slow down. Her buds formed quickly, each one a masterpiece of nature. The colors were a sight to behold – deep purples, vibrant magentas, and hints of dark blue. The aromatic symphony filled the grow room, a testament to her potent genetics and the meticulous care provided.
Natural Brilliance and Final Weeks: Observing her rapid progress, I ceased all feedings to let Blackberry Auto showcase her natural brilliance. Her final weeks were marked by a dazzling display of colors and an incredible pace of bud development. Each day brought new marvels, as her buds swelled and her trichomes sparkled like a constellation.
A Heartfelt Reflection: From the moment she sprouted to her final days of flowering, Blackberry Auto has been a true wonder. Her speed and beauty have exceeded all expectations, and it's hard to believe how quickly she reached this point. This journey has been a testament to the magic of cultivation and the resilience of a well-bred strain.
Acknowledgments and Gratitude: As we celebrate this harvest, I extend my deepest gratitude to @fastbuds_official for creating such a remarkable strain. To Aptus Holland, my main sponsor, your support has been invaluable in nurturing this beauty. A special thank you to Grow Diaries for providing a platform to share this journey, and to the community for your shared passion and camaraderie. 🌱💚
As we move forward, I eagerly anticipate the trim and smoke reports, where we'll dive into the sensory delights of Blackberry Auto. For now, let's revel in the joy of a successful harvest and the extraordinary journey that brought us here.
Genetics Blackberry Auto @Fast_Buds
Food - @aptusholland @aptus_world
As always thank you all for stopping by, for the love and for it all , this journey of mine wold just not be the same without you guys, the love and support is very much appreciated and i fell honored and blessed with you all in my life
Likes
2
Share


@Barzenegger
Follow
This week I didn't spend much time checking in on the tent, but when I went to check the reservoir, which I expected to be empty, I realized that the system was clogged. About half of the nutrient solution was still in the tank.
I opened the tent to check the moisture of the substrate. It was pretty dry already and the plants were showing some heat stress and the burnt tips had gotten somewhat worse. Being too close to the light didn't help either. They weren't hanging yet, but they needed to drink.
It was clogged in a small part of piping between the tank and the tap, which I realized, was never actually cleaned before. And I did have some organic compounds in there a rather long time ago, which probably caused this in the first place. I unclogged it within a few minutes, and bought some Canna D Block to try out. I will probably refill the reservoir again early next week.


Likes
3
Share


@CaptonianMoneymaker
Follow
Had little issue with under feeding but up all doses by 10ml per 2 litres
Likes
6
Share


@agustinnnv
Follow
Una planta criada en excelente condiciones desde el comienzo hasta el final de su ciclo. Nunca demostró carencias ni excesos y tuvo un buen armazón para el momento de empezar a cogollar. Aún así, no salió mucha cantidad pero no tengo ningún tipo de queja respecto a la calidad. Cogollos bañados en tricomas y con un pegue increíble. Excelente genética.

Likes
7
Share


@darcness
Follow
Substantial growth in the roots. Should hit flower in the next week or two.


Likes
7
Share


@AustinRon
Follow
Week 8 - Bolt 2 (Flower Week 2)
SB4Q - BOG Sour Bubble (BOG Bubble BX2)
Sour Bubble - BOG Seeds
(BOG Bubble x BOG Bubble)
Harvest Window:
Early Harvest: 52 ± 5 Days (7.4 Flower Weeks) 8 - 18 March 2023
or
Late Harvest: 84 ± 5 Days in Flower (12 Week Flowering) 7 - 17 April 2023
Veg Week
Start of Week: [ 2023-02-08, BSBQ4 56:F:9:1]
End of Week:
[ 2023-02-14, SB4Q 62:F:9:7]
HeightWeekStart: [ 8.5, in]
HeightWeekEnd: [ 9.0, in] #Last Topping
GERMINATION: 2022-12-16T14:25:51-0600
Week’s Environment
TempAvgMaxMin: [ x, y, z, °F]
RHAvgMaxMin: [ x, y, z, %]
VPDAvgMaxMin: [ x, y, z, kPa]
LightDistance: [ 21.5, in]
LightDimmer: [ 50 + 2 ticks, %]
LightPPFD: [ 786, µmol/m2/s] # 2/3 the way to 1000 PPFD at the center ~r
ReservoirTemperature: [ 56.5, ±1.5, °F]
Fertigation
The Rooted Leaf Hydro Chart:
- [ Primer A, 8.6, ml, gal]
- [ Primer B, 8.6, ml, gal]
- [ Silica Skin, 4.3, ml, gal]
- EC: 2.5
13, 13, 6.5
pA, pB, Ss, Lush green
4.3, 4.3, 3.25, 3
7, 7, 3.5
Fertigation
The Rooted Leaf Hydro Chart:
- [ Primer A, 28, ml, 3 gal]
- [ Primer B, 28 ml, 3 gal]
- [ Silica Skin, 13, ml, 3 gal]
The Rooted Leaf Foliar Chart:
Monday:
Solar Rain: 20, ml, gal
Silica Skin: 20, ml, gal
Mammoth-P: [ 3, drops, pt]
Wednesday:
CalMag Fuel: 20, ml, gal
Lush Green: 5, ml, gal
Mammoth-P: [ 3, drops, pt]
Friday:
Solar Rain: 20, ml, gal
Mammoth-P: [ 3, drops, pt]
Peak Bloom: 5, ml, gal
___________________
Wed 08 February 2023
BSBQ4 56:F:9:1, 6:B:1:6
Thu 09 February 2023
BSBQ4 57:F:9:1, 7:B:1:7
Fri 10 February 2023
BSBQ4 57:F:9:1, 8:B:2:1
Sat 11 February 2023
BSBQ4 57:F:9:1, 9:B:2:2
Sun 12 February 2023
BSBQ4 57:F:9:1, 10:B:2:3

- Defoliated 3rd Node Fans, as they were hanging and blocking understory air flow
- Installed Copper Core Wire trainers to spread final 2 nodes of 4 meristems.
- Raised Lamp to LightDistance: [ 14.5, in]
- Adjusted dimmer to yield
- Center: [ 885, µmol/m2/s]
- Corners: [ 530, µmol/m2/s]


___________________
Mon 13 February 2023
BSBQ4 57:F:9:1, 11:B:2:4
Tue 14 February 2023
BSBQ4 57:F:9:1, 12:B:2:5

Likes
124
Share


@CRiSPrGrow
Follow
Now it gets interesting! the couskush took to training as well as you can expect and auto to take to 90° bend training, it's bushing out nicely although highly apex dominant. It's pushing out thick leaves and loads of pre flowers and flowers. Sprayed it once with micro and kelp but i eyeballed the micro and it was too much so there's residue everywhere... I'm probably going to have to clean each leaf one by one with a moist paper towel, but that's a problem for future bulbi lol watered it with some co2 and also with a mix of micro and beneficials 2g each of the micro and 5grams each of the spores for 2L of water, of which i only use 1.5L that's three pints. I raised the pot slightly using a bakers tray, getting that airflow in. It's finally getting interesting now, so i'll be doing my best to get some nice pictures in. Comments and suggestions welcome ! drop me a message ! 🚀
