


Likes
Comments
Share


@weedelicious030
Follow
Alle Pflanzen wachsen sehr gesund. Das Training haben alle gut vertragen. In dieser Woche gab es keine Probleme


Likes
19
Share


@MrWolfe
Follow
Got them all stripped down and moved the lights closer.
Not going to top them next time, they respond so much more to supercropping.
Let me know what you think, if you could take a second to go follow on IG I'll be posting more and more there as I get some stuff to teach people.

Likes
16
Share

@ohcibi
Follow
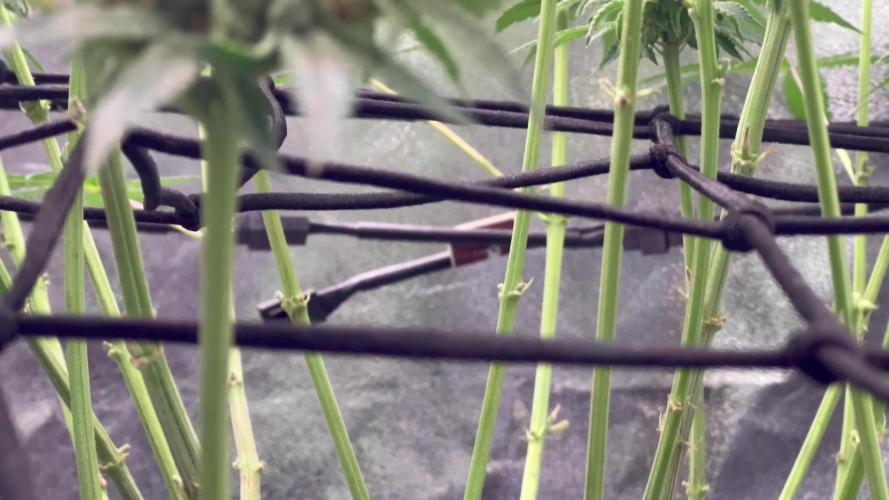
Still growing strong actively. In particular Ryu developed lots of newly freshly white pistils but also the lower bud sites started to grow significantly.
Fingers crossed that this will grow smoothly towards the end. The emergency harvested branches were ok but way to soon of course. At the same time they haven’t been very big either so I guess the impact on final harvest won’t be as big/maybe even beneficial as for air flow, nutrient supply etc for the rest of the branches. Also those I harvested have been excluded by my counting so far as I haven’t seen them since they were too low. There’s another one such candidate who might have to be emergency harvested as well but he’ll have a full more week and also he is heavily coated in sugar already.
Let me know in the comments how well you can see the sugar coating, especially the lower bud sites sometimes have an excessive coating. Would be interesting to know whether this has anything to do with lower bud sites doing something that it makes them sugar up more. Or maybe it’s the light that is different in these darker areas
The image quality in the video for some reason is much better often than in the photos. I don’t get why the iPhone isn’t just doing what it does in video mode in photo mode as well.
Processing
Likes
18
Share


@CanadianFillmore
Follow
Week 5 begins! Divine storm 1 & 2 are doing well, however DS2 is a bit hungrier. I believe that was do to her close location to the fan moving air around the bottom of the canopy.
Increased feeding to 5 liters per plant and did some defoliation of the yellowing leaves. Moved the ladies to the other side of the room for the rest of the grow.
Thanks for stopping by 👽🌳🔥
Processing
Likes
21
Share


@PrairieFrostGrow
Follow
********** Week 2 of flower - Sept 26 to Oct 2/20 ***********
It has been an exciting week with finding a crack in a main stem and started new supplemental nutrients as well.
On Sept 28 I found a crack and had to do some repairs. Gorilla Girl was better off than one of the Cream 47’s with a cracked stem. GG4 was caught early enough that she didn’t separate much at the base. Looks to be as though I have caused the issue by topping the main stem a little too low😢 Coming back though and when tied together and looked after, its crazy how these plants can heal themselves😀💪👍 Took the tips from fellow growers and decided to try and fabric something with some cushion so that the straps holding the branches together don't cut into the branches. Needed another tool of the trade.......DYNAVAP to calm the nerves😀 because the grow has been going well and this set back has me pissed off as it is grower error😡 Seems to have worked out pretty well.
Switching the PK booster at the end of the week to Big Bud and started to add Rezin from Green Planet. Not much for Bud Factor X left so will run with Terpinator and Rezin as a replcement.
2nd layer of SCROG netting added early in the week, Sept 27/20. They are pushing out a good amount of leaves now and stretching so need to provide that added support for down the road.
IPM spray again this week, last opportunity, with Plant Therapy. There has been something in the tent and I think I have killed them. One more shot though to make sure and before there are too many bud sites. Love this product!!!!!! Works so well at getting rid of thrips and mites.
Really good growth this week. I need these girls to stop now though!!!!! They getting really tall and have roughly 12” above the canopy now. The node stacking is really good and they are forming a number of colas. Looking very positive so far! This strain is so vigorous and she just want to go👍 They have gone from 18” tall to 34” in a week......crazy good growth.
Little more detail........
Sept 26/20, Day 8
- Little heavier feed as they have not been watered for two days
- 4L - CalMag @ 2ml, Sensi Bloom, B52, Bud Candy, Bud Ignitor @ 1ml
- 830ppm and 5.7pH
- will start to let the pH rise bit now over next couple of weeks
- side branching doing very well and coming up.
- GG4 a little bare in the middle of the plant with just four colas.
Sept 27/20, Day 9
- 2nd SCROG layer added.
- GG colas getting long........need to add more Silica as well.
Sept 28/20, Day 10
- more microbes today
- 4 L - Microbial Mass @ 1.5ml, CalMag @ 1ml
- 290ppm and 6.3pH
- pH was a little high but left it...wasn't moving and then boom,,,,,,,oh well.
- Good amount of runoff today.
- GG4 has one cola leaves not happy. Not sure if its light or wind. Moved the closest fan to her today.
- GG1 shooting lots of branches right now.
- GG4 bud stacking is happening already and doing very well.
Sept 30/20, Day 12
- Heavier feeding today
- 5L - CalMag, Vitathrive, Rezin @ 2ml Rhino Skin, Bud Candy, B52, Sensi Bloom @ 1ml.
- repaired the cracked stem a little better tonight......not as bad for this girl.
- Try and keep the paper towels wet now so the humidity is high around the wound.
- Should have left a little more branch from the node above when cutting the top.
Oct 1/20, Day 13
- Switching PK booster today to Big Bud......these two girls are past bud ignitor.....already stacking.
- 3L - CalMag, Sensi Bloom, B52, Bud Candy, Big Bud @ 1ml
- 665ppm and 5.9pH
- Since these girls are so tall I am not going to give them Green Planet Massive. I find they get quite a bit taller with that product. I am looking for chunky and not tall so I will keep up with Advanced PK boost.
- IPM spray tonight again with Plant Therapy. Think I have seen some bug damage on Cream 47 girls.
That takes us to the end of week 11 in growth and week 2 of flower. Time will go quick now that we are off and running. Will be done feeding by early week 7. Want a good flush and leeching on these girls to get all the nutes out. I have been missing it by a few days on the last few auto runs and want this photo run to be better as I have a better track of weeks and when she will be done..........should be the end of week 9 to first days of week 10 of flower, about 7 more weeks.
Cheers Growmies and have a great week. Thanks very much to Mr_Motalovah and spacecadet55 for sharing your comments on cracking the main stems. Should be avoidable next time and appreciate the knowledge🙏👍 Looking good Sweet Seeds, she is a grower and filling in already in first two weeks of flower........If you veg longer than 3 to 4 weeks, make sure you have allowed for height concerns💪

Likes
4
Share


@TRPHAUS089
Follow
The plants are doing super well under nearly perfect conditions. Unfortunately I didn't have so many pictures

Likes
25
Share


@Elpicor
Follow
3rd week I started with biogrow, raise dimmer from 25 to 35, no LST they will grow wild.
Likes
1
Share


@lov3m3mor3
Follow
We upgraded! Really thrilled with the new setup. Much better than those cardboard boxes. Pine tree kush was having issues due to the size of the makeshift setup so this tent was very much needed. No nutes as I just transplanted into new soil. I’ll give it a week before I decide if she’ll get one more round of fertilizer before we stop before harvesting.
Likes
13
Share


@420DeepGrow
Follow
Gracias al equipo de Royal Queen Seeds, en especial a @james, Marshydro y XpertNutrients y sin ellos esto no seria posible.
💐🍁 Gelato #44:
Los criadores de Tyson 2.0 criaron Gelato 44 a partir de cepas finas. Al cruzar la Sunset Sherbet y la Thin Mint Girl Scout Cookies, crearon un híbrido de dominancia índica que asesta fuertes golpes en el cuerpo y la cabeza.
Su contenido de THC del 22% crea sinergia con terpenos colocantes para ablandar los músculos
Mantenla hidratada y con una dieta constante y pasará por la fase de floración en unas ocho semanas. Las plantas de interior alcanzan una altura máxima de 120 cm y producen 400-450 g/m², mientras que sus homólogas de exterior alcanzan los 180 cm y producen hasta 600 g por planta.
🚀 Consigue aqui tus semillas:
https://www.royalqueenseeds.es/rqs-semillas-cannabis-tyson/663-gelato-44.html
💡FC6500: Eficiencia líder en el mercado: la lámpara de cultivo LED FC-E6500, que ostenta un estatus líder en el mercado, es una solución rentable con un PPE de 2,8 µmol/J y un rendimiento máximo de 2,5 g/vatio. Ofrece un PPF alto de 2026 umol/S y es adecuada para una cobertura de vegetación de 1,50 m x 1,50 m y una cobertura de flores de 1,20 m x 1,20 m.
Iluminación versátil y uniforme.
https://marshydro.eu/products/mars-hydro-fc-e-6500-730w-commercial-led-grow-light/?gad_source=1&gclid=Cj0KCQjw1qO0BhDwARIsANfnkv9IIrYSbmJqz8PqpJOIyWwJfp5bc3SGJgUV68USLQ4tjmXDYwoBuAsaAue3EALw_wcB
🚥 MarsHydro ADLITE UV/IR/RED:
Para lograr un crecimiento óptimo de las plantas y maximizar los rendimientos es un arte simple que depende en gran medida de las condiciones ambientales adecuadas. Reconociendo las limitaciones de la iluminación natural y las soluciones de iluminación tradicionales para satisfacer estas necesidades únicas, lanzamos ADLITE. Estas luces especiales UV, IR y roja están diseñadas para llenar áreas del espectro, proporcionando las altas longitudes de onda que las plantas necesitan para un crecimiento y desarrollo óptimos.
🚀 Consigue aqui tu Adlite:
https://marshydro.eu/collections/adlite-supplemental-lights/
🏠 : Marshydro 1.50 x 1.50 x 1.80, carpa 100% estanca con ventanas laterales para llegar a todos los lugares durante el grow
https://marshydro.eu/products/diy-150x150x200cm-grow-tent-kit
🌬️💨 Marshydro 6inch + filtro carbon para evitar olores indeseables.
https://marshydro.eu/products/ifresh-smart-6inch-filter-kits/
🍣🍦🌴 Xpert Nutrients es una empresa especializada en la producción y comercialización de fertilizantes líquidos y tierras, que garantizan excelentes cosechas y un crecimiento activo para sus plantas durante todas las fases de cultivo.
Consigue aqui tus Nutrientes:
https://xpertnutrients.com/es/shop/
📆 Semana 7:
Equivale a la semana 3, ya que el con el error que tuve en el cambio ellas no florecian.
Los cogollos comienzan a formarse y por fin se detiene su crecimiento. La resina empieza a estar presente en la hojas.
Likes
2
Share


@Delta9tetrahidro
Follow
Nuevamente repito siempre el mismo proceso en el cuidado de la planta en cada etapa. Siempre cuido el ph que para mí es lo más importante en este trabajo. Despúes todo lo demas se puede mejorar.
Likes
28
Share


@GodZilla_Owner
Follow
The plants have already been topped. Today, on 25-05-2024, two large leaves were removed, covering the sprouts.
The LST was done at the same time.


Likes
3
Share


@Luccannabis
Follow
This week the plant grew a lot even when I did her another defoliation (I’m really crazy I know) she’s auto but she didn’t show any stress with that. Is just 4 weeks left to harvest.
I broke the air stone when I was doing the solution change, so I have to buy a new one, the good thing is that the new one works much better. Let’s see how it goes this week, I did another and hopefully the last defo today (last pic) and we’ll se e the next one how she responded.


Processing
Likes
7
Share


@x_grower
Follow
Last week I neglected the fertigation beyond the low humidity all that delayed the first topping and leaf burned the most thirsty girls, by the end of the week I had already recovered them and succed topping, they are looking very healthy.
Likes
11
Share


@Hawkbo
Follow
This week they are all just putting on some weight still a few weeks left to go. Pics were taken on Monday video on Tuesday. The aromas are pretty strong in the tent in general.
This one is finishing up pretty quick I'll start lowering ppm soon.
Likes
8
Share


@CanabisLoverHobbyGrower
Follow
All looking good,.. healthy, not much smell yet but roll on next week 👌
Likes
3
Share


@Xabii
Follow
Had to do a root wash, again, also cut some really bad roots of, also saw lots of new healthy root growths since last week, upping ORP and wash last week seemed to have helped.
Overall still very unhappy but that is on me, learned that prepping a plant in DWC and then transplant it to NFT is not a good idea, better do it as usual directly in NFT so that the roots follow the stream better, usually at this time there would be at least 3x the amount of roots.
Also switched back to the 10cm diameter tube, will stick with that one from now on, very good experiences in the past and this one does not, maybe RH does not rise enough in a 16cm diameter tube.
Also changed the light cycle to 18/6 from 24/0, in the timelapse I see phases where the leafs droop slightly and come back, kind of like the night cycle but less, seems to me like the plant wants to go to "sleep" even tough it was raised in 24/0 and I have good experiences with 18/6.
Values are average of the day.
DATE - EC(us/cm)
20250430 1952
20250501 1649
20250502 1722
20250503 1735
20250504 1719
20250505 1750
20250506 1796
DATE - PH
20250430 6.03
20250501 6.24
20250502 6.27
20250503 6.24
20250504 6.21
20250505 6.15
20250506 6.13
DATE - ORP (mV)
20250430 259
20250501 248
20250502 225
20250503 233
20250504 222
20250505 235
20250506 307
DATE - °C - RH% (Tent Temp/RH)
20250430 25.9 42
20250501 25.4 47
20250502 26.6 48
20250503 24.2 51
20250504 23.7 46
20250505 24.5 45
20250506 24.0 47
DATE - °C (Reservoir)
20250430 20.4
20250501 20.4
20250502 21.7
20250503 21.1
20250504 19.5
20250505 19.3
20250506 19.6
DATE - CF
20250430 19.52
20250501 16.49
20250502 17.22
20250503 17.35
20250504 17.19
20250505 17.50
20250506 17.96
Likes
13
Share


@GrowGuy97
Follow
Day 28 - All 3 strains are growing beautifully & all seem very healthy! They all seem to be going into flower except the GSC but she should be following right behind them! Thanks for following & happy growing friends🙏🏼🌱✌️🏼
Likes
120
Share


@Themythicalchristine
Follow
These are doing awesome!
We have had a little bit of a change in the weather in the last week, the nights have gotten nice and cool, and the days are still quite warm.
We have also had a few showers this week which they seem to have loved.
We are at about 13.5 hours of sunlight a day, and cute little buds are forming quickly.
These smell peppery, sharp and sweet.
One of these babes has reached 7 ft from the ground; the others are between 6.5 and 7 ft aswell.
We heavily defoliated these giants today.
These ladies continue to impress me as we move slowly toward the autumn equinox; and into the harvest season 🌾
