
Likes
Comments
Share


@KcKush
Follow
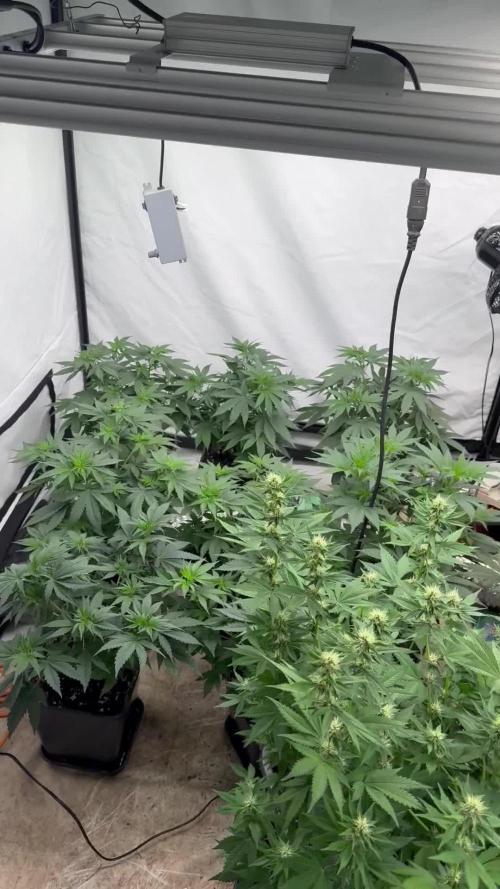
*increased ppm from 1050 to 1100
*i don’t see a lot of bud production but they do show a lot of heavy frost.
*one of the strains has long colas while the other ones remain short.


Processing
Likes
23
Share


@SativaSteve88
Follow
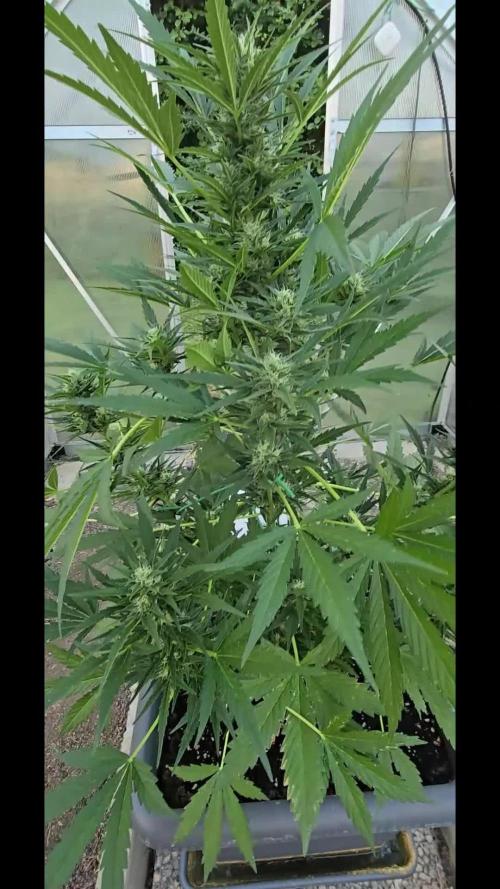
Another week down few more to go can't wait!! First ever attempt of growing my own so really impatient to see the final results now and get to the finish line, that said all has went well upto now other than the size they reached haha, really started putting on weight now it seems and they smell lovely, excited to see the buds fatten and progress over these last few weeks up until harvest now, started 5 liberty haze also they are just coming upto 3 weeks now so check that diary out to, any comments info tips for the final stages appreciated

Likes
1
Share

@Abracadabra69
Follow
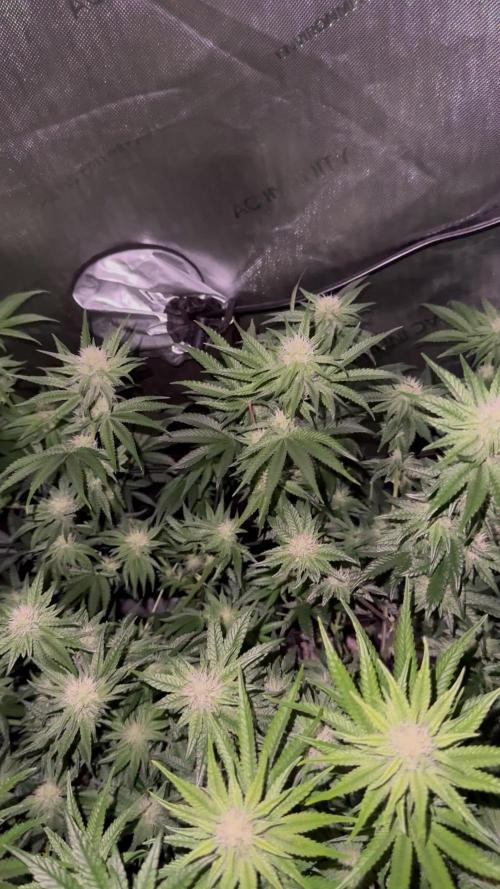
Been all good this week , starting to stack after the stretch 😎👍🏽
Moved in 8 more from other tent to also put into flower


Likes
470
Share


@PurpleWorship
Follow
BIG UPDATE THIS WEEK !!!
----------------------------------
FEEDING MISTAKE / TRANSPLANTING THE PLANT
-------------------------------------------------------
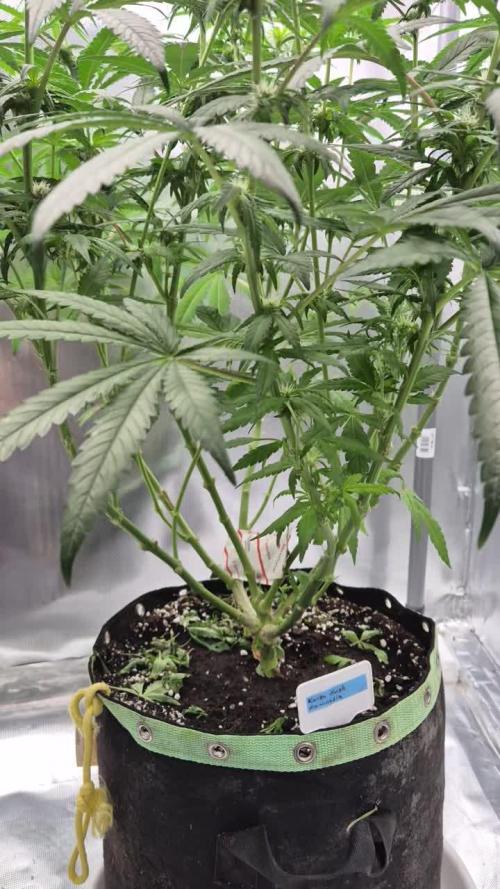
Last week, the plant was showing some feeding issue (some burned tips).
After discussing with another grower ( @Asnoriu ) and carefully listening his advices, I decided to transplant the queen to a bigger pot.
16L can be ok, but I had a long veg (10 weeks), and this was getting too small for the lady. So starting from now, I will always transplant before flowering, since I understood & learned how it help the plant to develop good roots network.
The plant probably suffered from too much feeding with Fish-mix. Asnoriu told me He was using it at 50% of the recommend dose, and not at each watering.
This totally make sense, especially when i look back at my first grow : I used no fish-mix during almost all the veg, and she grow verry well. My gardening soil was probably rich enough for my plants!
I transplanted the plant to a bigger pot (16L -> 30L) and filled the new pot with Biobizz All-Mix soil.
I took the plant from the old fabric pot like if it was a sock : what a niiiice and easy technic ! (Thanks again Asnoriu).
Watered with pure water (ph at 6.2-6.5), without any nutrients (All-mix is already rich enough). I will feed again in 1-2 weeks.
BIG ERROR WHEN APPLYING LST BACK IN THE NEW POT
---------------------------------------------------------------
I had to remove my strings (LST) to switch to the new Pot. When I was applying the LST again in the new pot, I went too far with tension... And the main-lining broke 😟
So I fixed it verrry quickly by releasing LST tension, and using a string to tight the stem where it broke. In less than 5 minutes it was fixed.
I was verry worried that it may have killed my queen.... But she didn't shown any sign of stunt, and 48h hours later, I can say that she look verry good. This doesn't slowed her.
She seems to grow faster since transplant, so all good :) So, note to myself : never try to LST when flowering started, or only verry carefully, with just littles adjustements.
SPONSORSHIP ANNOUNCEMENT & LIGHT + TENT UPGRADE
--------------------------------------------------------------------
I'm verry proud to announce that Mars Hydro ( @MarsHydroLED ) decided to sponsor me :)
So I received a TSW2000 (basically 2X the output of a TS1000), and a Mars Hydro tent (100cm x 100cm x 180cm)
That's PER-FECT, since I was already using a TS1000, which I bought because it was the best deal (price/quality) for me.
I'm verrrrry happy about it, and I feel verry lucky to be selected by Mars Hydro 🙌 This mean a lot to me. I still have a lot to learn, but I'm doing my best to improve myself and learn. Learning from the other, and sharing my experience, and being rewarded for that...
Damn, so cool 😍
MENTION
-----------
Once again, thanks a lot @Asnoriu
You are MY grower of the month, for sharing your ideas, opinions, and advices with me :)
WEEK DETAILS
----------------
- Day 79 : Watering 1L (ph 6.2 - 6.5) with feeding (as detailed in the week details)
- Day 82 : Transplanting from 16L pot to 30L pot. Broke stem, and repared it. Upgraded from Mars Hydro TS1000 to TSW2000 (2x more powerfull). Watered with pure water.
- Day 84 : Plant look verry great, and seems to stretch & flower faster :)

Processing
Likes
6
Share


@Jack_Greenstalk
Follow
platinum yeti 3 finally stopped stretch at 34 inches and its closest to bulb at 18 inches from closest top. rest are about 20-22 inches from the bulb
Likes
2
Share


@Saintvicious
Follow
Just keep watering as it drys. Supporting buds along the way that are getting too heavy. Smells like skunk and gas. Little fruit but not much. Trics still getting thick. Look forward to it finishing. Tricomes still cloudy. Little amber on sugar leaves but it's still going strong. Some leave fading finally to fall colors.
Likes
32
Share


@EBPbyEVD
Follow
Hey people! ✌️✌️
So, at the time of this post, it's day 60 of flowering. 🌸🌸🌸
We're nearing the finish line. This week, the seeds started popping out in all directions. Feeding remains unchanged: AB 20ml/5L.
Today, I noticed some scary numbers on the runoff, measuring at 2500ppm.
Next watering, I'll give them plain water.
I'll continue feeding until the very end. The taste of the buds isn't our focus in this grow, and what kind of buds can we expect anyway?
I continue to train the big plant as it started leaning to one side. I've tied it to the pot for support.
My bet is that in 2-3 weeks, we'll be harvesting, collecting seeds, and running some bubble hash.
There's a new addition to the grow box. I added a Barney's LSD auto since it's outgrowing my small box.
I also planted 7 no-name seeds that came my way by chance. Curious to see what comes out of them.
Well, until next time, have a great time! ✌️✌️


Likes
43
Share


@Mz876
Follow
She’s slowly but surly putting on weight . Trying my best not to harvest too early.


Likes
18
Share


@Grower_Of_Persia
Follow
my dry and cure style is this:
4 days of hanging upside down to get water activity lower to around 0.6 in 50% humidity and 26 C temp (i know its a little high but we are in a hot summer right now and i cant get it lower even with air conditioner) and then after 4 days of drying i remove leaves and stalks, trim buds and move them to jar for the rest of their life :D . and in the first 4 days of curing i open the jar door and let hem get some fresh air in the jar for about 5 minutes and close the jar door again, after 4 days of curing like that buds are smokable but they will get better as they getting cured about 1 month.
buds are one of the hardest as fucking rocks type of buds! very dense , compact , sticky , smelly , amazing at every aspect
growing stage was 56 days and flowering stage was 75 days total (harvested tops at day 64th)
the total weight of dry buds was : (plant #1 & #3 top buds 56 G + lower buds 22 G ) 78 G + (plant #2 top buds 47 G + lower buds 18 G ) 55 G + (plant #4 top buds 120 G + lower buds 67 G ) 187 G = 367 G


Likes
13
Share

@NSABND
Follow
Day 50 and a new week... the summer comes back to germany and "Hilde 2.0" goes well 🙏😀
Day 51 ... the summer is back in germany ... sun and heat 😎👍... good for the Buds 😉🙏
Day 52 summer sun and warm weather....😎🙌🙏👍
Day53 hell yeah....sun and hot weather 😎🙏👍
Likes
1
Share

@Borberad
Follow
Blütewoche 3
Die Blüte ist im Gange! Die Pflanze streckt sich immer noch zaghaft. Insgesamt ist die Pflanze sehr buschig und dicht gewachsen daher muss jetzt entlaubt und aufgeastet werden.Der Düngeplan bleibt unverändert.
* Zustand der Pflanze: Mäßiger Blütestretch, schöne Blütenstände.
* Wichtige Ereignisse: Zeltwechsel, Lollipoppen
* Düngung & Messwerte:
* Gießwasser: pH ca. 6,3. Leitwert 1,4 bis 2 S.
* Drain: Wir stellen sicher, dass der pH-Wert nicht unter 5,5 und nicht über 6,8 liegt und der Leitwert die +/- 500 S Abweichung einhält.
* Anpassungen: Entlauben und Lollipoppen


Likes
Comments
Share


Likes
4
Share


@Skillgrower
Follow
Começamos a 3° semana no domingo está agora com 18 dias a correr bem, vou dar continuidade ao lst ate à 5 ou 6 semana e mudar o ciclo pra floração
As mais pequenas no vídeo uma tem agora 12 dias e a outra está com 15 no fim da segunda semana começou hj o lst


Likes
17
Share


@eldruida_lamota
Follow
Venga familia que ya viene la cosecha de estas finta F1 de ZamnesiaSeeds, que ganas que tenia ya de darles machetazo, me estaban dando muchos quebraderos de cabeza.
Las flores no son para nada llamativas, una variedad más cruzada con rudelaris, que para mi gusto es perder el tiempo y el dinero invertido en cultivar cosas así… no merece la pena en interior, el ratio de gramo watio se me quedó en 0.5 , de los no peores resultados que tuve en los últimos 5 años.
a sido una genética con la que no disfruté nada cultivarla, es complicada, es bastante sensible.
Las plantas en sí se quedaron enanas y para nada fue lo que esperaba, me recordaron a las autos que plantaba en el 2012…
Agrobeta:
https://www.agrobeta.com/agrobetatiendaonline/36-abonos-canamo
Mars hydro:
Code discount: EL420
https://www.mars-hydro.com/
Hasta aquí es todo , espero que lo disfrutéis, buenos humos 💨💨.