




Likes
16
Share


@MadeInGermany
Follow
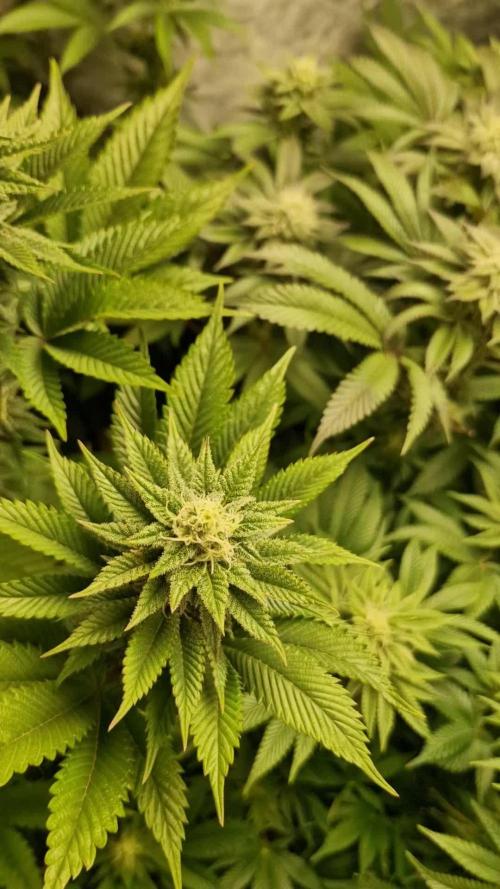
Flowering day 42
since time change
to 12/12 h .
Hey guys :-)
A lot happened this week :-).
The buds develop really nicely .
The scent wafts through the whole room when I open the tent 💚.
This week was poured 3 times with 1 l each (nutrients see table above) This week there was the maximum amount of fertilizer, which will be slowly reduced from next week :-) .
Have fun with the update and stay healthy 🙏🏻
👇🏼👇🏼👇🏼👇🏼👇🏼👇🏼👇🏼👇🏼👇🏼👇🏼👇🏼👇🏼
You can buy this Nutrients at :
https://greenbuzzliquids.com/en/shop/
With the discount code: Made_in_Germany you get a discount of 15% on all products from an order value of 100 euros.
👇🏼👇🏼👇🏼👇🏼👇🏼👇🏼👇🏼👇🏼👇🏼👇🏼👇🏼👇🏼
You can buy this strain at :
https://www.ripperseeds.com/en/feminized/kmintz-feminized-cannabis-seeds
Water 💧 💧💧
Osmosis water mixed with normal water (24 hours stale that the chlorine evaporates) to 0.2 EC. Add Cal / Mag to 0.4 Ec Ph with Organic Ph - to 5.8 - 6.5
MadeInGermany

Processing
Likes
4
Share


@Barcelona_Farmers710
Follow
Booommm! Llegó la hora tan esperada Farmers nuestras flores llenas de resina acabandose de formar, la verdad que estas genéticas ayudan mucho al desarollo del cultivo espero que os guste!! Salut y força al canut!!!

Likes
14
Share


@Kakui
Follow
22 Enero(F55): Solo queda una semana para terminar el cultivo, en estos últimos días se está usando Fade de Athena Nutrients, para ayudar con la maduración y mejorar sabores y olores. La luz de los LED se bajó a un 50% y la temperatura del agua de riego también se disminuyó. Los olores están demasiado potentes, tuve que poner filtro de carbono. Los últimos 4 días se regará solo con agua de osmosis + Cleanse.

Processing
Likes
3
Share


@dbzbr
Follow
due to the amount of branches I was required to add a SCROG screen.
The Flores started to get fat and I get more excited every second!😍
Processing
Likes
6
Share


@Jack_Greenstalk
Follow
3 Plants. 3 citrusy phenos!
#1 : First to sprout rapid rooter. TASTE: Pure Lemon front end into hashy cakey afghani. refer to this as the "lemon hashcake" phenom very dense, beautiful nug structure. Yielded 24.5 dry grams of primo smoke. Uplifting more cerebral sativa high with some punch in body as well. happy stress reliever for sure! has some "gassy" or fuel notes to it but very subtle
#2 Tangerine pheno: I orginally thought sour 76 was sour diesel x 76 Afghan til i read hso marks post on uk420 forums saying its cali sour d x 76 afghan. cali sour d is cali orange x sour d x mexican sativa. and it shows in this pheno which smell and taste pretty similar to tangie my friend grows which is cali orange x skunk 1 (mexican sativa x Colombian sativa x afghan indica) pretty similar genetics roots! Smell: Sweet tangerine 🍊
Taste: Just like tangerines 🍊
Medical Effects: Hybrid feeling effects felt both in body and mind. Stimulating mentally, relaxing in the body. Mild pain relief generally with amazing relief improving feeling in joints (reduced swelling or irritation in otherwise aching areas, loosened tension at joints)
Notes: After breaking up or grinding the sweet tangerine open jar/bud smells turns more sour tangerine with very subtle gas aroma. This one is scary strong! I am an all day regular smoker of the most potent buds I can find, and I never make it thru 1 bowl of this without long breaks after each hit. Starts off strong and creeps to EXTREME psychoactivity. Not for the faint of heart this one might not be best for "new smokers" 😎🔥🔥🔥 yielded 26.1 grams if id have taken clones this woulda been the keeper of the batch, but I got more to check out in future run :) and I got a cloner and veg chamber to start keepin the keepers now I know i like the strain!
#3 Lime Fuel pheno: Smell: Lime🍈 and gas ⛽
Taste: lime
Medical Effects: Cerebral uplift. Creeper. thought it was weakest on initial smoke but 10 minutes in it end up being strongest high of all 3. super wicked sativa, buzzy uplifting all similar to Cinderella 99 or strong jack herers this has almost a "scary high" first few times but once you get used to it or microdose, it is a super fun creative medicine. Helps my arthritis pains and gives me the clean up the house kind of high
Notes: Foxtailed, lowest yield of 3 sour 76's likely because its place directly under the light (perhaps didnt like too intense direct light) but is the most potent of the 3 as well. yielded 22.5 grams of dry
Likes
152
Share


@SlowpokeFuegobud
Follow
🍪 🍒 🍰🍩 🎀🍪 🍒 🍰🍩 🎀🍪 🍒 🍰🍩 🎀🍪 🍒 🍰🍩 🎀🍪 🍒 🍰🍩 🎀
Welcome to week 9, dear growmies!! 😘
DAY 57
Watered with 3ml humics, growzyme + bigfruits 💧
DAY 60
Watered with 4ml bloom+ 2mlpk + 4ml humics, growzyme + 3ml bigfruits+ 2ml calmag 💧
DAY 63
Watered with 3ml bloom + 4ml humics, growzyme + bigfruits + LO + 2ml calmag 💧
Thanks for showing up and supporting me and the girls, bless you, growmies!! 😘 ❤️
Shouts go out to my sponsors @GreenBuzzNutrients, thanks so much for your support!! 💚 💚 💚
If anyone would like to try their amazing organic products, you can find a generous discount code of 25% in my weekly comments! 😜 🙏
If you want a recommendation which product to get first.. BIGFRUITS!! 😍 I love the tasty terps with this one!!
https://greenbuzznutrients.com/
Thanks also of course @Kannabia, for the beautiful genetics!! 🧡🧡🧡
Pouring all my love into this grow, thank you for joining in, growmies!! 💚 💚 💚 😘 ❤️ ❤️ ❤️
Wishing you all the best for your beautiful gardens!🌱 🙏 Grower love!! 💚
_________________________________________________________
Strain Info:
https://www.kannabia.com/en/feminized-cannabis-seeds/break-up-cake
We need to talk
You’ve got to celebrate everything in this life, and that includes love and heartbreak. Since you’re all familiar with Wedding Cake feminised marijuana seeds, we’ve put a Break-up Cake in the oven at the Kannabia Seed Company – because things don’t always go well, and we sometimes need a friendly seed to lean on.
Break-Up Cake has a base of Girl Scout Cookies, one of North America’s best-known strains, which is earthy with a very potent indica effect. And we top it off with a delicious Cherry Pie which, in addition to giving it an elegant dark attire, adds a silky, deeply sweet flavour of cherries and berries. Look no further – it’s the perfect cake.
This seed will be celebrated for its ease of cultivation and abundant production. It’s one of the best investments you’ll make this year. But if it’s going to be memorable for one thing, it’s for its sweet complex flavour that’s full of contrasts. If we have to break up, let’s do it sweetly and amicably, right?
How to: Break-Up Cake
Break-Up Cake is an “all-terrain” marijuana seed, which will adapt to the place you allocate to it. An ode to independence, it’s a plant with only the most basic needs that knows how to grow by itself.
It’s a pale branching plant with tremendous dark green leaves, purple tips, and an icing sugar coating of trichomes. Its immense buds are some of the stickiest ones we’ve found in our seed bank recently.
Indoors, it needs 60 days of flowering to give no less than 600 grams per square metre. Use a Screen of Green method without hesitation, or plant it using hydroponics if you want to obtain the full benefit of its potency.
Outdoors, it reaches two metres in height with a harvest of 800 grams per plant, which is reason enough to give it a go. Like a good break-up cake, this plant doesn’t need to live with a partner, and knows how to live well in a Guerrilla plot. Between 25th and 10th October is its moment.
Taste and effect of Break-up Cake
Very relaxing but not causing lethargy, it’s a good indica-dominant plant. Its effect is mellow (we’re too old for childish games). It calms the consumer but it also gives rise to creative moments. Head on up to the top floor, later to make your way, little by little, down to the kitchen later (where you might want to give in to temptation if you need to stimulate your hunger).
The flavour is full of nuances. It will remind you of a vanilla sponge or cheese cake: you’ll notice a cherry topping, something sweet that you can’t quite distinguish, and an earthy undertone on a biscuit base… You’ve got to sample it to know it.
_____________________________________________________________________
SETUP:
80x80x180 cm Zelsius
240W Full Spectrum LED IR UV dimmable
DW240H-A6-HS
Heatsink color red
LED Chips:
512pcs SAMSUNG LM301H + 24pcs Osram 660nm + 8pcs Osram IR 730nm + 8pcs UV 385nm
Color mix: 2700K + 4000K
2,8umol/J
Driver HLG-240H-C2100B
Coverage: veg 5x3ft / flower 4x2ft
Product size: 628x205x68mm
Green Buzz Nutrients
Shouts go out to my sponsors @GreenBuzzNutrients, thanks so much for your support! 💚 💚 💚
If anyone would like to try their amazing organic products, use code GD42025 for generous 25% discount (for orders of minimum 75€) ✨
https://greenbuzznutrients.com/
Biobizz Lightmix
custom exhaust fan 320/270cm³/h
Carbon Active Granulate 240cm³/h
tab water pH 8 - EC 0,25 with Calmag to 0,5
Advanced Hydroponics pH minus Grow + Bloom to pH 6.2
🍪 🍒 🍰🍩 🎀🍪 🍒 🍰🍩 🎀🍪 🍒 🍰🍩 🎀🍪 🍒 🍰🍩 🎀🍪 🍒 🍰🍩 🎀

Likes
48
Share

@MadeInGermany
Follow
Info:
Unfortunately, I had to find out that my account is used for fake pages in social media.
I am only active here on growdiaries.
I am not on facebook instagram twitter etc All accounts except this one are fake.
Have fun with the update.
Flowering day 56
since the time
change to 12/12 h.
Hi everyone :-) .
As soon as I open the tent it gets nicer from week to week :-).
The buds start to swell and smell extremely tasty :-).
This week I also add the PK 13/14 so that from next week you will slowly be driven down so that you can use up your nutrients.
Otherwise everything was cleaned and checked.
Have fun and stay healthy 🙏🏻
You can buy this Strain at
https://www.amsterdamgenetics.com/product/kosher-tangie-kush/
Type:
Kosher Tangie Kush
☝️🏼
Genetics:
Kosher Kush
X
Tangie
👍
Vega lamp: 2 x Todogrow LED CXB3590 COB 55 W
1 x Sanlight S2W 62 W
💡
Flower lamp : 2 x Todogrow LED CXB3590 COB 55 W
1 x Sanlight S2W 62 W
💡 ☝️
Grow Aero System : Growtool 0.8
☝️
Fertilizer:
Canna Aqua Vega A + B , Canna Aqua Flores A + B , Rizotonic, Cannazym, CANNA Boost, Pk 13/14, Canna Cal / Mag, Canna Ph - Grow, Canna Ph-Bloom
☝️🌱
Water:
Osmosis water mixed with normal water (24 hours stale that the chlorine evaporates) to 0.2 EG. Add Cal / Mag to 0.4 Ec Ph with ph- to 5.2 - 5.8
💦 💧

Likes
4
Share

@DrewbieDoobieNoobie
Follow
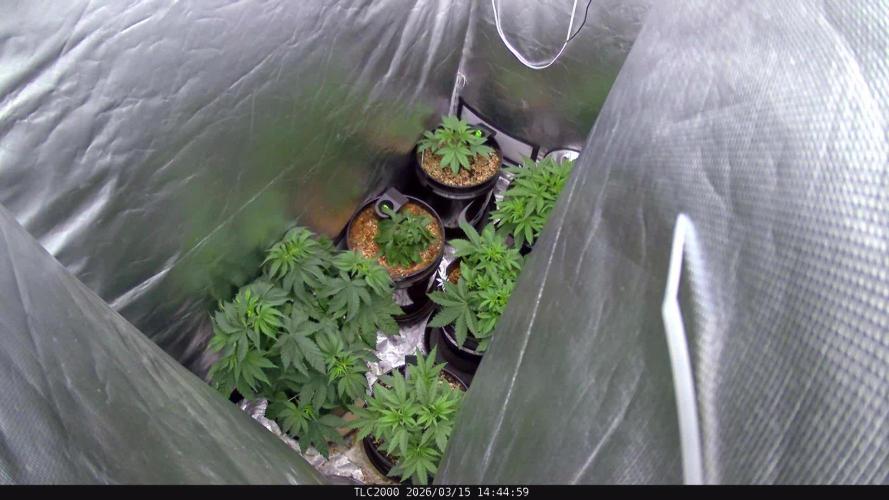
And them there were 5. Looks like I lost an NSB, no fault of the breeder mind you. It got really hot this week and I went a day over what I should have to water. let this be a lesson to new growers " ALWAYS CHECK YOUR GARDEN EVERY DAY AT THE SAME TIME" it does not take long for a pest or environment in this case to ruin you ladies. lazy cost you the hazy. so, the strong will survive. NSB1 needed a drink bad. Big fans require big water. all the buckets were light so time to top them off with the rainwater. at 7.0 ph. 30ppm. I added a little extra food as they will be going into flower next week. about 1200 ppm of food, and the stretch shall begin. I think I will ScrOG these in week 2 of flower. Stay tuned and Stay Lifted.
Likes
17
Share


@BudBrewerz
Follow
She's almost there and going strong , buds got a little thicker during this week, I did some trimming of shadowleaves.
It's just the waiting game now 😅

Likes
15
Share

@BettyFlores
Follow
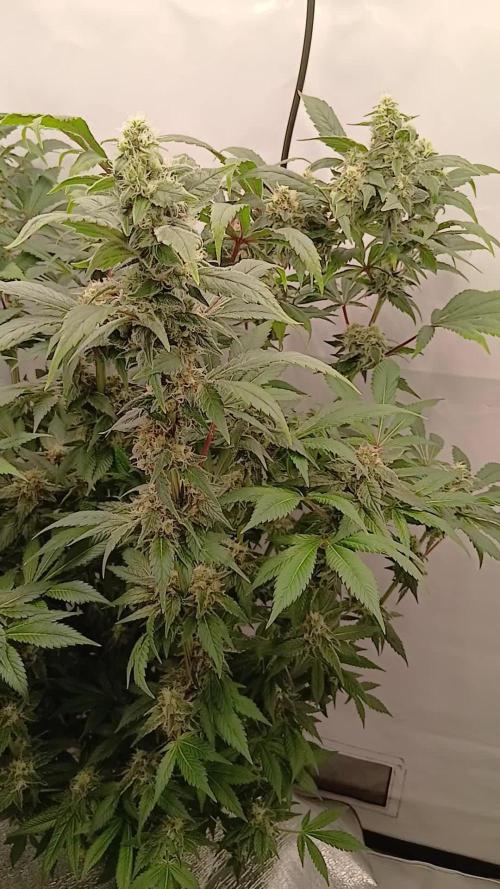
18.12.2025 It won't last any longer for harvesting. She is covered by many trichomes and the main amount is milky already. I'm checking on her every day now and I think she'll be ready very soon. Her pollinized bud is looking really funny, like creating a second bud out of the first. Really unique to me. So, still in progress but not for too long! Looking forward 🌸
Likes
19
Share


@Troy_Farms
Follow
Kicking off the 10th week and she is looking really great. Buds filling in and she is quickly getting thick with coverage from the 4 way mainline. Took a cutting from the side that needed to be trimmed anyway. Gonna experiment and try to get it to root and then spray with Silver Colloidal to try and get some Black Jack female pollen. But it is probably to far along for that, but definitely wont hurt to try. All good things.

Processing
Likes
15
Share


@420Consinc
Follow
- WEEK 8 -
----- Day 50 -----
Woo hoo. End is in sight and the plants are still PACKING the pounds on.
Big Bertha is 11 inches long, 2 inches wide.
The hidden massive Gertha is 8 inches in circumference in the middle in just bud alone and isn't even the largest part of this 8 inch long nug...
Fed 1150ppm 13L 6.4pH
5-15+ days left.
2-4 days till I start looking into trichome finish period.
Forgot to take a regular full shot and shots of tropicanna glookies. oh well. Later tonight if I remember.
I stopped bud candy cause I'm using a lot more molasses and its literally a sugar in itself so why put in bud candy which is just sugars... seems redundant.
----- Day 51 -----
Easy day of watching.
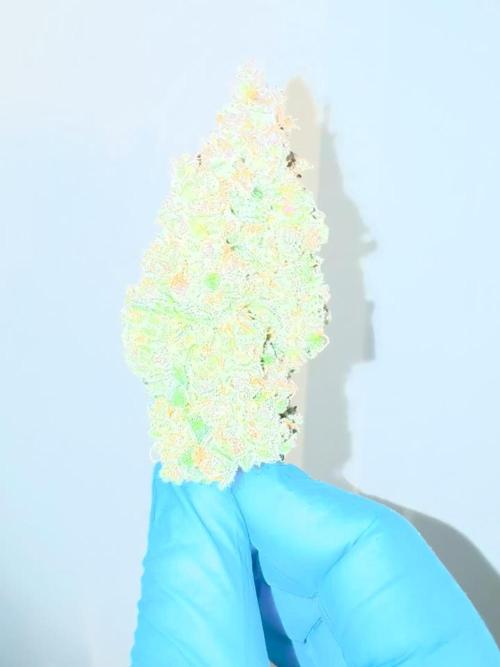
Some nice bud shots today. The whole basement smells of weed candy. Back right Tropicanna is pineapple gummy bear, front right is just gummy bear.
Wedding Cake is like sweet weed, you get the regular smell of pot but instead of skunky its sweet but that Tropicanna is just alllll candy no weed smell at all.
I did the first 60x shot today. 5% cloudy 95% clear on the Tropicanna. Long ways to go.
I'll be doing the Wedding Cake later tonight, got side tracked.
----- Day 52 -----
Fed 1200ppm 6.4ph 12 Liters
Tropicanna Glookies is going full blown purple. Should be covered in dark purple coloration within the week.
Wedding Cake is just fat. Super fat large nugs.
Easy day. Forgot to take trichome pics of Wedding Cake will do that later today probably.
Well, the largest bud is 1 foot in circumference now... rofl
----- Day 53 -----
Easy day. Fed some water, they're getting thirsty again.
I'm going to do a 13L feeding , then next day 5L water. So that's what I did today.
I'll be dropping the Kool Bloom Powder & CaliMagic by day 56 and only feed 1/2 strength molasses only.
Will pick the buds off as they finish, not gonna do 1 big chop unless it manages to turn out that way.
Colors are going wild.
Will check Wedding Cake & Tropicanna trichomes before lights out will update pics then.
----- Day 54 -----
1300ppm 13L 6.4ph fed
Here's some pics.
Wedding Cake is nowhere near ready by the trichomes. Barely any cloudy, no amber.
----- Day 55 -----
Tropicanna really turning purple now starting to infect the leaves at top of canopy.
Can't wait for what Day 63 holds for all these ladies.
Not going to check trichomes till probably day 58
Easy day, last fert feed with chemical nutrients tomorrow, after that its just molasses.
----- Day 56 -----
Didnt even bother with ppm/pH.
Molasses. roughly 30-50ml in 13-15 Liters.
Smoked a tester of the Tropicana Glookies (Sativa)
God daaaamn. Shits fire. Extremely strong. Very Cerebral and its not even at its peak yet...
I've chosen Tuesday as Harvest day for both Tropicana Glookies plants (they're clones of each other)
A single Wedding Cake testing nug is drying right now, I'll judge when it gets harvested based on the high, and if not sufficiently near my level i'll give it 2 days before drying another nug and trying again. I want heavy ass couch-lock.
6 days for Tropicana.
Probably 8 for Wedding Cake.
Will send samples off to Canvas Labs for testing like I've done in the past and will be making both edibles and bubble hash and will post those here as they happen.
Once thats done I will see if I can restart veg mode in this grow, and if so I will keep this going until the plants die (and just make side diaries for each individual plant variety grow).
Should be interesting.
*** update ***
Where'd the 1.5 Liter water bottle go?
rofl


Likes
14
Share


@GanjaReaper
Follow
Day 21:
They did grow a bit. The weather continues to be bad. It's like 10 to 12 degrees at night and daytime it is like 15 to 20.
It will stay like this for another 2 weeks.
There is not much I can do for now like LST because they are not stretching, neighter the newer branches.
Hopefully they will grow larger but I don't expect them to be maximum size at week 2 of flowering.
I expect them to pre-flower in like 7 to 14 days.
Until next week!
Likes
12
Share


@brosef_b_baggin
Follow
Week 23: Part of the plant has been stunted or the roots are having trouble in the soil. I haven't figured out the cause of the problems but I'm guessing it is a mix of stress, from when I split the main shoot first week of flower, nutrient burn/toxicities, fungus gnats/pests. Other than the foliage problems the buds are filling in nicely and the hairs are beginning to turn from white to orange.
Likes
8
Share


@BayAreaGrown
Follow
WEEK 1 flower so far the permanent marker is a very strong strain and it has a strong gas nose already

Likes
19
Share


@Jaxx_Teller
Follow
Very easy to grow and a decent yield for autos. Potency and flavour are there and they're very pretty buds 😍😍

Likes
5
Share


@killerjoint
Follow
10-8-2024 TOP DRESSING AND WORM TEA.....
NOTHING MORE
10-9-2024 22ND DAYS INTO FLOWERING
SMELLS CRAZY ON THESE STRAIN
GETTING SOME SNOW ON TOP
LET'S GO
10-11-2024 DO NOT HAVE ANY PEST BUT JUST IN CASE
NATURESGOODGUYS HOOK ME UP WITH LADYBUGS
JUST GOT HANGING PATCH ABOUT /WITH SHIPPING
10-14-24 NOTHING TO DO...JUST WATER (PH6.6)AND WATCHING THE PLANTS.......
COPY CAT GENETIX STRAINS ARE CRAZY!!!!!!!!


Likes
14
Share

@Skunkwalker
Follow
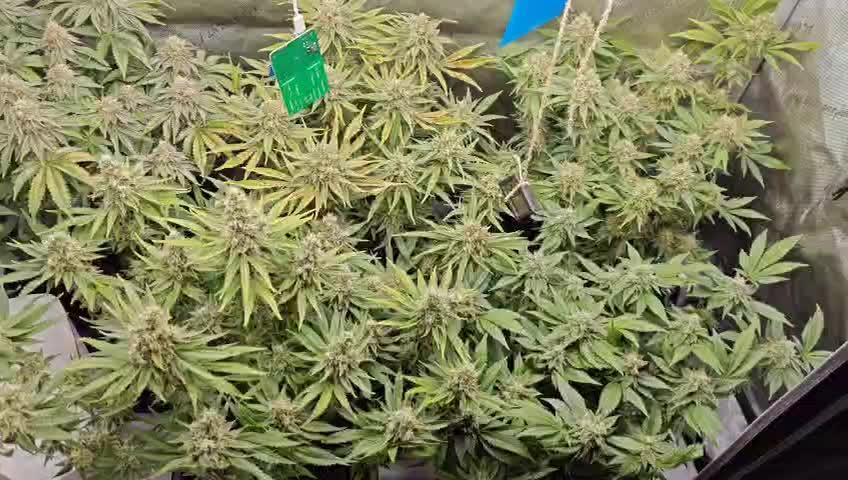
I was on a business trip, so one week is skipped. We are slowly approaching the finale. The Widow and Northern Lights are a little behind.
EC - 2000µS/cm
PH - 6,5pH


Likes
12
Share

@farah4weed
Follow
Hello guys😍😍
We have reached the 5th week of flowering.
The plants are almost done with their longitudinal growth and most of the plant is focused on buds.
I used overdrive fertilizer this week.
The smell of the buds has increased a lot.
And the buds have a stronger smell than the mother (cakes n cream) and give off a stronger OG smell😍
Because I increased the temperature difference between night and day, the color of the buds started to change.
Thanks for commenting🙏
"farah4weed"