
Laughing Buddha - 40x40 cm Growtent


Tent
40x40x160
King Power

Fan
100mm kit
Spider Farmer
Fan
Clip Ventilator
Fan
120mm USB PC Ventilator
EasyAcc


Contr
Duct Fan Controller
Spider Farmer

CO2
My lungs
Me

Soil
Custom

Other
Custom
Indoor
Room Type
Topping
weeks 2-3
Defoliation
weeks 2-3, 5, 10
Main-Lining
weeks 3, 5-9
LST
weeks 6-7
12 l
Pot Size
0.1 l
Watering
Start at Harvest
G
Germination2y ago


Blackbox Here we go! I'm a beginner at indoor growing. I'm planning to try main-lining with Buddha. The technique seems somehow fitting to me in a 40x40 cm tent with a sativa. Luckily, I have no idea what all can go wrong – I read that you shouldn't stress out about it. So, this is going to go really well.
In the tent, I only have room for one plant for main-lining. To be on the safe side, I germinated two seeds using the paper towel method. Both seeds sprouted within 36 hours and were transferred into small starter pots with BioBizz Light soil. Later, the stronger plant will be transplanted. Left Buddha or right Buddha, which one will it be?
------
Los geht's!
Ich bin ein Indoor-Anfänger. Ich plane mit dem Buddha Main-Lining auszuprobieren. Die Technik klingt für mich irgendwie richtig in einem 40x40 cm Zelt bei einer Sativa. Zum Glück habe ich keine Ahnung was da alles schief gehen kann - habe gelesen man soll sich nicht verrückt machen. Das wird also mega gut klappen.
Ich habe für Main-Lining im Zelt nur Platz für eine Pflanze. Zur Sicherheit habe ich zwei Samen mit der Paper Towel Methode gekeimt. 2/2 Samen sind innerhalb von 36 h gekeimt und wurden in kleine Anzuchttöpfchen mit BioBizz Light verfrachtet. Die kräftigere Pflanze wird dann später umgetopft. Linker oder rechter Buddha, welcher wird es?
### Update day 3:
I mixed the soil today. This way, it can infuse for another week or two. Is that necessary? I have no idea. But I had time today. ChatGPT helped me with the soil recipe... I listed the ingredients I had in the house and in my worm bin as a base and had a bit of a chat with the AI. You can read the result below. If it’s nonsense, feel free to let me know ;-)
"Planting Medium Recipe for 12 Liters by ChatGPT:
8 liters BioBizz Light Soil
(Base for the medium, contains light nutrients, and promotes good drainage.)
2.5 liters Worm Humus
(Nutrient-rich soil enhancer, supports soil life, and helps with nutrient availability.)
0.7 liters Coffee Grounds
(Source of nitrogen and slightly acidic, which stimulates soil life and improves soil structure.)
120 grams Rock Dust
(Source of trace elements, provides minerals like magnesium and calcium for healthy plant development.)
50 grams RQS Easy Boost Organic Nutrition
(Slow-release fertilizer, supplies the plant evenly with essential macronutrients over weeks.)
1 tablespoon Algae Meal
(Trace elements and growth promotion, supports root formation, and strengthens plant health.)
1 teaspoon Bat Guano
(Source of phosphorus for strong root and flower growth, released slowly.)
A small handful of compost worms
(Promotes soil aeration and decomposition, supports an active soil microbiome, and enhances nutrient availability.)
This mixture is nutrient-rich, promotes healthy soil life, and offers a consistent supply of nutrients throughout the growth phase."
-------
Ich habe heute die Erde gemischt. So kann sie noch ein bis zwei Wochen durchziehen. Ist das nötig? Keine Ahnung. Aber ich hatte heute halt Zeit. Bei dem Rezept für die Erde hat mir ChatGpt geholfen... Ich habe die im Haus und in meiner Wurmkiste vorhandenen Zutaten als Grundlage angegeben und ein bisschen mit der KI diskutiert. Nachfolgend kannst du das Ergebnis nachlesen. Wenn es Mist ist, sag mir gerne Bescheid ;-)
"Pflanzenmedium-Rezept für 12 Liter von ChatGpt:
- 8 Liter BioBizz Light Erde
(Basis für das Medium, enthält leichte Nährstoffe und fördert eine gute Drainage.)
- 2,5 Liter Wurmhumus
(Nährstoffreicher Bodenverbesserer, fördert Bodenleben und hilft bei der Nährstoffverfügbarkeit.)
- 0,7 Liter Kaffeesatz
(Stickstoffquelle und leicht sauer, was das Bodenleben anregt und die Bodenstruktur verbessert.)
- 120 Gramm Urgesteinsmehl
(Spurenelementequelle, liefert Mineralien wie Magnesium und Kalzium für eine gesunde Pflanzenentwicklung.)
- 50 Gramm RQS Easy Boost Organic Nutrition
(Langzeitdünger, versorgt die Pflanze über Wochen gleichmäßig mit wichtigen Hauptnährstoffen.)
- 1 Esslöffel Algenmehl
(Spurenelemente und Wachstumsförderung, unterstützt die Wurzelbildung und stärkt die Pflanzengesundheit.)
- 1 Teelöffel Fledermaus-Guano
(Phosphorquelle für kräftiges Wurzel- und Blütenwachstum, wird langsam freigesetzt.)
- Eine kleine Handvoll Kompostwürmer (Fördert Bodenbelüftung und Zersetzung, unterstützt ein aktives Bodenmikrobiom und verbessert die Nährstoffverfügbarkeit.)
Diese Mischung ist nährstoffreich, fördert ein gesundes Bodenleben und bietet eine konstante Nährstoffversorgung über die gesamte Wachstumsphase."
### Update day 5:
The root of the Buddha on the left is already coming out of the bottom of the seedling pot. Pretty quick, I think. The Buddha on the right is slower and actually not as strong. The Buddha on the left is obviously my racehorse. Wiieehhher :-) Buddha on the right will stay on the bench a bit longer before it leaves the team.
------
Die Wurzel von Buddha links kommt unten aus dem Anzuchttöpfchen. Ganz schön schnell, denke ich. Buddha rechts ist langsamer und tatsächlich auch nicht so kräftig. Buddha links wird offensichtlich mein Rennpferd. Wiieehhher :-) Buddha rechts bleibt noch eine Weile auf der Ersatzbank, bevor sie den Verein verlässt.
###Update day 6
I've transplanted the seedlings now. My racehorse Buddha on the left was moved into the large 12L fabric pot and would like to be called 'Hemprietta' from now on. Awww! Buddha on the right is very sad and only gets to live in a small pot. Boohoo! Buddha on the right absolutely does not / under any circumstances / no way wants to be called 'Greeny McWeedface.'
If the ChatGPT soil mix ends up killing Hemprietta, I still have Greeny McWeedface as a spare, growing purely in BioBizz Light soil :-)
-----
Ich habe die Sämlinge jetzt umgetopft. Mein Rennpferd Buddha links wurde in den großen 12l Stofftopf umgetopft und möchte ab jetzt 'Hemprietta' genannt werden. Awww! Buddha rechts ist ganz traurig und darf nur in einem kleinen Topf wohnen. Buuuhuhu! Buddha rechts will ab nun nicht / auf keinen Fall / kommt gar nicht in Frage, 'Greeny McWeedface' genannt werden.
Sollte die ChatGpt Erdrezeptur Hemprietta umbringen habe ich noch Greeny McWeedface als Ersatzteil auf reiner BioBizz Light Erde :-)
3 likes
comments
Share
Used method
Paper Towel
Germination Method
1
Week 1. Vegetation2y ago


5.5 cm
Height
16 hrs
Light Schedule
26 °C
Day Air Temp
6.5
pH
No Smell
Smell
65 %
Air Humidity
20 °C
Solution Temp
21 °C
Night Air Temp
12 l
Pot Size
0.2 l
Watering Volume
40 cm
Lamp Distance
900 PPM
CO₂ Level
Nutrients 5

Calmag
0.5 mll
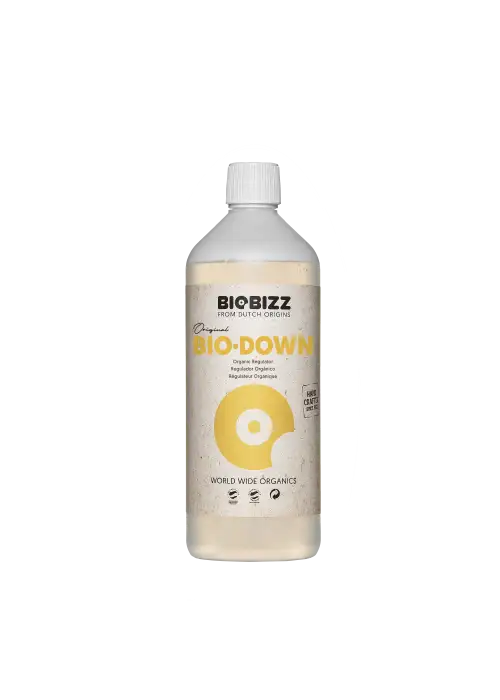
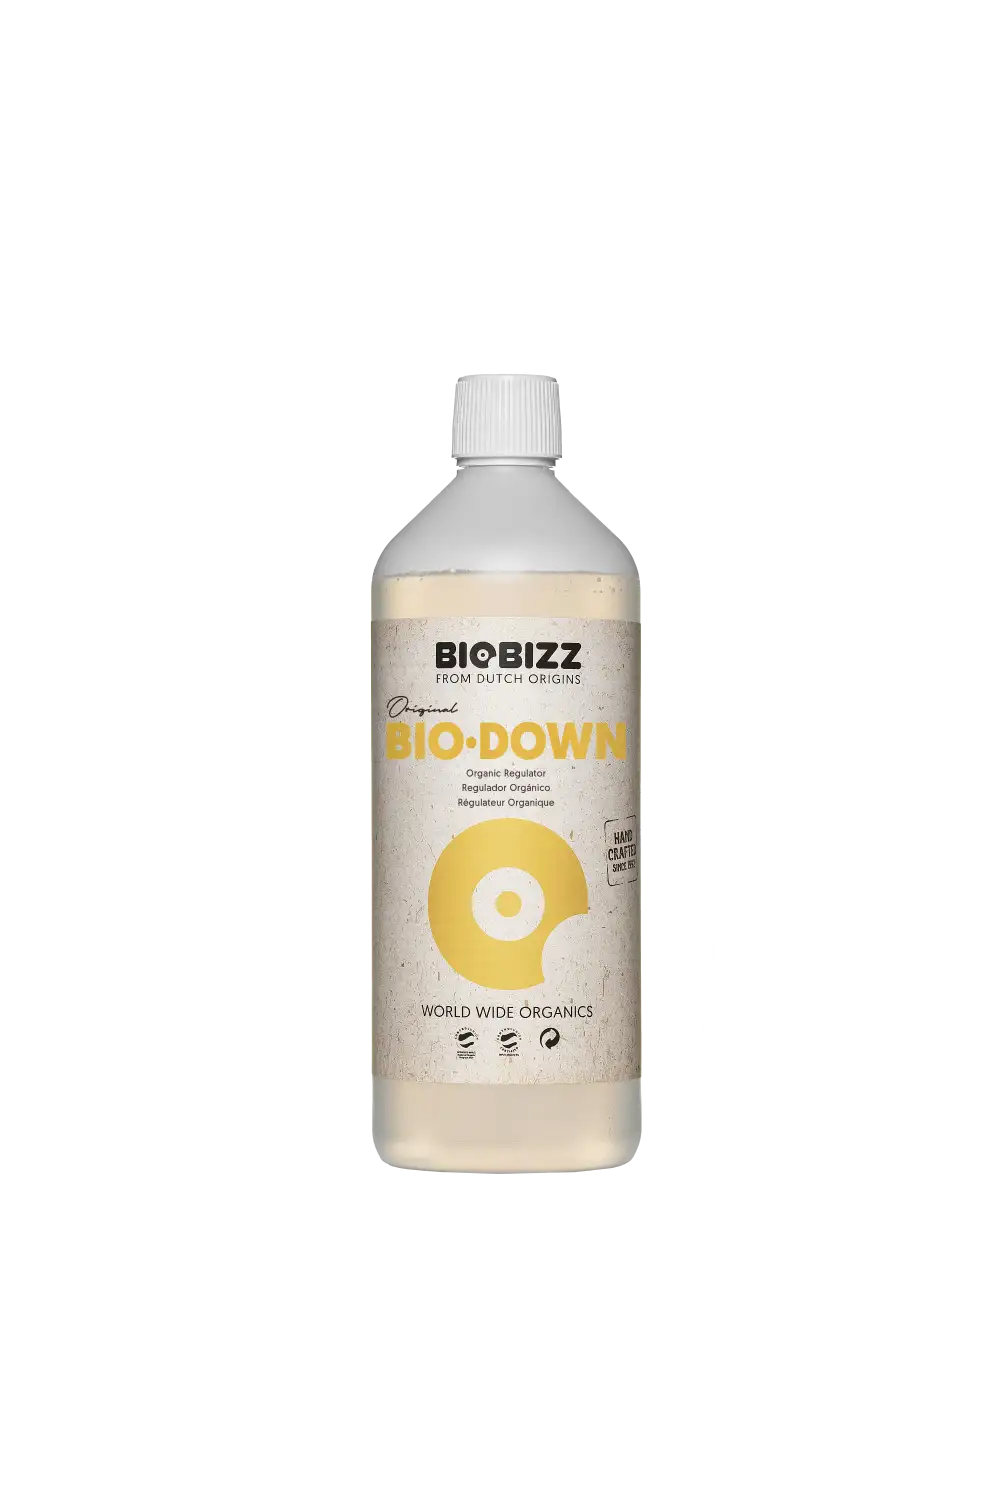
Bio-Down
0.3 mll

Bat Guano
0.33 mll
Blackbox Going well. The ChatGPT soil hasn’t (yet) killed Hemprietta. The CO2 levels for indoor cultivation in an apartment are apparently quite high. They fluctuate between 400 ppm (after airing) and 1500 ppm. The room is aired at least three times a day, so the average CO2 level in the room air is probably around 900 ppm. Hemprietta is enjoying it.
-----
Läuft gut. Die Chatgpt Erde hat Hemprietta (noch) nicht umgebracht. Die CO2 Werte beim Indooranbau in einer Wohnung sind offensichtlich recht hoch. Sie schwanken zwischen (nach dem Lüften) 400 ppm bis 1500 ppm. 3 Mal am Tag wird mindestens gelüftet. Also sind im Durchschnitt wahrscheinlich etwa 900 ppm CO2 in der Raumluft. Hemprietta gefällt's.
### Update day 10:
I checked the pH of the soil using a super cheap soil test kit from the hardware store. You know, the kind with a little test tube and all that. I feel like a real scientist now. The color scale suggests it might be pH 7. Or something between pH 6 and 8. Definitely not pH 4. Why does this color scale have such similar shades? Am I colorblind? Was the sampling even representative? No idea. Now I understand why everyone buys electronic testing devices. These test kits just don’t cut it. From now on, I’ll stick to plant-based testing:
Hemprietta is alive and showing only minor deficiencies – pH is correct.
Hemprietta is no longer alive, but replacement Greeny McWeedface thrives in BioBizz Light – pH is not correct.
By the way, according to the water supplier’s data sheet, my tap water isn’t ideal. It’s extremely soft and has a pH that’s too high. Now I understand why I never have to descale my coffee machine. I compensate with pH-Down and CalMag. Just to reach a reasonable magnesium level, I’d have to use a lot of CalMag. But I also mixed rock dust into the soil (thanks, ChatGPT), so there should already be calcium and magnesium in there... Phew. It’ll probably be fine.
How does it go again? You only notice deficiencies way too late, and then there’s not much you can do about it, right? So for now, it doesn’t make sense to dwell on it… Eyes closed, full steam ahead!
-----
Ich habe den pH-Wert der Erde mit einem super billigen Bodentestkit aus dem Baumarkt überprüft. Mit einem kleinen Reagenzglas und so. Fühle mich jetzt wie ein echter Wissenschaftler. Die Farbskala sagt mir es könnte sich um einen pH 7 handeln. Oder halt irgendwas zwischen pH 6 und 8. Auf jeden Fall nicht pH 4. Warum muss so eine Farbskala so ähnliche Farben haben? Bin ich farbenblind? War die Probennahme überhaupt repräsentativ? Keine Ahnung. Ich verstehe jetzt warum sich alle elektronische Testgeräte kaufen. So ein Testkit bringt es nicht. Ich teste in Zukunft nur noch pflanzlich:
- Hemprietta lebt und hat nur wenige Mangelerscheinungen - pH Wert richtig.
- Hemprietta lebt nicht mehr und Ersatzteil Greeny McWeedface fühlt sich Pudelwohl in BioBizz Light - pH Wert nicht richtig.
Das Leitungswasser ist übrigens laut Datenblatt des Versorgers nicht optimal. Absolut weich und pH-Wert zu hoch. Jetzt weiß ich warum ich die Kaffeemaschine nie entkalken muss. Ich steuere mit pH-Down und CalMag also nach. Alleine um auf einen vernünftigen Magnesiumwert zu kommen müsste ich schon ziemlich viel CalMag verwenden. Aber ich habe ja auch Urgesteinsmehl (dank ChatGpt) in die Erde gemischt. Da sollte ja eigentlich auch Kalzium und Magnesium drin sein... Puh. Wird schon passen. Wie ist das nochmal? Man bekommt den Mangel viel zu spät mit und kann dann auch nicht mehr wirklich was dagegen tun, oder? Also macht es für mich jetzt erst Mal keinen Sinn weiter darüber nachzudenken... Augen zu und durch :-)
3 likes
2 comments
Share
2
Week 2. Vegetation2y ago


10.5 cm
Height
16 hrs
Light Schedule
19 °C
Day Air Temp
6.5
pH
No Smell
Smell
60 %
Air Humidity
22 °C
Solution Temp
22 °C
Night Air Temp
12 l
Pot Size
0.3 l
Watering Volume
40 cm
Lamp Distance
900 PPM
CO₂ Level
Nutrients 2
Calmag
0.5 mll
Bio-Down
0.3 mll
Blackbox Hemprietta is growing wonderfully 🌿, with three nodes fully developed at the start of week 2. I think the ChatGPT soil is working well.
Greeny McWeedface has purple stems and is only half the size. Keeping Greeny McWeedface as sparepart doesn’t seem to make much sense anymore, so she’ll be sent to the circular archive. Farewell, my friend! Now I can place Hemprietta perfectly centered under the lamp. Finally, everything is symmetrical. That soothes my brain... Haha - Perfect.
-----
Hemprietta wächst ganz hervorragend 🌿 drei Nodien sind Anfang Woche 2 ausgeprägt. Ich denke die ChatGpt Erde funktioniert gut.
Greeny McWeedface hat lila Stängel und ist nur halb so groß. Greeny McWeedface als Ersatzteil beizubehalten macht wohl nicht mehr so viel Sinn und wandert ins Rundarchiv. Adieu mein Freund! Jetzt kann ich Hemprietta schön mittig unter die Lampe stellen. Endlich alles symmetrisch. Das beruhigt mein Gehirn... Hihi - Perfekt
###Update day 16:
As noted in week 2, the CO2 level in an inhabited apartment is quite high. Yikes! That’s fine during the lighting phase, but during the dark phase, Hemprietta needs more oxygen. Looking back, scheduling the dark phase from 8 AM to 2 PM was an optimal choice. On workdays, there’s no other oxygen competitor in the apartment during that time, and CO2 levels are around 500 to 600 ppm.
Currently, after ventilating, the humidity in the apartment is just over 30%, and consequently, it's not significantly higher in the grow box either. Since I don’t want Hemprietta to dry out yet, I need to introduce some moisture into the box. As I still need to ventilate my apartment to avoid suffocating, I implemented the following plan:
The ventilation only kicks in when the temperature reaches 28°C. The theory is that the leaves will evaporate more water, and less dry air will be added. However, since Hemprietta doesn’t yet have enough leaves to significantly impact the humidity, I “expanded” the leaf surface by adding two wet dish towels. One is tied above the lamp, and the other is hung over the pot.
This seems to be working. Humidity is now between 60% and 65% today. Yeah! I feel like a scientist again.
-----
Wie in Woche 2 festgestellt ist der CO2 Wert in einer bewohnten Wohnung recht hoch. Mief! Das ist ja während der Beleuchtungszeit ganz gut, aber in der Nachtphase braucht Hemprietta dagegen eher Sauerstoff. Rückblickend ist die Wahl der Nachtphase von 8 Uhr morgens bis 14 Uhr optimal. Denn an Arbeitstagen ist dann kein anderer Sauerstoff Konkurrent in der Wohnung und die Werte liegen um die 500 bis 600ppm CO2.
Aktuell liegt die Luftfeuchtigkeit nach dem Lüften in der Wohnung bei knapp über 30 % und in der Growbox dann entsprechend auch nicht wirklich höher. Da ich Hemprietta jetzt eigentlich noch nicht trocken möchte, muss irgendwie Feuchtigkeit in die Box. Da ich meine Wohnung weiterhin lüften möchte, um nicht zu ersticken, habe ich folgenden Plan umgesetzt:
Die Lüftung wird erst aktiviert, wenn die Temperatur 28°C erreicht. Die Theorie dahinter ist, dass die Blätter mehr Wasser verdunsten und weniger trockene Luft zugeführt wird. Weil Hemprietta leider noch nicht so viele Blätter hat, dass damit ein nennenswerter Unterschied bei der Luftfeuchtigkeit entsteht, erweiterte ich die "Blattoberfläche" mit zwei nassen Geschirrtüchern. Das eine oberhalb der Lampe festgeknotet und das andere über den Topf gehängt. Das scheint zu funktionieren. Die Luftfeuchtigkeit liegt heute zwischen 60 und 65 %. Yeah. Ich fühle mich wieder wie ein Wissenschaftler. :-)
###Update day 18
Hemprietta seems to be showing signs of deficiency. There are brown spots on two leaves, and the leaves are generally curling downward. What could be the cause?
Theory 1: The pot is too large, and the soil in the lower part is too wet. The roots are not getting enough air.
Theory 2: The ChatGPT soil recipe is rubbish. The soil’s pH value is incorrect, and the watering isn't improving the situation. However, if I’m reading the pH test strips correctly, the water's pH should actually be between 6 and 7.
Theory 3: The humidity in the grow box isn’t high enough or consistent enough. The spots are appearing especially on the side with the fan. I rotated Hemprietta and noticed that spots also appeared on the other side. Coincidence, perhaps?
Let’s see how things develop...
-----
Hemprietta hat augenscheinlich Mangelerscheinungen. Braune Flecken auf zwei Blättern und ganz allgemein nach unten gekrümmte Blätter. Was könnte die Ursache sein?
Theorie 1: der Topf ist zu groß und die Erde ist im unteren Teil zu feucht. Die Wurzeln bekommen nicht genug Luft.
Theorie 2: Das ChatGpt Erdrezept ist Mist. Der pH Wert der Erde ist falsch und das Gießwasser verbessert die Situation nicht. Wenn ich die pH Teststreifen richtig lese sollte der pH Wert des Wassers aber eigentlich zwischen 6 und 7 sein.
Theorie 3: die Luftfeuchtigkeit in der Box ist nicht hoch genug oder ausreichend konstant. Die Punkte treten insbesondere auf Seite des Lüfters auf. Ich habe Hemprietta gedreht und festgestellt, dass dann auch auf der anderen Seite Punkte entstehen. Vielleicht Zufall?
Mal sehen wie es so weiter geht...
###Update day 19
I topped above the 4th node despite signs of deficiencies. I left the fan leaves on the 1st and 2nd nodes to avoid stressing Hemprietta too much. However, I removed the shoots at the branch base to stimulate growth at nodes 3 and 4.
Hemprietta doesn't look happy at all... :-/
-----
Ich habe trotz Mangelerscheinungen oberhalb der 4. Nodie getoppt. Die Fächerblätter an 1. und 2. Nodie habe ich stehen gelassen, um Hemprietta nicht zu stark zu stressen. Den Spross an der Astwurzel habe ich aber jeweils abgenommen, um das Wachstum an Nodie 3 und 4 anzuregen.
Hemprietta sieht gar nicht glücklich aus... :-/
2 likes
comments
Share
Used techniques
Topping
Technique
Defoliation
Technique
3
Week 3. Vegetation2y ago


17 cm
Height
16 hrs
Light Schedule
26 °C
Day Air Temp
6.5
pH
No Smell
Smell
50 %
Air Humidity
20 °C
Solution Temp
19 °C
Night Air Temp
12 l
Pot Size
0.4 l
Watering Volume
39 cm
Lamp Distance
900 PPM
CO₂ Level
Nutrients 2
Calmag
0.8 mll
Bio-Down
0.3 mll
Blackbox ###Update day 24
I have now secured Hemprietta to the ground with galvanized earth anchors after two days of recovery. Unfortunately, I discovered today that one of the four fixed branches has snapped. Damn. It's about halfway through. The leaves still look fresh, so maybe she'll recover from it... I'll give her a few days before deciding how to proceed. With main-lining, everything is supposed to be symmetrical. That will be tricky with three branches :-) I actually want to work with four main branches and top them just once more to grow a total of eight colas with minimal intervention.
At least the deficiency symptoms have lessened. I've watered significantly less, and the soil seems to have dried out well in between. The pot feels light.
-----
Ich habe Hemprietta nach zwei Tagen Erholung nun mit verzinkten Erdankern nach unten gesteckt. Leider musste ich heute feststellen, dass einer der vier fixierten Zweige angebrochen ist. Mist. Halb durch etwa. Die Blätter sehen noch frisch aus, vielleicht erholt sie sich davon... Ich gebe ihr ein paar Tage bevor ich mit überlege wie ich weiter mache. Beim Main-Lining soll ja alles symmetrisch sein. Das wird mit drei Zweigen schwierig :-) ich will eigentlich mit vier Hauptzweigen arbeiten und diese nur ein Mal erneut toppen, um mit möglichst wenig Eingriff insgesamt acht Colas wachsen zu lassen.
Immerhin sind die Mangelerscheinungen weniger geworden. Ich habe deutlich weniger gegossen und die Erde scheint zwischendurch gut abgetrocknet zu sein. Der Topf fühlt sich leicht an.
###Update day 26
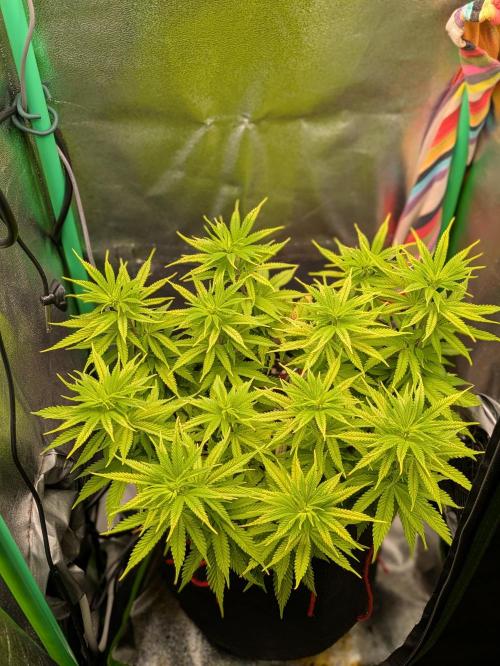
I decided to top Hemprietta for the second time today. I cut the main shoots on all four branches. Additionally, I removed any growth that didn’t look healthy and/or was blocking light for the main shoots. And since I was already at it and having a lot of fun cutting things, it was probably “a bit” too much. On each branch, I left one additional vertical shoot alongside the two future main shoots. Does that make sense? I don’t know. Maybe these will grow upwards faster than the two on the side? But if it works out and Hemprietta isn’t too upset with my rough treatment, I’ll soon enter the flowering phase with 4*2+4*1=12 main shoots.
-----
Ich habe entschieden heute Hemprietta das zweite Mal zu toppen. Ich habe die Haupttriebe an allen vier Ästen abgeschnitten. Außerdem habe ich allen Wuchs der nicht ordentlich aussah und/oder das Licht für die Triebe verdeckt hat entfernt. Und weil ich schon Mal dabei war und es rießig Spaß macht Dinge abzuschneiden war es wahrscheinlich "etwas" zu viel. An jedem Ast habe ich neben den beiden künftigen Haupttrieben noch einen vertikalen weiteren Trieb stehen lassen. Macht das Sinn? Ich weiß nicht. Vielleicht wachsen diese schneller in die Höhe als die zwei an der Seite? Wenn es aber klappen sollte und Hemprietta mir nicht all zu böse für meinen rabiaten Umgang mit ihr ist gehe ich bald mit 4*2+4*1=12 Haupttrieben in die Blütephase.
2 likes
1 comment
Share
Used techniques
Main-Lining
Technique
Topping
Technique
Defoliation
Technique
4
Week 4. Vegetation2y ago


16 cm
Height
16 hrs
Light Schedule
26 °C
Day Air Temp
6.5
pH
No Smell
Smell
50 %
Air Humidity
20 °C
Solution Temp
19 °C
Night Air Temp
12 l
Pot Size
0.4 l
Watering Volume
39 cm
Lamp Distance
900 PPM
CO₂ Level
Nutrients 2
Calmag
0.8 mll
Bio-Down
0.3 mll
Blackbox ### Update day 29
Hemprietta has coped well with the haircut so far. The newer fan leaves are a lush green – how reassuring! Perhaps the ChatGPT soil is actually working. I suspect the soil was simply too moist when the deficiencies or abnormalities in leaf shape and the brown spots appeared. Now that the soil has dried out quite well a few times, I somehow doubt that housemates Compost Worms One through Twelve are still alive. Well, maybe they’ve founded a rebel village underground and are eagerly collecting every drop of water. Hang in there, guys, you’ve got this! That’s why I gave a bit more water today for a change – about 700 ml. After all, it’s almost Christmas, even for worms.
The broken branch seems to be slowly scarring over and healing. However, its growth is just a tiny bit slower compared to the branch opposite…
-----
Hemprietta hat den Haarschnitt bisher gut verkraftet. Die neueren Fächerblätter haben ein sattes grün - wie beruhigend! Vielleicht taugt die ChatGpt Erde doch was. Ich mutmaße, dass die Erde einfach zu feucht war, als die Mangelerscheinungen bzw. Auffälligkeiten an Blattform und die braunen Flecken auftraten. Nachdem die Erde jetzt wohl ein paar Mal recht gut durchgetrocknet war glaube ich irgendwie nicht so richtig, dass die Mitbewohner Kompostwurm Eins bis Zwölf noch leben. Naja vielleicht haben sie ja auch ein Rebellendorf im Untergrund gegründet und sammeln hoffnungsvoll jeden Tropfen Wasser. Hey Jungs ihr schafft das! Ich habe deshalb heute ausnahmsweise mal etwas mehr Wasser gegossen. Etwa 700ml. Es geht ja auf Weihnachten zu, auch für Würmer.
Der angebrochene Zweig scheint langsam zu vernarben und zu heilen. Das Wachstum ist aber ein kleines bisschen langsamer im Vergleich zum Zweig gegenüber...
2 likes
8 comments
Share
5
Week 5. Vegetation2y ago


16 cm
Height
16 hrs
Light Schedule
26 °C
Day Air Temp
6.5
pH
No Smell
Smell
46 %
Air Humidity
20 °C
Solution Temp
19 °C
Night Air Temp
12 l
Pot Size
0.5 l
Watering Volume
41 cm
Lamp Distance
900 PPM
CO₂ Level
Nutrients 2
Calmag
1 mll
Bio-Down
0.25 mll
Blackbox ###Update day 35:
Phew, already 5 weeks have passed. Today, thanks to the suggestion from @Hummeraw90 (shoutout and thanks to you!), I optimized my training technique. The metal hooks aren’t particularly suitable for guiding the small shoots. At first, it seemed to work well, but a few hours later, two shoots had snapped at the nodes. Maybe because the branch moved upward and the metal hooks didn’t give way.
I’m now using red jute twine and foldback clips. The clips attach nicely to the pot, and I don’t need them for anything else anyway since I rarely feel like dealing with enough documents to actually clip together.
I tied the twine in a loose loop around the shoots. It can be adjusted with a tension knot I learned from a bushcraft video, but it doesn’t tighten on its own. This way, I can fine-tune the tension as needed. Yeah, bushcrafting is useful even in the city!
Otherwise, not much seems to be happening right now. Either I’m checking too impatiently and don’t notice any differences, or the growth has actually slowed down.
-----
Puh schon 5 Wochen vorbei. Ich habe heute Dank der Anregung von @Hummeraw90 (Grüße und Dank gehen hiermit raus) meine Trainingstechnik optimiert. Die Metallbügel eignen sich nicht sonderlich gut, um die kleinen Triebe zu lenken. Erst scheint es gut zu klappen, aber ein paar Stunden später waren zwei Triebe an den Nodien angebrochen. Vielleicht weil sich der Ast nach oben bewegt hat und die Metallbügel dann nicht nachgegeben können. Ich nutze nun roten Jutegarn und Foldbackklammern. Die Klammern kann man sehr gut am Topf befestigen. Außerdem brauche ich sie ohnehin nicht, weil ich eher selten Bock habe so viele Dokumente zu bearbeiten, dass ich da irgendwas zusammenklammern müsste.
Die Schnur habe ich in einer lockeren Schlinge um die Triebe gelegt. Sie kann mittels Spannknoten aus einem Bushcraft Video verstellt werden, aber zieht sich nicht von alleine zu. So kann ich die Spannung nach justieren. Yeah bushcrafting ist also auch in der Stadt zu gebrauchen :-)
Ansonsten passiert irgendwie gerade nicht so viel. Entweder schaue ich zu oft ungeduldig nach, sodass ich keinen Unterschied mehr wahrnehme oder das Wachstum ist tatsächlich langsamer geworden.
###Update day 39:
Today, I realigned the branches horizontally using the strings. I also moved the string loops further toward the tips and tightened them. The training seems to be going quite well for Hemprietta, so I decided on the spot to continue defoliating. This should encourage Hemprietta to focus growth on the new shoots.
Overall, I’m pretty satisfied with how the 12 shoots are positioned now. I plan to let her recover for about a week before gradually initiating the flowering phase and ending the training. If necessary, I might fine-tune the final positioning and height at the start of flowering with a small ScrOG net.
-----
Heute habe ich die Zweige mit den Schnüren erneut horizontal ausgerichtet. Dazu habe ich auch die Schnur-Schlingen weiter in Richtung der Spitzen verschoben und nach gespannt. Das Training scheint Hemprietta ganz gut zu verkraften, daher habe ich mich kurzentschlossen dazu entschieden weiter zu Entlauben, damit Hemprietta das Wachstum verstärkt in die neuen Triebe lenkt.
Insgesamt bin ich ziemlich zufrieden wie die 12 Triebe sich nun positioniert haben und plane nach etwa einer Woche Erholung langsam die Blüte einzuleiten und das Training zu beenden. Eventuell kann ich ja die endgültige Positionierung und Höhe zu Beginn der Blüte noch mit einem kleinen ScrOG Netz nachsteuern.
3 likes
comments
Share
Used techniques
Main-Lining
Technique
Defoliation
Technique
6
Week 6. Vegetation2y ago


18 cm
Height
16 hrs
Light Schedule
27 °C
Day Air Temp
6.5
pH
No Smell
Smell
55 %
Air Humidity
20 °C
Solution Temp
20 °C
Night Air Temp
12 l
Pot Size
0.7 l
Watering Volume
41 cm
Lamp Distance
900 PPM
CO₂ Level
Nutrients 2
Calmag
1.1 mll
Bio-Down
0.2 mll
Blackbox ###Update day 42:
Hemprietta handled the defoliation from a few days ago quite well. Today, I noticed that some shoots are starting to grow at the lower nodes. I removed these shoots with scissors but left the leaves to avoid taking too much leaf mass from Hemprietta.
I also readjusted the main shoots to keep them horizontal. I felt that three shoots on one branch were too close together. So, I tied the inner shoots more inward and clockwise. Now, eight shoots point outward, and the other four form a "windmill." I hope Hemprietta adapts well to this setup.
In about five days, I plan to start gradually encouraging Hemprietta to flower. Too early?
-----
Hemprietta kam ganz gut mit der Entlaubung vor ein paar Tagen zu recht. Ich habe heute bemerkt, dass einige Triebe an den unteren Nodien entstehen. Ich habe die Triebe mit der Schere herausgelöst und die Blätter stehen gelassen, um Hemprietta nicht zu viel Blattmasse zu nehmen. Die Haupttriebe habe ich wieder nachjustiert damit sie in der Horizontalen bleiben. Ich hatte das Gefühl, dass drei Triebe jeweils an einem Ast zu nahe zusammen sind. Daher habe ich die inneren Triebe stärker zurück nach innen und im Uhrzeigersinn gebunden. Nun zeigen acht Triebe nach außen und die vier anderen bilden ein "Windrad"... Hoffe Hemprietta kommt damit gut klar. In ca. 5 Tagen will ich Hemprietta langsam zur Blüte motivieren. Zu früh?
1 like
2 comments
Share
Used techniques
LST
Technique
Main-Lining
Technique
7
Week 7. Vegetation2y ago


20 cm
Height
12 hrs
Light Schedule
25 °C
Day Air Temp
6.0
pH
No Smell
Smell
55 %
Air Humidity
18 °C
Solution Temp
19 °C
Night Air Temp
12 l
Pot Size
0.8 l
Watering Volume
41 cm
Lamp Distance
900 PPM
CO₂ Level
Nutrients 2
Calmag
2 mll

Bio-Grow
1 mll
Blackbox ###Update day 49:
In the pot, I discovered some dry spots at the bottom and on the sides while feeling around. So, Hemprietta got a proper bath with 1.4 liters of water. I hope the substrate now fully soaks up the moisture again. Hemprietta is a bit upset with me – her leaves are drooping quite a bit. I’ve switched the light cycle to 12/12 to initiate flowering… it’s happening!
-----
Im Topf habe ich einige trockene Stellen unten und an der Seite beim Abtasten entdeckt. Daher hat Hemprietta ein ordentliches Bad mit 1,4 Liter Wasser bekommen. Ich hoffe, dass sich das Substrat nun wieder vollständig voll saugt. Hemprietta ist ein wenig sauer mit mir - sie lässt die Blätter ganz schön hängen. Ich habe den Lichtzyklus auf 12/12 umgestellt, um die Blüte einzuleiten... Es geht los!
###Update day 50
Of course, I forgot to turn the timer back on after adjusting it. Hemprietta has now had a 20-hour sunbath. And now, 10 hours of darkness will follow. That seems like quite a lot of stress for her biological cycle. Sounds familiar to me – on weekends, I feel the same: first too many drinks, then too long under colorful LED lights, and then at least 10 hours of sleep. I hope Hemprietta handles it better, though her leaves are still drooping despite the generous watering. At least Hemprietta didn’t have any tequila.
-----
Natürlich habe ich vergessen dir Zeitschaltuhr nach dem Verstellen wieder einzuschalten. Hemprietta hat nun ein 20 Stunden Sonnenbad hinter sich. Und nun folgen 10 Stunden Dunkelheit. Das scheint mir ein ganz schön starker Stress für den Biozyklus zu sein. Kommt mir bekannt vor - am Wochenende geht's mir auch so: Erst zu viel Getränke, dann zu lange im bunten LED Licht und anschließend mindestens 10 Stunden schlafen. Hoffe Hemprietta kommt damit besser klar, denn die Blätter hängen nach dem ausgiebigen Gießen nach wie vor... Wenigstens hatte Hemprietta keinen Tequila.
###Update day 51:
Today, I tried out a new pH test strip with slightly higher accuracy and tested the watering solution. Interestingly, the pH value is actually closer to pH 6. Therefore, I’m now leaving out the pH reducer. Honestly, it was pretty exhausting to measure 0.2 ml precisely anyway.
Since the leaves are developing brown spots here and there again, I’m increasing the CalMag dosage, even though it probably won’t make much of a difference now that flowering is starting. I calculated that to correct the calcium level to a target value of 100 mg/l during the pre-flowering phase, I’d need to add about 2 ml/l of CalMag. However, since my tap water contains only 4 mg/l of magnesium, this increases the magnesium level to only 26 mg/l, resulting in a ratio of 4:1. Not ideal, but probably better than before :-) I really wonder if the rock dust I mixed into the substrate contributes anything to the availability of calcium and magnesium. I did mix in a fair amount.
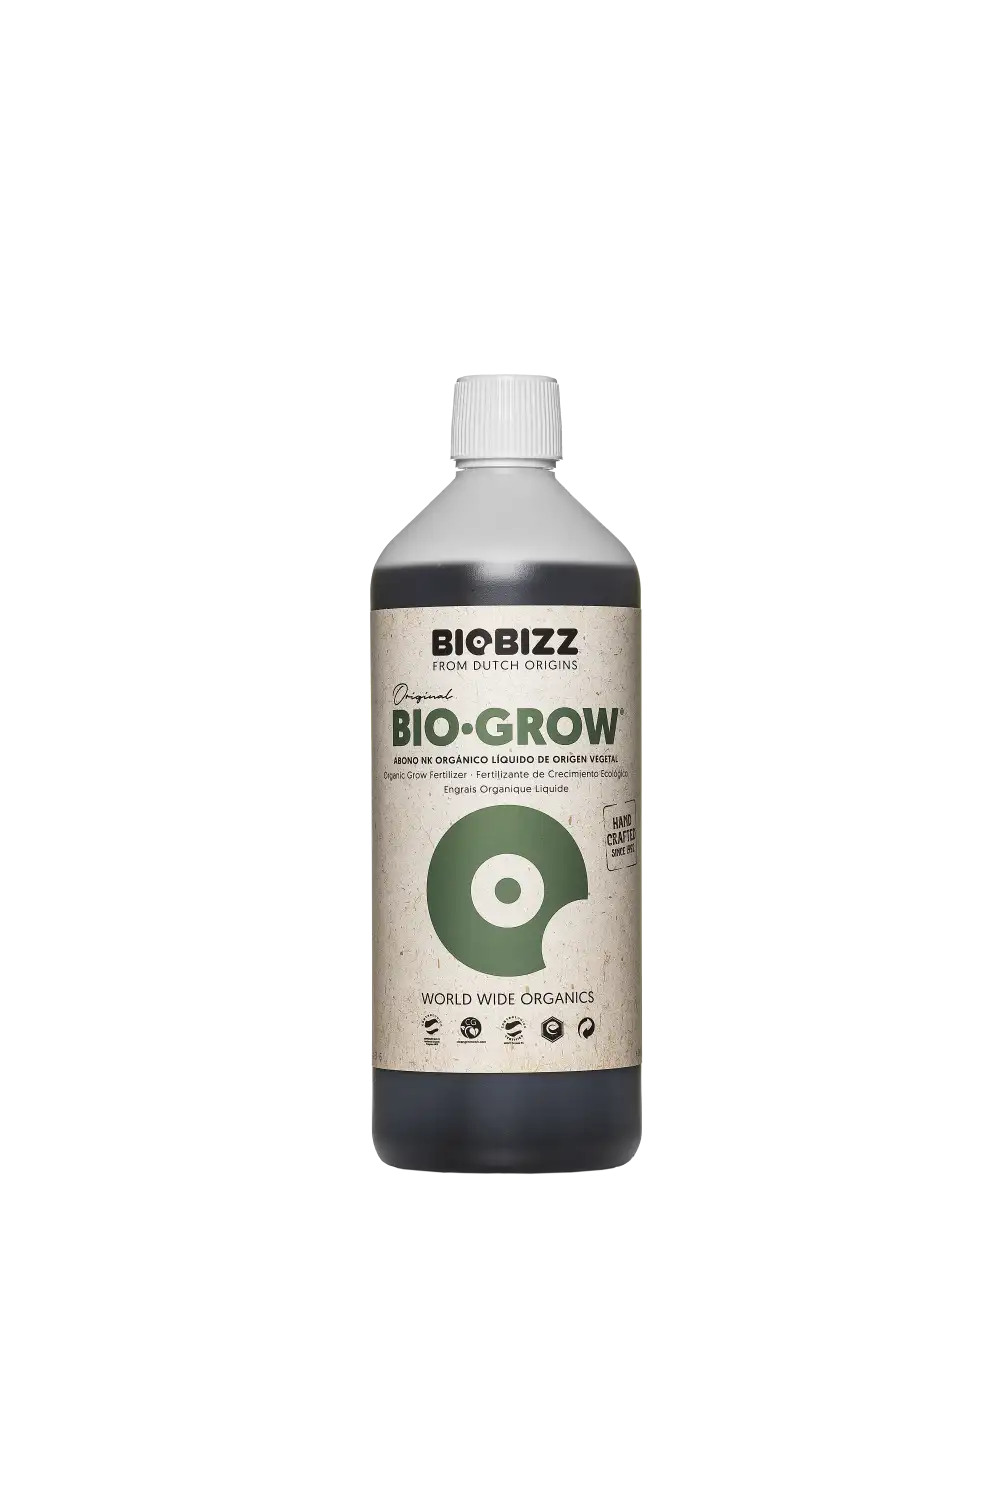
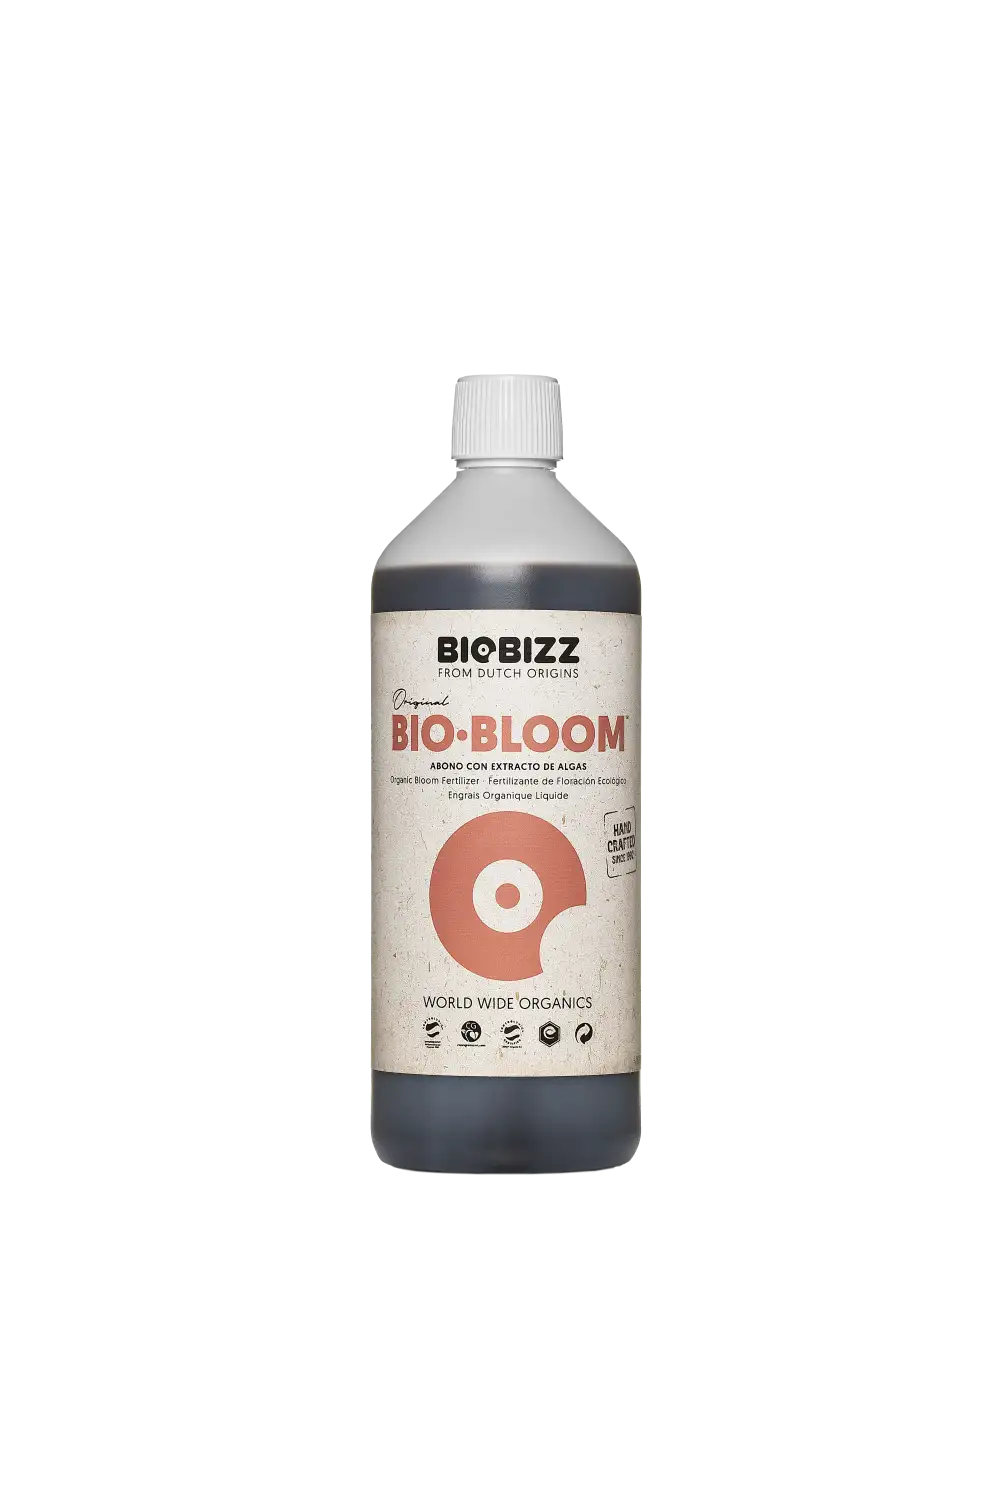
You’re constantly tempted to improve something with your plants – it’s terrible :-) That’s why I’m now adding BioBizz Grow, Bloom, and TopMax to the watering solution following the fertilizer schedule, starting this week. Let’s see if Hemprietta appreciates it and if my urge to keep optimizing (and possibly accidentally disrupting a functioning system) will subside.
-----
Ich habe heute einen neuen pH Teststreifen mit etwas höherer Genauigkeit ausprobiert und das Gießwasser geprobt. Interessanter Weise liegt der pH Wert tatsächlich eher um pH 6. Daher lasse ich nun den pH Senker weg. Es war ohnehin irgendwie ziemlich anstrengend 0.2ml genau zu dosieren.
Weil die Blätter wieder hier und da braune Flecken bekommen erhöhe ich die CalMag Zugabe, auch wenn es jetzt wohl gar nicht mehr so viel bringen wird, nachdem die Blütezeit ansteht. Ich habe ausgerechnet, dass ich zur Korrektur des Kalziumswerts bei einem Zielwert von 100mg/l in der Vorblüte etwa 2ml/l CalMag zugeben muss. Da in meinem Leitungswasser aber nur 4 mg/l Magnesium vorhanden sind, erhöhe ich dabei den Magnesiumwert nur auf 26mg/l. Also ein Verhältnis von 4:1. Nicht optimal aber wahrscheinlich besser als vorher :-) Ich frage mich echt, ob das Urgesteinsmehl im Substrat irgendwas für die Verfügbarkeit von Kalzium und Magnesium bringt... Habe ja auch nicht wenig beigemischt.
Man hat ja ständig Lust irgendwas an seinem Pflänzchen zu verbessern - echt schlimm :-) daher gebe ich nun dem Gießwasser BioBizz Grow, Bloom und Topmax nach Düngerschema beginnend mit dieser Woche zu - Mal sehen, ob sich Hemprietta darüber freut und mein Drang, weiter zu optimieren und damit evtl. auch ein laufendes System versehentlich zu stören, nachlässt.
5 likes
1 comment
Share
Used techniques
Main-Lining
Technique
LST
Technique
Grow Questions

Blackboxstarted grow question 1y ago
The brown spots are appearing more prominently on the older leaves. Overall, the color of the leaves is rather light green compared to other grow diaries. What could I do to fix the deficiency?

Solved
Leaves. Color - Pale
Leaves. Color - Dark-brown
likes

8
Week 8. Flowering1y ago


34 cm
Height
12 hrs
Light Schedule
25 °C
Day Air Temp
6.0
pH
No Smell
Smell
60 %
Air Humidity
19 °C
Solution Temp
20 °C
Night Air Temp
12 l
Pot Size
1 l
Watering Volume
32 cm
Lamp Distance
900 PPM
CO₂ Level
Nutrients 6
Calmag
3 mll
Bio-Grow
2 mll
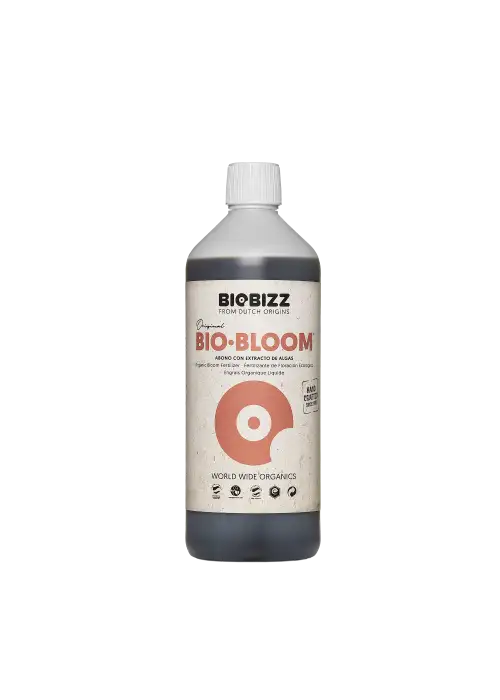
Bio-Bloom
1 mll
Blackbox ### Update day 56:
I feel really sorry for Hemprietta. What should I do?
Abort the mission and restart with proper watering and an optimized feeding schedule? My inner perfectionist is tempted to start over, do things better, and end up with prettier pictures of the plant.
Or should I try to get Hemprietta through the next 75 days of flowering? I’ve already invested so much energy, and maybe, once I manage to revitalize her, she’ll still perform quite well.
Well, I’m postponing the decision for a week. This week, Hemprietta will get the full package of nutrients. Either it helps, or the decision becomes irrelevant because Hemprietta succumbs to an overdose of fertilizer.
First, I applied Alg-a-Mic as a foliar spray – this will now happen 2 to 3 times a week. I also top-dressed with bat guano since, based on the great answers to my question, I can assume there’s also a potassium deficiency. From now on, the watering solution will be enriched with more CalMag, BioGrow, and additional BioBloom.
I even put my lab coat back on and analyzed a soil sample from the substrate. I’m hoping to determine whether an incorrect pH might have caused nutrient lockout. The result was a blue liquid – yay :-/. I interpret the blue as slightly lighter than pH 7 but clearly higher than pH 6. Not too bad. The enriched watering solution has a pH of around 6.75, which should work – even without pH down.
I think I can already see the inner leaves turning a slightly darker shade of green… Keep your fingers crossed for me, and thanks for all the fantastic answers to my question!
-----
Hemprietta tut mir mächtig leid. Was soll ich tun?
Missionsbruch und Neustart mit richtiger Bewässerung und optimieren Düngerschema? Mein innerer Perfektionismus findet es super nochmal anzufangen, mehr richtig zu machen und nachher hübschere Bilder von der Pflanze machen.
Oder Hemprietta noch 75 Tage durch die Blüte retten? Ich habe ja schon so viel Energie reingesteckt und vielleicht performt Hemprietta nachdem ich sie irgendwie revitalisiert bekommen habe doch noch ganz gut.
Tja ich verschiebe die Entscheidung erstmal um eine Woche. Diese Woche bekommt Hemprietta die volle Packung Nährstoffe. Entweder es hilft oder eine Entscheidung ist obsolet, weil Hemprietta an einem Überangebot von Dünger drauf geht.
Erst habe ich Alg-a-mic als Blattspray aufgetragen - das passiert nun 2 bis 3 Mal in der Woche. Zudem habe ich mit Fledermausguano top down gedüngt, denn dank der tollen Antworten auf meine Frage kann ich wohl davon ausgehen, dass auch Kalium fehlt. Das Gießwasser wird ab sofort mit mehr CalMag und BioGrow sowie zusätzlich BioBloom angereichert.
Ich habe auch meinen Laborkittel wieder angezogen und eine Bodenprobe vom Substrat analysiert. Damit erhoffe ich erheben zu können, ob ein falscher pH Wert zu einem Nährstoff Lockout geführt haben könnte. Es kommt eine blaue Flüssigkeit heraus - Jay :-/. Ich deute das Blau als etwas heller wie pH 7 aber deutlich höher wie pH 6. Eigentlich ganz gut. Das angereicherte Gießwasser hat ca. pH 6.75 sollte soweit passen - auch ohne pH down.
Ich meine bereits zu erkennen, dass die Blätter innen etwas dunkler im Grün werden... Drückt mir die Daumen und danke für die vielen tollen Antworten auf meine Frage!
###Update day 61:
Hemprietta seems to have recovered relatively well from the weeks of inadequate supply of almost all essential nutrients. At least her leaves are turning a darker green. There’s hardly any growth on the more severely damaged fan leaves, but they’re greening up again around the brown spots. The newer leaves are growing quickly and, as far as I can tell, without any symptoms. Phew! This might actually still turn out well! :-)
Today, I spread some worm castings from my worm bin as a top dressing – about 8 heaping tablespoons. And since I had the worm bin open anyway, I also mixed up a foliar spray using 1 part worm tea and 8 parts water. I enriched it with CalMag and Alg-a-Mic before applying it. Hemprietta survived the treatment even 9 hours later. If she continues to respond well, she’ll get another shower in two days.
Hemprietta had quite a bush at the bottom. Since things are looking pretty good at the top, I dared to remove a few lower shoots and fan leaves that weren’t getting much light anyway. The grow tent is getting a bit tight around the sides...
-----
Hemprietta hat sich augenscheinlich relativ gut von der wochenlangen mangelhaften Versorgung mit so ziemlich allen wichtigen Nährstoffen erholt. Zumindest nehmen die Blätter einen dunkleres Grün an. Bei den stärker geschädigten Fächerblätter ist kaum Wachstum festzustellen aber um die braunen Flecken herum werden sie auch wieder grün. Die neueren Blätter wachsen schnell und aus meiner Sicht ohne Symptome. Puh! Das könnte ja vielleicht doch noch was werden! :-)
Ich habe heute aus meiner Wurmkiste etwas Wurmhumus als Topdressing verteilt - so ca. 8 gehäufte Esslöffel. Und weil ich die Wurmkiste eh offenen hatte habe ich auch ein Blattspray aus 1 Teil Wurmtee und 8 Teilen Wasser angemischt, welches ich vor dem Auftragen noch mit CalMag und Alg-a-mic angereichert habe. Hemprietta hat die Behandlung auch 9 Stunden später nicht umgebracht. Wenn sie es weiterhin gut findet bekommt sie in 2 Tagen wieder eine Dusche.
Untenrum hatte Hemprietta einen ziemlichen Busch. Nachdem es obenrum ganz gut aussieht habe ich mich getraut unten ein paar Triebe und Fächerblätter, die ohnehin kaum Licht abbekommen haben, zu entfernen. Im Grow Zelt wird es zu den Seiten hin langsam eng...
3 likes
comments
Share
Used techniques
Main-Lining
Technique
9
Week 9. Flowering1y ago


42 cm
Height
12 hrs
Light Schedule
24 °C
Day Air Temp
6.0
pH
Weak
Smell
55 %
Air Humidity
19 °C
Solution Temp
20 °C
Night Air Temp
12 l
Pot Size
1.5 l
Watering Volume
26 cm
Lamp Distance
900 PPM
CO₂ Level
Nutrients 5
Calmag
3 mll
Bio-Grow
2 mll
Bio-Bloom
2 mll
Blackbox ###Update day 63:
Hemprietta is growing about 1 to 2 cm daily during the flowering stretch, and her leaves are reaching a decent size. The buds are also developing nicely. I’m now convinced that she’s no longer holding my past mistakes too much against me. Since she was undernourished for quite a while and likely needs a lot of nutrients during the stretch, I treated her to another foliar spray shower today with a 1:6 compost/worm tea-to-water mix, plus 2 ml/l of Alg-a-Mic. I have the feeling that she gratefully absorbs the nutrients through the foliar spray.
I’ve also adjusted my watering habits based on what I’ve learned so far: I’m now watering much more, but only every 2 to 3 days. After 48 hours, I can pour almost 3 liters of water into the pot before it starts draining out the bottom… Crazy! During the vegetative phase, I was seriously watering wrong and far too little :-D
I really should write down my findings for the next grow...
-----
Hemprietta wächst im Blütestretch täglich um ca. 1 bis 2 cm und die Blätter erreichen eine ordentliche Größe. Auch mit den Blüten geht es voran. Ich bin mir nun sicher, dass sie mir meine Sünden im der Vergangenheit nicht mehr all zu böse nimmt. Weil sie doch lange unterversorgt war und nun im Stretch vermutlich viele Nährstoffe benötigt, habe ich ihr heute wieder ein Dusche mit Blattspray 1:6 Kompost-/Wurmtee zu Wasser mit zusätzlich 2ml/l Alg-a-mic gegönnt. Ich habe das Gefühl, dass sie die Nährstoffe per Blattspray dankend aufnimmt.
Mein Gießverhalten habe ich an meinen derzeitigen Wissensstand angepasst: ich gieße nun deutlich mehr und dafür nur alle 2 bis 3 Tage. Nach 48 Stunden kann ich knapp 3l Wasser in den Topf geben, bevor es unten wieder heraus kommt... Irre! Ich habe in der Vegetationsphase aber Mal so richtig falsch und viel zu wenig gegossen :-D
Ich sollte meine Erkenntnisse für den nächsten Grow echt aufschreiben...
2 likes
comments
Share
Used techniques
Main-Lining
Technique
10
Week 10. Flowering1y ago


43 cm
Height
12 hrs
Light Schedule
24 °C
Day Air Temp
6.0
pH
Weak
Smell
55 %
Air Humidity
19 °C
Solution Temp
20 °C
Night Air Temp
12 l
Pot Size
1.51 l
Watering Volume
25 cm
Lamp Distance
900 PPM
CO₂ Level
Nutrients 6
Calmag
3.5 mll
Bio-Grow
3 mll
Bio-Bloom
2 mll
Blackbox ###Update day 70:
Hemprietta has been lightly defoliated, especially below the 5th node beneath the buds. I didn’t defoliate much at the start of the flowering phase because, given the insufficient nutrient supply at the time, I didn’t think it was the right thing to do. Now I’m leaving a few more leaves intact, even if that means some popcorn buds will develop.
I don’t have much experience with defoliation, and given the plant’s history, I don’t want to remove too much all at once in the middle of flowering. A few popcorn buds are certainly better than no harvest at all :-)
I could always harvest progressively later to give the popcorn buds a bit more time to catch up. Let’s see how it goes. I’m pretty happy with how things are going right now! Let’s go, Hemprietta, you’ve got this!
-----
Hemprietta wurde leicht entlaubt. Insbesondere unterhalb der 5 Nodie unterhalb der Blüten. Ich hatte zu Beginn der Blütephase wenig entlaubt, denn auf Grund der zu niedrigen Nährstoffversorgung hielt ich es nicht für richtig. Ich lasse nun auch wieder etwas mehr Blätter stehen, auch wenn dann wohl ein paar Popcornbuds entstehen.
Ich habe keine Erfahrung mit Entlauben und mit der Vorgeschichte möchte ich jetzt auch nicht zu viel auf einmal mitten in der Blüte wegschneiden... Ein paar Popcornbuds sind sicherlich besser als gar keine Ernte :-)
Ich kann ja dann auch progressiv ernten, um den Popcornbuds etwas mehr Zeit zum aufholen geben zu können. Mal sehen wie es weitergeht. Ich bin doch recht glücklich mit dem aktuellen Verlauf! Lets Go Hemprietta du machst das schon!
###Update day 71:
After adding fertilizer, the pH value of the irrigation water (probably due to the low buffering capacity of the soft tap water) drops, according to testing with pH strips, to a pH value of 5.75 to 6. So today, I tried to counteract this with baking soda. Of course, I used the fancy one with saffron dye, so everything turns nice and yellow... :-D It was the only option I had at the moment.
ChatGPT suggests proceeding as follows to raise the pH value from 6 to 6.5 — and it sounds somewhat plausible:
"Here’s a simpler method to raise the pH value with baking soda (sodium bicarbonate), based on the hardness of your water:
# Step 1: Determine Water Hardness
Water hardness indicates how much calcium and magnesium are dissolved in your water. You can often ask your water supplier for this information or measure it yourself with test strips.
Soft water: 8°dH (low buffering capacity, pH reacts quickly).
Moderate water: 8–14°dH (pH reacts moderately).
Hard water: 14°dH (pH reacts slowly).
# Step 2: Starting Amounts for Baking Soda
Start adding baking soda in small increments. The harder the water, the more baking soda is needed:
Soft water: Start with 0.2 g/L (about 1 pinch per liter).
Moderate water: Start with 0.5 g/L (about 1/8 teaspoon per liter).
Hard water: Start with 1 g/L (about 1/4 teaspoon per liter).
# Step 3: Measure the pH Value
After each addition of baking soda:
1. Stir the water thoroughly to dissolve the sodium bicarbonate.
2. Wait 5–10 minutes for the pH to stabilize.
3. Measure the pH with a test strip or pH meter.
# Step 4: Fine-Tuning
If the pH value has not yet reached 6.5, add more baking soda in increments of 0.1 g/L (a small pinch).
Measure the pH again until the desired value is achieved.
---
Note on Safety:
Avoid overcorrection: A pH value above 7 can cause nutrient lockout.
Always ensure the water is mixed thoroughly."
-----
Nach der Düngemittelzugabe rutscht der pH Wert des Gießwasser (vermutlich auf Grund der geringen Pufferkapazität des weichen Leitungswassers) nach Testung mit Teststreifen auf einen pH-Wert von 5.75 bis 6. Daher habe ich heute versucht mit Backpulver gegenszusteuern. Natürlich das gute mit Safranfarbstoff damit alles schön gelb wird... :-D Was anderes hatte ich spontan nicht da.
ChatGpt sagt mir ich soll wie folgt vorgehen, um den pH-Wert von 6 auf 6.5 anzuheben - das klingt irgendwie plausibel:
"Hier ist eine einfachere Methode, um den pH-Wert mit Backpulver (Natriumbicarbonat) anzuheben, basierend auf der Härte deines Wassers:
# Schritt 1: Wasserhärte bestimmen
Die Wasserhärte gibt an, wie viel Kalzium und Magnesium in deinem Wasser gelöst ist. Du kannst die Härte oft beim Wasserwerk erfragen oder mit einem Teststreifen selbst messen.
Weiches Wasser: 8°dH (geringe Pufferwirkung, pH reagiert schnell).
Mittleres Wasser: 8–14°dH (pH reagiert moderat).
Hartes Wasser: 14°dH (pH reagiert langsam).
# Schritt 2: Anhaltswerte für Backpulver
Beginne mit der Zugabe von Backpulver in kleinen Schritten. Je härter das Wasser, desto mehr Backpulver wird benötigt:
Weiches Wasser: Start mit 0.2 g/L (ca. 1 Messerspitze pro Liter).
Mittleres Wasser: Start mit 0.5 g/L (ca. 1/8 Teelöffel pro Liter).
Hartes Wasser: Start mit 1 g/L (ca. 1/4 Teelöffel pro Liter).
# Schritt 3: pH-Wert messen
Nach jeder Zugabe von Backpulver:
1. Rühre das Wasser gründlich um, damit sich das Natriumbicarbonat löst.
2. Warte 5–10 Minuten, damit der pH-Wert stabil wird.
3. Messe den pH-Wert mit einem Teststreifen oder pH-Meter.
# Schritt 4: Feintuning
Wenn der pH-Wert noch nicht bei 6.5 ist, füge in 0.1 g/L-Schritten (eine Prise) mehr Backpulver hinzu.
Miss den pH-Wert erneut, bis du den gewünschten Wert erreicht hast.
---
Hinweis zur Sicherheit
Vermeide eine Überkorrektur: Ein pH-Wert über 7 kann Nährstoffblockaden verursachen.
Achte darauf, das Wasser immer gründlich zu mischen."
4 likes
comments
Share
Used techniques
Defoliation
Technique
11
Week 11. Flowering1y ago


43 cm
Height
12 hrs
Light Schedule
25 °C
Day Air Temp
6.0
pH
Normal
Smell
55 %
Air Humidity
19 °C
Solution Temp
20 °C
Night Air Temp
12 l
Pot Size
1.3 l
Watering Volume
25 cm
Lamp Distance
900 PPM
CO₂ Level
Nutrients 6
Calmag
3 mll
Bio-Grow
3 mll
Bio-Bloom
3 mll
Blackbox ###Update day 77:
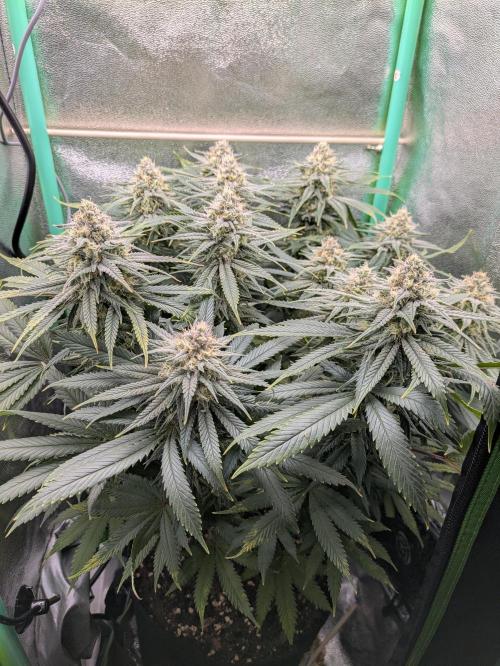
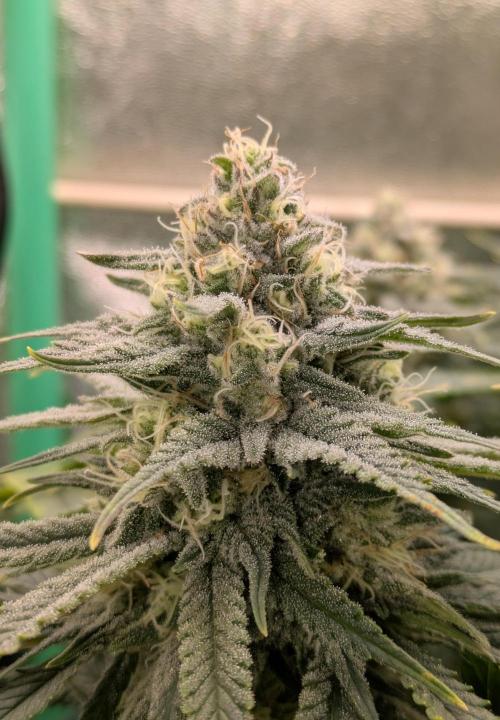
The fourth week of flowering. Hemprietta is blooming and sparkling – absolutely beautiful! I’m so thrilled!
Now my patience is being tested: there are still another six weeks of flowering to go. It feels like an eternity... :-)
I’m definitely not doing any more experiments. The discoloration on some leaves shows me that Hemprietta is starting to redirect nutrients from the leaves, probably to create more sparkle on and around the flowers. That’s exactly how it should be!
I can’t help but think a little about my experiment from last week. Maybe she didn’t appreciate the irrigation water with baking soda and reacted to it by changing the leaves. Adjusting the pH with baking soda is now simply too risky for me after 11 weeks of growth. The water stays as it is... If necessary, I could adjust it again with a bit of pH Up or Down – at least those can be dosed properly.
-----
Die vierte Blütewoche. Hemprietta blüht und glitzert - wunderschön! Ich freue mich total!
Meine Geduld ist jetzt gefordert: Es sind ja trotzdem noch weitere 6 Wochen in der Blüte. So endlos lange noch... :-)
Ich mache jetzt auf jeden Fall keine Experimente mehr. Die an einigen Ästen auftretenden Blattfärbungen zeigt mir, dass Hemprietta beginnt Nährstoffe aus den Blättern umzuleiten. Wahrscheinlich um mehr Glitzer um und an den Blüten anzubringen. Richtig so!
So ein kleines bisschen muss ich auch noch an mein Experiment in der letzten Woche denken. Vielleicht fand sie mein Gießwasser mit Backpulver nicht so dolle und hat eventuell auch deshalb mit den Blättern so reagiert. Die ph-Wert Anpassung mit Backpulver ist mir jetzt also für einen zweiten Versuch nach 11 Wochen Wachstum einfach zu viel Risiko. Das Wasser bleibt wie es ist... Zur Not könnte ich ja vielleicht auch nochmal mit etwas ph Up oder down nachjustieren - das kann man wenigstens ordentlich dosieren.
2 likes
comments
Share
12
Week 12. Flowering1y ago


43 cm
Height
12 hrs
Light Schedule
23 °C
Day Air Temp
6.0
pH
Normal
Smell
55 %
Air Humidity
20 °C
Solution Temp
20 °C
Night Air Temp
12 l
Pot Size
1.3 l
Watering Volume
25 cm
Lamp Distance
900 PPM
CO₂ Level
Nutrients 6
Calmag
3 mll
Bio-Grow
2.5 mll
Bio-Bloom
3 mll
Blackbox ###Update day 84:
Hemprietta looks great and is giving off a noticeable scent. Due to the weather, I’m currently struggling to keep the humidity in the tent below 60%, especially when the soil is well-saturated the day after watering.
The upper leaves, in particular, are visibly turning a darker green. I should keep an eye on nutrient levels. So, for now, I’ll slightly reduce the amount of Grow and Heaven. Hemprietta probably doesn’t need as much nitrogen anymore, and I assume that Grow is mainly used for nitrogen supply. According to the feeding schedule, Grow should actually be increased until the end of the flowering phase—but better safe than sorry.
As for Heaven, I have no idea what nutrients it contains or what exactly it does. Many people on Growdiaries don’t even use Heaven—it’s pretty expensive, after all. So it should be fine...
The first pistils are turning orange, and the buds are forming beautifully. Pretty!
-----
Hemprietta sieht prima aus und verströmt einen auffälligen Geruch. Auf Grund des Wetters fällt es mir derzeit schwer eine Luftfeuchtigkeit im Zelt von unter 60% zu erreichen. Insbesondere wenn die Erde am Tag nach dem Gießen gut gesättigt ist.
Insbesondere die oberen Blätter wechseln offensichtlich zu einem dunkleren grün. Ich sollte etwas auf die Nährstoffversorgung achten. Ich reduziere daher erstmal die Zugabe von Grow und Heaven etwas. Denn Hemprietta benötigt wahrscheinlich nicht mehr so viel Stickstoff und ich gehe davon aus, dass man Grow hauptsächlich zur Stickstoffversorgung nutzt. Laut Düngeschema steigt eigentlich die Zugabe von Grow bis zum Ende der Blütezeit. Aber sicher ist sicher.
Bei Heaven habe ich überhaupt keine Ahnung was da für Nährstoffe drin sind und was die konkret bewirken. Viele bei Growdiaries nutzen Heaven gar nicht - ist ja auch ziemlich teuer. Sollte also passen...
Erste Blütenstempel färben sich orange und die Blüten formen sich deutlich. Hübsch!
3 likes
3 comments
Share
13
Week 13. Flowering1y ago


43 cm
Height
12 hrs
Light Schedule
23 °C
Day Air Temp
6.0
pH
Strong
Smell
50 %
Air Humidity
20 °C
Solution Temp
20 °C
Night Air Temp
12 l
Pot Size
1.3 l
Watering Volume
25 cm
Lamp Distance
900 PPM
CO₂ Level
Nutrients 6
Calmag
3 mll
Bio-Grow
2.5 mll
Bio-Bloom
3 mll
Blackbox ###Update day 91 - Day 42 since switching to 12/12. About 28 - 33 days before chop.
Yeah, so I’m absolutely thrilled every time I finally get to water again every two to three days. Other than that, there’s not much to do. Somehow, the vegetative phase was more exciting... :-)
But I’m not complaining. Hemprietta looks fantastic. The buds are lush and pretty uniform.
Every time I look into the tent, I get this song stuck in my head:
"I like big buds an’ I cannot lie.
You otha brothas can’t deny."
Ridiculous :-D.
Looking back, I’ve noticed that the buds seem to bulk up until about the middle of the flowering phase and then hit some sort of growth plateau. It feels like not much is happening anymore. That’s probably normal—what’s actually happening is that a whole bunch of different terpenes are being produced, invisible to the eye. Fine by me—more of that, please! At least Hemprietta is smelling stronger by the day. I really have to make sure the fan is always running, or the whole apartment will reek. It’s kind of musty, peppery, with a hint of strawberry and banana.
For the final photo finish, I’d still love to see some of those big, swollen pistils—just like in the pictures from Barney’s Farm... Just because it looks awesome :-)
----
Joa, also ich freue mich wie bolle, wenn ich alle zwei bis drei Tage endlich wieder Gießen darf. Sonst gibt es wenig zu tun. Irgendwie war die Wachstumsphase spannender... :-)
Aber ich möchte mich nicht beschweren. Hemprietta sieht toll aus. Die Buds sind prächtig und ziemlich gleichmäßig.
Jedes Mal wenn ich ins Zelt schaue habe ich einen Ohrwurm:
"I like big buds an´ I can not lie.
You otha brothas can´t deny."
Dämlich :-D.
Ich stelle rückwirkend fest, dass die Blüten augenscheinlich bis zur Mitte der Blütephase fett werden und dann eine Art Wachstumsplateau erreichen. Denn gefühlt passiert nicht mehr so arg viel. Wird wahrscheinlich normal sein und es werden tatsächlich unsichtbar fürs Auge einen Menge verschiedene Terpene produziert. Voll in Ordnung für mich. Mehr davon. Zumindest riecht Hemprietta immer stärker. Ich muss wirklich darauf achten, dass der Lüfter immer läuft. Sonst riecht die ganze Wohnung. Eher muffig, pfeffrig und etwas nach Erdbeere und Banane. Für das Photo Finish wünsche ich mir aber schon noch ein paar auffällig geschwollene Blütenstempel - so wie auf den Bildern von Barneys Farm... Einfach weil es geil aussieht :-)
###Update day 95:
Oh wow, the scent has noticeably changed. It still has a spicy aroma, but the (green) banana note is completely gone.
Up close, it now smells more like pinecones with a hint of lemon peel. When I crush one of those (somehow unnecessary :-)) tiny popcorn buds between my fingers, the scent becomes surprisingly intense.
The trichomes on the sugar leaves are already looking quite milky in some areas. But depending on the focus point, they still appear more clear. There are also a few amber-colored ones starting to show. Most of the white pistils have already faded.
According to the seed bank, the flowering phase should still continue for about 3.5 more weeks before harvest. Luckily, I’ve seen several Growdiaries with a similar progression, where growers achieved some seriously fine results after 10 weeks of flowering. That reassures me a bit.
On one hand, I don’t want to harvest too early—I’d love to get a fully developed terpene profile and those fat, picture-perfect buds. On the other hand, I also don’t want to wait too long and risk losing that energetic, sativa-like effect.
So, what do you guys think?
-----
Oha der Geruch hat sich jetzt auffällig verschoben. Es riecht nun zwar immernoch recht würzig, aber der Geruch von (grüner) Banane ist jetzt weg.
Es riecht nun aus der Nähe verstärkt nach Pinienzapfen und ein bisschen nach Zitronenschale. Wenn man einen der (irgendwie unnötigen :-)) winzigen Popcornbuds zwischen den Fingern zerdrückt sogar ziemlich stark.
Die Trichome sehen auf den Zuckerblättern teilweise schon recht milchig aus. Je nach Fokuspunkt sieht es aber dann doch wieder mehr klar aus. Einige bernsteinfarbene Verfärbungen sind auch dabei. Es gibt nur noch wenige weiße Blütenstempel.
Laut Samenbank müsste die Blütephase vor der Ernte aber noch etwa 3,5 Wochen weiter andauern. Zum Glück gibt es einige Bilder hier auf Growdiaries, bei denen ein ähnlicher Verlauf beobachtet wurde und nach 10 Wochen Blüte offensichtlich ein richtig feines Ergebnis erzielt wurde. Das beruhigt mich etwas.
Ich möchte einerseits nicht zu früh ernten, um ein schön ausgeprägtes Terpenprofil und schön fette Bilderbuchbuds zu ernten. Andererseits auch nicht zu spät, um den sativatypischen energetischen Effekt zu erhalten.
Tja, was meint ihr?
5 likes
1 comment
Share
14
Week 14. Flowering1y ago


43 cm
Height
12 hrs
Light Schedule
23 °C
Day Air Temp
6.0
pH
Strong
Smell
52 %
Air Humidity
20 °C
Solution Temp
20 °C
Night Air Temp
12 l
Pot Size
1.3 l
Watering Volume
24 cm
Lamp Distance
900 PPM
CO₂ Level
Nutrients 6
Calmag
3 mll
Bio-Grow
1 mll
Bio-Bloom
3 mll
Blackbox ###Update day 98 - day 49 since switching to 12/12. About 21 - 26 days before chop.
Almost there! Come on, Hemprietta—you got this! :-)
I’ll only be adding nutrients to the water until the end of this week. With organic fertilizers like BioBizz, it doesn’t really make sense to continue feeding in the last two weeks before harvest anyway. The nutrients take about that long to break down into plant-available form in the soil.
I also can’t imagine that flushing out the remaining organic nutrients - like you would with synthetic fertilizers - makes much sense. I mean, no one would flood their tomato or potato plants in a fertile garden just to "clean" the soil, right? For me, it’s simply a matter of efficiency—there’s no point in wasting more fertilizer.
Besides, I have no clue when exactly this supposed “second-to-last week” for flushing is meant to be. I guess you’d figure that out if you grew the same strain multiple times a year. But for a microdoser like me, who grows a single plant for fun and ends up with enough supply to last a decade, that’s just voodoo...
-----
Endspurt! Los Hemprietta – du schaffst das! :-)
Ich werde nur noch bis etwa Ende dieser Woche Dünger ins Gießwasser geben. Bei organischen Düngern wie BioBizz macht es ja spätestens zwei Wochen vor der Ernte keinen Sinn mehr, weil es so lange dauert, bis die Nährstoffe im Boden pflanzenverfügbar werden.
Ich kann mir auch nicht vorstellen, dass es bei organischem Anbau nötig ist, in der vorletzten Woche noch groß zu "spülen“, so wie man es bei mineralischem Dünger macht. Niemand käme auf die Idee, in einem fruchtbaren Garten seine Tomaten oder Kartoffeln zu fluten, nur um die Nährstoffe loszuwerden. Also gibt’s bei mir einfach aus wirtschaftlichen Gründen keinen weiteren Dünger mehr.
Außerdem habe ich sowieso keine Ahnung, wann genau diese ominöse „vorletzte Woche“ fürs Spülen eigentlich sein soll. Das weiß man wahrscheinlich, wenn man regelmäßig dieselbe Sorte anbaut und Erfahrung sammelt. Aber für so Microdoser wie mich, die zum Spaß mal eine Pflanze für den Eigenbedarf hochziehen und damit für die nächsten zehn Jahre ausgesorgt haben, ist das einfach Voodoo...
###Update day 100:
100 days. One hundred. One. Hundred. Days.
During this time, Hemprietta has soaked up 1,494 hours of light. If she could store solar power, she’d probably be able to power a small town – or at least a very ambitious lava lamp.
I can hardly believe that my little plant has been enriching my life for over four months. 100 days of joy, worries, watering can acrobatics, pH-level debates, and the occasional spiritual experience while staring at trichomes under 60x magnification ("Do they look milky now, or are they still clear?!").
Hemprietta herself doesn’t seem to be aware of her epic journey. She just stands there, sparkling away and smelling like someone crashed a spice rack into a fruit bomb.
But whatever – today is a day to celebrate! 100 days of Hemprietta! I’m thinking about baking a cake… or just turning off the fan for a moment and taking a deep breath.
-----
100 Tage. Einhundert. Ein. Hundert. Tage.
In dieser Zeit hat Hemprietta 1.494 Stunden Licht getankt. Würde sie Solarstrom speichern, könnte sie vermutlich eine Kleinstadt versorgen – oder zumindest eine sehr ambitionierte Lavalampe.
Ich kann es selbst kaum glauben, dass mein kleines Pflänzchen seit über vier Monaten mein Leben bereichert. 100 Tage voller Freude, Sorgen, Gießkannenschwingerei, pH-Wert-Debatten und der ein oder anderen spirituellen Erfahrung beim Betrachten der Trichome unter 60-facher Vergrößerung („Sehen die jetzt eher milchig oder doch noch klar aus?!“).
Hemprietta selbst scheint sich ihrer epischen Reise nicht wirklich bewusst zu sein. Sie steht einfach da, glitzert vor sich hin und duftet, als hätte jemand ein Gewürzregal mit einer Fruchtbombe kollidieren lassen.
Aber egal – heute wird erstmal gefeiert! 100 Tage Hemprietta! Ich überlege, eine Torte zu backen… oder einfach den Lüfter kurz auszuschalten und einen tiefen Atemzug zu nehmen.
7 likes
comments
Share
Grow Questions
Blackboxstarted grow question 1y ago
The lady (Laughing Buddha) has been in bloom for 53 days out of a theoretical 70 to 75 days. The trichomes are now looking quite mixed here and there. Some amber-colored trichomes can even be found on the sugar leaves. What do you think? Should I wait until day 70?


Solved
Buds. Other
2 likes

WillynLunaanswered grow question 1y ago
Whether or not it's finished depends on where you're taking your trichome pictures at. If its the trichome on your sugar leaves, don't go by that. However, if indeed those are trichome pictures from your buds, then yes, you're in the harvest window. Some people like a more uplifting high and would start their harvest about now. Others prefer more of a "sedative" stoned high and those people would be likely to wait another week to 10 days.
If they were mine? I'd be cutting according to the breeder's recommendation, but that's just me. I've found through experience that since the harvest time is actually a 2-3 week window, it's better to wait than to rush into harvest.
15
Week 15. Flowering1y ago


43 cm
Height
12 hrs
Light Schedule
24 °C
Day Air Temp
6.0
pH
Strong
Smell
52 %
Air Humidity
20 °C
Solution Temp
21 °C
Night Air Temp
12 l
Pot Size
1.3 l
Watering Volume
24 cm
Lamp Distance
900 PPM
CO₂ Level
Nutrients 2
Calmag
3 mll
Bio-Down
0.1 mll
Blackbox ###Update day 105 - day 56 since switch to 12/12:
Hemprietta is now getting no more nutrients as planned. However, I still adjust the very soft tap water with CalMag and pH-down before watering.
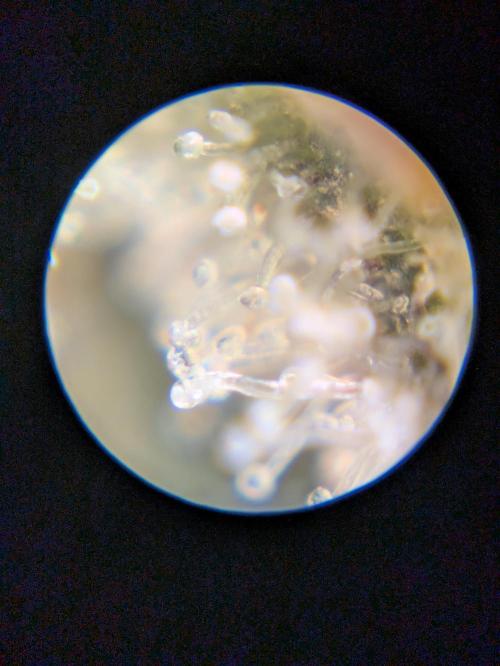
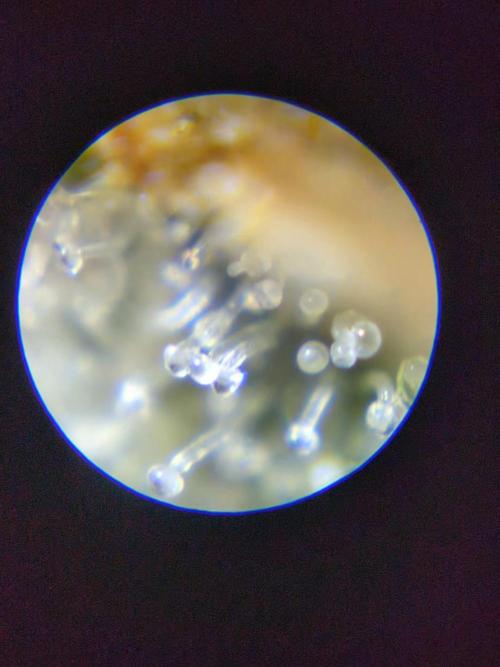
Thanks to all the responses to my question about the ripeness of the buds/trichomes, I took another deep dive into trichome inspection. So, I grabbed my phone microscope and snapped some shaky pictures of the trichomes on the buds. At 60x magnification, it was so wobbly that after 20 minutes, I felt like I was getting seasick... :-)
What I found: many trichomes closer to the buds are definitely still clear or only partially milky. I didn’t spot any amber ones there. So, I’ve decided to wait another week and keep monitoring how things develop.
-----
Hemprietta bekommt nun wie geplant keinen Dünger mehr. Ich passe das sehr weiche Leitungswasser vor dem Bewässern dennoch weiterhin mit CalMag und ph-down an.
Dank der vielen Antworten auf meine Frage zur Reife der Blüten/Trichome habe ich mich noch Mal eingehender mit den Trichomen beschäftigt. Also Handymikroskop dran und wackelige Bilder von den Trichomen an der Blüte geknipst. Das ist bei der Vergrößerung 60x so wackelig, dass ich nach 20 min das Gefühl hatte seekrank zu werden... :-)
Festgestellt habe ich: Viele Trichome näher an der Blüte sind definitiv noch klar oder nur teilweise milchig. Bernsteinfarbene habe ich dort keine gefunden. Ich habe mich also dazu entschieden noch eine Woche abzuwarten und den weiteren Verlauf zu beobachten.
9 likes
1 comment
Share
16
Week 16. Flowering1y ago


43 cm
Height
12 hrs
Light Schedule
24 °C
Day Air Temp
6.0
pH
Strong
Smell
52 %
Air Humidity
20 °C
Solution Temp
21 °C
Night Air Temp
12 l
Pot Size
0.1 l
Watering Volume
24 cm
Lamp Distance
900 PPM
CO₂ Level
Nutrients 1
Calmag
0.1 mll
Blackbox Update day 112 - day 63 since switch to 12/12:
Hemprietta is looking good. She drank a bit less at the end of last week, but that might have been due to the broken heater. At least it got fixed after two days before things got too cold in the apartment. I suspect Hemprietta wouldn’t handle a sweater as well as I do...
I’ve been keeping an eye on the trichomes. On the upper sugar leaves, about 50% have turned amber. On the buds, the trichomes are all over the place—some areas have clear and amber trichomes but no milky ones, while others have mostly milky with a few clear ones. Honestly, I can't make much sense of it. :-) I read that for long-flowering sativas, a harvest point at around 60% amber trichomes can still be fine.
Regardless, I’ll be harvesting in the next few days, even if it might be a little early. My goal is an energetic effect, and too much CBN from amber trichomes would counteract that. Maximizing potency isn’t my priority either since I consume infrequently and in small amounts. If the result isn’t perfect, I’ll still have more than enough weed to last until my next grow—where I can improve a ton of things. :-D
Now I’ll just wait until the soil is fairly dry, and then… the scissors are coming out! This grow has been such a joy so far!
-----
Hemprietta sieht gut aus. Sie hat Ende der letzten Woche etwas weniger getrunken. Könnte aber auch an der ausgefallenen Heizung gelegen haben. Immerhin wurde die Heizung nach zwei Tagen repariert, bevor es zu kalt in der Wohnung wurde. Ich vermute Hemprietta kommt mit einem Pulli weniger gut klar wie ich...
Ich habe die Trichome weiter beobachtet auf den oberen Zuckerblättern sind etwa 50% bernsteinfarben. An den Buds sind die Trichome ziemlich gemischt. Es gibt Stellen mit klaren und bernsteinfarbenen, aber keine milchigen. An anderer Stelle gibt es viele milchige und wenige klare. Irgendwie werde ich daraus nicht schlau :-) ich habe gelesen, dass bei lange blühenden Sativa durchaus auch ein Erntezeitpunkt erst bei 60% bernsteinfarbenen Trichomen okay sein kann. Ich werde die Ernte dennoch in den nächsten Tagen einfahren, auch wenn es etwas zu früh sein könnte. Mein Ziel ist schließlich ein eher aktivierendes Cannabis - viel CBN in den bernsteinfarbenen Trichomen ist nun Mal im Effekt gegenläufig. Das Maximum an Potenz zu erreichen ist mir ebenfalls nicht so wichtig, da ich insgesamt wenig und nicht regelmäßig konsumiere. Wenn das Ergebnis nicht zufriedenstellend ist, habe ich vermutlich dennoch genug Gras, um bis zum nächsten Grow (bei dem ich echt verdammt viel besser machen kann) über die Runden zu kommen :-D. Ich warte nun also ab, bis die Erde recht trocken ist und dann kommt die Schere! Man hat der Grow bis hierhin Freude bereitet :-)
7 likes
1 comment
Share
17
Week 17. Harvest1y ago
Happy Harvest Day!


10/10
Rated
An obviously quite stress-resistant strain. Handled training (main-lining) and occasional nutrient deficiencies very well. Even broken branches from training healed surprisingly quickly and nicely. The yield turned out to be much bigger than expected.
-----
Ein offensichtlich recht stressresistente Sorte. Kam sehr gut mit Training (Mainlining) und teils unzureichender Nährstoffversorgung zurecht. Auch Brüche beim Training sind überraschend schnell und gut verheilt. Der Ertrag ist viel größer als erwartet.
Show more
Translate
Spent 114 days
Ger Veg Flo Har
570 g
Bud wet weight per plant
115 g
Bud dry weight per plant
1
Plants
0.16 m²
Grow Room size
Normal
Difficulty

Giggly, Energetic, Talkative
Positive effects

Dry mouth
Negative effects

Depression, Stress
Medical effects

Tropical, Pine, Earthy
Taste
Height
Day air temperature
Air humidity
PH
CO2
Light schedule
Solution temperature
Night air temperature
Pot size
Lamp distance


Blackbox So, that’s it. :-) Hemprietta is no longer among the living. After an 8-day drying phase at 45 to 53% humidity, she’s now chopped up and curing in two jars. The yield is pretty big. Due to local legal restrictions, I’m not keeping everything—I got rid of all the small stuff. What a luxury to have a selection… and how ridiculous not to be able to keep it all. :-) Oh well, it was still a joy… I kept the best buds. And damn—are they beautiful!
Final thoughts: Main-lining works extremely well for a sativa in a small grow tent, even with the extra 2 to 3 weeks of training. It’s great for height control and gives the plant a solid structure, resulting in almost exclusively fat, dense main buds. I’d say the yield-to-effort ratio isn’t compromised at all. If I had kept all the solid buds (no popcorn buds), the dry weight would have been around 110 to 120 grams—which would be perfect for a two-person household. ;-) One thing I’ve learned: a 95-watt lamp might be slightly overkill for a 40x40 cm tent…
Update after curing an tasting:
After about three weeks in the jar, I finally had the chance to try Hemprietta. Yay!
I’m really impressed with the effects—this is some seriously fine herb. I can’t decide whether it takes first or second place in my personal top 10.
The high is pretty strong, which I don’t usually love as an occasional smoker, but since there’s no real couchlock, the intensity is totally fine for me. After a long, stressful day, just a few puffs completely wipe out any tiredness and make you want to be social again.
A light euphoria and good mood set in. You feel focused and receptive—though whether you actually are focused is another question. At least while playing FIFA, there were no mediocre results: either a crushing 7-1 victory or a humiliating 1-7 defeat—nothing in between. Conversations are fun and quickly get silly to downright goofy. At higher doses, you get properly stoned and suddenly feel an overwhelming urge to inhale obscene amounts of potato chips and gummy bears. Great for the soul, not so great for the waistline. But hey, it works. It’s crazy how even then, you don’t feel stuck to the couch.
Overall, a fantastic experience. I can fully recommend Laughing Buddha—it’s perfect for social occasions!
-----
So das war's wohl. :-) Hemprietta weilt nicht mehr unter den Lebenden. Nach einer Trocknungsphase von 8 Tagen bei 45 bis 53 % Luftfeuchtigkeit ist sie jetzt zum Härten zerstückelt in zwei Gläser verteilt. Der Ertrag ist ziemlich groß. Auf Grund der hiesigen gesetzlichen Bestimmungen behalte ich also nicht alles - sondern habe den ganzen Kleinkram beseitigt. Was für ein Luxus eine Auswahl zu haben. Und wie bekloppt nicht alles behalten zu können. :-) egal, war dennoch eine Freude... Die schönsten Buds habe ich behalten. Und meine Fresse - die sind aber auch schön!
Als Resümee: Main Lining funktioniert bei einer Sativa in einem kleinen Growzelt mit ca 2 bis 3 Wochen Mehraufwand extrem gut, um die Höhe zu kontrollieren und der Pflanze eine sinnvolle Struktur zu geben. So entstehen eigentlich nur fette / harte Main-Buds. Ich würde Mal behaupten, dass der Ertrag im Verhältnis Aufwand-Nutzen keineswegs geschmälert ist. Wenn ich alle ordentlichen Buds (keine Popcornbuds) aufgehoben hätte, wäre sicherlich ein Trockengewicht von ungefähr 110 bis 120 Gramm herausgekommen - was für einen Zweipersonenhaushalt perfekt wäre ;-) ich lerne daraus, dass eine 95 Watt Lampe für ein Zelt 40x40 offensichtlich etwas überdimensioniert sein könnte...
Update nach Curing und Verkostung:
Nach etwa drei Wochen im Glas habe ich die Gelegenheit gehabt Hemprietta zu verkosten. Jay! Ich bin sehr angetan von der Wirkung. Aus meiner Sicht ein richtig feines Gras. Ich bin unentschieden, ob es auf Platz 1 oder 2 meiner Top 10 landet. Die Wirkung ist ziemlich stark - eigentlich finde ich das als Gelegenheitskonsument nicht sooo geil, aber da kein wirklicher Couchlock eintritt ist die Stärke voll okay für mich. Nach einem langen stressigen Tag ist die Müdigkeit nach wenigen Zügen vertrieben und man bekommt (wieder) Lust auf sozialen Kontakt. Eine leichte Euphorie und gute Laune macht sich breit. Man fühlt sich ziemlich fokussiert und aufnahmefähig. Ist man auch wirklich fokussiert? Schwer zu sagen :-) zumindest beim FIFA zocken gab es keine mittelmäßigen Ergebnisse mehr. Entweder Sieg 7:1 oder Niederlage 1:7 - aber nichts dazwischen... Gespräche machen Spaß und sind schnell ziemlich lustig bis albern. Bei höherer Dosierung ist man schon ziemlich breit und hat Bock obszön viele Kartoffelchips und Gummibärchen in sich zu stopfen. Gut für die Seele, schlecht für die Figur. Passt also. Verrückt, dass man auch dann noch nicht das Gefühl bekommt an der Couch zu kleben.
Also insgesamt ein großartiges Erlebnis. Ich kann Laughing Buddha voll und ganz empfehlen. Sehr gut geeignet für soziale Anlässe.
7 likes
8 comments
Share
Equipment Reviews


28 comments
Sort by
popularity
popularity
newest
oldest

NattyMeds commentedweek 131y ago
I'm running this one next time, nice to see an old school strain turn out absolutely amazing, good job! What she smell like?
likes 2

Greg_McGregerberger commentedweek 32y ago
I would advise staying away from metal for training. I have snapped a few branches over the years using them
I like to use lst grow pots that have holes around the top. You can use string to gently pull each branch where you want.
like 1
Blackbox commented2y ago
@Greg_McGregerberger, Thank you very much for your tip! I actually noticed that two of the shoots were damaged when I checked 12 hours after the training. Thanks to your advice, I’ve now fixed all the shoots, except for the main branches, using string and foldback clips.
likes
Greg_McGregerberger commented2y ago
@Blackbox, no problem.
I actually keep a roll of cheap yarn by my tent at all times for training.
likes
Greg_McGregerberger commented2y ago
@Blackbox, I just saw your yarn and clip technique. That is awesome. Super simple but very
like 1
Greg_McGregerberger commentedweek 171y ago
Curious if you have sampled anything yet?
like 1
Blackbox commented1y ago
@Greg_McGregerberger, I’ve now had the chance to try Hemprietta :-) – and I also updated the diary today. The effects are really great! Just like how you imagine cannabis from movies and TV, but the kind you haven’t found on the black market in recent years (or maybe ever). Uplifting, stoned, and happy!
likes
Greg_McGregerberger commented1y ago
@Blackbox, glad to hear. I am excited to try mine.
Hoping for the exact same effects.
likes

Fat_Olsh_Farms commentedweek 171y ago
Beautiful buds! Congrats on the harvest. Great job 🤘🏻 🇺🇸.
like 1
Blackbox commented1y ago
@Fat_Olsh_Farms, thank you :-)
likes
Greg_McGregerberger commentedweek 171y ago
Congrats on the harvest!
like 1
Blackbox commented1y ago
@Greg_McGregerberger, Hey, thanks! Your harvest is coming up soon too! 🥦
likes
Greg_McGregerberger commentedweek 42y ago
Looking great. I like the 4 branch mainline. Started two laughing buddhas last week along side some sour strawberry. Going to choose the best ones and give away the others.
like 1
Blackbox commented2y ago
@Greg_McGregerberger, nice! Have fun!
likes

DuckeedWizard commentedweek 42y ago
Funny name, she looks strong, healthy stem!
like 1
Blackbox commented2y ago
@DuckeedWizard, Hemprietta really appreciates it when you speak about her stem like that... 😘😃
like 1

Only4passion commentedweek 42y ago
Nice work 🍀👏
like 1
Blackbox commented2y ago
@Only4passion, Thank you 🌿👋
likes

Suemchen commentedweek 12y ago
Good luck with your grow 🤙
like 1
Blackbox commented2y ago
@Suemchen, Thank you 👍🥦
likes

Martian commentedweek 171y ago
Great grow!
like 1
Greg_McGregerberger commentedweek 161y ago
The purple shade is beautiful.
like 1

Qutro commentedweek 151y ago
Such a beauty she is.
like 1

Legendaryseedthumb commentedweek 72y ago
I love that I came by your page, I really like what I see!
Keep up the good work! I’m soon done with my Black Muffin please have a visit if you can💜🌱
like 1
Greg_McGregerberger commentedweek 62y ago
Looking reall good. Really wanted to do the Xmas ornaments but never got to it.
like 1
Greg_McGregerberger commentedweek 121y ago
Wie riecht es bisher?
likes
Blackbox commented1y ago
Ich finde aus der Entfernung leicht muffig (aber nicht schlecht ) und würzig. Näher an der Blüte zusätzlich nach Banane und und ein bisschen nach Erdbeere. Das fruchtige kommt mir jetzt neu vor. Hatte Hemprietta aber bisher auch nicht eingehend beschnuppert... :-D
like 1
Greg_McGregerberger commented1y ago
Mostly just the musty notes on mine.
I hope i get some fruity notes .
Danke!
likes 2

the end.
Enjoying this diary? Follow for more updates!


Prefer the old Diary view?
Go back to the old Diary view