By continuing to use the website or clicking Accept you consent to our cookies and personal data policy and confirm that you are at least 18 year old. For details please see Privacy Policy and Terms
Accept

Harlequin CBD


Lamp
Helios 480x
4 seasons

Tent
4x4
4x4


Filt
AC Infinity
Air Filter


Perlite
Substrate
Indoor
Room Type
Transplantation
weeks 4
Topping
weeks 5
15 liters
Pot Size
Start at 12 Week
G
Germination5mo ago


xchdave Successful germination, excited to try some CBD flower
2 likes
comments
Share
Used method
Paper Towel
Germination Method
1
Week 1. Vegetation4mo ago
18 hrs
Light Schedule
24 °C
Day Air Temp
No Smell
Smell
60 %
Air Humidity
24 °C
Night Air Temp
2.5 liters
Pot Size
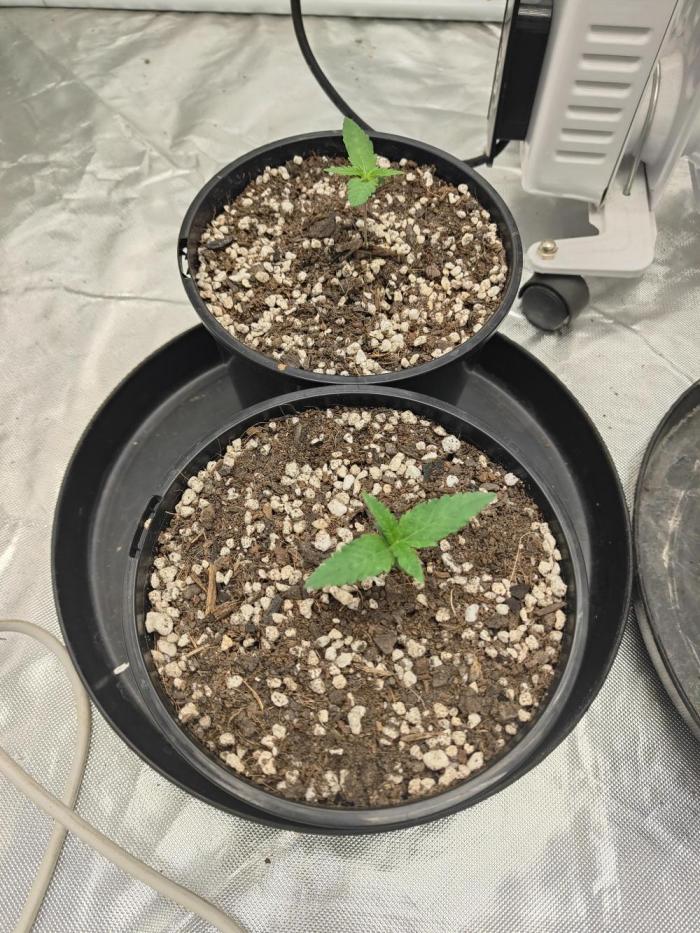
xchdave Week 1 – Seedling Stage (Days 1–7)
Harlequin CBD seedlings emerged alongside the Super Lemon Haze and are sharing the same environment.
Transplanted straight into 2.5L pots filled with a super coco and perlite mix, early growth has been slow but expected as they focus on building out a strong root system.
A humidifier was added on day 4, bringing RH up to a much more seedling-friendly 60–70%. Temps have been steady at 23–24°C with light intensity set to ~280 PPFD.
So far, the Harlequin seedlings are showing healthy coloration with no signs of stress or stretch. With roots now taking hold and environmental conditions optimized, I’m expecting more noticeable vegetative growth heading into week 2.
1 like
1 comment
Share
2
Week 2. Vegetation4mo ago

18 hrs
Light Schedule
24 °C
Day Air Temp
No Smell
Smell
60 %
Air Humidity
24 °C
Night Air Temp
2.5 liters
Pot Size
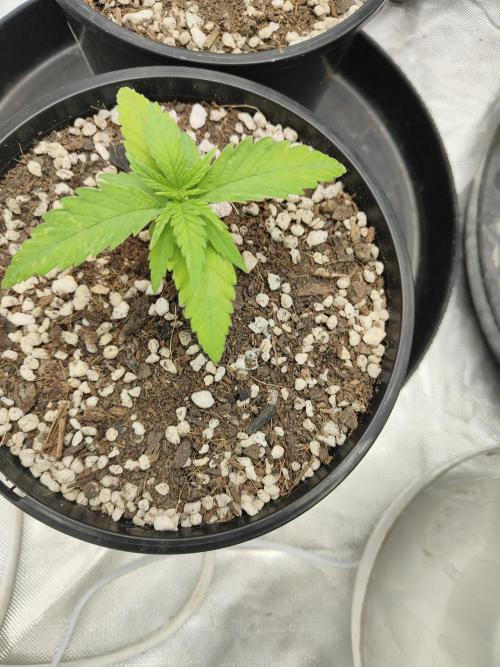
xchdave Harlequin CBD – Week 2 Update (Day 14)
The Harlequin seedlings are now two weeks old and settling in well.
🌱 Growth:
Plants are establishing nicely in the 2.5L pots, with steady development of true leaves.
They are showing healthy green color overall, with no significant signs of stress or deficiency.
Growth is slightly behind the Super Lemon Haze, which is expected given Harlequin’s genetics — more moderate vigor in early veg.
💧 Watering:
No water added for the past two days, as the medium still retains moisture. Root zones are being encouraged to search deeper, helping establish a stronger root mass.
🌡️ Environment:
Temp: ~25°C
Humidity: 60–70%
PPFD: ~320
Ventilation: AC Infinity T6 running at speed 1 — providing good fresh air exchange at this early stage.
likes
comments
Share
4
Week 4. Vegetation4mo ago

18 hrs
Light Schedule
24 °C
Day Air Temp
No Smell
Smell
60 %
Air Humidity
24 °C
Night Air Temp
15 liters
Pot Size
xchdave Well we run into a bit of trouble the last two weeks, what I thought was over watering symptoms was actually caused by under watering.
This means that by continuing holding off from watering, I made the plants issues worse. By the time I corrected my mistakes the plants were already stunted and showing signs of nutrient deficiency.
I continued to struggle with the plants for a week and they did improve. However not as fast as I would have liked. This prompted me to change the entire course for this grow.
See I'm normally a coco and synthetic grower. I don't have these problems with coco because coco can be 100% saturated and still have access to adequate air. I was hoping to try my hand at organics this run but given the above issues I decided to revert back to what I know. And well, the plants are back to being healthy, all be it very small for this stage of a grow.
It just means we've got a bit of extra veg time before flipping to flower and that's why I love photos over autos.
I transplanted to 15L autopots with the 50/50 of coco perlite and feed at 1.0 ec and a pH of 5.8 until runoff.
My nutrients of choice are:
Yara Kristalon Brown
Calcinit
Epson salts
I've used a few different brands of nutrients in my time and this is by far the most economical solution I've found and dialed in properly gives just as good as results as any name brand nutrient out there. If you're buying bottled nutrient you're paying for water.
This set up makes for an easy grow, especially when we add the autopot bases and turn the reservoir on.
Anyways thanks for reading my dairy and continuing to follow along, I'll be sure to keep this dairy updated going forward.
1 like
2 comments
Share
Used techniques
Transplantation
Technique
5
Week 5. Vegetation3mo ago

18 hrs
Light Schedule
24 °C
Day Air Temp
5.7
pH
No Smell
Smell
650 PPM
TDS
60 %
Air Humidity
24 °C
Night Air Temp
15 liters
Pot Size
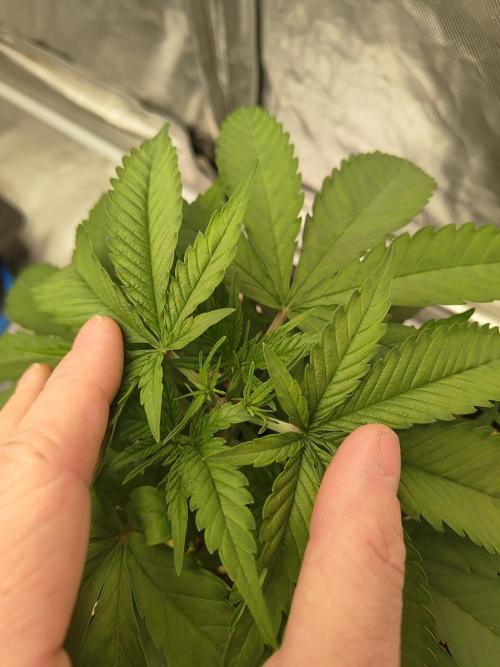
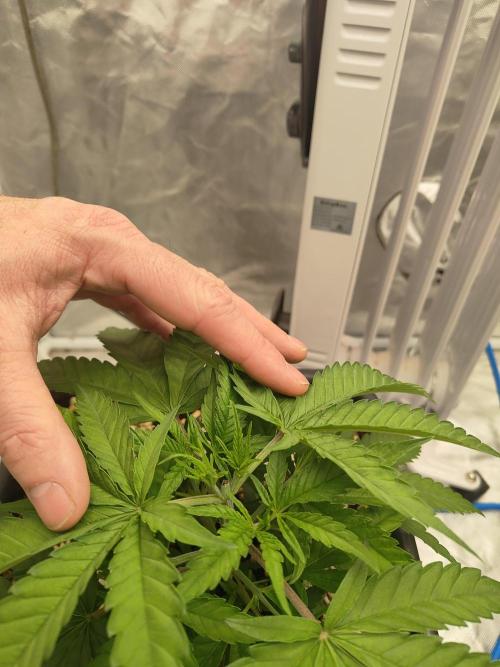
xchdave The CBD plants have shown good recovery from earlier minor stunting. This week I topped both CBD plants, and new shoots are forming well. I turned on the Autopot system after giving a manual feed of 1.5L with light runoff. They're now being fed the same 1.3 EC reservoir as the Super Lemon Haze. Overall health looks great—leaf color is vibrant and growth is vigorous. They are slightly shorter and bushier than the Lemon Haze, as expected for this phenotype, and are holding moisture well with the Autopots now running. Lighting was also increased to 450–520 PPFD, which they’re handling well. Very promising recovery and growth heading into the next week.
1 like
comments
Share
Used techniques
Topping
Technique
6
Week 6. Vegetation3mo ago

18 hrs
Light Schedule
24 °C
Day Air Temp
5.7
pH
No Smell
Smell
650 PPM
TDS
60 %
Air Humidity
24 °C
Night Air Temp
15 liters
Pot Size
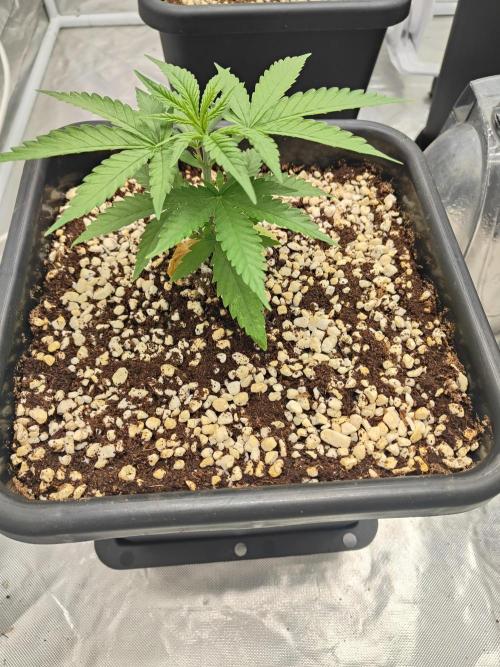
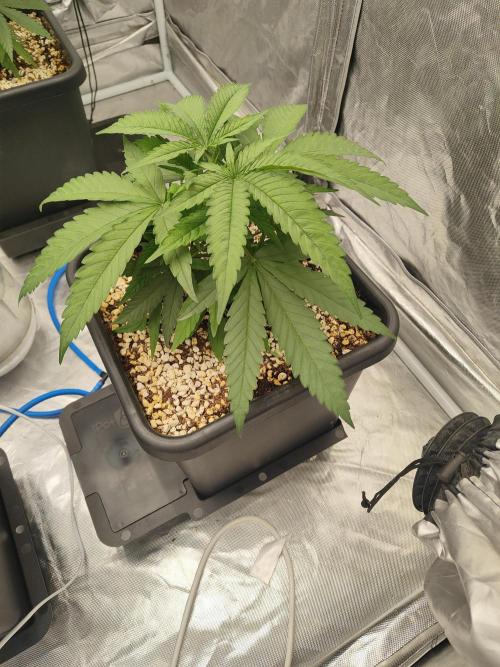
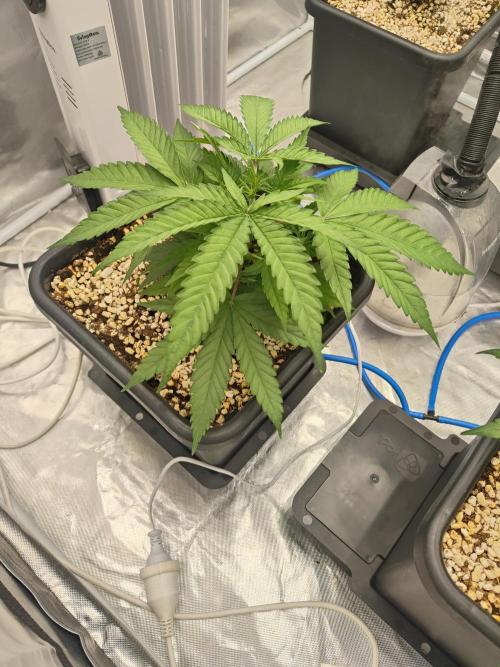
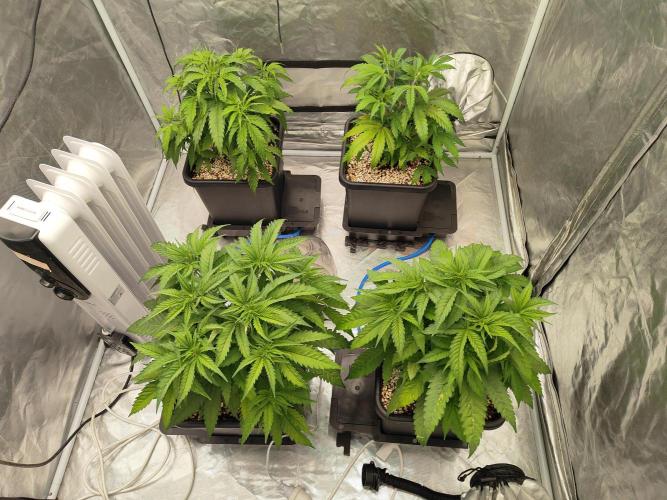
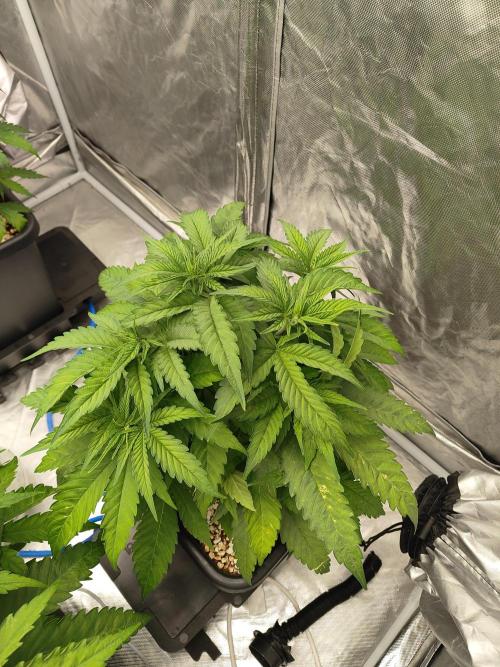
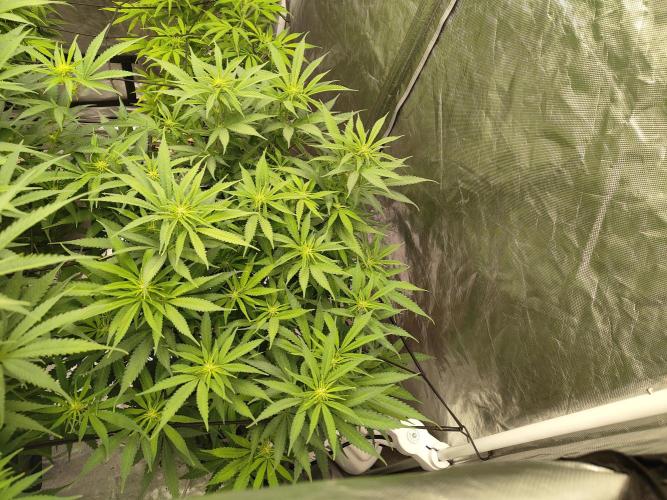
xchdave These girls have bushed out incredibly well. They're enjoying the autopots and the environment seems dialed in perfectly for them. And as such have exploded with growth this last week
This coming week I'm going to defoliate, scrog, take cuttings to clone and hopefully get ready to flip to flower!
1 like
comments
Share
9
Week 9. Vegetation3mo ago
18 hrs
Light Schedule
24 °C
Day Air Temp
5.7
pH
No Smell
Smell
650 PPM
TDS
60 %
Air Humidity
24 °C
Night Air Temp
15 liters
Pot Size
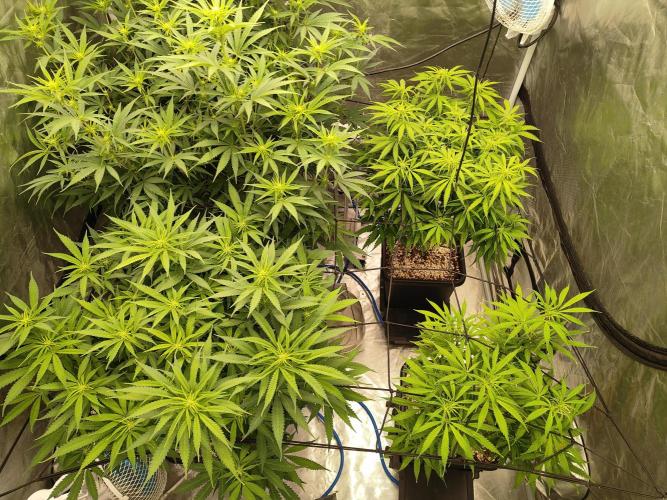
xchdave Hey there!
It's been a few weeks and I haven't updated the grow dairy. Well things haven't been going so well.
First of all I had a death in my family which meant I spent the better part of two weeks out of town, thankfully the autopots kept the girls feed, the days I was home I only had time to fill up the res, no training or really spending anytime with the plants.
This was unfortunate because had I been around I would of noticed an issue in my tent much sooner. Somehow the switch on my mechanical timer for the light had switched off. Giving the girls full 27/7 light. To make matters worse the plants had grown significantly and by the time I fixed the problem they were getting 850ppfd 24/7.
During my check-ins I had noticed the plants beginning to yellow, in particular one of the Super Lemon Haze. I put this down to a nutrient deficiency, I know my current nutrients lack in the micro nutrient department. And while this was probably the case I think it was made a lot worse by the lighting mistake.
Anyways fast forward another few days and the light is now back to 18/6 and 600ppfd, nutrients dialed back in and all four plants have been bouncing back.
The two Harlequin seem to have been very resilient to the added stress and are bigger plants than the two SLH
likes
comments
Share
10
Week 10. Flowering2mo ago
11 hrs
Light Schedule
24 °C
Day Air Temp
5.7
pH
No Smell
Smell
650 PPM
TDS
60 %
Air Humidity
24 °C
Night Air Temp
15 liters
Pot Size
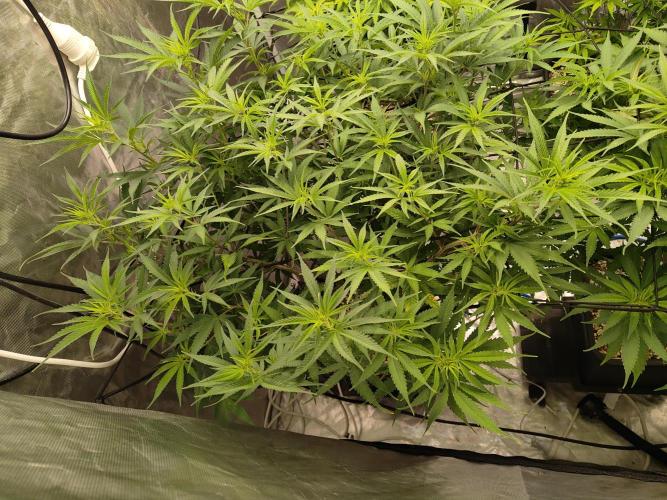
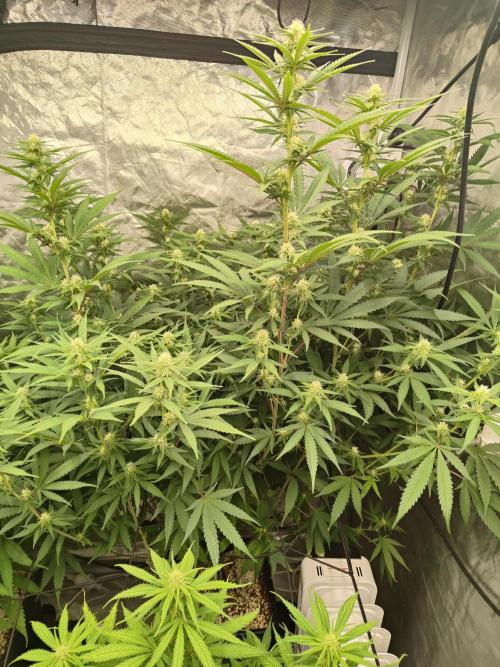
xchdave I'm calling this week a flower week even though it's only been 3 days.plants look to be transitioning well and very healthy.
The one on the left is taking up the most space in the tent where the one on the right is a bit tighter mode spacings.
Both are doing better than the super lemon haze
likes
comments
Share
11
Week 11. Flowering2mo ago
12 hrs
Light Schedule
24 °C
Day Air Temp
5.7
pH
No Smell
Smell
650 PPM
TDS
60 %
Air Humidity
24 °C
Night Air Temp
15 liters
Pot Size
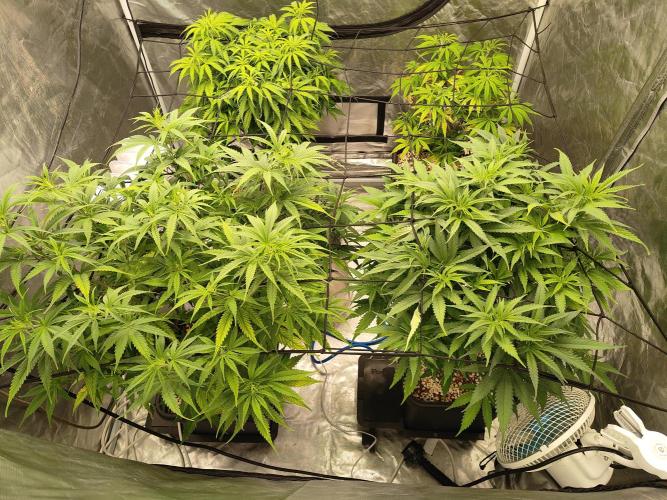
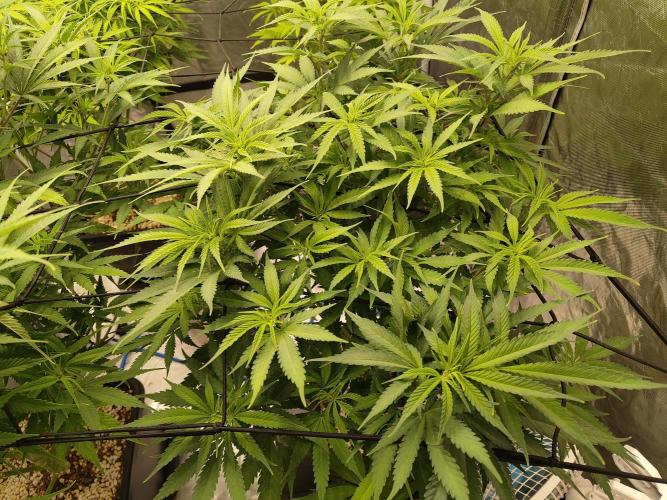
xchdave We're definitely in stretch. One pheno is definitely a lot stretchier than the other. Thought that would be the case, probably should manage the canopy a bit better but for now I'm just letting them do their thing. They're both larger than the super lemon haze which is a bigger problem.
likes
comments
Share
12
Week 12. Flowering2mo ago
12 hrs
Light Schedule
24 °C
Day Air Temp
5.7
pH
No Smell
Smell
650 PPM
TDS
60 %
Air Humidity
24 °C
Night Air Temp
15 liters
Pot Size
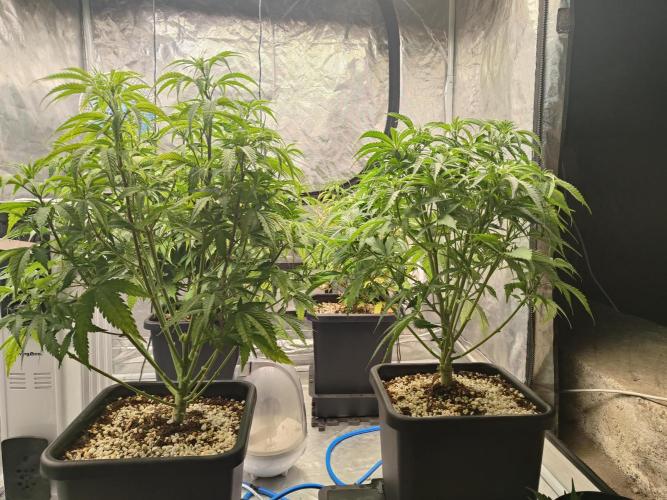
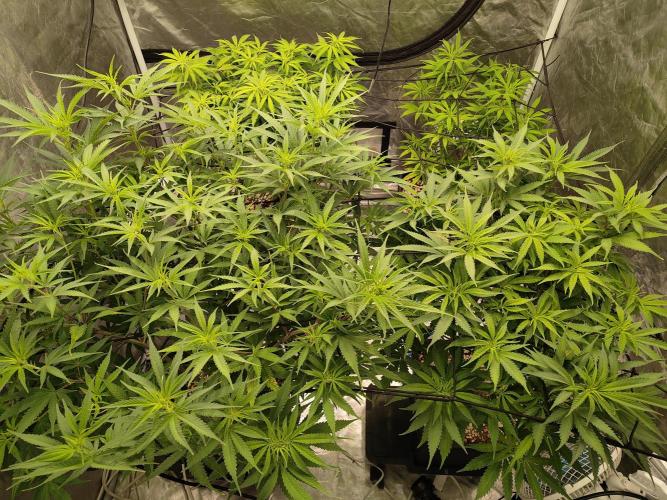
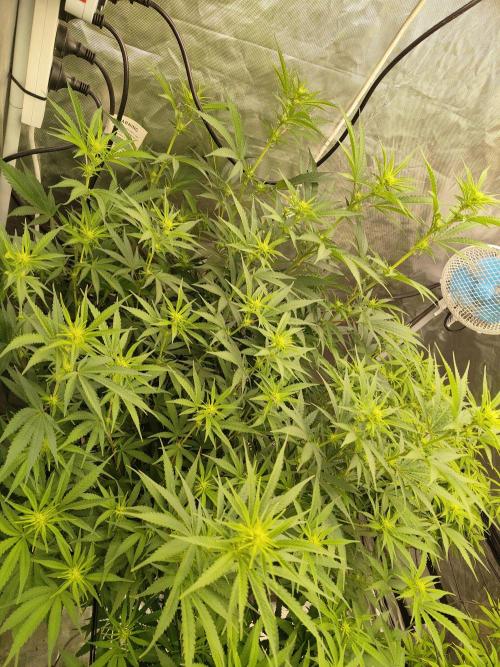
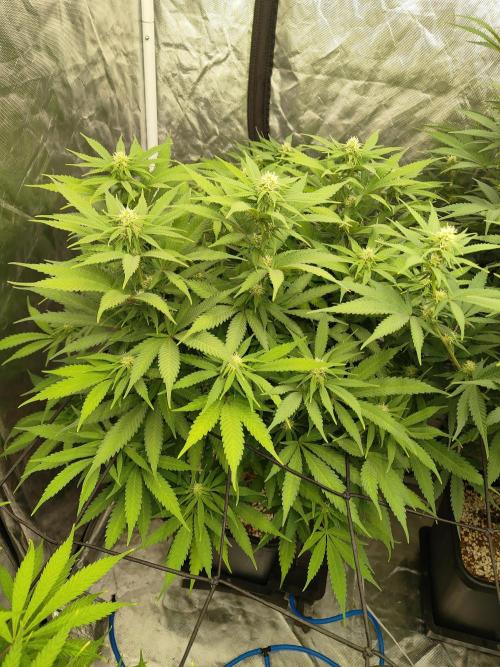
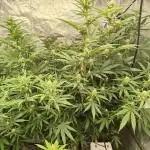
xchdave Definitely two different phenos, one stretched a lot, the other has stayed squatty. Buds developing nicely
likes
comments
Share
Enjoying this diary? Follow for more updates!

Prefer the old Diary view?
Go back to the old Diary view