
Auto Flower Perpetual Redundancy Part 3


Soil
Custom

Coco Coir
Custom

Perlite
Custom


Indoor
Room Type
LST
weeks 4
12 l
Pot Size
Start at Harvest
1
Week 1. Vegetation6y ago


3.81 cm
Height
20 hrs
Light Schedule
29 °C
Day Air Temp
6.5
pH
70 %
Air Humidity
23 °C
Solution Temp
23 °C
Night Air Temp
11.73 l
Pot Size
76.2 cm
Lamp Distance
1200 PPM
CO₂ Level
Nutrients 1
Water
26.417 mll
Philindicus Auto Flower Perpetual Redundancy Part 3
per·pet·u·al/pərˈpeCH(o͞o)əl/ Occurring repeatedly; so frequent as to seem endless and uninterrupted.
re·dun·dan·cy/rəˈdəndənsē/ The inclusion of extra components which are not strictly necessary to functioning, in case of failure in other components.
Follow along with my multi part Auto Flower Perpetual Redundancy Diaries. Part 1 and Part 2 consisting of 2 different strains cultivated side by side in my Veg tent. Once officially in bloom they will be transferred to my Bloom tent. I have chosen to allow at least a week past the mid-point of bloom before starting the next phase of the Auto Flower Perpetual Redundancy Part 3 and Part 4. I will repeat the process running 2 additional strains starting once again in my Veg tent. I am doing this to allow a slight buffer to give me more time for harvesting, drying, preparing for re-potting the next batch and ensuring space is available in my bloom tent.
I’ve been pondering a way to increase production for some time. With my set up I can typically expect to harvest about every 75 to 77 days. If I choose the appropriate strains, I will be able to increase the number of harvests to at least 8 or 9 per year with faster finishing auto flower strains.
Each diary will contain and repeat similar or possibly identical growing conditions, feeding schedules etc. A couple or a few photos will be posted each week depending on my available time with the bulk of the photos being during the last weeks of flush and harvest. Specific review about each strain’s growing characteristics will be given after harvest/curing including a smoke report. Thanks for following along.
Also be sure to read my TIP OF THE WEEK
OFFICIAL SET UP
VEG TENT
Gorilla Grow Tent Shorty 2 ft X 4 ft X 5 ft
(2) G8 Led grow lights 140 actual watts each
(4) 1020 reinforced drainage trays
(8) 3.17 Gallon Maxi Pots (12 Liter)
(2) Exhale XL Co2 bags
(2) 6-inch 2-speed circulation fans
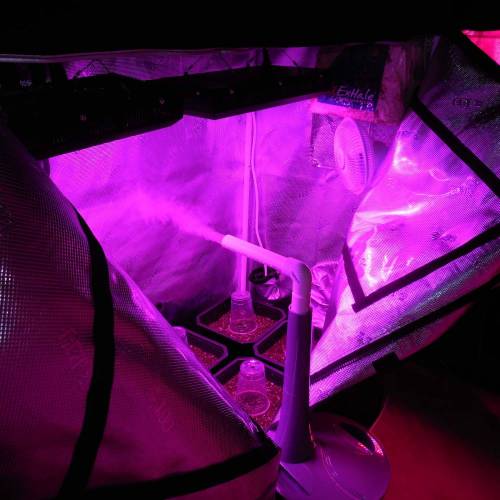
Customized Air Innovations 2-gallon Cool Mist Ultrasonic Humidifier
4-inch 190 cfm variable speed exhaust fan no filter
BLOOM TENT
Gorilla Grow Tent Shorty 2 ft X 4 ft X 5 ft
(2) G8 Led bloom lights 245 actual watts
(4) 1020 reinforced drainage trays
(8) 3.17 Gallon Maxi Pots (12 Liter)
(2) Exhale XL Co2 bags
(2) 6-inch 2-speed circulation fans
4-inch 190 cfm variable speed exhaust fan with carbon filter
MISCELLANEOUS TOOLS OF THE TRADE
Aquatic Life RO Buddie 100 Gallon Three Stage Reverse Osmosis System
(10) 5-Gallon BPA Free Food Grade Water Jugs
(8) Clear Solo Cups with 5 Vent Holes (Humidity Domes)
Super Foam Wire Ties (Cut to 12” Lengths)
Hydro Farm PPF/PAR Meter
H&M TDS Meter (0.5 ppm scale)
Hanna PH Meter
Hanna Cleaning, Storage and Calibration Solutions
Digital Infrared Thermometer
(2) Digital Thermometer/Hydrometer
Precision Hand Held Watering Device (Turkey baster)
Graduated Nutrient Eyedropper
Various Sized Mixing Containers
3/8-inch Siphon Hose
2 Gallon Wet/Dry Vacuum
40X LED Lighted Jewelers Loupe
(2) Curved Bladed Trimming Shears
(4) Teflon Coated Baking Pans 10”x 16”x 2”
(8) Heavy Duty Wire Clothes Hangers
Roll of Fine Florist’s Wire (Cut to 6-inch lengths)
Digital Scales (Large & Small)
(12) Half Gallon Glass Jars
(12) Ink Bird LED Hydrometers
(12) 62% Boveda Humidity Packs
(1) Pack RAW Hemp Rolling Papers
(1) Butane Lighter
(1) Comfortable Lazy Chair
SOIL COMPONENTS
Canna Coco Coir Mix
Fox Farm Ocean Forest Mix
Perlite
Extreme Gardening Azos (Azospirillum brasilense)
Extreme Gardening Mykos (Rhizophagus intraradices)
Bacillus thuringiensis israelensis (All Fungus Gnats Must Die)
BULK MIX PROPORTIONS
60% Fox Farm Ocean Forest
30% Canna Coco Coir
10% Perlite
SEEDLING MIX PROPORTIONS
7 parts Biobizz light
1-part Canna Coco Coir
1-part Perlite
SEEDLING / VEG. NUTRIENTS
Canna Bio Rhizotonic
Canna Bio Vega (If needed)
BLOOM NUTRIENTS
Advanced Nutrients
Connoisseur Bloom A & B
Big Bud
Canna PK 13/14
Canna Boost
SUPPLEMENTS
AN B-52
AN Bud Candy
AN Sensi Cal Mag Xtra
Canna Cannazyme
General Hydroponics Armor Si
Epsom Salt (If Needed)
Mammoth Microbes Mammoth P
Organic Blackstrap Molasses
LABS (Lactic Acid Bacteria Serum) https://themodern.farm/why/
FLUSHING SOLUTION
General Hydroponics Flora-Kleen
AUTO FLOWER LED LIGHT INTENSITY
Recommended LED PPFD/PAR Values / DLI Based on 20 hrs. of light.
Seedlings 150 - 200 umol / DLI 10.80 - 14.4 moles per day
Veg up to 9" 450 umol / DLI 32.40 moles per day
Early bloom 500 umol / DLI 36.00 moles per day
Mid bloom 650 umol / DLI 46.80 moles per day
Late bloom 750 umol / DLI 54.00 moles per day
Ripen 400 umol / DLI 28.80 moles per day
*** Use extreme caution going 700 umol or higher @ 20 hrs/day this could cause leaf burn***
PAR is the amount of light in the 400 - 700 nm color spectrum that can actually be used by the plant.
PAR does not measure the amount of UV and Infrared that plays a part in trichome formation and cell quality.
DLI (Daily Light Integral) is the total amount of PAR the plant has received per day
Our goal is to have a minimum DLI in the 38-40 mole range when in bloom.
https://www.waveformlighting.com/horticulture/daily-light-integral-dli-calculator
https://horticulturelightinggroup.com/blogs/news/horticulture-metrics-par-ppf-ppfd-dli
TIP OF THE WEEK
Product Review / LVPD (Leaf Vapor Pressure Deficit)
Air Innovations 2.15 Gal. Ultrasonic Cool Mist Dual Tank Digital Humidifier. It’s large enough to create any amount of humidity needed. I typically only have to fill it every other day. It’s digital and comes with a handy remote control. If used inside a tent it can be automatically set to regulate the humidity of your liking. Which is nice and no fuss. Fairly easy to clean and fill. I’m rating it at 4.5 stars. I would give it 5 stars if it allowed top filling of the tanks rather than having to shut it off and remove the tank which have a bottom fill fitting.
https://www.amazon.com/Air-Innovations-Ultrasonic-Digital-Humidifier/dp/B01A1BFPJ8?th=1
I purchased this nice humidifier and customized it to add crucial humidity during the critical beginning stages of a seedlings life and control the LVPD (Leaf Vapor Pressure Deficit) during the later stages of the plant’s life.
This LVPD heavily influences the plants ability to regulate proper plant transpiration during the vegetative, early, mid and late bloom stages of the plant’s life. There is a definite correlation between the “Leaf Canopy” temperature and humidity these numbers are used to properly calculate LVPD. Sorry to say if your using ambient grow room temperature to make this calculation you’re doing it wrong! The whole idea is to provide optimal conditions to allow the stoma on and under the leaves surface to open more often to release moisture and absorb more Co2. When the stoma are open it’s like the top of a straw and the bottom of the straw are your roots. When the stoma are open, they are drawing water and nutrients up through the plant. As your plant and roots mature, we tend to lower the humidity which in turn increases transpiration causing the plant to feed more.
Believe it or not the type of lighting your using can increase or decrease the leaf surface temperature.
When using LED lights leaf surface temperature taken with an infra-red thermometer tend to run around 5 degrees lower than ambient room temperature possibly more.
When using HID lights with heavy red spectrum like HPS your leaf surface temperature can run 5-7 degrees higher than ambient room temperatures. While in bloom keeping the plant canopy temperature below 80 F will help preserve the terpenes in your buds, above that and you’re quickly evaporating those precious terpenes.
With Autoflower plants I personally feel the first 4 weeks of the plant’s life are the most important. The plants energy is typically spent developing a nice root system so we need to keep our humidity high Day 1 to Day 7 (65 to 70%) to keep water lost through the leaf surfaces as low as possible. As week 2 progresses and a root mass forms you will see the vegetative growth start to kick in allowing you to slowly lower your humidity into the 60% to 65% range encouraging more transpiration to occur and cause the developing root system to begin drawing the nutrients needed for explosive root growth and pulling the nitrogen needed for vegetative growth in week 3-4-5 and begin their stretch.
Once the plants are well into the flowering stage in week 6-7-8, 50% to 55% humidity is a good range.
Because they are being watered/fed more regularly it’s “almost” unnecessary to use a humidifier since we are slowly lowering the humidity to increase the transpiration rate forcing the plant to draw more nutrients through its root system during key flower development stages. During the ripening stage weeks 9-10-11, 40% to 45% humidity is fine the plants have reached the end of their life and have slowed down or stopped feeding. We also do this to prevent mold and rot issues on and inside the buds. Lastly, we only need to give them a nice flush to get them to use up any nutrients stored in the plants system for a nice clean smoke.
Please keep in mind the recommended humidity levels are based on the canopy leaf surface temperatures which allow for the optimal amount of transpiration for each stage of growth and flowering.
Recommended LVPD
Seedlings/Early Veg 0.4 - 0.8 kPa
Late Veg/Early Bloom 0.8 - 1.2 kPa
Mid/Late Bloom 1.2 - 1.6 kPa
*** Danger Zone*** Below 0.4 kPa / Over 1.6 kPa
https://www.dimluxlighting.com/knowledge/vapor-pressure-deficit-vpd-calculator/
https://vpdcalculator.com/vpd-calculator
https://www.blackdogled.com/lst
13 likes
1 comment
Share
2
Week 2. Vegetation6y ago


8.89 cm
Height
20 hrs
Light Schedule
29 °C
Day Air Temp
6.5
pH
65 %
Air Humidity
23 °C
Solution Temp
23 °C
Night Air Temp
11.73 l
Pot Size
60.96 cm
Lamp Distance
1500 PPM
CO₂ Level
Nutrients 2

BioRHIZOTONIC
1.057 mll

Mammoth P
0.132 mll
Philindicus Week 2 Update
Getting amazingly great growth out of these girls so far. Running 2 Exhale XL bags is really helping increase my Co2 levels. Indica shaped leaves are pretty good sized I'm guessing these will be hungry plants. I'm using only Canna Biorhizotonic and Mammoth P every other watering. Keeping watering to a bare minimum every 4th day once the surface of the pots is dry a couple of inches deep and only watering to moisten the top of the pots. Since I pre-moisten my soil mixture before I pot them up I know there is plenty of moisture that has wicked down deeper in the pots. Very impressed so far with Ethos auto flower genetics.👍👍
TIP OF THE WEEK
Exhale Co2 Bags
Most growers understand the benefits of adding extra Co2 to your grow space including increasing the growth and harvest potential of your plants. If you’re in doubt compare my first 4 weeks of Autoflower growth to your own grows to see if your plants could benefit from some additional Co2.
For a typical 2-foot by 4-foot tent one XL bag should be enough for additional Co2 for 6 to 8 plants of modest size.
I personally have been running Exhale bags for some time in my tents and have actually increased to running 2-XL Exhale bags per tent and pretty consistently getting Co2 levels into the 1500ppm range when the lights are on. I’m running 2 bags because I am in a warmer climate where excess heat building up in my tents can be an issue especially during the bloom phase, so my exhaust fans are running continuously. You will find that the Co2 ramps up when your lights come on over a few hours and then goes down when your lights go off. Since plants don’t consume Co2 at night this doesn’t present an issue and is completely natural.
My system is pretty simple I have 4 XL Exhale bags they last about 6 -7+ months before they slowly get burned out. When you get a fresh bag it’s basically sterile then injected with a spore print with a specific type of mycelium. This mycelium spreads and fully colonizes the substrate and produces Co2. This process takes a few weeks before full Co2 production ramps up. To compensate for this, I order a new bag every 3 months and continuously rotate them out.
While the Original size Exhale bag would be fine for a small grow, I recommend the XL Bag in other words go big or go home type of mentality. The third option is the Exhale 365 which comes with a mycelium colony inside the bag which is separated from the substrate which you release inside the bag when you’re ready to colonize the entire bag. Just keep in mind it will take longer for the mycelium to fully colonize the substrate and start producing enough Co2 to be beneficial to your plants.
I’ve looked into buying the supplies to try to make and colonize my own bags but to be realistic it would cost just as much to buy them direct from the manufacturer.
In the USA I’ve found Arbico Organics is a reliable distributor for Exhale bags at a reasonable price. They take your order then the manufacturer themselves send you a “Fresh Bag” not some bag that’s been sitting in some hydro-shop for a month or 2.
Exhale bags are also available in Canada and the EU which makes for a great distribution range for the product.
So go check them out a give them a try.
https://www.arbico-organics.com/
https://www.exhaleco2bags.com/
13 likes
2 comments
Share
3
Week 3. Vegetation6y ago


13.97 cm
Height
20 hrs
Light Schedule
29 °C
Day Air Temp
6.5
pH
60 %
Air Humidity
23 °C
Solution Temp
23 °C
Night Air Temp
11.73 l
Pot Size
50.8 cm
Lamp Distance
1500 PPM
CO₂ Level
Nutrients 2
BioRHIZOTONIC
1.057 mll
Mammoth P
0.132 mll
Philindicus Week 3 Update
These girls are about to take off with their stretch starting soon. Just incredible growth not just on top but even the root system must be very good since I needed to water to run off at the end of the week. My run off was 1100 to 1200 ppm with a ph of 6.3. This is the first grow where the plants have already needed to be watered to runoff by week 3. Usually end of week 4 beginning of week 5 has been the standard for my auto grows. I think these may be heavy drinkers/feeders we will see. Holding off on nutes until I see some fade in the single and 3 point oldest lower leaves.
TIP OF THE WEEK
Please feel free PM me for questions about the Hydrofarm PAR Meter or recommendations for brands.
AUTO FLOWER LED LIGHT INTENSITY
I’m trying to keep things here as simple as possible. Forget about Lux and Lumens they serve little or no purpose in growing plants. These terms are meant for light spectrums visible to the human eye not plants.
The following terms are really what we want to be dealing with when trying to purchase or calculate lighting for our grows.
PAR (PHOTOSYNTHETICALLY ACTIVE RADIATION)
Photosynthetically Active Radiation is the spectral range (wave band) of light radiation from 400 nm (Blue) to 700nm (Red)wavelength. Plants use light within this range for the process of photosynthesis. So PAR is basically the amount of light in the 400 - 700 nm color spectrum that can “actually” be used by the plant.
PAR does not measure the amount of UVA or UVB and Infrared that plays a part in trichome formation and cell quality. Some manufacturers have meters which can measure further into the infrared and far-red spectrum which may not be entirely necessary.
PPF measures the total amount of PAR emitted from the lighting system per second. Most common unit is μmol/second. μmol are also known as (Micro Moles).
PPFD (PHOTOSYNTHETIC PHOTON FLUX DENSITY)
PPFD is a measurement of the amount of Photosynthetic Photon Flux per unit area. Its number of photosynthetically active photons that fall on a given surface each second”. PPFD is measured at a specific position of plant canopy and is measured in micro moles per square meter per second or μmol/m2/s. For the purpose of simplicity, I will just use the term umol when discussing PAR meter readings.
DAILY LIGHT INTEGRAL (DLI)
Daily Light Integral (DLI) is the total number of photosynthetically active radiation (PAR) photons (traditionally those between 400-700 nm) incident on an area over the course of a day. DLI is a function of both the intensity and duration of the photosynthetic light falling on the target over a day and is most commonly expressed as moles of light per square meter per day. For the purpose of simplicity, I will just use the term moles when discussing DLI amounts per day.
Using a PAR meter and calculating DLI is the only way to properly measure how much of this lighting spectrum and its intensity you are exposing your plants to on daily basis during key phases of growth and bloom. If not, you are just guessing and risk damaging your plants and precious buds.
Our goal is to have a “minimum” DLI in the 38-40 moles range when in bloom. Extreme care should be used when approaching a DLI of 60 moles or higher. Using a DLI of 65 moles is typically the maximum high light intensity/duration cannabis plants can handle per day and it is extremely risky to expose them to this much light therefore it is not recommended. In reality a light intensity of this nature would be if you lived at the equator during mid-summer on a crystal-clear day when the sun is at its highest intensity possibly on a mountain side.
Growers who prefer Photoperiod plants can actually run their intensities at a higher level because they are only running their lights 12 hours a day while in bloom. At 12 hours per day in order to meet the minimum DLI required for bloom running the intensity at 900 umol (DLI 38.80) works well and running the intensity at 1200 umol (51.84) during late bloom is a safe maximum. You can possibly run at a higher intensity with the use of supplemental Co2.
Keep in mind that these are estimates and each plant or strain may be able to handle more or less light. Other considerations like temperature, humidity and Co2 concentration should be taken into account.
Finally, the moment we have all been waiting for! Why is getting the light intensity and spectrum so important when growing Cannabis? It's actually very simple, light intensity and spectrum triggers your plants natural defense to protect themselves from the intense and possibly damaging light by producing more trichomes which is exactly what we want. Giving them the right spectrum and intensity during each stage of growth and bloom will yield some of the finest quality bud we all know and love.
I personally use the following as a guide when growing Auto Flower strains.
Recommended LED PPFD/PAR Values / DLI Based on 20 hrs. of light.
Seedlings 150 - 200 umol / DLI 10.80 - 14.4 moles per day
Veg up to 9" 450 umol / DLI 32.40 moles per day
Early bloom 500 umol / DLI 36.00 moles per day
Mid bloom 650 umol / DLI 46.80 moles per day
Late bloom 750 umol / DLI 54.00 moles per day
Ripen 400 umol / DLI 28.80 moles per day
(Ripen is the last 7 to 10 days before harvest.)
*** Use extreme caution going 700 umol or higher @ 20 hrs./day this could cause leaf burn***
I’ve included some links for more in-depth information and a nice calculator for assessing your lighting needs.
https://www.apogeeinstruments.com/determining-grow-light-position-using-a-par-meter/
https://www.apogeeinstruments.com/daily-light-integral-measurement/
https://www.waveformlighting.com/horticulture/daily-light-integral-dli-calculator
https://horticulturelightinggroup.com/blogs/news/horticulture-metrics-par-ppf-ppfd-dli
https://www.waveformlighting.com/horticulture/what-is-the-difference-between-ppfd-and-ppf
11 likes
1 comment
Share
4
Week 4. Vegetation6y ago


45.72 cm
Height
20 hrs
Light Schedule
26 °C
Day Air Temp
6.5
pH
60 %
Air Humidity
23 °C
Solution Temp
23 °C
Night Air Temp
11.73 l
Pot Size
40.64 cm
Lamp Distance
1500 PPM
CO₂ Level
Nutrients 2
BioRHIZOTONIC
1.057 mll
Mammoth P
0.132 mll
Philindicus Week 4 Update
These girls are looking ready to start their stretch with one/two over achievers taking the lead. started to do some LST work as needed. Seeing a few pistil puffs starting to form some nice preflowers so I'm still calling them as in Veg this week. Looking really good with nice fairly dark green leaves. Still not feeding any nutrients yet going to try to wait on feeding until the oldest lower leaves start to lighten up in color. The soil mixture is giving them what they need. Humidity is bouncing around at 60% to 55% between waterings.
TIP OF THE WEEK
LABS (Lactic Acid Bacterial Serum)
LABS are a naturally organic way to enhance your plants terpene production.
Ingredients
350 grams Organic White Rice
250 ml Distilled Water
1 Quart Glass Jar (2 Jars makes it easier)
Cheese Cloth
Turkey Baster
Organic Whole Milk
Organic Blackstrap Molasses
I find starting my LABS in the beginning of week 4 works out perfectly to start applications in week 6.
Boil ordinary tap water add to jar or containers to be used let sit for 5 minutes. Empty and allow to cool to room temperature.
Add rice and distilled water to jar tighten top and vigorously shake jar for one minute.
Pour only the liquid milky portion through strainer into separate jar.
Cover jar with a thin layer of cheese cloth use a rubber band etc. to hold it in place.
Place inside of a dark kitchen cabinet. Start checking on the progress about 3 or 4 days later.
It should show 3 layers, a sediment on the bottom, a liquid middle layer and a skin should be forming on the top surface. It should smell slightly sweet but sour but not rotten or foul smelling.
Use a Turkey Baster to carefully remove only the middle liquid layer from the jar and transfer it into the other jar containing “Room Temperature” Organic whole milk. Try to leave an inch or 2 of air space to the top of the jar. Once again cover with cheese cloth and place into a dark cabinet.
Check on this every other day until you see 3 distinct layers it can take up to a week depending on the temperature. The yellowish liquid is what we want. Remove the cheese like curd top layer and avoid the sediment on the bottom. Use a turkey baster to remove the LABS (Lactic Acid Bacteria Serum) and filter it through several layers of cheese cloth or very fine coffee strainer. To stabilize and provide food for your LABS add an equal amount or Organic Black Strap Molasses stir well place a loose-fitting cover on the jar or bend cover to allow breathing room and place into refrigerator.
How to use your LABS. They tend to only survive in only the top layer of your soil. I typically add 50 ml (2 Turkey Baster fills) of the LABS/Organic Blackstrap Molasses mixture to 1 gallon of water. This is more than enough for (8) 3-gallon pots. After feeding my plants I drizzle 4 or 5 turkey baster fills of this solution to the surface of the pots once a week. If you use full strength nutrients, I would suggest adding this on the days you use plain water to avoid killing the LABS. I typically don’t use more than 3/8 strength nutrients when growing auto flower strains. Also try to do this just before lights out because UV light can kill the LABS. Some growers suggest spraying the surface of the soil with the solution, I feel subsequent watering will flush the carbohydrates deeper into your pots to feed the other microbes in your soil. Try it out see if you notice any difference in your grows coloration, bud quality and terpenes.👍👍
Check out this page for further information.
https://themodern.farm/why/
16 likes
1 comment
Share
Used techniques
LST
Technique
5
Week 5. Flowering6y ago


66.04 cm
Height
20 hrs
Light Schedule
26 °C
Day Air Temp
6.5
pH
465 PPM
TDS
55 %
Air Humidity
23 °C
Solution Temp
23 °C
Night Air Temp
11.73 l
Pot Size
40.64 cm
Lamp Distance
1500 PPM
CO₂ Level
Nutrients 10

pH Perfect Connoisseur Bloom Part A
0.528 mll

pH Perfect Connoisseur Bloom Part B
0.528 mll

Sensi Cal-Mag Xtra
0.528 mll
Philindicus Week 5 Update
Moved the girls into the bloom tent swinging the main colas to the outside edges of the tents and hit them with some nutrients. Humidity is running between 50 to 55% between waterings.
TIP OF THE WEEK
Affordable Reverse Osmosis Water Filter Review
H2O, life as we know it wouldn't be possible without it.
The biggest issue we as growers face is finding clean usable water for our grows.
Believe it or not most nutrient manufacturers recommend using R.O. water. This is to avoid possible issues with their products properly staying in solution and leading to nutrient lock out. Hard alkaline water heavy with calcium carbonate and magnesium can lead to an unacceptable ph and high TDS (Total Dissolved Solids) for proper nutrient absorption. Not to mention the potential for other undesirable heavy metals, chlorine and dissolved organics which may be lurking in your local drinking water supply.
Using a Reverse Osmosis (R.O.) water filtration system takes the guess work out of your water quality.
I’ve found that I’m using over 160 gallons of water each grow between using it for my humidifier, regular watering and feeding to the big flush in the end.
I’m in the USA and found a simple and affordable 100 gpd (Gallons Per Day) R.O. filter which will fill a 5-gallon jug in around 1 hour depending on the water pressure. Since I typically run 8 plants, I have 10 of these jugs which is enough to flush all of them in the end. I also have a number of 1-gallon jugs which are easier to use when the plants are smaller.
I found the Aquatic Life RO Buddie at a local pet supply wholesaler called Chewy for about $70.00 USD.
https://www.chewy.com/aquatic-life-ro-buddie-three-stage/dp/146153
It’s a small, simple yet efficient 3 cartridge design and comes with everything you need to get it up and filling those jugs in under 1 hour. The push in style connectors are great. Just use the supplied razor to cut the tubing to the needed length and push it into the fitting. It also comes with a standard hose hook up with a sink faucet adapter making it easy to use inside or outside your home.
My tap water is typically 7.5+ ph and at least 360ppm which is not good. I have found this hard alkaline water can lead to something called ph bounce. In other words, you try to adjust the ph using phosphoric acid and initially you see the ph drop, but after a few hours it bounces back up. Causing nutrient lock out issues.
After using the RO Buddie, I see my ppm’s in the low teens usually 12 to 15 ppm.( IMPORTANT) You always need to keep in mind that R.O. water has been stripped of almost all nutrients especially calcium and magnesium. If you try to water your plants with plain R.O. water remember to at least add a small amount of cal/mag or a weak nutrient solution because if not it will steal nutrients from your substrate causing future deficiencies.
In terms of cartridge life, I’ve been running mine for as long as 9-10 months before I see the ppm’s rise into the 60 to 70 ppm range and need to replace the cartridges. As with all things replaceable the cost of the 3 cartridges is about $52.00 USD almost as much as the whole unit.
My conclusion is investing in an inexpensive R.O system is worth the over all expense in the long run to allow plants to be efficiently able to absorb all the nutrients they need in order to grow and bud properly without the interference caused by poor water chemistry. This will also ensure your buds are not contaminated with toxic metals etc. Using this product will give you some peace of mind that you’re supplying a safe top-quality product for consumption.👍👍
11 likes
1 comment
Share
6
Week 6. Flowering6y ago


66.04 cm
Height
20 hrs
Light Schedule
26 °C
Day Air Temp
6.5
pH
625 PPM
TDS
50 %
Air Humidity
23 °C
Solution Temp
23 °C
Night Air Temp
11.73 l
Pot Size
40.64 cm
Lamp Distance
1500 PPM
CO₂ Level
Nutrients 10
pH Perfect Connoisseur Bloom Part A
0.793 mll
pH Perfect Connoisseur Bloom Part B
0.793 mll
Sensi Cal-Mag Xtra
0.793 mll
Philindicus Week 6 Update
Pretty basic week buds are becoming a bit more complex in structure. I saw a lower leaf going yellow telling me these girls are getting hungry. Increased the nutrients for 2 feedings this week but found my runoff at the end of the week was running a bit low at 700ppm to 800ppm with a ph of 6.2. These plants are very thirsty and hungry compared to other strains I've grown. Lastly drizzled the tops of the pots with LABS ( Lactic Acid Bacterial Serum) and Organic Blackstrap molasses mixture diluted into water. I feel this has improved my grows by feeding the microbes in my soil and enhanced the terpene production in the final stages of bloom. Not to mention it seems to help bring out some great coloration during flush. Definitely try it out see if you have similar results. Humidity is bouncing between 50% to 55% between waterings feedings.
TIP OF THE WEEK
DIGITAL MOISTURE METER
The following is my personal opinion and experience on watering my auto flower plants. Every grower has different ways to properly water their grows try a few out and see what works best for you based on your watering style and technique.
Any one who has followed any of my diaries knows that I am a self-admitted over waterer. It’s the hardest habit to break. There really needs to be a 12-step program for overwaters!
We all are guilty of doing it but few of us actually admit to it. The reality of this bad habit is that it is the leading cause of nutrient deficiency issues in your grow.
The scenario is you wake up lift your pots to guestimate the weight of your pots to see if they feel light enough that they need to be watered. While this works fairly well for 2 to 4 pots try doing this with 16 or more pots and keeping track of each one. Definitely don’t wake and bake until after you’ve finished the work on your plants.
So, what usually winds up happening is because you’re going to work and won’t be home for the next 10 to 12 hours and you’re afraid they may dry out too much you decide to water them anyways regardless just to get them done. Now you’ve set yourself up for an overwatering/nutrient deficiency issue.
Hence the most valuable tool in my arsenal beside my trusty turkey baster is a Digital Moisture Meter. I know it sounds almost childish that I have to use a moisture meter to get my watering routine done properly.
Surprisingly it works well and what’s really nice is I can tell what the moisture levels are at different depths of the pot. This is extremely important with growing auto flower seedlings and young plants in their oversized final pots. Even though they are in their final pot you always need to understand water flows downhill. (Did I really need to put that in?)
During the first 2 weeks of your plants life remembering to water them sparingly as if they were growing in a 16-ounce solo cup until the root system is large enough in a few weeks can be challenging. Every time you water it filters down to the middle and lower parts of the pots which in turn can become over saturated with water and also nutrients that are in the substrate.
Once the roots reach this over saturated substrate it can cause root growth, nutrient absorption, root disease and oxygen issues for your root system. The oxygen is important not only for your root system but also the beneficial bacteria and microbes living in your substrate. Root burn can also occur since nutrients from the upper parts of the pot have filtered down and concentrated in the middle and lowest parts of the pot. Once the young delicate roots hit the lower parts of the pot bam you’ve got root burn. This happens with a nutrient rich substrate and why you should not add nutrients until the root system is mature enough to handle the additional nutrients.
So basically, using a moisture meter will give you a clear picture of what’s going on inside your pots at different depths.
0.0 is bone dry and 9.9 is saturated. I use 3.1-gallon pots and always premoisten my hybrid soil potting mixture before potting. I add only enough water to hold the mixture together but not enough that you can squeeze water out of it. It should be loose and a bit fluffy. If your substrate is like muck or muddy you have a poor substrate mixture. It should always be light, airy and drain freely.
When watering use Biorhizotonic and Mammoth P to encourage root growth/development/feeding try to keep it organic if possible to aid the colony growth of beneficial microbes in your substrate during the first 4 to 5 weeks. Adding additional beneficial microbes to your substrate mixture like Azos (Azospirillum brasilense) a nitrogen fixing bacteria which will help with early top growth and Mykos (Rhizophagus intraradices) a type of mycorrhizae will help kick root development into overdrive.
Day Zero - Plant your seeds after a nice tail has emerged. Use a pencil to lightly poke a small hole to allow the tail to easily fit in and the shell of the seed should be just below the substrates surface. Lightly sprinkle extra fine substrate mixture on the shell about an 1/8 inch is all you need. Use an eye dropper and add several drops of water exactly where the seed is located and cover with clear plastic solo cups with hole in them to allow good air circulation and avoid a damping off issue with the seedlings. Do not add too much water which will cause the seed to sink too deep into the substrate.
Week 1- Day 1 is when the first set of true serrated leaves emerge from the cotyledon. Remove the humidity domes keep tent humidity levels high 65 to 70 %. Use a minimal amount water about 3 inches in diameter around the seedling as if they are in ½ a solo cup watering only as needed typically every 4th or 5th day. Try using a turkey baster when watering.
Week 2- I find that allowing the top couple of inches of my pots to go dry 0.0 before watering an area around 6 inches in diameter works well. Use the moisture meter to see the moisture level about 6 inches deep it should be about 5.0 to 6.0. At 8 inches it should be around 7.0 to 8.0. Allow the tops to get dry again before the next watering. At the end of week 2 lightly water the entire top 2 inches of the pots with a turkey baster maybe 6 to 8 basters full. Typically, about every 4th day.
keep humidity levels at 60 to 65% in your tent.
Week 3 - The first roots hit the bottom of the pot. Once again let the top 2 inches of the pots dry out then water only the top 2 inches with 6 to 8 basters full of water only as needed. At this point the excess water in the deepest parts of the pots are finally being utilized. If you check the moisture levels in the deepest parts of the pot it will be 8.0 to 8.5. If it’s 9.0 or 9.9 do not add any more water until it drops lower. The roots will grow deeper in the pots going for the water. Maintain humidity in your tent at 55% to 60%.
Week 4 - Signs of numerous roots are seen coming out of the pots drain holes. Once again only water once the top 2 inches of the pot are very dry. Moisture levels in the deepest parts of the pot will be 6.5 to 7.5 before watering. If the moisture level in the deepest parts of the pot are 6.0 or less the root system is large enough to handle 1 quart or 1 liter of water. Keeping the humidity in the 55% range would be ideal.
End of week 4 beginning of week 5 top 2 inches is dry 0.0, moisture level at 4 inches deep is 3.5 to 4.5, deepest parts of the pot is 5.0 to 6.5. You can now water to the point of complete run off. The root system is large enough to handle larger amounts of water and allow you to test the 1st run off ph and ppm to determine when you need to start adding nutrients into your watering routine. Try lowering your humidity to 50% to 55% to increase transpiration causing the plant to feed more preparing for the stretch and start the preflowering stage.
Week 5 to harvest simply use the moisture meter at full depth to determine if or when they need to be watered. When the readings are 5.0 or less water them. If they’re at 6.0 or higher let them dry out a bit more. I typically feed to the point of slight run off to avoid wasting nutrients. Then use water with a small amount of cal /mag in between feedings or if my ppm’s are running high. The last feeding of the week will be to the point of 10% to 20% run off check my run off ph and ppm’s. I keep this cycle up until 10 to 14 days before harvest when my flush begins. Week 5 to week 8 start of week 9 using 50% humidity works well to encourage more feeding during key bud development stages. End of week 9 to 11 keep humidity as low as possible 35% to 45% if possible to promote terpene, resin, more trichome development, prevent rot and mildew issues. I also like to use a bit of drought stress during the final weeks before harvest waiting until the pots are dryer than usual before the next watering using smaller amounts of 1/2 gallon every few days. Using this technique helps keep the humidity from bouncing up and down from larger waterings and triggers a self preservation trait enhancing resin and terpene production.
In conclusion with a little bit of practice and patience using a digital moisture meter can help you develop a better watering technique to help improve your grow.
P.S. I’ll never tell anyone you’re using one too!
10 likes
2 comments
Share
7
Week 7. Flowering6y ago


66.04 cm
Height
20 hrs
Light Schedule
26 °C
Day Air Temp
6.5
pH
Weak
Smell
725 PPM
TDS
55 %
Air Humidity
23 °C
Solution Temp
23 °C
Night Air Temp
11.73 l
Pot Size
40.64 cm
Lamp Distance
1500 PPM
CO₂ Level
Nutrients 10
pH Perfect Connoisseur Bloom Part A
0.793 mll
pH Perfect Connoisseur Bloom Part B
0.793 mll
Sensi Cal-Mag Xtra
0.793 mll
Philindicus Week 7 Update
Buds are starting to fill in nicely. One plant the buds have some freakishly long pistils. Nice light sweet chem odor starting to come through. Gave them a nice pop of PK 13/14 hoping to see some more filling in then a bit of bulking up over the next week or 2. Using a wet then dry type watering cycle feed ,feed, water. Weekly run off is coming out between 1000ppm to 1200ppm with a 6.2 ph. Weekly application of LABS/ Organic Blackstrap Molasses to the surface of the pots. Humidity is bouncing around between waterings at 50% to 55%.
TIP OF THE WEEK
How to Test Your Digital Hygrometers
When starting to cure your buds using a 62% humidity is an industry benchmark we would all like to attain. Testing your Hygrometers will ensure you are hitting the mark as accurately as possible.
When salt and water (NaCl and H2O for the sci-geeks), are in a saturated solution at equilibrium, the resultant humidity is 75%. This gives a fantastic reference point to calibrate our hygrometer. There is an easy way to determine if your hygrometer is accurate. Here's the procedure you should use: You need a small ziploc bag, a plastic bottle cap, table salt or kosher salt, and water.
Place the salt in the bottle cap.
Dampen the salt with water. Do not put so much in that the salt gets "sloppy". You want a damp pile of salt in the bottle cap.
Place both the hygrometer and the bottle cap full of damp salt in the ziploc bag and seal it well trapping as much air into the bag as possible. (It is important not to let air in or out while the test is going on.)
Keep it like this for 12+ hours. Larger bags may take longer.
After 12+ hours in the damp salt environment, the actual air humidity inside the bag will be 75%. Compare it to your hygrometer, your hygrometer should also read 75%. If not, you will then know exactly how far off your hygrometer is. If it's off, note the amount that it actually reads and be sure to add or subtract that amount when reading the hygrometer. If the hygrometer has a control to adjust it you can set the hygrometer to 75% immediately after the test. Or simply mark the difference on each hydrometer.👍
13 likes
1 comment
Share
8
Week 8. Flowering6y ago


66.04 cm
Height
20 hrs
Light Schedule
26 °C
Day Air Temp
6.5
pH
Normal
Smell
800 PPM
TDS
50 %
Air Humidity
23 °C
Solution Temp
23 °C
Night Air Temp
11.73 l
Pot Size
40.64 cm
Lamp Distance
1500 PPM
CO₂ Level
Nutrients 10
pH Perfect Connoisseur Bloom Part A
1.321 mll
pH Perfect Connoisseur Bloom Part B
1.321 mll
Sensi Cal-Mag Xtra
0.793 mll
Philindicus Week 8 Update
Buds on 2 plants are a bit ahead of the other 2. Starting to show a bit of plumping up and showing off some nice coloration with a bit of fade coming in telling me they are getting closer to getting flushed. The smell of spicy sweet chem is over powering the rest of the grow. Got in 2 feedings this week with one plain watering and drizzled the tops of the pots with LABS(Lactic Acid Bacterial Serum) and Organic Blackstrap Molasses diluted with water. Looks like they are still feeding/drinking. Run off is 950 ppm to 1050 ppm with a 6.2 ph. Trying to squeeze in at least one or more feedings in week 9.
TIP OF THE WEEK
Rehydrating your Boveda 62% humidity packs.
Week 8 leaves us plenty of time to rehydrate those crunchy Boveda packs which they claim are no longer any good. Well I call B.S. on that fact.
Always handle the packs gently so as not to damage the packs membrane. In other words don't fold them, crush them etc. Take an airtight container and add a small bowl of water with a small amount of hydrogen peroxide to keep it sterile. Add your Boveda packs and a hygrometer. (Note "DO NOT" put the packs in the water) Put the top on tightly and allow the humidity to rise. They will absorb the 95%+ moisture in the air to rehydrate.
After 4 to 5 days open the top and remove the packs that are once again fully liquidized. Any ones that still have any solid salts leave in the container and repeat the process as long as needed. The ones that have fully rehydrated can be placed into a jar with a properly calibrated hygrometer and check the humidity level. We are looking for 62% to 63% humidity. If it's higher than this simply remove the top from the jar for a few hours at a time and recheck the humidity levels. It may take 3 or 4 tries to get it back down into the correct range but be patient.
I've taken packs that were completely dry and rehydrated them. Sometimes it can take up to 2 weeks to accomplish this but it does work. If you have any liquid leakage coming out of the packs toss them because the membrane is damaged we want to avoid getting our buds wet. We all know this is an expensive hobby but every little bit helps out in the long run.👌
9 likes
3 comments
Share
9
Week 9. Flowering6y ago


66.04 cm
Height
20 hrs
Light Schedule
26 °C
Day Air Temp
6.5
pH
Strong
Smell
45 %
Air Humidity
23 °C
Solution Temp
23 °C
Night Air Temp
11.73 l
Pot Size
40.64 cm
Lamp Distance
1500 PPM
CO₂ Level
Nutrients 1

FlashClean
1.321 mll
Philindicus Week 9 Update
The flush is on the girls are throwing out some great coloration and permeating the house with their funky goodness. I used FloraKleen in the previous watering then let them dry out a bit. Then I put 6 gallons through the pots dropped the run off to under 150 ppm. I adding more FloraKleen to the last gallon of water. Still applying my LABS(Lactic Acid Bacterial Serum and Organic Blackstrap molasses mixture through the end until harvest. I'm letting them dry out fairly well until the next watering with R.O. water which should strip the soil of whatever nutes are left in there.
TIP OF THE WEEK
PH and TDS/EC METER CLEANING, CALIBRATION, STORAGE
The end of a grow is a great time to clean and re-calibrate your PH and TDS meters. Some recommend monthly cleaning and or calibrations depending on how much testing is being done.
Taking care of and properly maintaining your precision measure tools is very important.
With PH meters cleaning the porous glass electrode is important to get an accurate measurement.
Most manufacturers recommend soaking the bulb in a cleaning solution for about a half an hour. Next you need to rinse it off with distilled or deionized water. Rehydrate the bulb in fresh storage solution for at least ½ hour then rinse with distilled or deionized water. Don’t forget to clean the storage cap out well with a Q-tip or swab. Bacteria and other contaminants can thrive in these dark, wet and warm environments.
You can use a one- or two-point calibration solutions. Typically, 7.01 ph and 4.01 ph solutions are the range we are usually testing in. Doing a 2-point calibration will give you the best accuracy from your meter.
Follow your manufacturer’s instructions for properly calibrating your meter. After the first 7.01 ph calibration point be sure to rinse off the solution before performing the 2nd 4.01 ph calibration point. Perform a final rinse with distilled water the add some storage solution to the storage cup ensure the glass bulb is kept wet while kept in storage until it’s next use. I find that using a small plastic cough medicine cup is perfect for testing with your calibration solutions to prevent waste. Never pour the used solution back into the bottle. Always use fresh testing solution when calibrating.
Manufacturers claim there is an expiration date on these solutions but in my opinion if you properly store away from extreme heat, light and cold you can use them for well over a year with no issue. I have tested new against old and they test out the same.
Storing the bulb wet is very important. The storage solution is usually potassium chloride and distilled or deionized water. If the glass bulb ever dries out you need to place it in storage solution to rehydrate the porous glass bulb. Storing it in the proper solution will extend the life of the sensing bulb.
You should try to always rinse off your ph meter in distilled water after using it. I typically use a glass with some storage solution in it keep the bulb wet when taking multiple measurements and another with distilled water to rinse it off between measurements. Using distilled water for long term storage is not recommended and can cause inaccurate ph measurements.
Lastly if you are experiencing erratic ph results always replace the batteries then clean and recalibrate the meter. If issues are still occurring the bulb may need to be replaced then recalibrated.
TDS/EC meters are pretty good at holding calibration. Cleaning can be done by soaking the sensing tip in white cider vinegar or other acidic solution to dissolve any minerals that may have built up on the probe. Use a Q-tip or other soft swab to remove any excess debris then rinse well with distilled or deionized water and shake off the excess.
Typically, a 342-ppm and 1000-ppm sodium chloride testing solutions are used to calibrate TDS meters. Use the solution which is closest to the ppm you will be mixing your nutrient solution to. Once again using a cough medicine measuring cup helps prevent wasting your calibration solutions. Early in your grow using the 342-ppm calibration solution will give you the best accuracy when feeding delicate younger seedlings and plants. Once your feedings are getting into the 700-ppm to 1200-ppm range using the 1000-ppm calibration solution will give you the best accuracy.
Always discard the used calibration solution.
If you are getting erratic measurements try replacing the batteries.
Always rinse off your TDS meter probe with distilled water after use and shake off the excess then store in in a cool dry location keeping the sensor in a dry state.
12 likes
2 comments
Share
10
Week 10. Flowering6y ago


66.04 cm
Height
20 hrs
Light Schedule
26 °C
Day Air Temp
6.5
pH
Strong
Smell
45 %
Air Humidity
23 °C
Solution Temp
23 °C
Night Air Temp
11.73 l
Pot Size
50.8 cm
Lamp Distance
1500 PPM
CO₂ Level
Philindicus Week 10 Update
Just plain R.O water for these girls. Going to let them dry out well. Got them ready for a nice chop by starting to remove some larger fan leaves. Taking them on day 74-75.👍
I hope every one liked my diary. I want to wish every one a happy, safe and prosperous New Year for 2021. Thanks for following along.
20 likes
2 comments
Share
10
Week 10. Harvest6y ago
Happy Harvest Day!


10/10
Rated
OFFICIAL STRAIN REVIEW
ETHOS OG KUSH AUTOFLOWER Rbx
Genetic Lineage: (‘92 OG Kush x Diesel Ryder) x Pluto Cut
Sprout to Harvest: 70-80 Days
4- Plants
Grow area 2 ft x 2 ft=4 sq.ft. (Half of a 2 ft x 4 ft grow tent)
G8-240 Veg/Bloom light draws 140 true watts
G8-450 Bloom light draws 240 true watts
4 sq. ft. / 240 watts = 60 watts per square ft.
Harvest weight 266 grams = 9.38 oz.
1.10 grams per watt
66.50 grams per sq.ft.
2.34 oz per plant average
ABOUT THE GROW
Started them in my Veg. tent under one 140 true watts full spectrum G-8 LED light. Maintained a high humidity during the first week to week and a half until modest root development and leaf growth was obvious. Then slightly lowered humidity in stages to increase the transpiration rate and encourage them to begin feeding.
Seeds sprouted quickly telling me they were strong, nice and fresh. Seedlings showed strong rapid root development which allowed me to water to the point of run off by the end of week 3 about a week earlier than most strains I’ve grown.
Leaf size/shape where more of a large wide darker green Indica hybrid to start then the blades narrowed slightly upon maturity. Size of main cola leaves were hand sized.
Started LST training in week 4 bending back the main stem at about 6 inches above the base of the plant when they were 9 inches tall, then repositioning of the lower stems for ideal placement. Leaf tucking and swinging/tying back the large fan leaves to the rear and sides of the developing main cola were performed.
They immediately started stretching and were about ¾ of the way through their stretch by the end of week 4 requiring me to swing the main colas to the front and rear of the side of the tent to control the amount of light intensity to the upper cola.
Week 5 they were transferred to the bloom tent under a 240 true watts G-8 bloom light where they finished up the last bit of their stretch with ideal internode length to allow ample light to reach bud sites where preflowers were already developing. I removed the lowest bud sites on the lower branches to encourage more prominent upper bud development and removed a few of the lowest fan leaves over a period of the next few weeks. They received their first nutrient feeding.
Week 6 through harvest the plants handled intense lighting and nutrients/watering very well including some slight underwatering events. Weekly applications of LABS (Lactic Acid Bacterial Serum) and Organic Blackstrap Molasses solution were used week 6 through harvest to aid in terpene development and feed microbial colonies in the substrate. Day 63 standard 10-to-14-day flush period before harvest.
ABOUT THE FLOWERS
Showed sex on day 17 and began to develop preflowers in week 4. By week 5 the size and bud complexity were beginning to develop. Week 6 obvious signs of trichome development was seen on the buds. Week 7 and 8 buds began filling in and calyx were evident then started to swell slightly and give off a nice lightly scented sweet chem smell. Week 8 pistils are drying and curling into the calyx which were swelling up nicely. Week 9 the buds started throwing out some nice coloration and bulked up like plump little grapes. The stems were getting heavy with the weight of the buds. Smell was absolutely insane permeating the house with a sweet spicy chem smell. Trichome color were some clear/half cloudy, the majority were milky with a good 5 % amber showing. Week 10 the buds are almost ready and display a heavy chunky high calyx to leaf ratio and are covered with mostly milky trichomes with about 10% to 15% amber showing.
ABOUT THE HARVEST
Harvest was one of the easiest I’ve done took them on day 75. Main cola was mostly cloudy/milky trichomes with about 15+% amber. After removing most of the largest fan leaves at the end of week 10 all that needed to be done was remove any larger sugar leaves then cut the tips off anything that wasn’t completely covered in trichomes. The dense swollen calyx made up the majority of the bud so I had very little to trim off of them.
ABOUT THE DRYING PROCESS
I typically hang my branches from regular wire clothes hangers I like to use a fine florist type wire to wrap under the stems of the last buds give it a twist then wrap it a few times over the hanger. One hanger seems to hold one plants worth of branches. These are placed in a dark closet or back into the tent with a small fan indirectly blowing near them. I typically dry for the first 2 days at 45% to 50% humidity 73 F to get the bulk of the moisture out of them. Then the humidity is raised to 55%+ to slow down the drying process. I will begin removing the smallest looser buds on the lower branches around day 4 and jar them up. Then over the next few days proceed to remove the medium size buds next then the largest ones last and put them in a Teflon coated baking pan with indirect air moving over them and turn them every day. I like to make sure the outside of the buds are dry enough so when they are in the pan, they don’t develop a flat side or shape. Drying time ranges from 7-10 days for the whole process to get them down into the 62% to 65% humidity range.
ABOUT THE CURING PROCESS
The buds were loosely put into ½ gallon glass jars about ¾ full with an Inkbird digital hydrometer and it usually takes a few days to stabilize my humidity into the 62% to 63% range then I drop a Boveda 62% humidity pack into them and start my cure. The larger buds can be a bit rebellious and if I find the humidity to be 67% or higher, I will remove the buds from the jar for several hours then repeat the whole process if needed. If they land in the 66% or lower, I’ll remove the top off the jars a few/several hours a couple of times a day as needed.
From this point I will let them cure for two weeks then pull the best top cola bud and sample the smoke. I like to allow the buds to finish curing for about another 4 weeks. I use 6-week cure total before I send my buds out for others to enjoy. During this time, I will open the tops of the jars to allow some fresh air in a few times a week then once a week toward the end. Yes of course I squirrel the top choice buds away for my head stash for a nice longer-term cure. This cure gives the buds time to improve the overall complexity of flavors, smells and smoothness that even the most discerning connoisseurs of fine cannabis can appreciate.
ABOUT THE SMOKE
I chose to try out one of the top main cola buds from the heavy burgundy colored plant which perfumed my house with a sweet/spicey chem scent. The very sticky and heavy resinous bud was outrageously wonderful to twist up. After a couple of tokes my lungs filled with a heavy flavorful smoke, on the exhale the smoke tasted slightly earthy with a light citrus/chem flavor in my mouth. High was a head shot for the first 15-20 minutes settling into a nice relaxing body high which led into serious munchie episode with bit of cotton mouth kicked in near the end of a nice 2+ hour ride. She was definitely a heavy hitter in my opinion in terms of strength.
ABOUT MY CONCLUSION
Ethos OG Kush Rbx is the type of genetics all breeders should use as a standard when it comes to quality auto flower genetics.
Ethos has taken the time to hunt down the finest genetics and has been working on the strain since 2008 and continues to tweak in some outstanding photoperiod traits into the strain.
She was an absolute stinker while growing and highly recommend a good carbon filter so as not to serenade your neighbors with the smell of your grow.
The flavor of the smoke was superb and will impress even an experienced smoker. I would even venture to say if put up against a photo period OG Kush she could hold her own.
I foresee Ethos Genetics as being a leader in the auto flower industry in the not-so-distant future. I am looking forward to growing more of their genetics in the near future.
Genetics like this is exactly why I’ve been on a continual hunt to track down the best of the best for my grows.
Be sure to check out Ethos Genetics
https://www.ethosgenetics.com/
Show more
Translate
Spent 71 days
Ger Veg Flo Har
268.82 g
Bud wet weight per plant
66.48 g
Bud dry weight per plant
4
Plants
0.37 m²
Grow Room size
Easy
Difficulty

Happy, Hungry, Relaxed
Positive effects

Dry mouth
Negative effects

Citrus, Diesel, Earthy
Taste
Height
Day air temperature
Air humidity
PPM
PH
CO2
Light schedule
Solution temperature
Night air temperature
Pot size
Lamp distance


35 likes
13 comments
Share
Equipment Reviews


29 comments
Sort by
popularity
popularity
newest
oldest

DankGardener commentedweek 26y ago
Off to a great start
likes 5

Med_in_Tropic commentedweek 16y ago
Precision hand held watering device and lazy chair! 😀😀😀😂😂😂
likes 3

Philindicus commented6y ago
@Med_in_Tropic, I may need to hire an assistant so I can lounge and bit more.👍
likes 2

DreamIT commentedweek 106y ago
congratulations on the diary of the month, yeah !!! 🎊🤠💚
likes 3

MrJones commentedweek 106y ago
Great harvest, Diary, and Congratulations on the DOM!
likes 3

JinksyGrows commentedweek 106y ago
Killed it buddy. Friggin solid✊
likes 3

Ferenc commentedweek 96y ago
Nice thick! @Philindicus
likes 3

DreamOn commentedweek 26y ago
Nice job, looks great!
Good luck further & have fun! 🌱😎
likes 3

Lukush commentedweek 106y ago
Nice looking buds man ✌️🌲🌲
If you have a chance check out mi diaries 😎😎✌️
likes 2

Smokwiri commentedweek 106y ago
Hey there, i took a peek at your diary, and what a delight it was, always nice to see other people ganja's growing 👌💪👻
likes 2
Med_in_Tropic commentedweek 106y ago
“to be use as standard”
Phil, you set the bar sky high. 😀😀😀😀😀
likes 2

Dr_Doobie commentedweek 106y ago
😳
likes 2

SweetKush commentedweek 96y ago
Härliga färger 😍..
likes 2

Filippo commentedweek 66y ago
Bellissima! Spero di poter vincere un kit di luci così da poter avere anche io un piccolo bosco come il tuo!!!
likes 2

HAPPY91 commentedweek 66y ago
Looking very happy healthy and strong. Keep up the amazing progress. Good luck stay safe happy growing cheers!!!!!
likes 2

Polaskis commentedweek 56y ago
This is a perfect plant! 💯
likes 2
DankGardener commentedweek 36y ago
Damn those girls might need a haircut 👍
likes 2

ganjapanda commentedweek 105y ago
Hey mate! Do you trim wet?
like 1
Philindicus commented5y ago
@ganjapanda, I always wet trim. Then after drying and curing I usually give them a light trim to neaten them up a bit. I like my buds with a nice tight trim. There are a lot of growers that try to pad their weight by not trimming until after they've dried their crop.
likes 2
ganjapanda commented5y ago
@Philindicus, yeah, your buds look extremely sexy. Thanks man!
likes

ThrashedTV_BakedByGlaze commentedweek 86y ago
Still waiting for my first fade/colour as nice as this 😍
like 1
Philindicus commented6y ago
@ThrashedTV_BakedByGlaze, It's intresting I usually get one or two plants that show off some nice coloration near the end but I never get all of them to put on a nice show. I think it's just phenotype differences.👍
like 1
ThrashedTV_BakedByGlaze commented6y ago
I kept my window open/igloo'd around the base of my CMOG Autos to try and pull anything and only go a small amount of purple on the main sugar leaves 😓 i gotta find a way to drop it under 18 Celcius in my room to try and get more 💀
like 1

GuerrillaNo_4 commentedweek 105y ago
Hey bro,
Quick question, have you used both Sensi and Connoisseur from AN in the past?
like 1
Philindicus commented5y ago
@GuerrillaNo_4, I have used Sensi Bloom in the past with good results. Supposedly the Connoisseur Bloom contains higher quality ingredients than the Sensi Bloom. In my opinion the both work well regardless.
like 1

heizen commentedweek 76y ago
Nice grow mate, plants are looking good, keep it up, imma follow this one upclose.
like 1

the end.
Enjoying this diary? Follow for more updates!


Prefer the old Diary view?
Go back to the old Diary view