


juan HERER in ¡LIVING SOIL!


Soil
Custom

Coco Coir
Custom

Perlite
Custom

Outdoor
Room Type
LST
weeks 13
Topping
weeks 13
Defoliation
weeks 13
Main-Lining
weeks 5
50 liters
Pot Size
3 liters
Watering
Start at Harvest
G
Germination6y ago


Nutrients 1
agua sin cloro
1000 mll
CapybaraProbioticTeam Para la germinacion, utilizo en primer lugar un vaso de agua (agua sin cloro) a 26ºC durante 6hs. Luego, muevo la semilla entro dos paper towel (mojados con agua sin cloro) donde dejo germinando a 26-28ºC. Todo el proceso en completa oscuridad. Apenas observo la raiz, como en la foto #1, coloco en tierra aireada.
Esta semilla en particular, le llevo aproximadamente 32hs romper el "cascaron" y asomar la raiz, y luego menos de un día para salir de la tierra. Salio sin la corteza de la semilla, por lo que abrió los cotiledones muy rápidamente.
El crecimiento de esta raza ira en conjunto con otras dos strains, que seguiré en otro diario.
Para el sustrato en esta primera etapa de "plántula", utilizo un sustrato muy ligero con fibra de coco y perlita, entre otras cosas. Es un suelo abonado orgánicamente, con suplemento extra de hummus de lombriz y guano (muy poca cantidad).
6 likes
1 comment
Share
Used method
Paper Towel
Germination Method
1
Week 1. Vegetation6y ago


6.3 cm
Height
16 hrs
Light Schedule
28 °C
Day Air Temp
No Smell
Smell
56 %
Air Humidity
23 °C
Solution Temp
20 °C
Substrate Temp
24 °C
Night Air Temp
0.35 liters
Pot Size
0.03 liters
Watering Volume
Nutrients 2
Bioroots
2 mll
lentil SST
1 mll
CapybaraProbioticTeam Esta fue la primera semana.
Como comenté en "germinacion", se encuentra en un sustrato muy liviano, ideal para que se expandan las raíces con facilidad. Por esta primera semana, realice un riego al principio con Bioroots + SST de lentejas. El resto de los riegos con agua sin cloro.
La planta se espigó un poco dado a que los primeros 3 días fueron días nublados :(. Capaz la trasplante a 0,5L para enterrar un poco el tallo, y que no tenga riesgo de doblarse por el viento.
Este es un cultivo OUTDOOR, 100% cultura orgánica y técnicas KNF. 💪
Comienzo en macetas pequeñas porque creo que es mejor tener las primeras 2 semanas las plántulas bien controladas. Luego en la semana 3 paso a una maceta con living soil del volumen final.
Cualquier sugerencia es bienvenida!
Saludos!!
6 likes
2 comments
Share
2
Week 2. Vegetation6y ago


6.5 cm
Height
16 hrs
Light Schedule
30 °C
Day Air Temp
No Smell
Smell
57 %
Air Humidity
20 °C
Solution Temp
22 °C
Substrate Temp
24 °C
Night Air Temp
0.5 liters
Pot Size
0.05 liters
Watering Volume
Nutrients 3
Bioroots
2 mll
lentil SST
2 mll
FPJ
1 mll
CapybaraProbioticTeam Hola!
Esta semana me encontré en la obligación de transplantar la planta, ya que en la primera semana se espigo mas de lo normal, y como este es un cultivo outdoor creo que es importante que las plantas tengan un tallo resistente, por lo que transplante a 0,5L y enterré parte del tallo, de manera que quedo mas firme. No fue un transplante planificado.
El riego se basa en los nutrientes que nombré, el FPJ lo hago con brotes verdes y tiernos de calabaza. Realizo micro-riegos todos los días con agua sin cloro, y cada tres días riego con los nutrientes. Esta semana agregue micorrizas.
La planta se ve saludable, aunque creo que para esta fecha podría estar mas firme.
Cualquier sugerencia es bienvenida!! Saludos 😘
**Todas las fotos son del día 14.
9 likes
3 comments
Share
3
Week 3. Vegetation6y ago


7 cm
Height
15 hrs
Light Schedule
27 °C
Day Air Temp
Weak
Smell
60 %
Air Humidity
20 °C
Solution Temp
22 °C
Substrate Temp
19 °C
Night Air Temp
0.5 liters
Pot Size
0.08 liters
Watering Volume
Nutrients 4
WS-Ca
0.5 mll
lentil SST
2 mll
FPJ
1 mll
CapybaraProbioticTeam Hola!
Esta fue una buena semana, ya que las temperaturas no fueron muy altas, lo cual es raro. La planta esta recibiendo 11 horas de luz solar directa, aunque en los horarios de mucho calor la suelo poner bajo una mediasombra y realizo riegos foliares para bajar un poco la temperatura. Si bien no muestra señales de stress por calor, lo hago para prevenir uno.
Con respecto al riego de esta semana, no incorpore bioroots pero comencé a agregar WS-Ca. Todos los días realizo microriegos con aproximadamente 80ml, de la siguiente manera:
-Día 15: riego con nutrientes (especificados arriba)
-Día 16: riego con agua sin cloro
-Día 17: agua sin cloro.
-Día 18: nutrientes.
-Día 19: agua sin cloro.
-Día 20: agua sin cloro.
-Día 21: nutrientes.
Es decir, dejando dos días en el medio sin nutrientes. En general los riegos con agua los realizo con menor volumen, aproximadamente 40-50ml, que es un 10% del volumen de la maceta.
Todas las fotos son del ultimo día de la semana, el día 21 (28/11/2020). En la ultima foto aparecen otras dos plantas de otro diario que tengo activo en este momento.
Esto fue todo. Saludos!!😘
Cualquier sugerencia es bienvenida. 👌💪
8 likes
2 comments
Share
4
Week 4. Vegetation6y ago


9 cm
Height
15 hrs
Light Schedule
26 °C
Day Air Temp
Weak
Smell
60 %
Air Humidity
20 °C
Solution Temp
22 °C
Substrate Temp
16 °C
Night Air Temp
0.5 liters
Pot Size
0.08 liters
Watering Volume
Nutrients 5
WS-Ca
0.5 mll
lentil SST
2 mll
FPJ
1 mll
CapybaraProbioticTeam Hola!
Esta semana transplante (al fin!) el ultimo día de la semana (el 05/12/2020) a una maceta geotextil de 50L. Puse en condiciones el volumen anterior, ya que si bien pase a la maceta grande, toda la semana la planta estuvo en la de 0,5L. La maceta tiene living soil hecho a mano, bastante nuevo ya que lo prepare durante el invierno. Arriba están creciendo tréboles blancos, margaritas, albahaca, romero y una planta con flor naranja que funciona contra ciertos nematodos patógenos del suelo.
El sustrato esta compuesto por living soil hecho sobre una base de 50% fibra de coco (bien aereado), perlita, y tierra orgánica. Tiene, entre otras cosas: harina de sangre, harina de hueso, de carne, sales de epsom, dolomita, alfalfa, compost, lombrices, guano, humus de lombriz, etc.
Inmediatamente antes de trasplantar espolvoreo el hueco con esporas de micorrizas (lo blanco que se observa en las fotos) . Hay que tener en cuenta que las mico son sensibles a la luz UV, por lo que no hay que realizarlo al sol directo y tratar de ser rápido.
El riego durante la semana fue idéntico a la semana pasada, salvo que luego de trasplantar, realice un riego rico en SST de lentejas, FPJ de brotes y bioroots para estimular las raíces.
Todas las fotos son del día de trasplante, día 28 de la planta. Lamentablemente las fotos no las pude tomar con mi cámara, y están sacadas con un celular, por lo que la calidad de imagen no es la misma que la de siempre.
Esto fue todo. Cualquier sugerencia es bienvenida!💪
Saludos!!
10 likes
4 comments
Share
5
Week 5. Vegetation6y ago


13 cm
Height
15 hrs
Light Schedule
27 °C
Day Air Temp
Weak
Smell
60 %
Air Humidity
20 °C
Solution Temp
22 °C
Substrate Temp
19 °C
Night Air Temp
50 liters
Pot Size
0.7 liters
Watering Volume
Nutrients 3
WS-Ca
0.5 mll
FPJ
1 mll
LABs
1 mll
CapybaraProbioticTeam Hola amigos!
Esta fue la quinta semana, que termino el 12/12/2020. Las fotos corresponden a los primeros días de la semana y al día de corte, el día 30. El punto en el que hago el main-lining es cuando la planta tiene 5-6 nudos, y corto sobre el tercero. La panta se fue adaptando bien a la maceta, y el riego lo mantuve de manera intermitente con nutrientes y agua sin cloro.
Estoy sorprendida por el fenotipo indico de las hojas, ya que esta strain es 70% sativa, 30% indica, así que ansío ver como se desarrollan los cogollos y el efecto.
Esto fue todo por esta semana.
Saludos!!
8 likes
1 comment
Share
Used techniques
Main-Lining
Technique
13
Week 13. Vegetation6y ago


82 cm
Height
15 hrs
Light Schedule
36 °C
Day Air Temp
Normal
Smell
50 %
Air Humidity
20 °C
Solution Temp
25 °C
Substrate Temp
20 °C
Night Air Temp
50 liters
Pot Size
3 liters
Watering Volume
Nutrients 2
FPJ
1 mll
melaza organica
2 mll
CapybaraProbioticTeam Hola!
Antes que nada, quería pedir disculpas por no poder continuar las semanas de vegetación como correspondía, pero por cuestiones personales se me hizo imposible.
Las fotos corresponden al ultimo dia de la semana 13 de la planta, el día 6/02/2021. En todo este periodo de crecimiento vegetativo realice mainlining, como muestro en la semana 5 subida, y luego deje que las dos ramas se desarrollen hasta tener 5 nudos cada una y realice en ambos extremos una poda apical, o topping. Luego, con tecnicas de LST fui torciendo las ramas para que vayan creciendo mas o menos parejas, pero al ser un cultivo outdoor obviamente esto no sucede tan prolijamente como en un indoor. Mas alla de eso, estoy contenta con el resultado: 10 ramas principales y muchas pequeñas en la vegetación. Fui haciendo defoliaciones suaves, y ahora le tocará la ultima antes de que empiece a florecer. Con respecto a esto, la planta sexó finales de enero, pero recién ahora esta comenzando a mostrar signos de que esta por empezar a florar, así que la semana que viene será la primera de flora. Esto por mas que parezca raro suele ser común por lo menos en esta region, muchas veces las plantas sexan antes y no muestran signos de comenzar a florecer hasta unas cuantas semanas después, nada que ver a como ocurre cuando uno controla el fotoperiodo.
Por suerte la temporada viene siendo mas seca de lo normal, y poco lluviosa, por lo que tuve problemas con trips pocos días. En general cuando tocan veranos lluviosos se vuelve muy complicado tratar las plagas. En particular en mi patio suelo tener problemas con trips, pero no de otras plagas ya que las plantas de acompañamiento son suficiente para espantarlas.
En las fotos notaran que el tronco principal esta partido en dos, esto sucedió cuando se le cayo un peso importante encima hace 4 semanas, pero con unas rápidas ataduras y la correcta nutrición la planta sano al 100%.
Esto ha sido todo. Cualquier sugerencia es bienvenida. 💪
Saludos!! 😘
7 likes
3 comments
Share
Used techniques
LST
Technique
Topping
Technique
Defoliation
Technique
14
Week 14. Flowering6y ago


92 cm
Height
13 hrs
Light Schedule
29 °C
Day Air Temp
Normal
Smell
50 %
Air Humidity
20 °C
Solution Temp
25 °C
Substrate Temp
17 °C
Night Air Temp
50 liters
Pot Size
3 liters
Watering Volume
Nutrients 3
FPJ
2 mll
melaza organica
2 mll
SST maiz
5 mll
CapybaraProbioticTeam Hola!!
Esta fue la primera semana de flora, según los cambios que he visto en la planta. Como ya he explicado en la semana 13, en outdoor no siempre es tan claro cuando las plantas comienzan a florar, ya que muchas veces muestran los hermosos pistilos blancos (sexan) pero no comienzan con el proceso estricto de floración que se ve en indoor cuando uno repentinamente cambia el fotoperiodo d 18/6 a 12/12. Esta vendría a ser la primera semana ya que, como se ve en algunas fotos, se comenzaron a agrupar los nudos y a tomar la geometría para formar cogollos.
Con respecto al riego, estoy agregando pocos inputs para que el suelo haga lo suyo... En unas semanas comenzare de a poco con té de guano y de compost, así como otros inputs probióticos para floración. Como esta haciendo calor, suelo regar todos los días con agua sin cloro mas inputs o solo agua.
Esto fue todo. Cualquier sugerencia es bienvenida! 💪
Saludos!!😘😚
**note: las fotos corresponden al ultimo día de la 1er semana de flora, el sábado 13/02/2021.
6 likes
1 comment
Share
15
Week 15. Flowering6y ago




101 cm
Height
13 hrs
Light Schedule
29 °C
Day Air Temp
Normal
Smell
60 %
Air Humidity
20 °C
Solution Temp
24 °C
Substrate Temp
17 °C
Night Air Temp
50 liters
Pot Size
2 liters
Watering Volume
Nutrients 3
melaza organica
3 mll
avena meal
10 mll
AEM1
3 mll
CapybaraProbioticTeam Hola!!
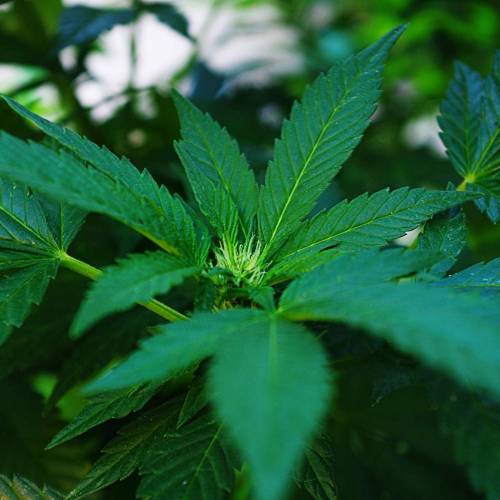
Bueno, esta fue la segunda semana de floración. Los cogollos de a poco comienzan a tener forma y se empiezan a formar. Note un avance significativo en los mismos de la semana anterior a esta, y también me sorprende que se siga estirando tanto, siendo que en esta semana creció 9cm.
Con respecto al riego, esta semana hice dos aplicaciones de agua sin cloro + avenal meal + AEM1, y es resto de los días con agua sin cloro. Esta haciendo bastante calor estos dias, asi que todos los días riego por la tarde y mojo la maceta geotextil por afuera, para que mantenga el sustrato y las raíces mas frescas.
Las fotos las saque el ultimo día de la semana, el sábado 20/02/2021, por la tarde con el ultimo rayo de sol. También tome fotos luego de realizar un riego foliar con aceite de neem para prevenir los trips y refrescar la planta.
Cualquier sugerencia es bienvenida. 💪
Saludos!! 😘
5 likes
comments
Share
16
Week 16. Flowering6y ago


106 cm
Height
12 hrs
Light Schedule
29 °C
Day Air Temp
Normal
Smell
60 %
Air Humidity
20 °C
Solution Temp
23 °C
Substrate Temp
16 °C
Night Air Temp
50 liters
Pot Size
3 liters
Watering Volume
Nutrients 2
alfalfa meal
400 mll
LABs
3 mll
CapybaraProbioticTeam Esta fue la tercera semana de floración. Estoy teniendo mucho trabajo por lo que me atrase en subir contenido estas semanas.
La planta esta largando pistilos blancos y formando de a poco los cogollos. El riego lo realice con Alfalfa meal que preparo con una receta. Mi idea es ir cambiándole de a poco a la receta la cantidad de guano, para que vaya aumentando conforme avanza la floración (el guano es rico en P).
Hice tres riegos esta semana con alfalfa meal, y es resto con agua sin cloro.
Esto fue todo. Las fotos corresponden al ultimo día de la semana, el sábado 27/02/2021. Cualquier sugerencia es bienvenida.
saludos!!😘
2 likes
comments
Share
17
Week 17. Flowering6y ago


107 cm
Height
12 hrs
Light Schedule
28 °C
Day Air Temp
Normal
Smell
47 %
Air Humidity
20 °C
Solution Temp
23 °C
Substrate Temp
16 °C
Night Air Temp
50 liters
Pot Size
3 liters
Watering Volume
Nutrients 3
melaza organica
3.906 mll
WS-Ca
3 mll
AEM1
3 mll
CapybaraProbioticTeam Esta fue la cuarta semana de floración. Al igual que en la semana anterior, no estoy teniendo mucho tiempo para sacar fotos y subir contenido, por lo que lo voy a hacer mas breve.
Estos días siguen muy calurosos, y me esta costando controlar las plagas. Con respecto al riego, regué 3 veces en la semana con los inputs orgánicos y el resto de los días con agua sin cloro.
Las fotos son del ultimo día de la semana, el sábado 06/03/2021.
Esto fue todo por esta semana. Cualquier sugerencia es bienvenida!
Saludos!! 😘
4 likes
comments
Share
18
Week 18. Flowering6y ago


108 cm
Height
12 hrs
Light Schedule
28 °C
Day Air Temp
Normal
Smell
50 %
Air Humidity
20 °C
Solution Temp
23 °C
Substrate Temp
17 °C
Night Air Temp
50 liters
Pot Size
3 liters
Watering Volume
Nutrients 1
Alfalfa meal
350 mll
CapybaraProbioticTeam Hola!!
Esta fue la quinta semana de floración. Los cogollos vienen avanzando bien, y ya están comenzando a formar tricomas. La planta se ve bien, robusta y sus ramas son resistentes pero en breve tendré que colocar varillas para sostener los cogollos. Esta es la ultima semana de calor en esta zona, ya que para la semana que viene se pronostican tormentas y que el clima cambie y refresque, lo que favorecerá la floración.
Con respecto al riego, prepare Alfalfa (and guano) meal para las plantas. La semana que viene prometo subir la receta. Estoy regando con esta solucion 3 veces por semana, y el resto de los días con agua sin cloro.
Esto fue todo. Las fotos corresponden al ultimo día de la semana, el sábado 13/03/2021. Saque fotos con flash con el objetivo que se vean los pistilos y el desarrollo de las ramas, ya que a luz natural se pierden entre tanto verde y hojas.
Cualquier sugerencia es bienvenida!
Saludos!! 💪😋😅
8 likes
5 comments
Share
19
Week 19. Flowering6y ago




109 cm
Height
12 hrs
Light Schedule
25 °C
Day Air Temp
Strong
Smell
47 %
Air Humidity
20 °C
Solution Temp
23 °C
Substrate Temp
16 °C
Night Air Temp
50 liters
Pot Size
3 liters
Watering Volume
Nutrients 2
melaza organica
5 mll
Alfalfa compost guano tea
333 mll
CapybaraProbioticTeam ¡Hola!
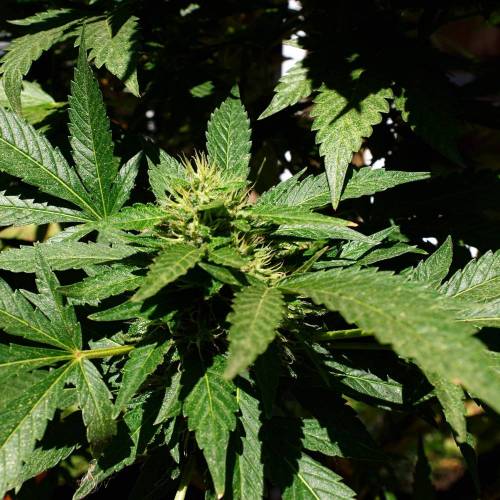
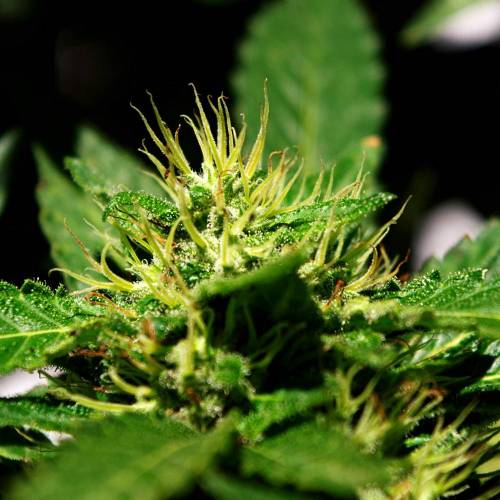
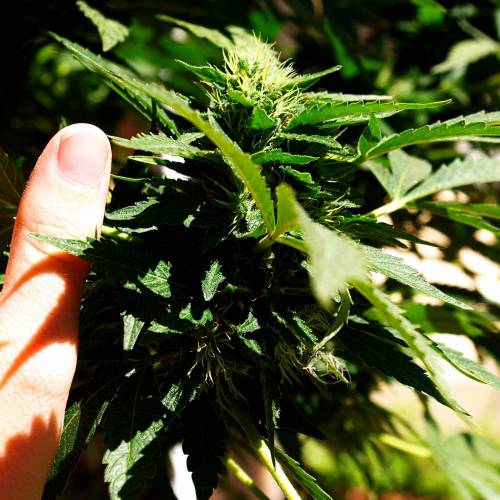
Esta fue la 6ta semana de floración. Los cogollos siguen engordando y formando mas pistilos. Para la semana que entra tengo que buscar varillas para sostener las ramas, ya que se están comenzando a torcer. Para dar una idea del tamaño que están teniendo, en la ultima foto hay un cogollo de ramas bajas, es decir, de los mas chicos, junto a mi dedo pulgar. Es mas grande el cogollo. Para la semana que viene intentare preparar fotos con una regla, para dimensionar mejor el tamaño.
Con respecto al riego, tire tres veces en la semana mi solución casera de alfalfa+compost+guano tea. Lo preparo poniendo a fermentar aproximadamente:
-1 taza de alfalfa
-1/2 taza de compost
-1/2 taza de guano
- 1 cucharadita de azomita.
- 4 cucharadas de melaza orgánica.
- 5 litros de agua sin cloro.
La alfalfa, el guano y el compost van colocados dentro de un "filtro" que arme con una tela vieja, dentro de la solución. La azomita y la melaza se mezclan con el agua. Todo esto lo fermento durante 48hs con aireación y agitación. Utilizo un aireador de pecera. Luego utilizo una dilución 1/3 de esta solución (por eso coloque 333ml/L en "nutrients").
**Capaz estén leyendo hace unas cuantas semanas que riego solo con este tea, pero lo que voy variando es la concentración de guano que le coloco. A medida que va progresando la floración, voy aumentando la cantidad de guano que coloco, ya que es la fuente principal de P.
Las fotos son del ultimo día de la 6ta semana, el sábado 20/03/2021.
Esto ha sido todo por esta semana. Cualquier sugerencia es bienvenida. 😋
Saludos!!😊💪
3 likes
comments
Share
20
Week 20. Flowering5y ago








110 cm
Height
12 hrs
Light Schedule
20 °C
Day Air Temp
Strong
Smell
55 %
Air Humidity
20 °C
Solution Temp
23 °C
Substrate Temp
12 °C
Night Air Temp
50 liters
Pot Size
3 liters
Watering Volume
Nutrients 2
melaza organica
5 mll
Alfalfa compost guano tea
333 mll
CapybaraProbioticTeam Hola!
Esta fue la 7ma semana de floración! Ya nos vamos a acercando al final.
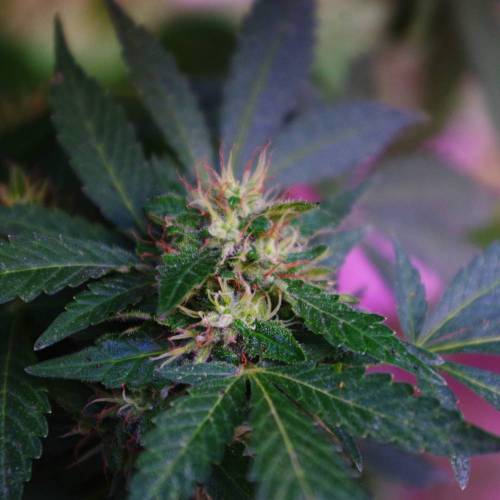
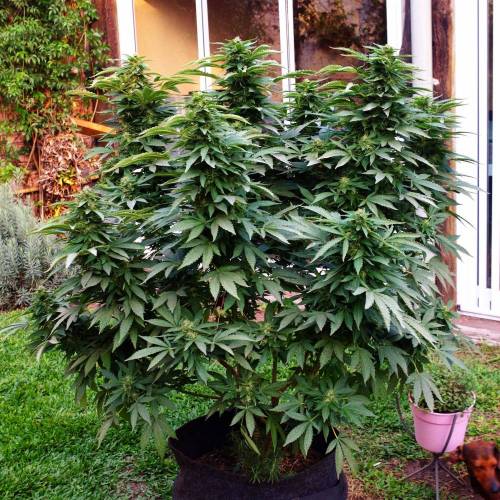
Por suerte las temperaturas bajaron, pero gracias a unas tormentas asi que la humedad estuvo un poco mas alta de lo ideal. Como verán, los cogollos no tienen varillas de guia para sostenerlos, pero utilice otro sistema: Los hilos rosados que se ven están atando las ramas entre si por dentro de la planta, usando como soporte entre si ramas opuestas. Utilice este sistema ya que no quería alterar la forma de las colas, y porque la estructura de las ramas es muy fuerte. Se que no se entiende muy bien, pero para la semana que viene sacare una foto donde se vea.
Con respecto al riego, sigo con el guano and alfalfa tea pero incrementando la concentración de guano. Tres veces por semana, el resto de los dias humedezco el sustrato con agua sin cloro.
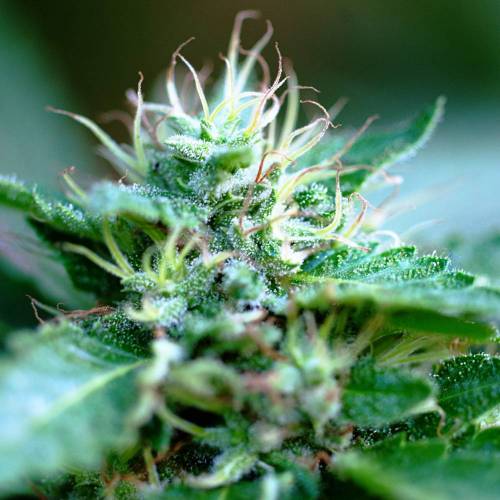
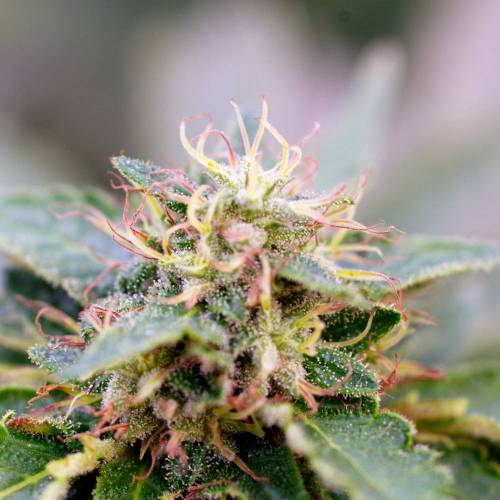
Todas las fotos son del ultimo día de la 7ma semana, el sábado 27/03/2021. Podrán apreciar que en algunas se notan los pistilos color rosado 😍. Esto fue todo. Cualquier sugerencia es bienvenida😋
Saludos !! 😋
6 likes
3 comments
Share
21
Week 21. Flowering5y ago


112 cm
Height
12 hrs
Light Schedule
25 °C
Day Air Temp
Strong
Smell
55 %
Air Humidity
20 °C
Solution Temp
23 °C
Substrate Temp
16 °C
Night Air Temp
50 liters
Pot Size
3 liters
Watering Volume
Nutrients 1
agua sin cloro
1000 mll
CapybaraProbioticTeam ¡Hola!
Esta fue la 8va semana de floración. La planta formo de manera rápida muchos mas tricomas de los que tenia la semana pasada. De hecho, que haya tenido tantos pistilos y pocos tricomas me estaba preocupando, pero estos se desarrollaron muy rápido esta semana.
Como ya nos estamos acercando al corte, estoy regando solamente con agua, mas allá de que con cultivos 100% orgánicos no sea necesario, me gusta bajarle un poco la carga al suelo para mejorar mas aun los sabores que nos otorga lo orgánico.
Las fotos corresponden al ultimo día de la semana, el sábado 03/04/2021. No estuve muy inspirada, así que las fotos son aburridas. Hay fotos que la planta esta en otro lugar, ya que la movi abajo de un techo porque hay pronostico de lluvia para esos días, y es importante en estas semanas criticas que no estén bajo una tormenta.
Esto ha sido todo. Cualquier sugerencia es bienvenida.
Saludos!!
6 likes
2 comments
Share
21
Week 21. Harvest5y ago
Happy Harvest Day!


8/10
Rated
Esta es la segunda strain review que escribo en esta web, espero que les guste.
Para empezar, el crecimiento y desarrollo de la planta en vegetación me impresiono. Crece de manera muy robusta y fuerte. Las hojas son grandes con color verde oscuro, y su apariencia es totalmente indica pero parecería que la velocidad y altura de crecimiento son sativas. En este aspecto la strain es perfecta, sobre todo para outdoor. El crecimiento en floración no se queda atrás, las colas crecen muy grandes y robustas, albergando unos cogollos muy pesados. En este momento la planta comienza a ser mas susceptible a plagas y a hongos.
Siguiendo con los cogollos, el aroma que despiden es a limón e incienso, mientras que el olor de la ceniza y el humo es ligeramente mas dulce. El sabor es mas terroso-inciensado-picante. Si bien su fenotipo es mayormente indico, al fumar esta strain se siente mayormente sativa. Su efecto es explosivo. Sube muy rápido y te llena de energía, pero sin irse a lo psicodélico. Es una strain ideal tanto para el día como para la noche si se quiere tener la cabeza despejada para realizar alguna actividad, hasta incluso para hacer actividad física, ya que el cuerpo se siente muy liviano. Se siente muy bien y muy ligera. No deja nada de "resaca", ni la cabeza ni el cuerpo pesado.
La verdad, la strain me gusto mucho. La recomiendo, sobre todo para outdoor, ya que se banco todas las condiciones climáticas sin mostrar signos de estrés o sufrimiento. En mi opinión personal, creo que le haría falta un efecto mas potente para estar equiparado con lo fuerte que es la planta en si misma, pero la realidad es que el efecto esta muy bien balanceado: la energía y el clear-headed típico de su padre Jack Herer junto con la sensación del cuerpo liviano de una indica hacen que se sienta muy muy bien.
Este fue un cultivo 100% orgánico y probiótico, y esta strain creció muy a gusto en este tipo de suelo.
Show more
Translate
Spent 100 days
Ger Veg Flo Har
612 g
Bud wet weight per plant
307 g
Bud dry weight per plant
1
Plants
Easy
Difficulty

Energetic, Talkative, Uplifted
Positive effects

Insomnia
Negative effects

Citrus, Earthy, Herbs
Taste
Height
Day air temperature
Air humidity
Light schedule
Solution temperature
Night air temperature
Substrate temperature
Pot size


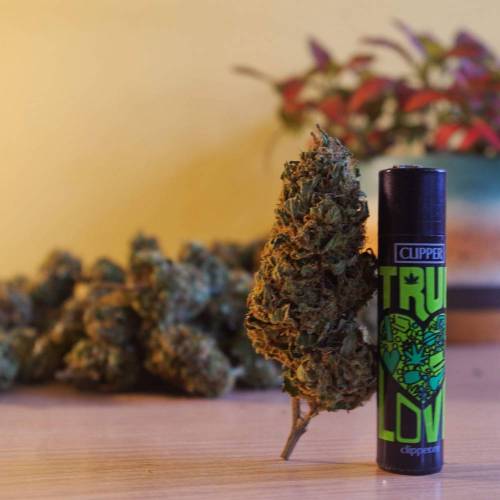


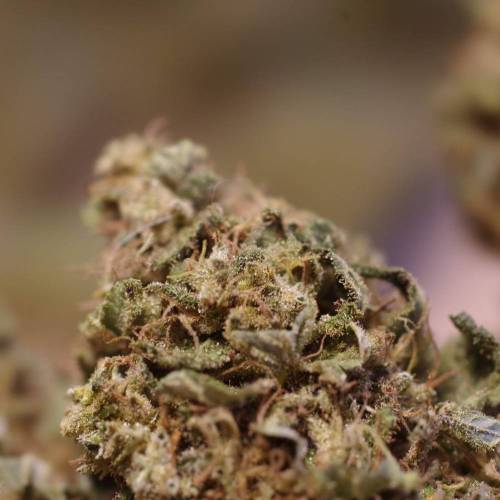


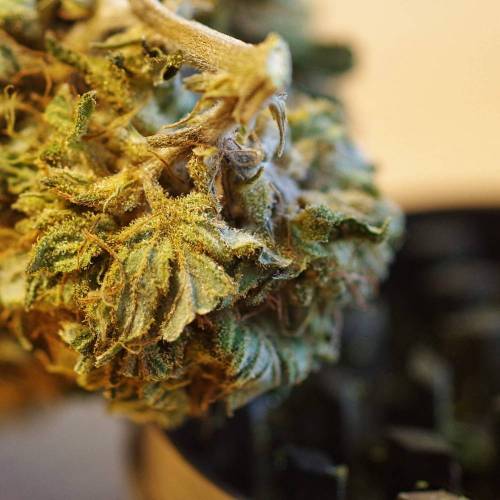


CapybaraProbioticTeam Hablando mas del cultivo en si, coseche al día 64 de floración, es decir, 9 semanas completas. Saque 307g de cogollos grandes y lindos, y además otros 120g mas de popcorns y manicura fina que irán para hacer extracciones. Por lo que el peso final total es de unos 416g aproximadamente.
Para el secado, puse a secar las colas luego de una leve defoliación (solo hojas satelite grandes), en un espacio ventilado, oscuro, a temperatura aproximada 20ºC y humedad 55%. Tardo 10 días en secarse completamente. Si bien en mi opinion las condiciones optimas son 60%H / 15ºC, no cabian los cogollos en el espacio que tengo preparado para mantener esas condiciones.
Para el curado, luego de manicurar los cogollos se pasaron a frascos grandes con termo-higrómetros dentro. Se fueron abriendo en principio 3 veces por día, y a medida que la humedad fue bajando, se fueron abriendo menos, hasta llegar a la humedad deseada, que a mi gusto es 62% de humedad. Siempre se van rotando los frascos para que los cogollos rueden y vayan tomando forma.
Espero que les sirva esta review. Saludos!!😘
8 likes
5 comments
Share
5 comments
Sort by
popularity
popularity
newest
oldest

CapybaraProbioticTeam commented5y ago
Sorry for the bad English, but I write in my native language (Spanish) and the page translates it. I hope to have more time in the future to write in English so you could understand me better. Anyway, I don't know how many people read me... hahaha 😅
like 1

SEGA_Y_Griega commented5y ago
Прекрасные фотографии бро !!! Удивительно красивые бутоны !!!👍
like 1
CapybaraProbioticTeam commented5y ago
@SEGA_Y_Griega, Thanks!!!!
likes

MrHightimes commented5y ago
Thats a great photo of the month submission!
Nice Harvest!!!
like 1
CapybaraProbioticTeam commented5y ago
@MrHightimes, Thanks!!!!
likes

DoDrugs420 commented5y ago
Gotta love that Original Juan Herrer.
like 1

the end.
Enjoying this diary? Follow for more updates!

Prefer the old Diary view?
Go back to the old Diary view