


Likes
11
Share


@Inceptionist
Follow
I mean actually using this tent for other grow, so might as well rate it.
It's quite durable and like the shape and color of it but I like this tent less with every grow.
Doesn't has the best placement of air vents and therefore steals quite a bit of space which is supposed to be for your plants because it develops too much negative pressure.
The three squared "windows" at the bottem aren't really usable because too much light will come through. It's just gonna make your tent a hermie tent.


Processing
Likes
3
Share


@Simon_Says_Smoke
Follow
30 September 2020
Sunset Sherbet
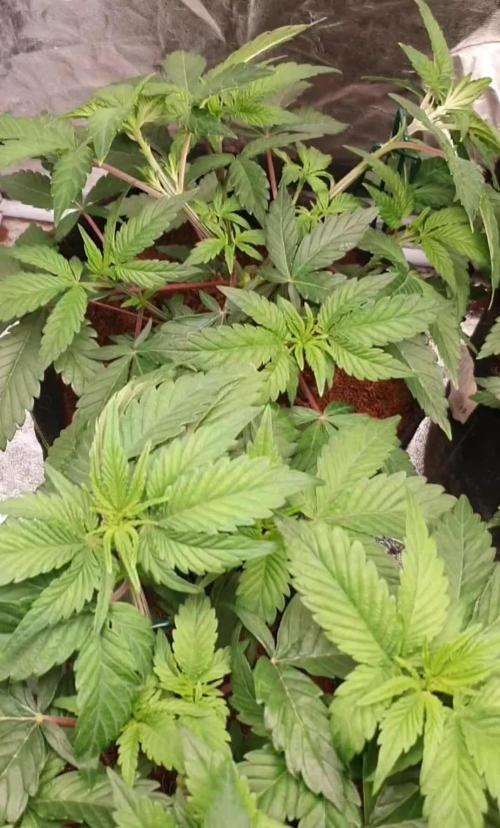
Plant is growing very strong and the bottom 3 cola branches are being stress trained to all edges of the pot, this helps -
with all the branches being exposed to the light and to grow the same height as the rest of the canopy.
The stem is of this plant is growing really thick 🍑 about 1cm thick
Leaves are big and strong reaching ( 15,5cm length )
My experience with growing Sunset Sherbet so far ( Week 6 Day 2 )
This strain from Cape Ape Seeds is actually so good, just the plant itself is a bright lime green and the nugs it will carry is going to be Frosty Purple❄️💜 nugs. By growing this beautiful strain so far it has grown very healthy and just in general very fast, this plant has no problems so far and all it wants to do is continue growing.
Do-Si-Wine
The Do-Si-Wine is growing very well, a very moderate growth as it says in it’s subscription, but none the less still a very grow so far.
The bottom 4 colas are all stress trained to the edges of the pot to ensure each branch from each cola gets to grow outwards in its own space and to get more light.
The stem is about 0.7cm thick which is not that thick compared to the SunSet Sherbet.
While writing this I noticed my she has SNAPPED from her previous stress straining session, I was checking out the stem thickness and noticed the main stem had snapped. But luckily this is not the first this happened and I know how to fix this. To fix this all you need is some tape, now see if the plant didn’t completely break off you can still tape the plant back together and the plant should heal itself within a few days, although I need to wait a bit before I stress train this one again.
She started making pistols🤗, but I’m not sure if this is because of the snap or if it’s getting ready to start blooming.
All the side branches from the bottom 4 colas are all nice and long growing at a nice rate.
The leaves are nice and strong reaching ( 11cm in length )
My experience from growing Do-Si-Wine 🎶🍷 from Cape Ape Seed seed bank is very good so far, on the site it says moderate growth difficulty and it is quite accurate compared to the Sunset Sherbet’s easy growth difficulty, it’s quite fun working with a moderate growth because the plant needs more tending to, for instance the side branches are thinnish and need to be stress trained often to reach the end of the pot, the plant is also very stiff because she snapped without me realising and had to tend to the break a day later.
Also while growing this plant I noticed that the plant’s leaves are very dark green and the bud it’s going carry is going to be white so I can’t wait to see how she makes her buds.
Likes
12
Share


@GarciasGarden
Follow
ALRIGHT ALRIGHT ALRIGHT IM BACK FOR GOOD!
WEEK: 2 of flower
Let me start by saying this run has been so smooth after getting everything locked down and making sure I have no fluctuations in temperature, PH levels, and humidity. I am watering a half gallon of ph’d water with perfect amounts of Advanced Nutrients daily .
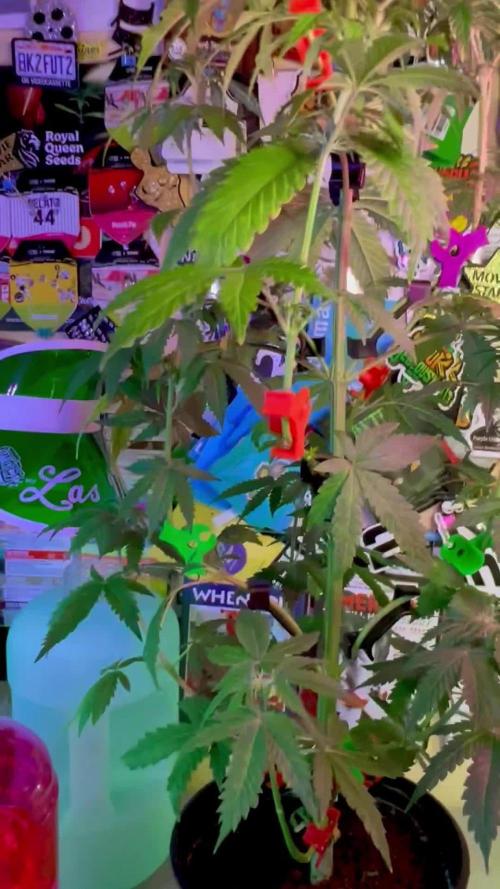
The plants are healthier than I have ever seen bright green leaves and growing non stop with strong roots and stems, Two of the PHENOS are outgrowing all the other plants growing to be taller than 5 feet for example I am 5 foot 10 and the plant’s are to my forehead!!... each plant has at least 150 watts of full spectrum led with side light from the neighboring LEDs . Being 5 days in to week 2 the buds are Already starting to form ,I can see a HUUUUGEEE difference with the “BIG BUD” Advanced nutes almost 50% faster and bigger growth on this run ! I can’t wait to see the flower produced by these beauties; if they are anything close to my last run I know they’re going to be gorgeous.
Mother & 3 clones: The plants on the far Left consist of my washing machine mother , a huge blueberry clone , a kosher Kush clone, and another itty bitty washing machine clone. I wanted to see out of the 3 strains which one would be the strongest and outgrow the other plants, clearly the blueberry from Seedsman outdid both of the others . THESE PLANTS STARTED THEIR FLOWERING FASE ALMOST 2 weeks prior to the Wet Betty’s.
CATCH ME NEXT WEEK!!

Likes
3
Share

@Gram_Solo
Follow
😎👍
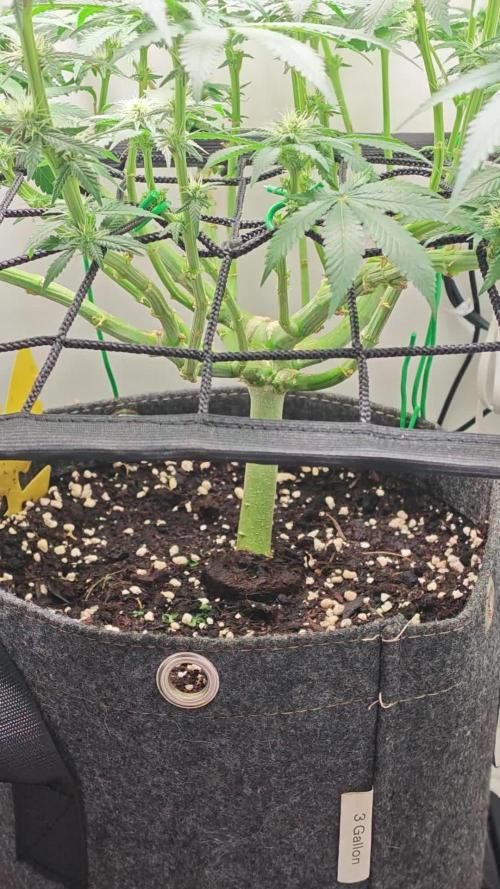
Done some defoilation this week took away a few big fan leaves and most of the growth at the bottom, going to try and concentrate on big nugs at the top. Will repeat the process each 2 week and get rid of all them nute suckers.
Been using some plant stakes to weigh the stems down for a while. it doesn't last long but gives us a shape that's compact and not getting too tall. Will get some twisty tie soon to do some proper LST.
This week will just be training and getting our shape in order.
Looking good so far 👌 🌴🌴🌴🌴
Processing
Likes
Comments
Share


@Heathi
Follow
Flipped to flower to see what she can do because so many clones took! I'm so super new that it's still so exciting every time I figure something out.
Definite pistils at day 3 of flower

Likes
3
Share

@CalGonJim
Follow
2/2 3:45 AM. Everyone is looking great. I separated the plants. I only have three going in the temp because there was airflow issues. I upped the EC to 1600 last time use 2 mL of calcium and 2 mL of purple on top of maxi bloom powder about 4 1/2 g into a gallon. I have been a little light so they’re a little stared in some ways but not too bad. the flowers look great. I’m seeing plenty of resin on OG triploid by Humboldt seeds. They look great.
2/4 1:48AM Goin gto flip the PHOTOPERIODS to flower. I started too many photos..... will only do Autoflowers from now on...too much work, to many extra steps fro photos. Im not feeling good enough to do all that any more. I cut back the Trailer Park Boys plants for a show grow, Tyson plants are in a new tent....photos and micro grows are difficult to maintain.
2/6 1:59 PM I worked on the Tyson plants goat auto is doing good. Corkscrew is very bushy. I put training clips in all of them. I should look good.
2/7 4:32AM BPP RF3 by Fast Buds is everything they say it is....TWICE as big as all the others at the same age. HUGE main cola and only in a 2 gallon container. Running at about 80W and it's more than enough. I over fed and she didnt mind.... RF3's are my new favorite from Fast Buds, totally worth it!!!!!!!!!!!!!!


Likes
3
Share


@Carpangler
Follow
Ahoj.Začíná nám druhý týden květu.Je to prales.Ohýbám zatím listy pod sebe.Ať to roste,přátelé. :)
Likes
14
Share


@Bread_n_Buds
Follow
Our Black Runtz branded Zamnesia has arrived at the moment of truth, it's going very well from the start and the god of Jella has punished me because I'm bragging too much:
I accidentally knocked out the fan that cut a brunch. I'm an asshole, I was very high and I did this damage that I also reported in the photo to make amends and remind myself not to do this bullshit.
Apart from this which is still a disgrace for me, the plant is an excellent beauty, it's doing very well, we only went from 16 buds to 14 buds like this damage that I caused. They know 14 succulent buds, let's hope. If I don't do any more damage.
We did our best, Zamnesia has put superb genetics and at home B&B we are working to show you the plants in all their possible meanings.
This plant like all the other photoperiodic ones has been worked with a topping x16 buds, simply repeating the topping technique without doing anything else than cleaning the leaves from time to time and now the branches that I believe do not give me good flowers at the bottom. After the damage x14 buds
The 14 buds are not perfectly aligned there is something that escapes upwards but it is normal in the economy of a plant i tried to FIM before go in bloom.
We are still using soil, fertilizers and all the additives recommended by Plagron 100% organic.
The plant has been flowering for 3 days, in the diary I leave it indicated as the last week of vegetative but we move on to the fertilizers for flowering.
We have now moved on to the early flowering program which maintains the same additives Power Roots, Sugar Royal, Pure Zym and adds the flowering stimulant Power Buds. Now the base fertilizer is now Alga Bloom with which I get along very very well even more than Alga Grow that sometimes I have to understand well how to dose in some particular cases (
topping). Probably try to prepare the soil with Plagron Super Mix or with the Zamnesia Pellet.
The Green Sensation will arrive as the hero of the end of flowering and at the same time it will be time to remove power roots and a week later the Pure Zym enzymes.
---- Decide on the right soil and calculate your fertilizer card based on the soil on the official website.
-- www.plagron.com
Try a seed of this strain that drives us crazy..
-------- https://www.zamnesia.io/en/11159-zamnesia-seeds-black-runtz.html
Zamnesia Description // Black Runtz comes from a truly legendary genetic pool. Our breeders used three modern classics from the United States to create this strain: Zkittlez, Gelato, and Runtz. With 20% THC and flavors of grapes and berries, Zkittlez passed on her delicious flavors and relaxing effects. Gelato contributed to Black Runtz's immense flavor profile by passing on high concentrations of the terpenes limonene and humulene. Finally, Black Runtz inherited the high potency of the original Runtz, a strain with a respectable 21% THC. The end result of this 3-way cross is a strain with 55% indica genetics and 45% sativa. Black Runtz boasts rapid flowering times, high potency, and contrasting yet balanced terpenes that supports its delicious flavor profile.
All the best that mother nature can offer is on ---- www.zamnesia.com


Likes
6
Share


@Ninjabuds
Follow
Those two permanent marker plants are still kinda short, but they're finally starting to take off. It's cool to see them getting bushy. They're looking good so far.
Well, it's Christmas again. This year feels a little different, though. Maybe it's the snow blanketing everything, or the way the tree lights up the whole living room. Either way, it's cozy and warm, even when it's freezing outside. I'm really looking forward to seeing what Santa brings. I hope I get that new video game I've been wanting. But most of all, I can't wait to spend time with my family. We always have so much fun
This past week was a good one for the plants. They started the first week of their stretch, and they've already grown a decent amount. I can really see them filling out. It's cool to watch them grow so fast. I can't wait to see how big they get by the end
I always get a little worried at this stage, like they're not gonna get as big as I want them to. But then I remember how they always end up surprising me. By the end, they're always perfect.

Likes
21
Share


@JohnnyBlaz3
Follow
Shes close!! lol I think I might be missing a week oh well lol she is the plumpest auto in the tent of the 4 by far!!! she lookin thiiiickkkkkkk. shes got about 5 giant colas, lots of trichs and stanks real good!!! indoor and outdoor have their own goals but this is obviously alot higher quality than outdoor! The next update could quite possibly be the harvest 😎
Likes
8
Share

@Bud_vista
Follow
Welcome to Week 9 of my white truffle grow!
In week 8 she stretched a little and the buds starting to develop and slowly bulk up.
I have to defoliate here and there but in general the plant looks healthy.
In this week you can tell that she's starting to develop her smell. A nice cannabis smell just like you walk into a coffeeshop. Buds bulking up continuously and the stretch seems to reduce in week 9.


Likes
3
Share


@Integrajosh
Follow
Day 40 of 12/12
Switched to the ripen phase for feed, in ml per gallon-
Cal/mag- 1.5/g
Micro- 1/g
Bloom- 4/g
Switched to dry koolbloom for this last week of feed (more aggressive pk ratio) used at 1 gram/gallon
EC 1.2
PH 5.8


Likes
6
Share


@Lowkeynotbad
Follow
By the end of week 4 you can see pre flowers and it begins to stretch
Likes
16
Share


@PigBearMan
Follow
Hey there,
as the clones are almost ready and I will transplant them in the aeroponic system tomorrow, I allowed myself to get the pH and EC ready and stabilize it over a night. 😏
August, 20th:
23 of the 30 clones made it to the system and are now growing fine. Guess those 7 clones that didn‘t make it were old ones from below the mother plant.
SanLights at 40%. ☀️
Likes
2
Share

@Hidden
Follow
:
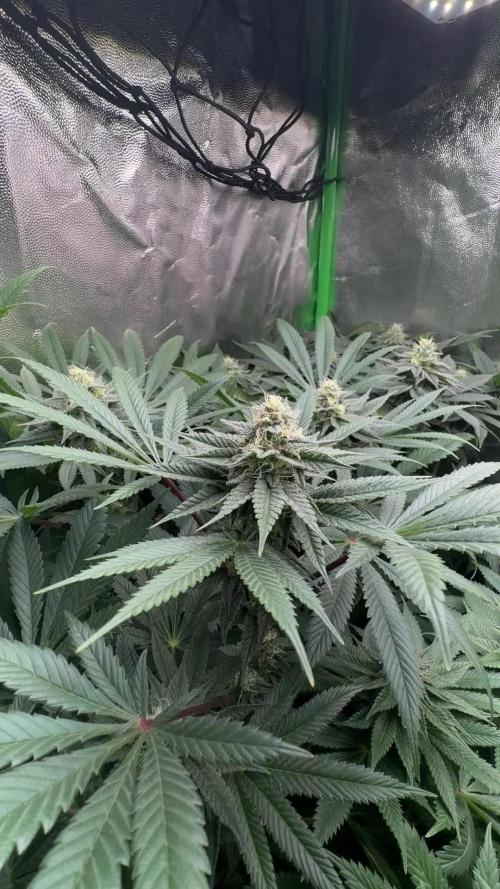
End of week #6, and I’m extremely happy with the results so far, especially considering the conditions inside the tent — it’s quite small with limited airflow. The plants are in full bloom and still bulking up nicely. A strong aroma is starting to fill the space (my roommates are already complaining about the smell!). I’ve been following the BioBizz feeding schedule to the letter, carefully keeping the pH between 6.3 and 6.5, and watering every other day without skipping nutrients. As shown in previous weeks, my RHC #2 has become the tallest plant, and it’s clearly the one that will produce the biggest and fattest colas. RHC #1, on the other hand, is denser but its colas aren’t as large. Overall, I’m very pleased with the progress and now eagerly waiting for the moment to start the drying process.
I assume that eventually the colas will start turning red, although there’s only about a 60% chance of that happening. RHC #1 is already showing some color on its leaves, which is a good sign. Once it’s fully mature, the colors should become more intense — hopefully shifting into a deep, vibrant red. I’m really looking forward to seeing that transformation take place as the plants reach their final stages.
😍